Tag: Quick and Easy

  • Buttery Moong Dal With Cumin Rice

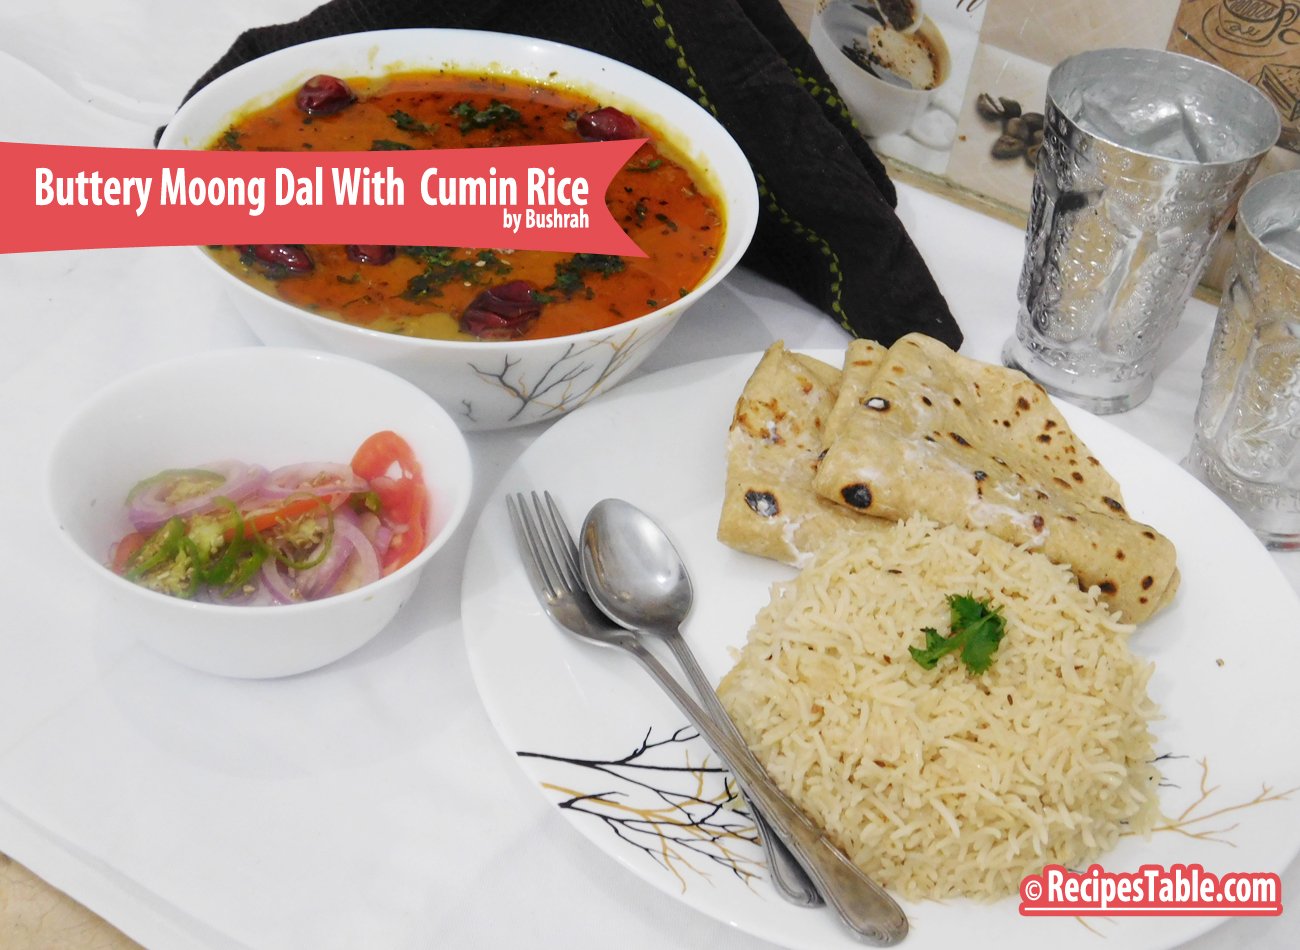
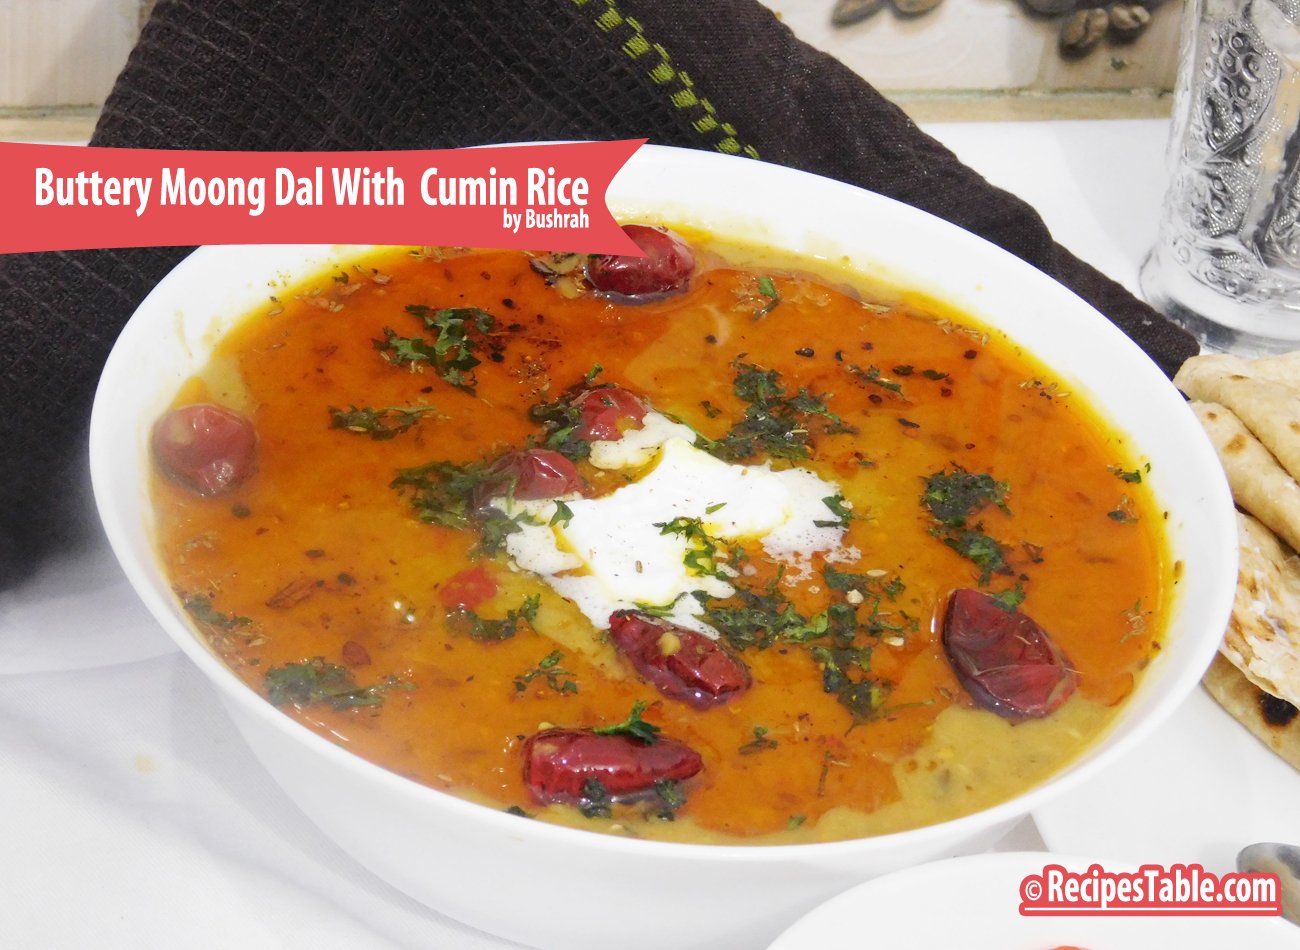
    Buttery Moong Dal

     A very easy to make and healthy Moong Dal recipe. It is simmered with sautéed onion-tomato with basic spice powders. Must try it!!
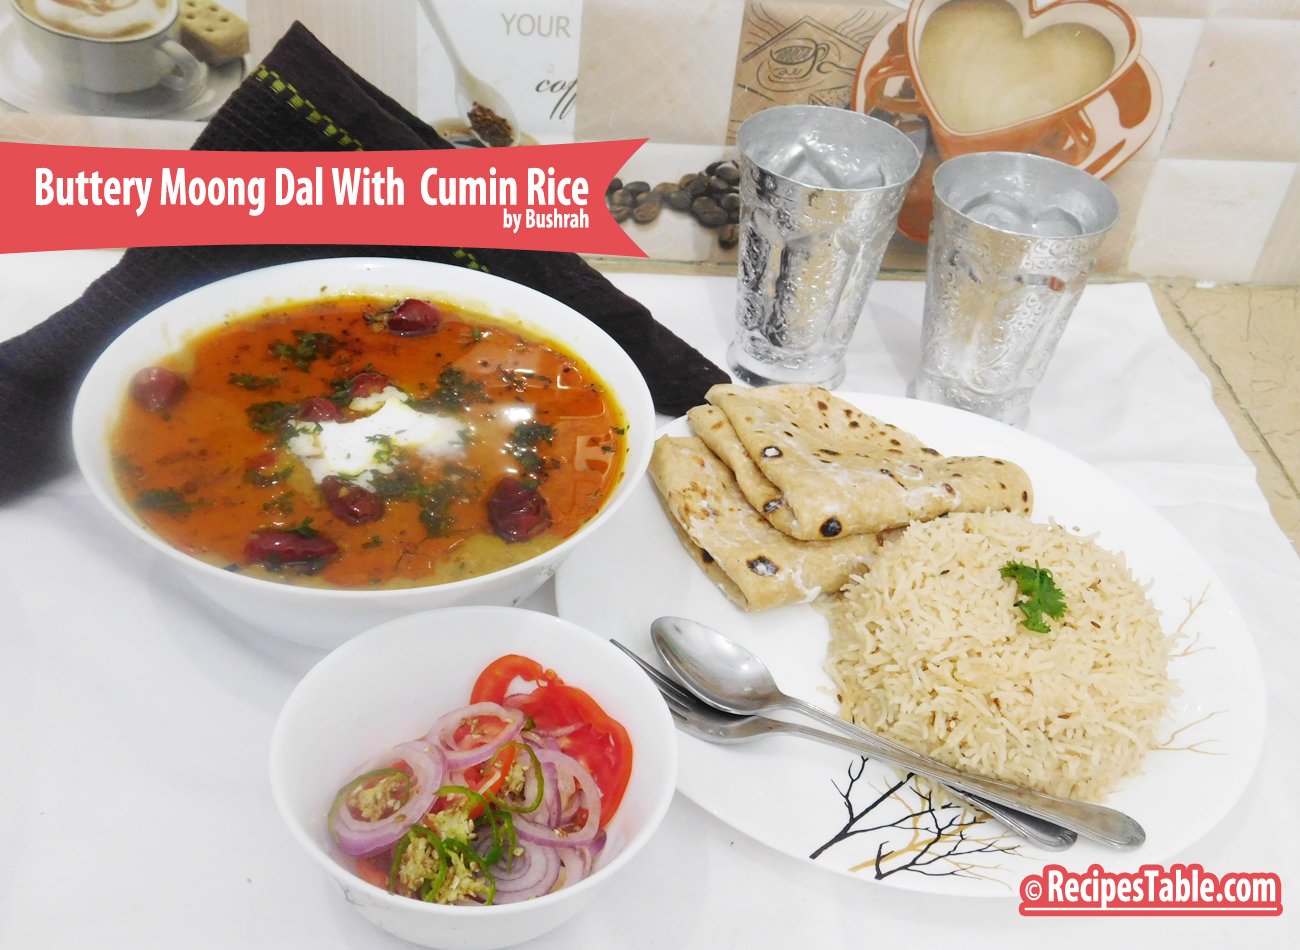
    Buttery Moong Dal with Cumin Rice
    Buttery Moong Dal with Cumin Rice
    Buttery Moong Dal
    Buttery Moong Dal
    Buttery Moong Dal with Cumin Rice
    Buttery Moong Dal with Cumin Rice
    Buttery Moong Dal with Cumin Rice
    Buttery Moong Dal with Cumin Rice

    Check it out the Moong Dal Recipe here!!

    [divider]

    [one_fourth]Prep Time:15 minutes[/one_fourth] [one_fourth]Cook Time:45 minutes[/one_fourth] [one_fourth]Servings: 6[/one_fourth] [one_fourth_last]Difficulty Level:Easy [/one_fourth_last]

    [divider]

    [tabs type=”horizontal”] [tabs_head] [tab_title]Ingredients[/tab_title] [tab_title]Nutrition[/tab_title] [/tabs_head] [tab]

    • 2 cup dried yellow split peas (Moong dal)
    • 1 cup chopped tomatoes
    • 1 small size finely sliced onion
    • 1 tsp red chili powder
    • 1/2 tsp coriander powder
    • 1/2 tsp turmeric powder
    • 5 black pepper
    • 3 cloves
    • 2 cardamon
    • 1 bay leaf
    • 4 curry leaves
    • 1 tsp gram masala powder
    • 2 tbsp lemon juice
    • 2 garlic cloves, thinly sliced
    • 1/2 tsp garlic paste
    • 1/2 tsp cumin
    • 2 dried red chili pepper
    • 2 tbsp fresh chopped coriander leaves
    • 2 fresh green chilies
    • Salt to taste
    • 3 tbsp pure ghee (Desi Ghee)
    • 1 tbsp vegetable oil

    [/tab] [tab]Yield: 6 servings

    Nutritional information is not yet available. [/tab] [/tabs]

    Directions:
    [tabs type=”horizontal”] [tabs_head] [tab_title]Step by Step Method[/tab_title] [tab_title]Serving Suggestions[/tab_title][/tabs_head] [tab]

    Step 1

    Wash and soak dal for 30-35 minutes.

    Step 2

    Heat split Moong Dal and water with red chili powder, coriander powder, turmeric powder, garlic paste, Until boiling.

    Step 3

    Cook for 10 -12 minutes on a low flame.

    Step 4

    Now add tomatoes, green chopped chilies and cook until dal is tender and thickened.

    Step 5

    Add more water if necessary, to prevent drying out .

    Step 6

    To the cooked split add bay leaves, lemon juice, salt and gram masala powder and mix well.

    Step 7

    Heat oil in a small pan, add thinly sliced onion and fry till golden brown.

    Step 8

    Now add this fry onion with oil pour in dal.

    Step 9

    Heat pure ghee (Desi Ghee) another pan. Add cumin seeds, cloves, black pepper, cardamon, curry leaves, dried red chilies, garlic chopped cloves, and saute for 2-3 minutes on a very low flame.

    Step 10

    Now this tadka (Baghar) pour on Moong dal.Garnish with fresh chopped coriander leaves.Moong dal is ready to serve.

    [/tab] [tab]

    • Serve hot with rice, chapati and mint chutney.

    [/tab] [/tabs]
    If you like Moong dal Recipe and make it then let me know your feedback by commenting below.And if you know more innovative ways in which we can utilize this mouth watering Moong dal, do share with us and we would be glad to give it a try.
  • The BEST Chicken Keema Recipe in 30 Minutes!

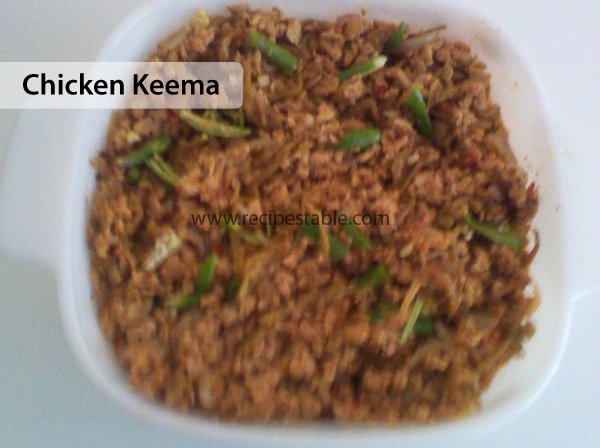
    Chicken Keema

    A delicious and simple recipe to follow in week days. Chicken Keema is a distinct taste then normal mince cooking. Goes great with boiled rice. Try this Chicken Keema Recipe and smack your lips for this mouthwatering dish made with chicken mince and spices.

    Chicken Keema Recipe
    Photo: Chicken Keema Recipe

    Check it out the Chicken Keema Recipe here!!

    [divider]

    [one_fourth]Prep Time:5 minutes[/one_fourth] [one_fourth]Cook Time:40 minutes[/one_fourth] [one_fourth]Servings:2 [/one_fourth] [one_fourth_last]Difficulty Level: Easy[/one_fourth_last]

    [divider]

    [tabs type=”horizontal”] [tabs_head] [tab_title]Ingredients[/tab_title] [tab_title]Nutrition[/tab_title] [/tabs_head] [tab]

    • 500 gm chicken mince
    • 1 onion, finely chopped
    • 2 tomatoes , finely chopped
    • 4 tbsp oil or butter
    • 2 tbsp ginger garlic paste
    • 1 tsp lemon juice
    • 1 tsp red chili powder
    • 1 tsp coriander powder
    • 1/2 tsp white pepper powder
    • 1/2 tsp garam masala powder
    • 1/4 tsp turmeric powder

    For Garnishing:

    • 2 tbsp corriander and mint leaves, chopped
    • 4 green chillies, slit

    [/tab] [tab]Yield: 2 servings

    Nutritional information is not yet available. [/tab] [/tabs]

    Directions:
    [tabs type=”horizontal”] [tabs_head] [tab_title]Step by Step Method[/tab_title] [tab_title]Serving Suggestions[/tab_title][/tabs_head] [tab]

    Step 1

    Heat 1 tbsp oil in a non-stick kadai or pan and saute the onions on a low flame till golden.

    Step 2

    Add ginger garlic paste and tomatoes. Mix well.

    Step 3

    Add all the dry masalas and saute on a low flame till oil separates.

    Step 4

    Add the minced chicken and cook on a low flame for about 30 mintues.

    Step 5

    Add mint and coriander leaves, green chillies and lime juice. Mix well and simmer for 10 mins or until done.

    Step 6

    Dish it out. Chicken Keema is ready to serve. ENJOY!!

    [/tab] [tab]

    • Serve hot with Boiled Rice.

    [/tab] [/tabs]
    If you like Chicken Keema Recipe and make it then let me know your feedback by commenting below.And if you know more innovative ways in which we can utilize this mouth watering Chicken Keema, do share with us and we would be glad to give it a try.
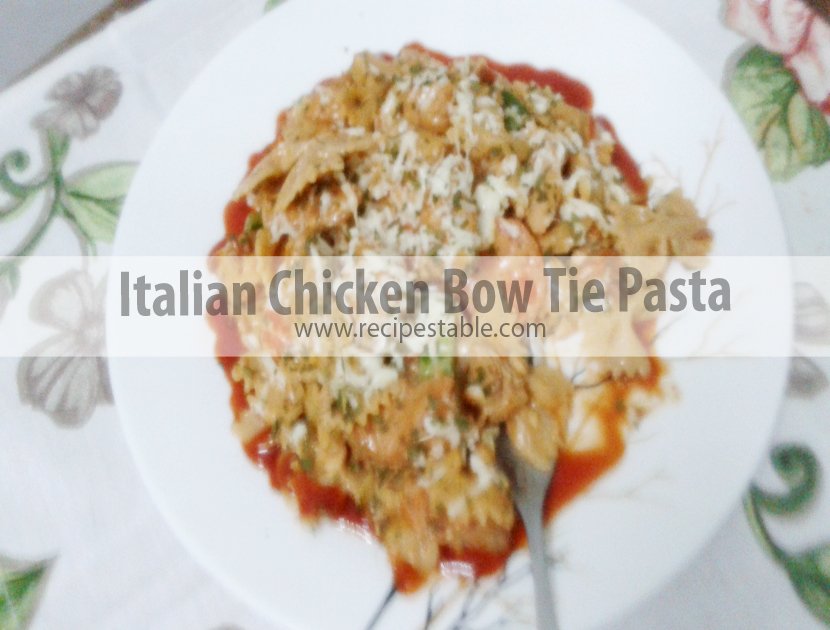
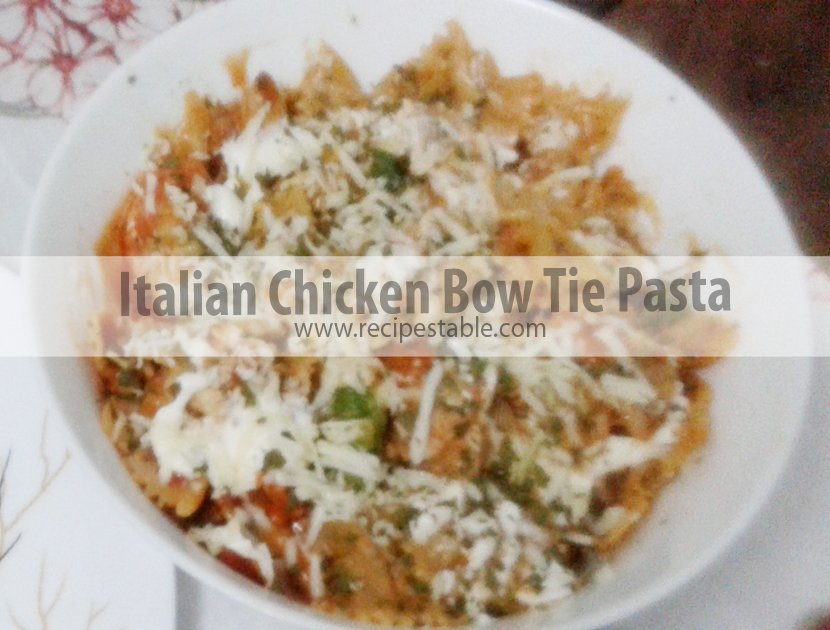
  • Italian Chicken Bow Tie Pasta Recipe

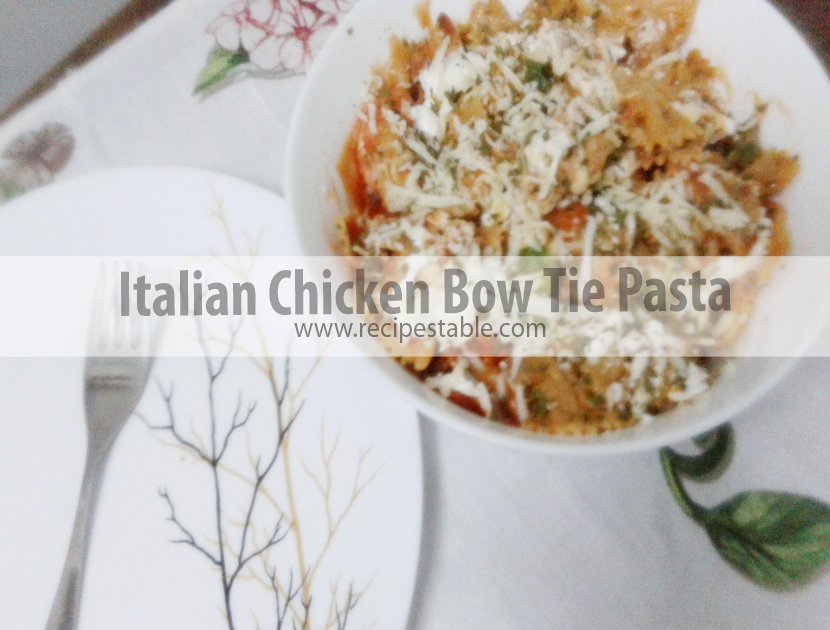
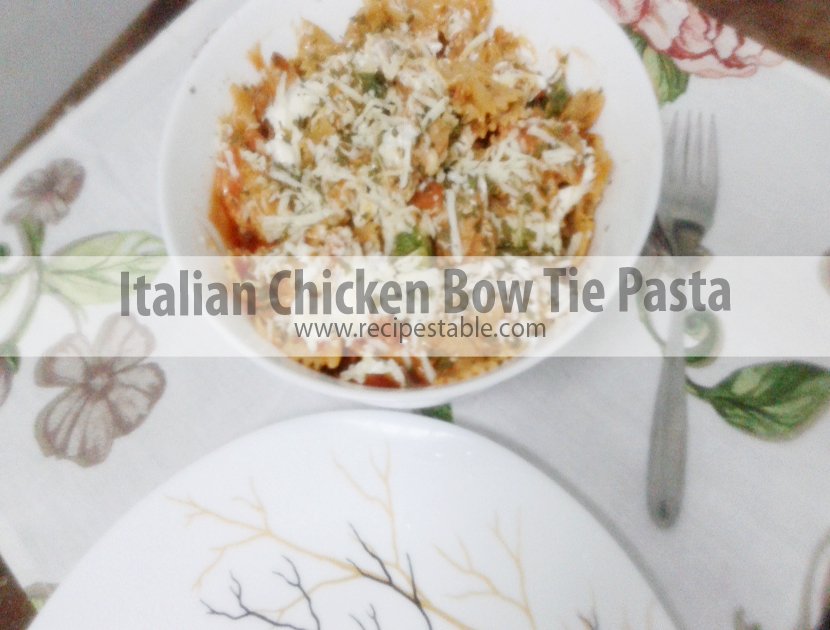
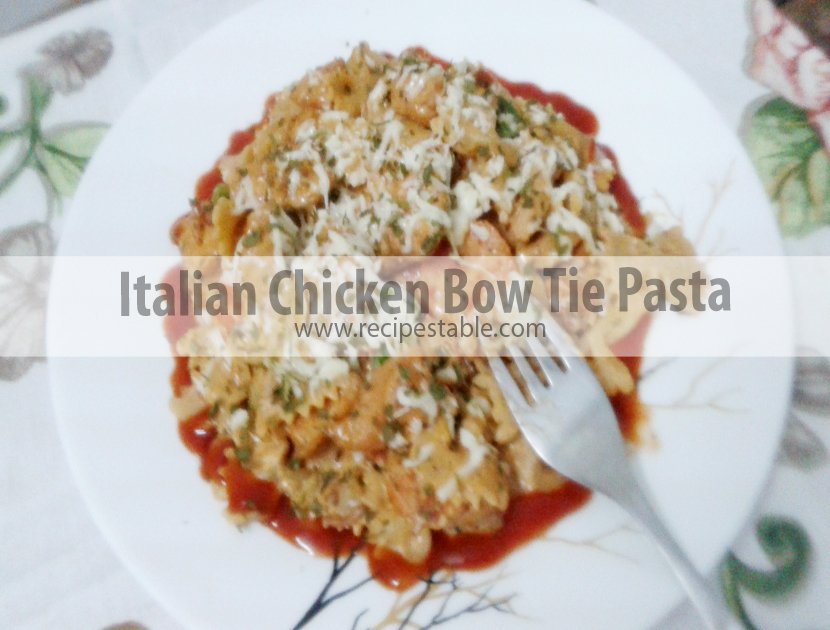
    Italian Chicken Bow Tie Pasta

    This is really a good dish for only a few ingredients. Very good and modifiable to suit your own tastes. Must try this Italian Chicken Bow Tie Pasta Recipe, you’ ll love it.

    Italian Chicken Bow Tie Pasta recipe
    Photo:Italian Chicken Bow Tie Pasta
    Italian Chicken Bow Tie Pasta
    Photo:Italian Chicken Bow Tie Pasta

    Italian Chicken Bow Tie Pasta2 Italian Chicken Bow Tie Pasta3 Italian Chicken Bow Tie Pasta4 Italian Chicken Bow Tie Pasta5

    Check it out the Italian Chicken Bow Tie Pasta Recipe here!!

    [divider]

    [one_fourth]Prep Time:10 minutes[/one_fourth] [one_fourth]Cook Time:10 minutes[/one_fourth] [one_fourth]Servings:4 [/one_fourth] [one_fourth_last]Difficulty Level: Easy[/one_fourth_last]

    [divider]

    [tabs type=”horizontal”] [tabs_head] [tab_title]Ingredients[/tab_title] [tab_title]Nutrition[/tab_title] [/tabs_head] [tab]

    • 4 skinless, boneless chicken breast halves – cooked
    • 1 (16 oz) package bow tie pasta
    • 1 (8 oz) bottle Italian-style salad dressing
    • 1 tomato, finely chopped

    [/tab] [tab]

    Yield: 4 servings.

    Amount Per Serving:

    • Calories: 712 kcal
    • Carbohydrates: 88.7 g
    • Cholesterol: 73 mg
    • Fat: 21.2 g
    • Fiber: 4.2 g
    • Protein: 43 g
    • Sodium: 982 mg

    [/tab] [/tabs]

    Directions:
    [tabs type=”horizontal”] [tabs_head] [tab_title]Step by Step Method[/tab_title] [tab_title]Serving Suggestions[/tab_title][/tabs_head] [tab]

    Step 1

    Bring a large pot of lightly salted water to a boil.

    Step 2

    Add bow tie pasta; cook for 8-10 minutes or until al dente.

    Step 3

    Drain and rinse in cold water.

    Step 4

    In a medium bowl, stir together chicken and salad dressing.

    Step 5

    Add pasta; toss to coat evenly.

    Step 6

    Stir in the chopped tomato. Italian Chicken Bow Tie Pasta is ready to serve. Enjoy!!

    [/tab] [tab]

    • Serve warm.

    [/tab] [/tabs]
    If you like Italian Chicken Bow Tie Pasta Recipe and make it then let me know your feedback by commenting below.And if you know more innovative ways in which we can utilize this mouth watering Italian Chicken Bow Tie Pasta , do share with us and we would be glad to give it a try.

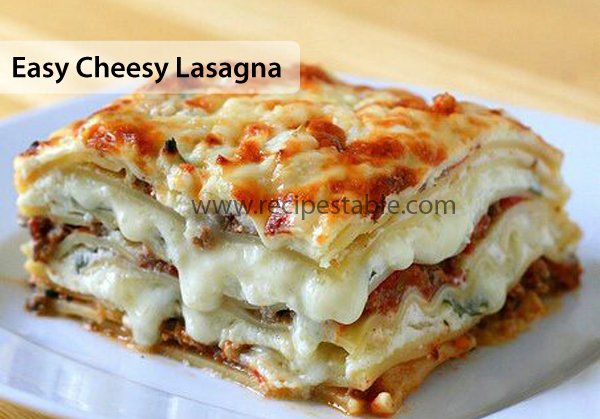
  • Easy Cheesy Lasagna Recipe

    Easy Cheesy Lasagna

    This is a fast and easy way to make lasagna. It is yummy too. You get the same great flavor of a more complicated dish but exert none of the effort. Yum Yum !!

    Easy Cheesy Lasagna Recipe
    Photo: Easy Cheesy Lasagna Recipe

    Check it out the Easy Cheesy Lasagna Recipe here!!

    [divider]

    [one_fourth]Prep Time:10 minutes[/one_fourth] [one_fourth]Cook Time:30 minutes[/one_fourth] [one_fourth]Servings: 6[/one_fourth] [one_fourth_last]Difficulty Level: Easy[/one_fourth_last]

    [divider]

    [tabs type=”horizontal”] [tabs_head] [tab_title]Ingredients[/tab_title] [tab_title]Nutrition[/tab_title] [/tabs_head] [tab]

    • 1 pound ground beef
    • 1 (8 ounce) package wide egg noodles, cooked
    • 1 (8 ounce) package shredded mozzarella cheese
    • 1 (26 ounce) jar spaghetti sauce
    • 1 cup grated Parmesan cheese
    • 1 cup cottage cheese

    [/tab] [tab]Yield:6 servings

    Nutritional information is not yet available. [/tab] [/tabs]

    Directions:
    [tabs type=”horizontal”] [tabs_head] [tab_title]Step by Step Method[/tab_title] [tab_title]Serving Suggestions[/tab_title][/tabs_head] [tab]

    Step 1

    Heat a non-stick skillet over medium high heat.

    Step 2

    Place beef into the skillet. Cook for 15-20 minutes or until lightly browned.

    Step 3

    Drain.

    Step 4

    Stir in spaghetti sauce.

    Step 5

    Cover and simmer for 5 minutes.

    Step 6

    Stir in noodles.

    Step 7

    Sprinkle with mozzarella cheese and cottage cheese. Stir until well combined.

    Step 8

    Tranfer to a greased 2-quart casserole dish.

    Step 9

    Top with Parmesan cheese.

    Step 10

    Bake, uncovered, at 350 degree F, for 30 minutes or until bubbly and lightly browned. Easy Cheesy Lasagna is ready to serve. ENJOY!!

    [/tab] [tab]

    • Serve with Broccoli Bites.

    [/tab] [/tabs]
    If you like Easy Cheesy Lasagna Recipe and make it then let me know your feedback by commenting below.And if you know more innovative ways in which we can utilize this mouth watering Easy Cheesy Lasagna, do share with us and we would be glad to give it a try.
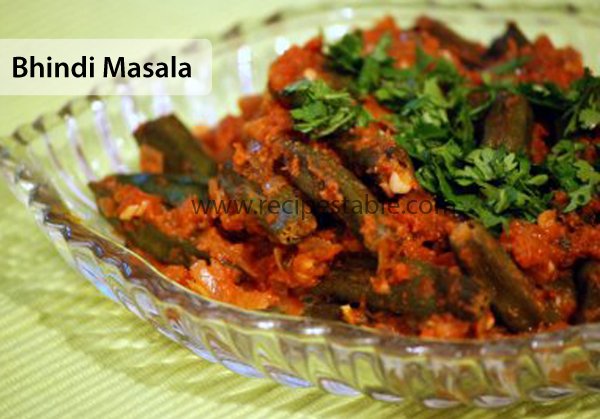
  • Best Bhindi Masala Recipe You’ll Ever Try

    Bhindi Masala

    The Bhindi Masala Recipe is a simple and quick recipe that you can make in a jiffy for a week-night dinner. All you need is Bhindi , tomatoes and onions and a few basic spices. Must try it and Share your experience with us!!

    Bhindi Masala Recipe
    Photo: Bhindi Masala Recipe

    Check it out the Bhindi Masala Recipe here!!

    [divider]

    [one_fourth]Prep Time:10 minutes[/one_fourth] [one_fourth]Cook Time:30 minutes[/one_fourth] [one_fourth]Servings:4 [/one_fourth] [one_fourth_last]Difficulty Level: Easy[/one_fourth_last]

    [divider]

    [tabs type=”horizontal”] [tabs_head] [tab_title]Ingredients[/tab_title] [tab_title]Nutrition[/tab_title] [/tabs_head] [tab]

    • 500 gm Okra (bhnidi)
    • 1/2 cup cooking oil
    • 2 onions, chopped
    • 2 green chillies, finely chopped
    • 2 tomatoes, finely chopped
    • 1 teaspoon red Red chilli powder
    • 1/2 teapoon coriander powder
    • 1/2 teaspoon dry mango powder
    • 1/2 teaspoon cumin seeds
    • 1/2 teaspoon turmeric powder
    • Salt to taste

    [/tab] [tab]Yield: 4 servings

    Nutritional information is not yet available. [/tab] [/tabs]

    Directions:
    [tabs type=”horizontal”] [tabs_head] [tab_title]Step by Step Method[/tab_title] [tab_title]Serving Suggestions[/tab_title][/tabs_head] [tab]

    Step 1

    Wash and pat dry the Bhindi/Okra and cut into long pieces.

    Step 2

    Heat Oil in a pan and add cumin seeds and fry it for a minute.

    Step 3

    Add chopped onions and saute till they are soft.

    Step 4

    Add chopped tomatoes and green chillies and fry for another two minutes.

    Step 5

    Add chilli, coriander and turmeric powders and toss well.

    Step 6

    Stir in the chopped Okra pieces and combine it well. Cook covered on a medium flame , stirring occasionally.

    Step 7

    Add salt and Amchur powder.

    Step 8

    When the Okra is cooked and raw smell goes.

    Step 9

    Remove the lid and saute well for 4-5 minutes.

    Step 10

    Remove from the heat and transfer into a serving bowl. Bhindi Masala is ready to serve.

    [/tab] [tab]

    • Serve with roti.

    [/tab] [/tabs]
    If you like Bhindi Masala Recipe and make it then let me know your feedback by commenting below.And if you know more innovative ways in which we can utilize this mouth watering Bhindi Masala, do share with us and we would be glad to give it a try.
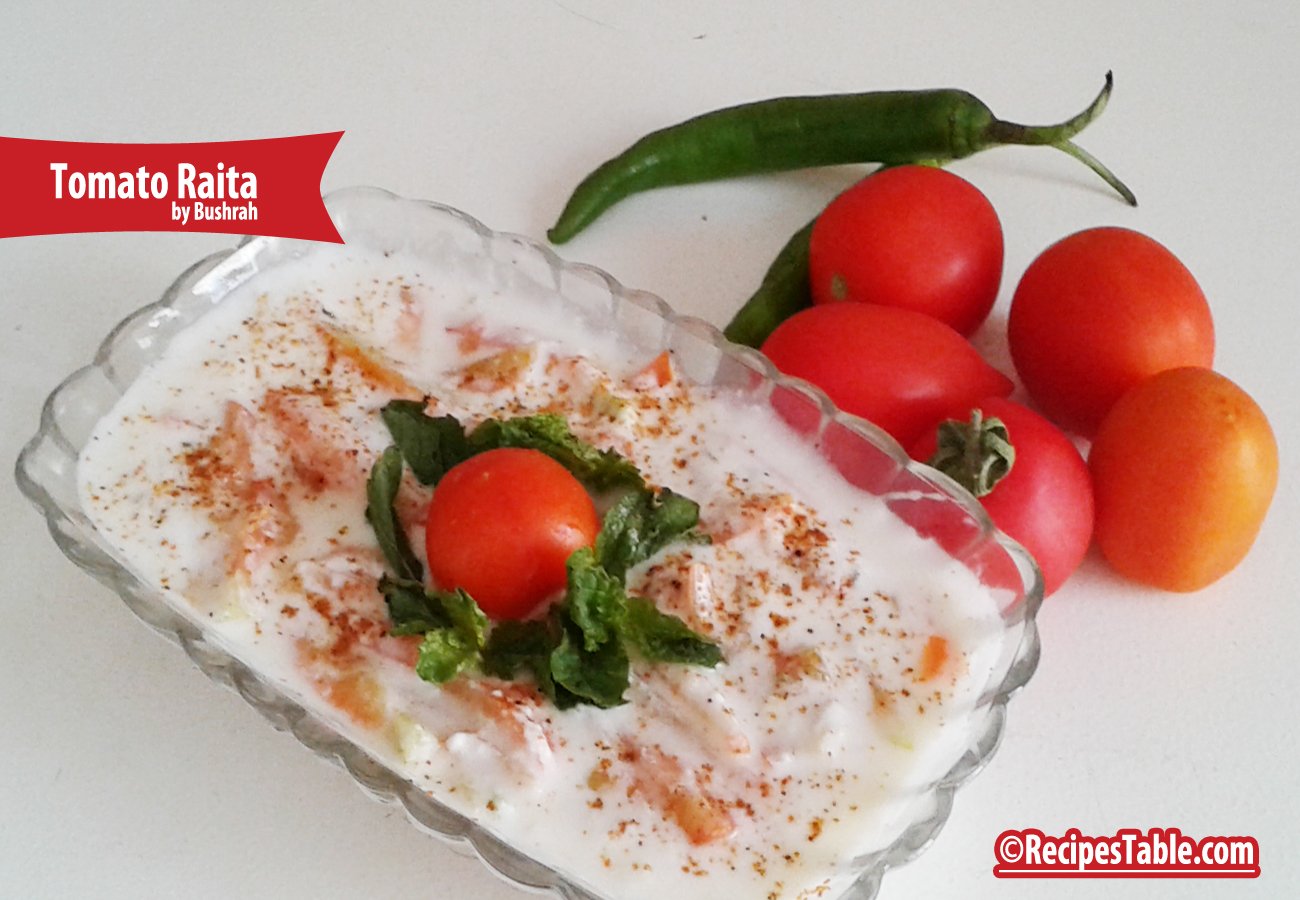
  • Cool & Refreshing Tomato Raita Recipe (The Perfect Dip!)

    Tomato Raita

    Tomato Raita is one of the easiest condiment recipes which does not require any cooking and can be made at home by combining chopped tomatoes and yogurt. This tomato raita recipe is a great accompaniment for spicy dishes.Goes great with spicy pilafs or any spicy dishes.

    Tomato Raita recipe
    Photo: Tomato Raita
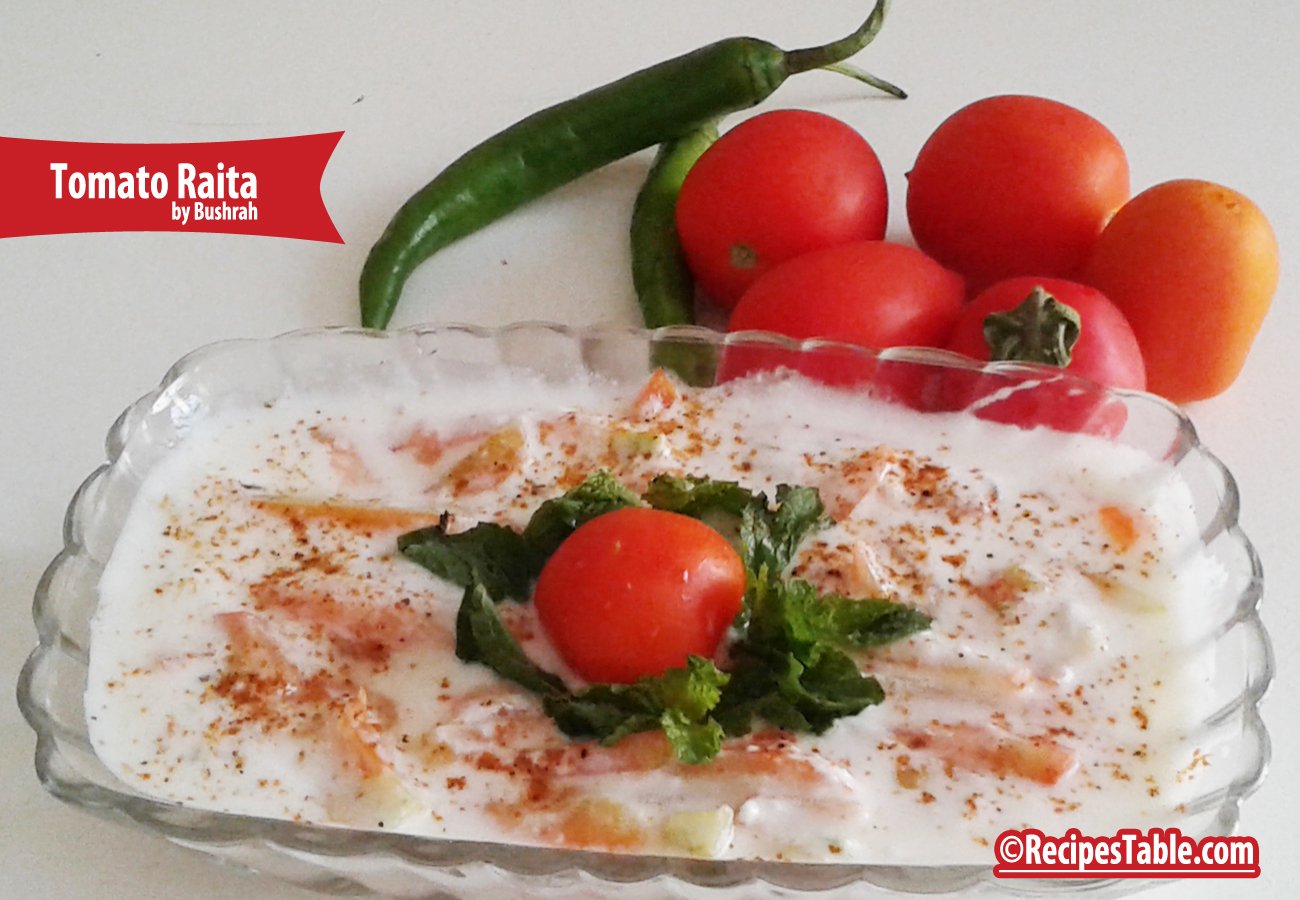
    Tomato Raita recipe
    Photo: Tomato Raita

    Check it out the Tomato Raita Recipe  here!!

    Prep Time:5 minutes

    Cook Time:not required

    Servings:2

    Difficulty Level: Easy

    Ingredients: 

    • 2 tomatoes
    • 1 cup plain yogurt
    • 1 green chili, chopped
    • Salt to taste
    • few coriander leaves
    • 1/2 teaspoon cumin seeds
    • 1/4 teaspoon chaat masala powder

    Directions:

    Step 1

    Beat yogurt in a mixing bowl.

    Step 2

    Add chopped tomatoes, green chili, salt, cumin seeds, and a pinch of chaat masala.

    Step 3

    Mix well.

    Step 4

    Garnish with fresh coriander leaves.

    Step 5

    Sprinkle remaining chaat masala over it. Tomato raita is ready to serve.

    Recipe Note’s

    • You can add black pepper powder along with or instead of green chili according to your taste.

    Serving Suggestions:

    • Serve with rice or bread immediately or after cooling in the fridge for sometime.

    If you like Tomato Raita Recipe and make it then let me know your feedback by commenting below.And if you know more innovative ways in which we can utilize this mouth watering Tomato Raita, do share with us and we would be glad to give it a try.
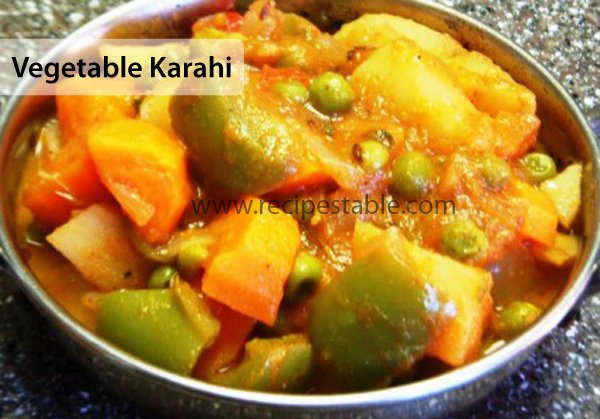
  • Vegetable Karahi Recipe

    Vegetable Karahi

    A popular side dish that you get in Indian restaurants. An all in one side dish for rotis. Today, I’m posting a Vegetable Karahi recipe for all the vegetarian curry fans. This Vegetable Karahi recipe is a homemade version of the Vegetable karahi.

    Vegetable Karahi Recipe
    Photo: Vegetable Karahi Recipe

    Check it out the Vegetable Karahi Recipe here!!

    [divider]

    [one_fourth]Prep Time:10  minutes[/one_fourth] [one_fourth]Cook Time:35 minutes[/one_fourth] [one_fourth]Servings: 4[/one_fourth] [one_fourth_last]Difficulty Level: Easy[/one_fourth_last]

    [divider]

    [tabs type=”horizontal”] [tabs_head] [tab_title]Ingredients[/tab_title] [tab_title]Nutrition[/tab_title] [/tabs_head] [tab]

    • 1/2 cauliflower, cut in slices
    • 1/2 cup green peas
    • 2 Potatoes
    • 1 green pepper
    • 1 red pepper
    • 1 Carrot
    • 1 onion
    • 4 Green chillies, thinly sliced
    • 2 tablespoon ginger garlic paste
    • 3 tomatoes, chopped
    • 1/4 cup plain yogurt
    • 1 tablespoon turmeric powder
    • 1 tablespoon Garam masala powder
    • 1 tablespoon red chili powder
    • 1 tablespoon cumin powder
    • Salt as taste

    For Garnishing:

    • 1 inch piece of ginger, thinly sliced
    • few coriander leaves

    [/tab] [tab]Yield: 4 servings

    Nutritional information is not yet available. [/tab] [/tabs]

    Directions:
    [tabs type=”horizontal”] [tabs_head] [tab_title]Step by Step Method[/tab_title] [tab_title]Serving Suggestions[/tab_title][/tabs_head] [tab]

    Step 1

    Take a wok put oil and heat it up and fry onion until light pink.

    Step 2

    Then put ginger garlic paste and fry, then put chopped tomatoes and mix well.

    Step 3

    Then put salt, red crushed chillies, turmeric powder, cumin powder, garam masala, and mix it well, then add vegetables and mix it well,

    Step 4

    Then put yogurt and fry bit, after 3 min put green chillies, fresh coriander and ginger flakes with little bit of water and cook on steam until vegetables done.

    Step 5

    Garnish with fresh coriander, ginger and green chilies. Vegetable Karahi is ready to serve.

    [/tab] [tab]

    • Serve hot with chapati or naan!

    [/tab] [/tabs]
    If you like Vegetable Karahi  Recipe and make it then let me know your feedback by commenting below.And if you know more innovative ways in which we can utilize this mouth watering Vegetable Karahi , do share with us and we would be glad to give it a try.
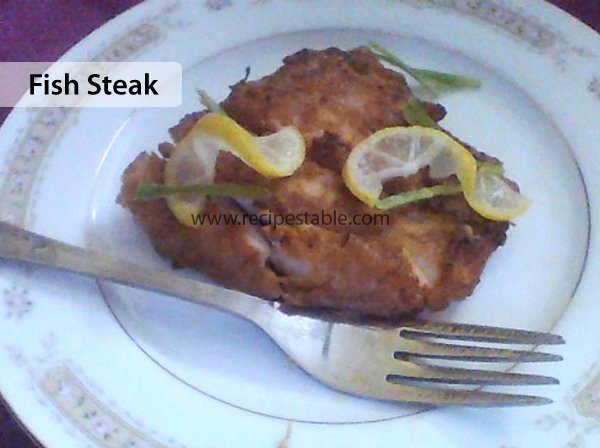
  • Say Goodbye to Dry Fish: The Secret to Making Juicy Fish Steak!

     Fish Steak

    Fish Steak is a healthy alternative to beef or chicken, and even non-fish eaters may enjoy this meaty, mild-flavored fish steak. So, must try out this delicious Fish Steak Recipe that is made with few simple ingredients and simple method. You can bake it as well if you don’t want to pan-fry.

    Fish Steak Recipe
    Photo: Fish Steak Recipe

     Check it out the Fish Steak Recipe here!!

    [divider]

    [one_fourth]Prep Time:15 minutes + marination[/one_fourth] [one_fourth]Cook Time:15 minutes[/one_fourth] [one_fourth]Servings:4 [/one_fourth] [one_fourth_last]Difficulty Level:Easy [/one_fourth_last]

    [divider]

    [tabs type=”horizontal”] [tabs_head] [tab_title]Ingredients[/tab_title] [tab_title]Nutrition[/tab_title] [/tabs_head] [tab]

    • 4 fish fillets (halibut)
    • 4 tablespoon butter
    • 2 tablespoon lemon juice
    • 1 teaspoon ginger garlic paste
    • 1 teaspoon mustard paste
    • 1 teaspoon white pepper
    • 1 teaspoon sesame oil
    • 1 teaspoon dried basil
    • 1 teaspoon fresh parsley, chopped

    [/tab] [tab]Yield: 4 servings

    Nutritional information is not yet available. [/tab] [/tabs]

    Directions:
    [tabs type=”horizontal”] [tabs_head] [tab_title]Step by Step Method[/tab_title] [tab_title]Serving Suggestions[/tab_title][/tabs_head] [tab]

    Step 1

    In a small mixing bowl, mix together the ginger-garlic paste, mustard paste, sesame oil, basil, salt, pepper, lemon juice, and parsley.

    Step 2

    Place the fish fillets in a resealable plastic bag.

    Step 3

    Pour the marinade over the fish fillets.

    Step 4

    Seal the bag Shake to coat evenly.

    Step 5

    Place in the refrigerator for 1 hour to blend flavors.

    Step 6

    Melt butter in a shallow frying pan.

    Step 7

    Remove fish fillets from the marinade.

    Step 8

    Pan-fry fish fillets for 5 minutes on each side or until fish is done when easily flaked with a fork.

    Step 9

    Transfer into a serving dish. Garnish with lemon wedges. Delicious Fish Steak is ready to serve. ENJOY
    [/tab] [tab]

    • Serve along with Tartar sauce and French Fries.

    [/tab] [/tabs]
    If you like Fish Steak Recipe and make it then let me know your feedback by commenting below.And if you know more innovative ways in which we can utilize this mouth watering Fish Steak, do share with us and we would be glad to give it a try.
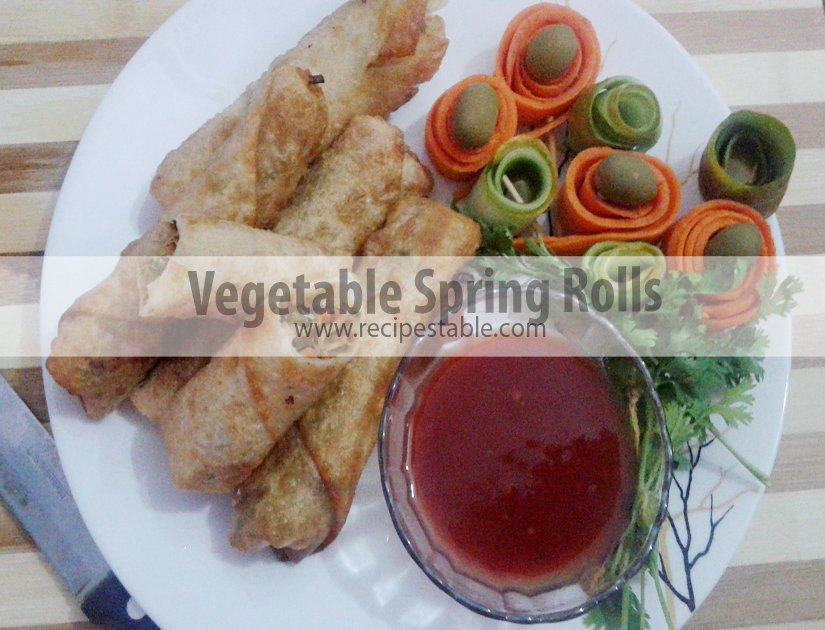
  • The Best Vegetable Spring Rolls Recipe: Easy and Delicious

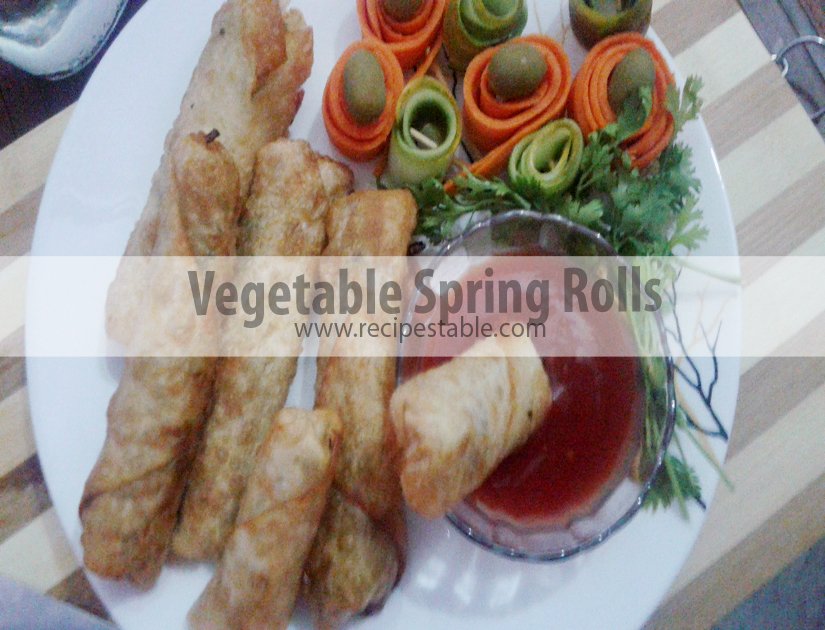
    Vegetable Spring Rolls

    Here is the my favorite Vegetable Spring Rolls Recipe. You can make them before Ramadan and can also freeze them and fry them when ever you want.

    Vegetable Spring Rolls
    Vegetable Spring Rolls


    These spring rolls are a perfect tea time snack and great party food. With a combination of colorful veggies and exotic taste of soy sauce, these rolls are a great choice for snacking. Give it a try!!

    Vegetable Spring Rolls
    Vegetable Spring Rolls

    A really delicious and colourful way to eat your spring vegetables.These Vegetable Spring Rolls tastes fresh and crisp and adds a lot of beautiful color to tea time.

    colorful vegetables
    Colourful And Delicious Ways To Eat Spring Vegetables

    Vegetable Spring Rolls Recipe With Step By Step Pictures:

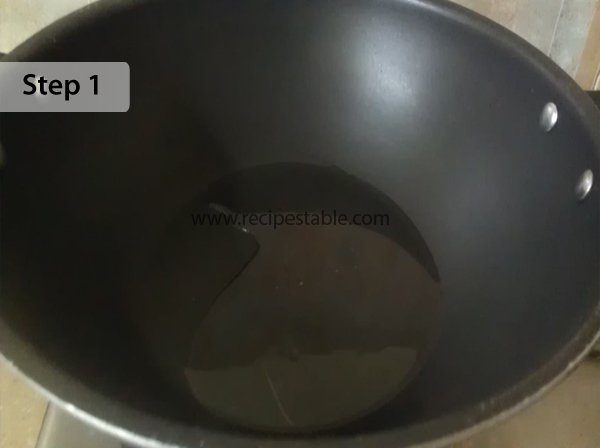
    Step 1 : Heat 1 tablespoon vegetable oil in a wok over high heat.

    Vegetable Spring Rolls
    Step 1 

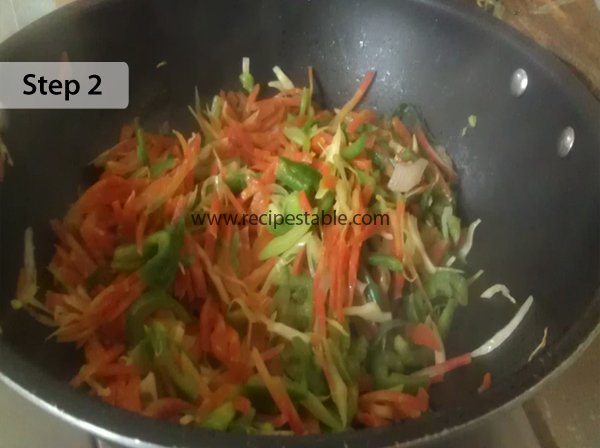
    Step 2:Stir fry onion, garlic, green peas, carrot, green pepper and cabbage for few minutes or until crisp tender.

    Vegetable Spring Rolls recipe
    Step 2 

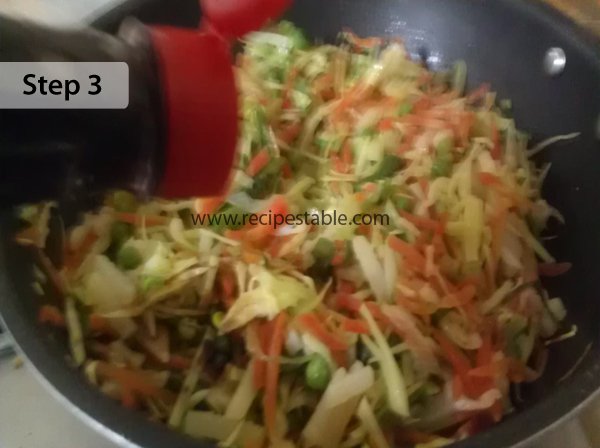
    Step 3: Stir in the instant noodles (crushed) and soy sauce. Add seasoning and mix well.

    vegetable Spring Rolls
    Step 3

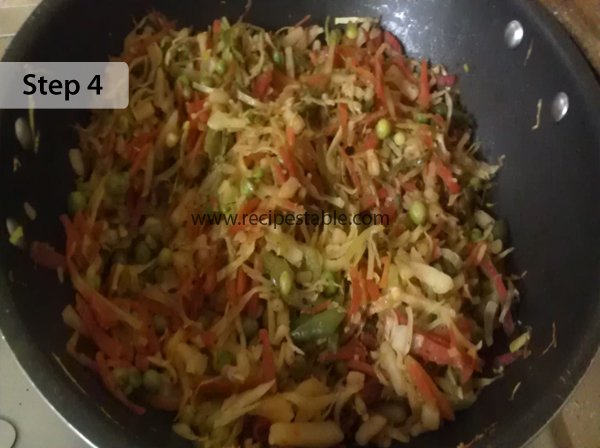
    Step 4: Turn off the stove and let it slightly cool.

    Vegetable Spring Rolls Recipe
    Step 4 

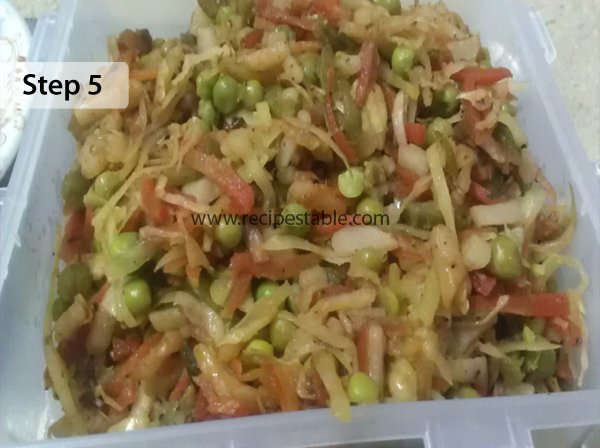
    Step 5: Transfer into a bowl. Keep aside to cool completely.

    Vegetable Spring Rolls recipe
    Step 5

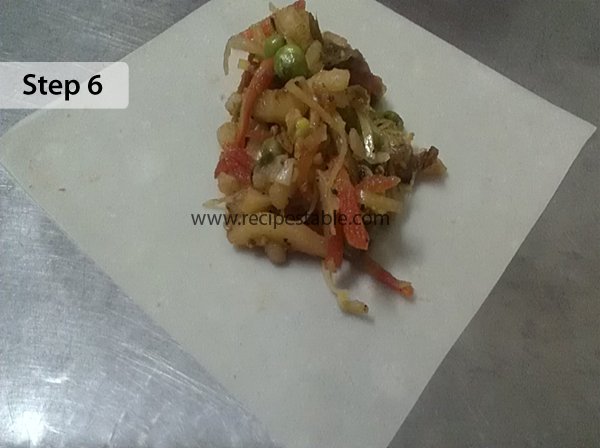
    Step 6:Place a roll wrapper on a clean surface with a corner pointing towards you.Put 1 tablespoon vegetable mixture into the center of the wrap. Brush the edges with egg yolk or cornflour mixture.

    Vegetable Spring Rolls recipe
    Step 6 

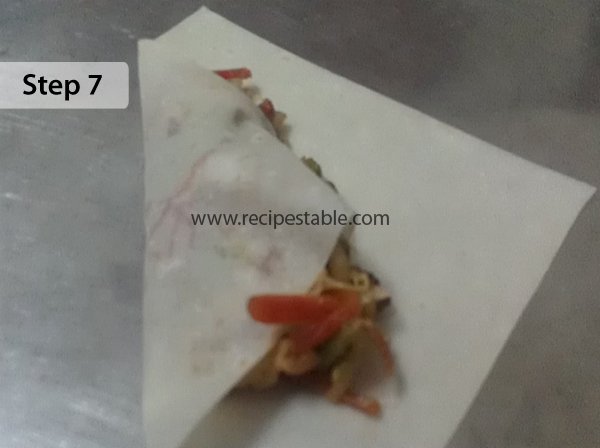
    Step 7:Fold corner over the filling then roll up from corner to corner, folding edges in  to enclose filling.

    Vegetable Spring Rolls recipe
    Step 7 

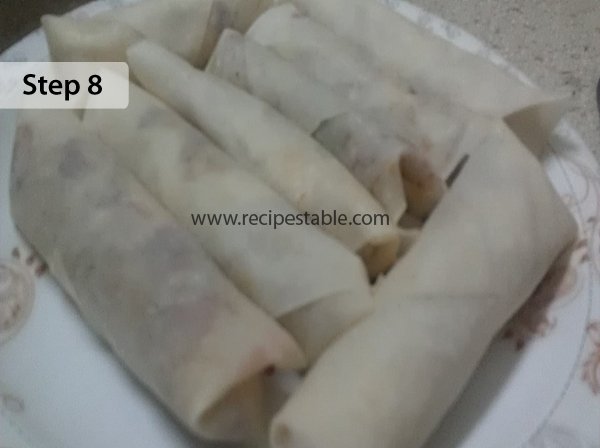
    Step 8:Repeat this method with remaining wrappers and vegetable filling. And make twenty spring rolls.

    Vegetable Spring Rolls recipe
    Step 8 

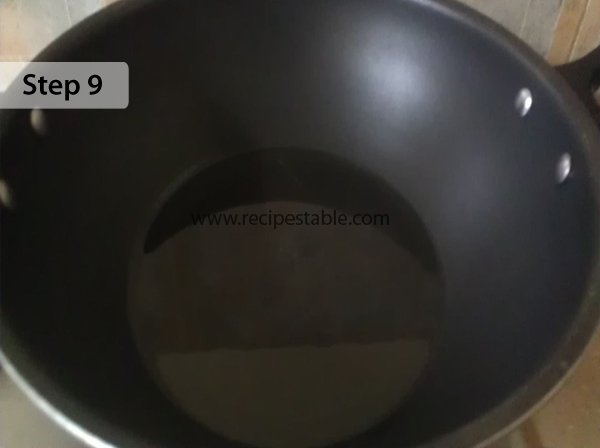
    Step 9:Heat oil in a wok over medium heat.

    Vegetable Spring Rolls
    Step 9 

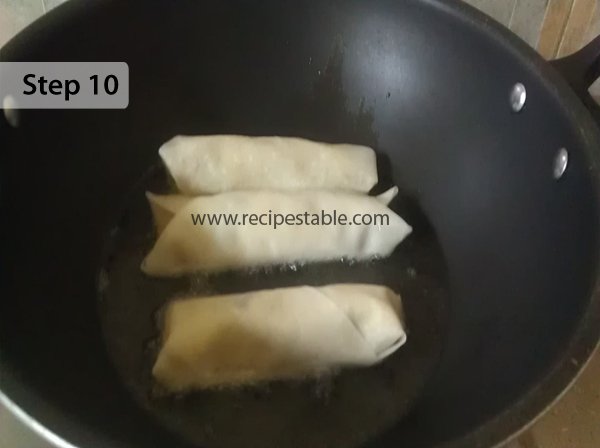
    Step 10: Fry spring rolls in batches.

    Vegetable Spring Rolls recipe
    Step 10

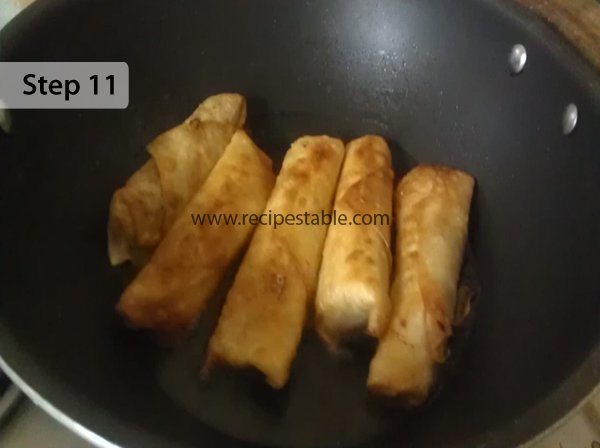
    Step 11: Fry on both sides for 1-2 minutes or until they turn crispy and golden in colour.

    Vegetable Spring Rolls recipe
    Step 11

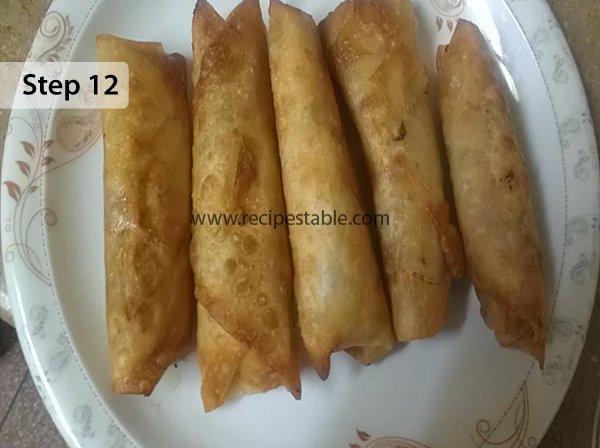
    Step 12: Remove from the oil and transfer into a plate. Ready to enjoy!!

    Vegetable Spring Rolls recipe
    Step 12

    Check it out the printable version recipe below:

    Vegetable Spring Rolls

    A really delicious and colourful way to eat your spring vegetables.This Vegetable Spring Rolls recipe tastes fresh and crisp and adds a lot of beautiful color to tea time.
    Prep Time 20 minutes
    Cook Time 10 minutes
    Total Time 30 minutes
    Servings 10
    Author Bushrah | Recipestable

    Ingredients

    • 1 packet instant noodles
    • 1 tbsp vegetable oil
    • 2 cups shredded cabbage
    • 1/2 cup boiled green peas
    • 3 green onions sliced
    • 2 garlic cloves crushed
    • 1 carrot grated
    • 1 green pepper chopped
    • 1 tbsp soy sauce
    • 1/4 tsp white pepper
    • salt to taste
    • 20 frozen spring roll wrappers thawed
    • oil for frying
    • 2 tablespoon cornflour dissolved in a lil water and make a thick paste or a egg yolk

    Instructions

    Directions

    • Heat vegetable oil in a pan over high heat.
    • Add onion, garlic, green peas, carrot, green pepper and cabbage. Cook and stir for few minutes or until crisp tender.
    • Add instant noodles (crushed) and soy
    • sauce.
    • Season with salt and pepper.
    • Turn the heat off and take it out in a
    • bowl.
    • Set aside to cool.
    • Place 1 wrapper on a board with a corner pointing towards you.
    • Brush edges with cornflour mixture.
    • Spoon 1 tbsp vegetable mixture into the corner of the wrap.
    • Fold corner over the filling then roll up from corner to corner, folding edges in to enclose filling.
    • Repeat with remaining wrappers, cornflour mixture and filling.
    • Heat oil in a deep pan over medium high heat.
    • Deep fry spring rolls, in batches, for 2-3 minutes or until crispy and golden.
    • Remove from the oil and drain on kitchen paper. ENJOY!

    Notes

    Notes:
    Keep remaining wrappers covered with damp tea towel.
    Serving Suggestions:
    Serve hot with sweet chilli sauce.

    If you like this  recipe, Please Subscribe to my blog. I have lots more recipes to share with you. And If you make it then let me know your feedback by commenting below.

  • Crispy Perfection: The Secret to Making the BEST Brinjal Pakora Ever!

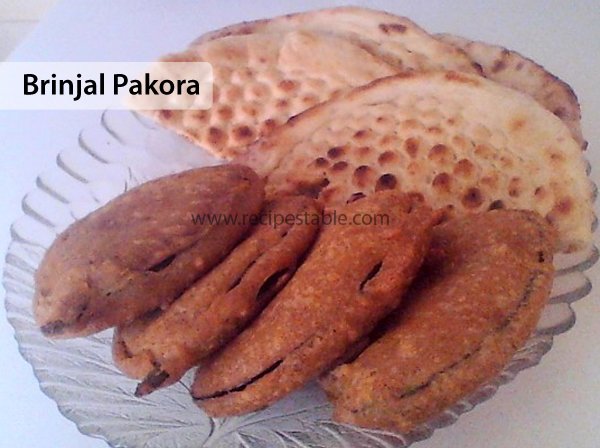
    Brinjal Pakora

    Brinjal Pakora is a yummy tea time snack. It easy to prepare and taste delicious when served with Brown Chutney. Give it a try!!

    Brinjal Pakoda Recipe
    Photo: Brinjal Pakora Recipe

    Check it out the Brinjal Pakora Recipe here!!

    [divider]

    [one_fourth]Prep Time:15 minutes[/one_fourth] [one_fourth]Cook Time:10 minutes[/one_fourth] [one_fourth]Servings:4 [/one_fourth] [one_fourth_last]Difficulty Level: Easy[/one_fourth_last]

    [divider]

    [tabs type=”horizontal”] [tabs_head] [tab_title]Ingredients[/tab_title] [tab_title]Nutrition[/tab_title] [/tabs_head] [tab]

    • 2 big brinjals
    • 1-1/2 cup gram flour
    • 1/2 cup rice flour
    • 1 tsp red chilli powder
    • Salt to taste
    • water as required
    • oil for frying

    [/tab] [tab]Yield: 4 servings

    Nutritional information is not yet available. [/tab] [/tabs]

    Directions:
    [tabs type=”horizontal”] [tabs_head] [tab_title]Step by Step Method[/tab_title] [tab_title]Serving Suggestions[/tab_title][/tabs_head] [tab]

    Step 1

    Wash brinjal and cut into thick round slices.

    Step 2

    Soak into cold water and set aside.

    Step 3

    Take a bowl , add gram flour, rice flour, red chilli powder, salt and water to make a thick and smooth paste.

    Step 4

    Keep aside for 15 min.

    Step 5

    Now heat oil in a deep pan.

    Step 6

    Take a round slice of brinjal and dip in prepared paste.

    Step 7

    Deep fry for 8-10 minutes or until crispy and golden brown.

    Step 8

    Remove from the oil and drain on kitchen paper. Brinjal Pakora is ready to serve.

    [/tab] [tab]

    • Serve with Brown Chutney.

    [/tab] [/tabs]
    If you like Brinjal Pakora Recipe and make it then let me know your feedback by commenting below.And if you know more innovative ways in which we can utilize this mouth watering Brinjal Pakora, do share with us and we would be glad to give it a try.
  • Rainy Day Snack: Easy Vegetable Pakora Recipe (Warm & Comforting!)

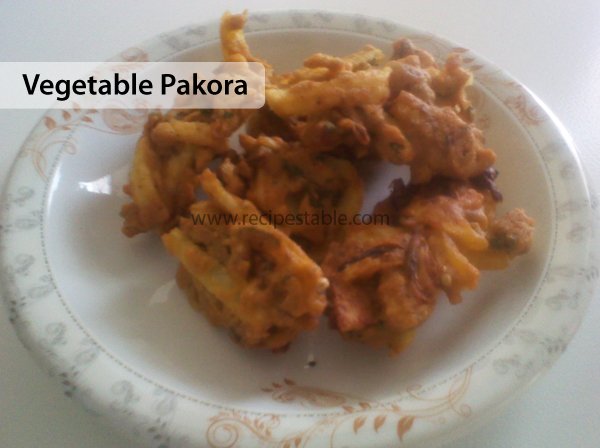
    Vegetable Pakora

    Pakoras are very famous in Pakistan and India.Your favorite vegetables are dipped in a spicy batter and deep fried to make fabulous fritters. Try this Vegetable Pakora Recipe, you’ll love it.

    Vegetable Pakora Recipe
    Photo: Vegetable Pakora Recipe

    Check it out the Vegetable Pakora Recipe here!!

    [divider]

    [one_fourth]Prep Time:10 minutes[/one_fourth] [one_fourth]Cook Time:20 minutes[/one_fourth] [one_fourth]Servings:4 [/one_fourth] [one_fourth_last]Difficulty Level: Easy[/one_fourth_last]

    [divider]

    [tabs type=”horizontal”] [tabs_head] [tab_title]Ingredients[/tab_title] [tab_title]Nutrition[/tab_title] [/tabs_head] [tab]

    • 400gm gram flour
    • 1 onion, chopped
    • 1 green chili,chopped
    • 2 potatoes
    • 1/2 tsp red chili powder
    • salt to taste
    • 1 tsp garlic, chopped
    • 1 tsp ginger,chopped

    [/tab] [tab]Yield: 4 servings

    Nutritional information is not yet available. [/tab] [/tabs]

    Directions:
    [tabs type=”horizontal”] [tabs_head] [tab_title]Step by Step Method[/tab_title] [tab_title]Serving Suggestions[/tab_title][/tabs_head] [tab]

    Step 1

    Add slowly more and more water while kneading the dough.

    Step 2

    In the end it should be a creamy substance, pancake-like.

    Step 3

    Let it stand for 5 till 30 minutes to soak through.

    Step 4

    Heat oil in a deep pan and deep-fat-fry spoonfuls of dough.

    Step 5

    Alternatively slice a raw potatoes into thin slices, turn them in the dough and deep-fry.

    Step 6

    If you like it hot, sprinkle some chat masala on the brown Pakora pieces. Vegetable Pakora is ready to serve. Enjoy!

    [/tab] [tab]

    • Serve with imli ki chutney or green chutney.

    [/tab] [/tabs]
    If you like Vegetable Pakora Recipe and make it then let me know your feedback by commenting below.And if you know more innovative ways in which we can utilize this mouth watering Vegetable Pakora, do share with us and we would be glad to give it a try.
  • Fresh from the Garden: Flavorful Garden Pizza Recipe (A Burst of Summer!)

    Garden Pizza

    A delicious vegetarian pizza made with zucchini, sweet red pepper, carrots and tomatoes. Give it a try!!

    Garden Pizza Recipe
    Photo: Garden Pizza Recipe

    Check it out the Garden Pizza recipe here !!

    [divider]

    [one_fourth]Prep Time:15 minutes[/one_fourth] [one_fourth]Cook Time:10 minutes[/one_fourth] [one_fourth]Servings:2 [/one_fourth] [one_fourth_last]Difficulty Level: Easy[/one_fourth_last]

    [divider]

    [tabs type=”horizontal”] [tabs_head] [tab_title]Ingredients[/tab_title][tab_title]Nutrition[/tab_title] [tab_title]Diabetic Exchange[/tab_title][/tabs_head] [tab]

    • 1 prebaked mini pizza crust
    • 1/3 cup seeded tomato, chopped
    • 1/3 cup shredded Italian cheese blend
    • 1/2 cup zucchini, chopped
    • 1/2 cup sweet red pepper, chopped
    • 1/2 cup green pepper, chopped
    • 2 tbsp finely chopped onion
    • 2 tbsp finely chopped carrot
    • 2 tsp butter
    • 1 tsp garlic powder
    • 1/8 tsp Italian seasoning
    • 1/8 tsp dried oregano
    • a pinch of pepper

    [/tab] [tab]Yield: 2 servings

    Amount Per Serving:( 1 serving = 1/2 pizza)

    • Calories: 324
    • Fat: 13 g (6 g saturated fat)
    • Cholesterol: 23 mg
    • Sodium: 568 mg
    • Carbohydrate: 42 g
    • Fiber: 4 g
    • Protein: 12 g

    [/tab] [tab]

    • 2 starch
    • 2 vegetable
    • 1-1/2 fat
    • 1 lean meat.

    [/tab][/tabs]

    Directions:
    [tabs type=”horizontal”] [tabs_head] [tab_title]Step by Step Method[/tab_title] [tab_title]Serving Suggestions[/tab_title][/tabs_head] [tab]

    Step 1

    Preheat oven to 450 degree F.

    Step 2

    Place pizza crusts on a pizza stone.

    Step 3

    Melt butter in a large skillet over medium heat.

    Step 4

    Saute the zucchini, peppers, onion, carrot and garlic for 8-10 minutes or until crisp-tender.

    Step 5

    Sprinkle with Italian seasoning, oregano and pepper.

    Step 6

    Toss to coat.

    Step 7

    Spoon vegetable mixture onto the prepared crust to within 1/2 inch of edges.

    Step 8

    Top with tomato and Italian cheese.

    Step 9

    Bake, in the preheated oven, for 10 minutes or until cheese is melted.

    Step 10

    Remove from the oven. Cut into wedges. Garden Pizza is ready to serve. Enjoy!!

    [/tab] [tab]

    • Serve with your favorite dipping sauce.

    [/tab] [/tabs]
    If you like Garden Pizza Recipe and make it then let me know your feedback by commenting below.And if you know more innovative ways in which we can utilize this  mouth watering Garden Pizza, do share with us and we would be glad to give it a try.
  • Italian Rice Balls Recipe

    Italian Rice Balls

    Arancini or rice balls are a traditional Italian recipe. Try this Italian Rice Balls Recipe and find out how to make these rice balls with cheese and Italian herbs.

    These cheesy deep fried rice balls are served with Italian dinners as a side like a bread. Goes great with sauce and pasta dishes.

    Italian Rice Balls Recipe
    Photo: Italian Rice Balls Recipe

    Check it out the Italian Rice Balls Recipe here!!

    [divider]

    [one_fourth]Prep Time:15 minutes[/one_fourth] [one_fourth]Cook Time:15 minutes[/one_fourth] [one_fourth]Servings: 12 [/one_fourth] [one_fourth_last]Difficulty Level: Easy[/one_fourth_last]

    [divider]

    [tabs type=”horizontal”] [tabs_head] [tab_title]Ingredients[/tab_title] [tab_title]Nutrition[/tab_title] [/tabs_head] [tab]

    • 2 cups cooked white rice
    • 1-1/2 cups dried bread crumbs
    • 2 eggs
    • 1/3 cup grated Parmesan cheese
    • 1 tbsp dried parsley
    • 1 teaspoon salt
    • 1/4 tsp freshly ground black pepper
    • oil for frying

    [/tab] [tab]Yield: 24 rice balls

    Amount Per Serving: ( 1 serving = 2 each)

    • Calories: 683 kcal
    • Carbohydrates: 34.7 g
    • Cholesterol: 47 mg
    • Fat: 57.8 g
    • Fiber: 1.3 g
    • Protein: 7.3 g
    • Sodium: 822 mg

     [/tab] [/tabs]

    Directions:
    [tabs type=”horizontal”] [tabs_head] [tab_title]Step by Step Method[/tab_title] [tab_title]Serving Suggestions[/tab_title][/tabs_head] [tab]

    Step 1

    Place rice in a large bowl.

    Step 2

    Add eggs, cheese, parsley, pepper, and salt.

    Step 3

    Stir until well combined.

    Step 4

    Place bread crumbs on a shallow dish or plate.

    Step 5

    Dampen hands and roll rice mixture into 1 inch balls.

    Step 6

    Then coat each ball with bread crumbs.

    Step 7

    Heat oil in a deep pan pver medium heat.

    Step 8

    Fry rice balls few at a time, for 2-3 minutes or until crispy and lightly browned.

    Step 9

    Drain on paper towels. Italian Rice Balls are ready to serve. ENJOY!!

    [/tab] [tab]

    • Serve with your favorite dipping sauce and pasta dishes.

    [/tab] [/tabs]
    If you like Italian Rice Balls Recipe and make it then let me know your feedback by commenting below.And if you know more innovative ways in which we can utilize this mouth watering Italian Rice Balls, do share with us and we would be glad to give it a try.
  • Beyond the Box: Simple Roasted Herb Chicken Recipe (Full of Flavor!)

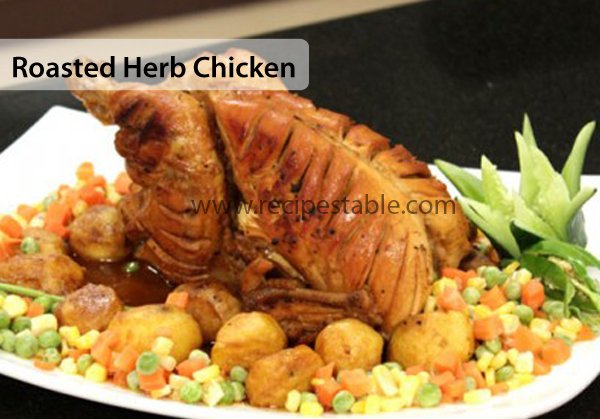
    Roasted Herb Chicken

    Want a roasted herb chicken that is juicy inside without the use of a baking bag or flour? Then try this Roasted Herb Chicken recipe. It is quick and easy to prepare. The aroma from the oven while it’s baking is tantalizing.

    Roasted Herb Chicken Recipe
    Photo: Roasted Herb Chicken Recipe

    Bismillah, let’s begin!

    Check it out the Roasted Herb Chicken Recipe and printable version below.

    Roasted Herb Chicken Recipe

    Prep Time 15 minutes
    Cook Time 2 hours
    Total Time 2 hours 15 minutes
    Servings 6
    Author Bushrah | Recipestable

    Ingredients

    • 1 4 pound whole chicken
    • 2 lemons juiced
    • 1 cup butter softened
    • 1 tbsp garlic powder
    • 1 tsp freshly ground black pepper
    • 1 tsp dried thyme
    • 1 tsp dried parsley
    • 1 tsp dried rosemary
    • 1 tsp seasoning salt

    Instructions

    Method

    • Preheat oven to 175 degrees C.
    • Rinse chicken thoroughly and pat dry with paper towels.
    • In a small bowl, mix together the margarine,garlic powder, black pepper, thyme, parsley,rosemary and lemon juice.
    • Rub this mixture outside and inside of the chicken thoroughly.
    • Place chicken into a baking dish.
    • Bake, in the preheated oven, for 2 hours or until chicken is lightly browned and all the juices run clear.
    • Remove from oven. Roasted Herb Chicken is ready to serve.

    Notes

    Serving Suggestions:
    Serve with Roasted Potatoes and Vegetables.

    I have also posted Tandoori Roast Chicken Recipe  which is another easiest & tastiest version of making Chicken Roast.Do check it out as well.


    Put your own spin on it. And lemme know how it turns out. Post a photo on Facebook (Recipestable) or  on Twitter so I can see how lovely yours turn out.


    Happy Cooking!!

    If you like this post, Please Subscribe to my blog and let me know your feedback by commenting below.. I have lots more recipes to share with you.

  • Easy Crispy Zinger Burger Recipe: Restaurant-Style at Home in Minutes!

    Crispy Zinger Burger

    Zinger Burger is one of the most loving burger around the world due to its crispy delicious taste. I’ve tried these burgers and they are same as KFC. So, Today i m going to share this Crispy Zinger Burger recipe with you all.

    Try it and don’t forget to share your experience with us!!

    Crispy Zinger Burger Recipe
    Photo: Crispy Zinger Burger Recipe

    Check it out the Crispy Zinger Burger Recipe here!!

    [divider]

    [one_fourth]Prep Time:10 minutes[/one_fourth] [one_fourth]Cook Time:25 minutes[/one_fourth] [one_fourth]Servings:2 [/one_fourth] [one_fourth_last]Difficulty Level: Easy[/one_fourth_last]

    [divider]

    [tabs type=”horizontal”] [tabs_head] [tab_title]Ingredients[/tab_title] [tab_title]Nutrition[/tab_title] [/tabs_head] [tab]
    For Burger Patty

    • 2 boneless skinless chicken breasts
    • 1 egg, lightly beaten
    • 1/2 cup plain flour
    • 1/2 cup cornflour
    • 1/4 cup rice flour
    • 2 tablespoon baking powder
    • 1/2 teaspoon garlic powder
    • 1/2 teaspoon salt
    • 1/2 teaspoon black pepper
    • 1/4 teaspoon white pepper
    • oil for frying

    For Burger

    • 2 burger buns
    • 2 tablespoon mayonnaise
    • 2 slices cheese
    • 2 leaves lettuce

    [/tab] [tab]Yield: 2 servings

    Nutritional information is not yet available. [/tab] [/tabs]

    Directions:
    [tabs type=”horizontal”] [tabs_head] [tab_title]Step by Step Method[/tab_title] [tab_title]Recipe Note’s[/tab_title][tab_title]Serving Suggestions[/tab_title][/tabs_head] [tab]

    Step 1

    In a shallow dish, combine together the plain flour, cornflour, rice flour, baking powder and a pinch of salt and pepper.

    Step 2

    Keep aside.

    Step 3

    Sprinkle salt, black pepper, garlic powder and white pepper on both sides of chicken breasts.

    Step 4

    In a small bowl, beat egg with salt, black and white pepper.

    Step 5

    Dip each chicken breast in egg then coat with flour mixture.

    Step 6

    Again apply egg and flour(you have to do a double coating).

    Step 7

    Heat oil in a deep pan over medium heat.

    Step 8

    Deep fry the chicken for 5 minutes then cover with a lid while frying. Fry until crispy and golden brown.

    Step 9

    Cut bun into halves.

    Step 10

    Spread mayonnaise on each side of bun.

    Step 11

    Put fried chicken, lettuce leave, and cheese slice.

    Step 12

    Cover with other piece of bun on top. Crispy Zinger Burger is ready to serve. ENJOY!

    [/tab] [tab]

    • Add seasoning in flours, this will make the coating more tasty.

    [/tab][tab]

    • Serve with French Fries and Tomato Ketchup.

    [/tab] [/tabs]
    If you like Crispy Zinger Burger Recipe and make it then let me know your feedback by commenting below.And if you know more innovative ways in which we can utilize this  mouth watering Crispy Zinger Burger, do share with us and we would be glad to give it a try.
  • Cashew Chicken Casserole Recipe

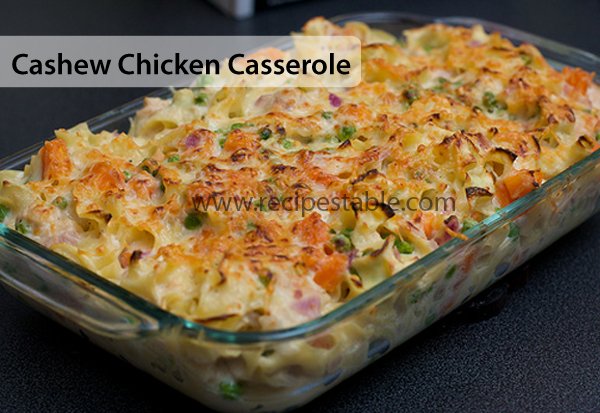
    Cashew Chicken Casserole

    Plan ahead to get this dish ready the day before you need it. It’s easy to whip up with common pantry items. Give it a Try!!

    Cashew Chicken Casserole Recipe
    Photo: Cashew Chicken Casserole Recipe

    Check it out the Cashew Chicken Casserole Recipe here!!

    [divider]

    [one_fourth]Prep Time:15 minutes[/one_fourth] [one_fourth]Cook Time:35 minutes[/one_fourth] [one_fourth]Servings:6 [/one_fourth] [one_fourth_last]Difficulty Level: Easy[/one_fourth_last]

    [divider]

    [tabs type=”horizontal”] [tabs_head] [tab_title]Ingredients[/tab_title] [tab_title]Nutrition[/tab_title] [/tabs_head] [tab]

    • 1 can (8 ounces) sliced water chestnuts, drained
    • 1 can (14-1/2 ounces) chicken broth
    • 1 can (10-3/4 ounces) condensed cream of mushroom soup, undiluted
    • 1 can (10-3/4 ounces) condensed cream of chicken soup, undiluted
    • 1 small onion, chopped
    • 3 cups cubed cooked chicken
    • 2 cups uncooked elbow macaroni
    • 1-1/3 cups milk
    • 1/2 cup process cheese (Velveeta)
    • 1/2 cup chopped celery
    • 1/2 cup chopped green pepper
    • 1/4 cup butter, melted
    • 2/3 cups crushed saltines( about 20 crackers)
    • 3/4 cup cashew halves

    [/tab] [tab]

    Yield: 6 servings

    Amount Per Serving: 

    • Calories: 620
    • Fat: 34 g
    • Cholesterol: 102 mg
    • Sodium: 1,515 mg
    • Carbohydrate: 45 g
    • Fiber: 4g
    • Protein: 35 g

    [/tab] [/tabs]

    Directions:
    [tabs type=”horizontal”] [tabs_head] [tab_title]Step by Step Method[/tab_title] [tab_title]Serving Suggestions[/tab_title][/tabs_head] [tab]

    Step 1

    Lightly grease a 13×9-inch. baking dish with cooking spray.

    Step 2

    Layer the macaroni, chicken, cheese, celery, onion, green pepper and chestnuts in the baking dish.

    Step 3

    In a large bowl, combine the milk, soups and chicken broth.

    Step 4

    Pour this mixture over the water chestnuts.

    Step 5

    Cover and place in the refrigerator for 8 hours or overnight.

    Step 6

    In a small bowl, toss butter and cracker crumbs.

    Step 7

    Sprinkle crumbs over the casserole.

    Step 8

    Top with cashew nuts.

    Step 9

    Bake, uncovered, at 350 degree F, for 40 minutes or until macaroni is tender. Cashew Chicken Casserole is ready to serve.

    [/tab] [tab]

    • Serve warm.

    [/tab] [/tabs]
    If you like Cashew Chicken Casserole Recipe and make it then let me know your feedback by commenting below.And if you know more innovative ways in which we can utilize this mouth watering Cashew Chicken Casserole, do share with us and we would be glad to give it a try.