Tag: Quick and Easy

  • Shimla Mirch with Chicken Recipe

    Shimla Mirch with Chicken

    As the title of recipe Shimla Mirch with Chicken  suggest this dish is a delicious combination of green bell pepper, spiced and mainly chicken. You can have it dinner as well as in lunch. Do confer it an attempt for your own good.

    Shimla Mirch with Chicken Recipe
    Photo: Shimla Mirch with Chicken Recipe

    Check it out the Shimla Mirch with Chicken Recipe here!!

    [divider]

    [one_fourth]Prep Time:5 minutes[/one_fourth] [one_fourth]Cook Time:45 minutes[/one_fourth] [one_fourth]Servings: 6[/one_fourth] [one_fourth_last]Difficulty Level: Easy[/one_fourth_last]

    [divider]

    [tabs type=”horizontal”] [tabs_head] [tab_title]Ingredients[/tab_title] [tab_title]Nutrition[/tab_title] [/tabs_head] [tab]

    • 1-1/2 kg whole chicken, cut into pieces
    • 3/4 cup cooking oil
    • 2 large onions, chopped
    • 3 tomatoes, chopped
    • 1 onion, thinly sliced
    • 4 green bell peppers, cubed
    • 1 tablespoon ginger garlic paste
    • 1 tablespoon lemon juice
    • 1 teaspoon red chili powder
    • 1 teaspoon cumin powder
    • 1/2 teaspoon coriander powder
    • 1/2 teaspoon garam masala powder
    • 1/4 teaspoon turmeric powder
    • salt to taste

    [/tab] [tab]Yield: 6 servings

    Nutritional information is not yet available. [/tab] [/tabs]

    Directions:
    [tabs type=”horizontal”] [tabs_head] [tab_title]Step by Step Method[/tab_title] [tab_title]Serving Suggestions[/tab_title][/tabs_head] [tab]

    Step 1

    Heat oil in a large pot over moderate heat.

    Step 2

    Saute onions, ginger and garlic paste, for few minutes or until trasnculent.

    Step 3

    Add tomatoes, salt, turmeric, coriander powder and red chilli.

    Step 4

    Stir well.

    Step 5

    Cook for 5 minutes or until the oil comes on the top and the tomatoes and tender.

    Step 6

    Add the chicken and cook on high flame for 15-20 minutes or until no longre pink.

    Step 7

    Add 1 cup of water.

    Step 8

    Cover the pot and cook on medium flame for 20 minutes or until the chicken is cooked thorough and little water is left.

    Step 9

    Now add green bell pepper and sliced onion. Cook on high flame so that the water dries and oil comes on surface.

    Step 10

    Sprinkle garam masala ovre it. Mix it well.Shimla Mirch with Chicken is ready to serve. ENJOY!!

    [/tab] [tab]

    • Serve with chapati or rice.

    [/tab] [/tabs]
    If you like Shimla Mirch with Chicken Recipe and make it then let me know your feedback by commenting below.And if you know more innovative ways in which we can utilize this mouth watering Shimla Mirch with Chicken, do share with us and we would be glad to give it a try.

  • Quick Weeknight Meal: Chana Biryani Recipe – Ready in Under 30 Minutes

    Chana Biryani

    An aromatic Biryani made with Chickpea (kabuli chana). Bring a completely new scrumptious flavor in lentils. And put a hearty smile your family’s face with great tasting Chana Biryani Recipe on week days.

    Chana Biryani Recipe
    Photo: Chana Biryani Recipe

    Check it out the Chana Biryani Recipe here!!

    [divider]

    [one_fourth]Prep Time:30 minutes[/one_fourth] [one_fourth]Cook Time:40 minutes[/one_fourth] [one_fourth]Servings:6 [/one_fourth] [one_fourth_last]Difficulty Level: Easy[/one_fourth_last]

    [divider]

    [tabs type=”horizontal”] [tabs_head] [tab_title]Ingredients[/tab_title] [tab_title]Nutrition[/tab_title] [/tabs_head] [tab]

    • 3 cups boiled chickpeas
    • 3 cups basmati rice
    • 2 Onions, finely chopped
    • 4 tomatoes, finely chopped
    • 6 whole green chilies
    • 1/4 cup milk
    • 4 tablespoon lemon juice
    • 3 tablespoon tomato paste
    • 3 tablespoon yogurt
    • 2 tablespoon fried onion
    • 2 teaspoon ginger garlic paste
    • 1 teaspoon Vinegar
    • 2 teaspoon red pepper flakes
    • 2 teaspoon cumin seeds, roasted and crushed
    • 1 teaspoon red chili powder
    • Salt according to taste

    For Garnishing:

    • 2 green chillies, finely chopped
    • few coriander leaves, finely chopped
    • Orange Food color

    [/tab] [tab]Yield:6 servings

    Nutritional information is not yet available. [/tab] [/tabs]

    Directions:
    [tabs type=”horizontal”] [tabs_head] [tab_title]Step by Step Method[/tab_title] [tab_title]Serving Suggestions[/tab_title][/tabs_head] [tab]
    Step 1

    Boil rice with salt and vinegar till 2/3 is done.

    Step 2

    Drain water and keep aside.

    Step 3

    Heat oil in a large pot or skillet over medium heat.

    Step 4

    Fry onion when brown add ginger garlic paste.

    Step 5

    Add tomatoes, tomato paste, green chilis whole, salt chili powder, chili flakes, cumin seeds, yogurt and boiled chickpeas.
    Cook and simmer for 5 minutes till oil separates and water dries.

    Step 6

    Now take a large pot, layer half of boiled rice then layer all chickpea masala and top with other layer of rice.

    Step 7

    Pour lemon juice, milk and few drops of food colour on top and put on dum for 15 minutes.

    Step 8

    Lastly garnish with fried onion, green chiliess and green coriander and close lid. Turn off stove after 5 minutes.

    Step 9

    Dish it out. Delicious Chana Biryani is ready to serve. ENjoy!!

    [/tab] [tab]

    • Serve with raita.

    [/tab] [/tabs]
    If you like Chana Biryani  Recipe and make it then let me know your feedback by commenting below.And if you know more innovative ways in which we can utilize this mouth watering Chana Biryani , do share with us and we would be glad to give it a try.

  • Restaurant Secret Revealed: Make Restaurant-Style Hot and Sour Soup at Home!

    Learn how to make restaurant-style Hot and Sour Soup with this quick and easy recipe.  It’s easy to adapt to your personal taste preferences, and so delicious!

    Hot and Sour Soup

    Delicious hot and sour soup does not need to be complicated. This Hot and Sour Soup recipe is quick and easy to make, SO tasty and flavorful, and tastes just like the Chinese restaurant version! 

    And today’s recipe is one that I’ve been meaning to share with you on the blog for years, after literally dozens and dozens of you have requested it. (apparently many of you usually opt for the hot and sour soup at your favorite Chinese restaurants and have wanted to learn how to make it!)

    Well, good news, friends! Traditional hot and sour soup is actually incredibly easy to make as well. And the bonus of making it at home is that it’s also incredibly easy to customize to your taste. Like it extra hot? Add in more chili garlic sauce. Like it extra sour? Add in more rice wine vinegar. Like it vegetarian? Make it with tofu. Like the meat version? Just add in some chicken.

    Trust me, this is one of those restaurant recipes that will taste just as good at home. And on chilly winter weeks like this one that we’re having here in Lahore, it’s guaranteed to warm you up in the most delicious of ways.

    Really, traditional hot and sour soup is just a hotter and sour-er version of egg drop soup, with some mushrooms and chicken (or tofu) thrown in. Oh, and bamboo shoots. Although I’m not really a fan of those, so I left them out in the version above (and included instructions in the recipe for how to add them if you’d like).I highly recommend using shiitake mushrooms for this recipe if you want it to taste ultra-authentic. But if you can’t find any, baby bella or white button mushrooms will totally work too.

    Winters’s most favorite mouth watering hot and sour soup, You can serve as appetizer to your guests in special dinner or lunch. Serve very hot to enjoy it’s real taste.

     Hot and Sour Soup with lots of veggies has a wonderful blend of hot and sour flavours, this is the perfect choice for a lazy winter evening. I love hot n sour soup especially if I have one of those really bad sinus or chest colds. Try this Hot and Sour Soup Recipe, and don’t forget your experience with us !!

    Then just follow the instructions and bring everything to a simmer, drizzle in those eggs in a thin stream while stirring the soup (to create those pretty egg ribbons), and add in your cooked chicken (or tofu) and sesame oil and green onions at the end…

    …and serve it up nice and warm, topped with extra green onions for garnish.

    The whole thing usually comes together for me in just about 20-25 minutes, making it the perfect meal to warm you up quickly on a chilly day. I love serving it with my homemade fried rice recipe, or any kind of stir-fry that sounds good. And it always, always hits the spot.

    Stay warm this week, everyone!

    Easy Hot and Sour Soup Recipe
    Photo: Easy Hot and Sour Soup Recipe

    Check it out the Easy Hot and Sour Soup Recipe here!!

    Easy Hot and Sour Soup

    Prep Time 5 minutes
    Cook Time 25 minutes
    Total Time 30 minutes
    Servings 8
    Author Bushrah | Recipestable

    Ingredients

    • 2 cups boiled chicken cut into small chunks
    • 8 cups chicken stock
    • 1 chicken cube
    • 1/2 cup chopped carrots
    • 1/2 cup corn
    • 1/2 cup shredded cabbage
    • 1/4 cup green bell pepper
    • 1 tablespoon soy sauce
    • 1/2 cup Chilli sauce
    • 2 tablespoon White vinegar
    • 2 teaspoon sesame oil
    • 2/3 teaspoon black pepper
    • 1 teaspoon white pepper
    • 1 tablespoon cornflour
    • 1 egg white
    • Salt according to taste

    Instructions

    Method

    • Heat oil in a large pot or saucepan.
    • Add carrots, bell peppers, corn and chicken. Saute for few minutes or until crisp-tender.
    • Add chicken cube and stock and cook on medium to high heat .
    • Bring to a boil then add cabbage.
    • Add seasoning that is chili sauce, vinegar, soy sauce, black pepper and salt to taste.
    • Add egg white and then add corn starch paste slowly to monitor consistency.
    • Don’t overcook it as it will become thin if you keep on cooking.
    • Top with spring onions.Easy Hot and Sour Soup is ready to serve. ENJOY!!

    Notes

    Serving Suggestions:
    Serve hot with bread-sticks.

    I have also posted Chicken Corn Soup Recipe which is another easiest & tastiest version of making soup. Do check it out as well.


    Put your own spin on it. And lemme know how it turns out. Post a photo on Facebook (Recipestable) or  on Twitter so I can see how lovely yours turn out.


    Happy Cooking!!

    If you like this post, Please Subscribe to my blog and let me know your feedback by commenting below.. I have lots more recipes to share with you.

  • Healthy Weeknight Meal: Chicken Corn Soup Recipe (Boost Your Immunity!)

    Chicken Corn Soup

    Sometimes its just a bowl of simple chicken corn soup that we need to lift our mood, spirit and feel blessed. It’s a very quick and easy soup perfect for a Sunday night dinner.

    This Chicken Corn Soup is made entirely with fresh corn and chicken stock, seasoned with chinese seasoning and flecked with egg. Give it a try, a warming Winter treat!!

     Chicken Corn Soup Recipe
    Photo: Chicken Corn Soup Recipe

    Check it out the  Chicken Corn Soup Recipe here!!

    [divider]

    [one_fourth]Prep Time:5 minutes[/one_fourth] [one_fourth]Cook Time:30 minutes[/one_fourth] [one_fourth]Servings:8 [/one_fourth] [one_fourth_last]Difficulty Level: Easy[/one_fourth_last]

    [divider]

    [tabs type=”horizontal”] [tabs_head] [tab_title]Ingredients[/tab_title] [tab_title]Nutrition[/tab_title] [/tabs_head] [tab]

    • 2 cups boiled chicken, shredded
    • 1/2 cup boiled corn, roughly chopped
    • 8 cups chicken stock
    • 2 large eggs, lightly beaten
    • 1 teaspoon salt or to taste
    • 1 teaspoon black pepper
    • 2 tablespoon vinegar
    • 2 teaspoon chilli sauce
    • 1-1/2 teaspoon soy sauce
    • 1 tablespoon cornflour( depends how much you want to soup thickness.)

    [/tab] [tab]Yield: 8 servings

    Amount Per Serving: ( 1 serving = 1 cup)

    • Calories:271 kcal
    • Carbohydrates:14.2 g
    • Cholesterol:120 mg
    • Fat: 12.4 g
    • Fiber: 1.1 g
    • Protein: 24.7 g
    • Sodium: 122 mg

    Percent Daily Values are based on a 2,000 calorie diet.

    [/tab] [/tabs]

    Directions:
    [tabs type=”horizontal”] [tabs_head] [tab_title]Step by Step Method[/tab_title] [tab_title]Serving Suggestions[/tab_title][/tabs_head] [tab]

    Step 1

    Pour chicken stock in a large pot or saucepan.

    Step 2

    Bring to a boil, add shredded chicken and boiled corn.

    Step 3

    Cover and simmer for 5 minuets than add the seasonings.

    Step 4

    Dissolve 1 tablespoon cornflour in 1/4 cup of water.

    Step 5

    Slowly add this mixture in the boiling stock .
    Note: Be careful, when you add the corn flour mixture .

    Step 6

    If you want light soup add little and if you want thick soup than add almost all the corn flour .

    Step 7

    Continuously mix it with spatula now add soya sauce and vinegar.

    Step 8

    Mix well .

    Step 9

    Finally, add the beaten eggs and mix it for 2 minutes.

    Step 10

    Turn the heat off and stir in chili sauce.

    Step 11

    Ladle into soup bowls. Chicken Corn Soup is ready to serve . ENJOY!!

    [/tab] [tab]

    • Serve with breadsticks.

    [/tab] [/tabs]
    If you like Chicken Corn Soup Recipe and make it then let me know your feedback by commenting below.And if you know more innovative ways in which we can utilize this mouth watering Chicken Corn Soup , do share with us and we would be glad to give it a try.
  • Spicy & Smoky: Authentic Chicken Karahi Recipe (Restaurant-Style at Home!)

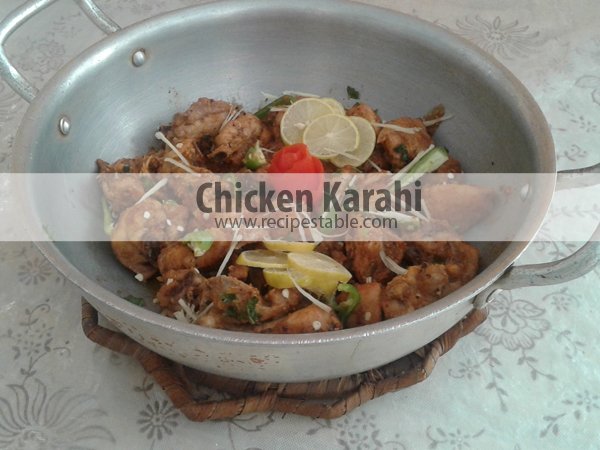
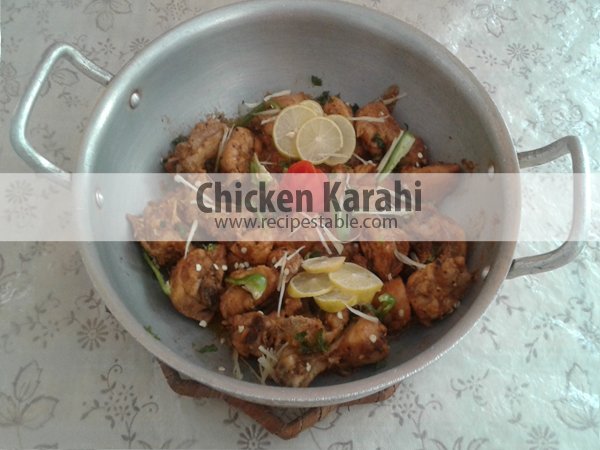
    Chicken Karahi

     Chicken Karahi is a very delicious and easy to make main dish. You can substitute chicken with mutton, and serve with peas pilaf or naan. Give it a try!!

    Chicken Karahi is one of the recipes that is probably available in every restaurant and road side dhaba. Karahi refers to Pakistani style wok which is slightly deeper (compared to Chinese wok) and narrower in diameter with a round bottom and curved handles.
    Since in Karahi ghost no water or stock is used to cook the ghost and rather the mutton cooks in the masala and its own stock, karahi makes sure the meat doesn’t burn and simmers away slowly braising the meat. Having said that, you may as well cook it in a deep bottom pot with a little stock to help you through.

    It is a traditional Pakistani dish which is easy-to-make at home with less oil. In this recipe, chicken nicely is cooked with tomatoes, ginger garlic, green chilli, yogurt and traditionsl Pakistani spices. This simple dish can make your dinner more fantastic.

     Chicken karahi Recipe
    Photo: Chicken karahi Recipe
    Chicken karahi Recipe
    Photo: Chicken karahi Recipe

    Check it out the Chicken Karahi Recipe here!!

    Prep Time:10 minutes

    Cook Time:40 minutes

    Servings:4 

    Ingredients

    • I kg chicken (cut into medium pieces)
    • 1 cup oil
    • 1 medium onion, finely chopped
    • 1 tbsp ginger paste
    • 1 tbsp garlic paste
    • 4 tomatoes,peeled and chopped
    • 1/2 cup plain yogurt
    • 1 tsp red chili powder
    • 7 whole peppercorns, crushed

    For Garnishing:

    • 1/2 tsp garam masala powder
    • 5 green chilies,thinly sliced
    • 2 tbsp fresh ginger(julienne)
    • fresh Coriander leaves, finely chopped


    Directions:

    Step 1

    Rinse and drained chicken properly and set aside.

    Step 2

    Heat oil in a karahi(pan), add chopped onions and cook it for 2-3 minutes.

    Step 3

    After 2 minutes add ginger,garlic paste and stir fry it.

    Step 4

    Add chicken in it and cook for 10 minutes.

    Step 5

    Then add tomato puree,yogurt,salt and chili powder.

    Step 6

    Cover with lid and continue cooking.

    Step 7

    When the water dries and chicken is tender add the peppercorns,and cook for 2 more minutes.

    Step 8

    Then remove from heat.

    Step 9

    Sprinkle garam masala on it.

    Step 10

    Garnish chicken karahi with julienne ginger,fresh coriander and green chilies. Chicken karahi is ready to serve.


    • Serve with naan and mint chutney.


    Note:

    If you want creamy mixture, you can also add 2-3 tablespoon fresh cream in the last step and simmer for 1-2 minutes and turn off the stove.
    Adding onion to your desired level, above one is a medium spicy curry.
    Adding peppercorn is optional, but sure it gives nice flavor and taste to the curry.
    For dry masala skip the onion.
    If you want to add more colour to the dish, add one teaspoon of tomato paste with the tomatoes. You may have to play around a bit with the chili heat. I find four to six chilies do the trick, my mommy always adds eight. Perhaps one could start with two for a taste-test.
    If you like Chicken Karahi Recipe and make it then let me know your feedback by commenting below.And if you know more innovative ways in which we can utilize this mouth watering Chicken Karahi, do share with us and we would be glad to give it a try.
  • Beetroot Raita Recipe

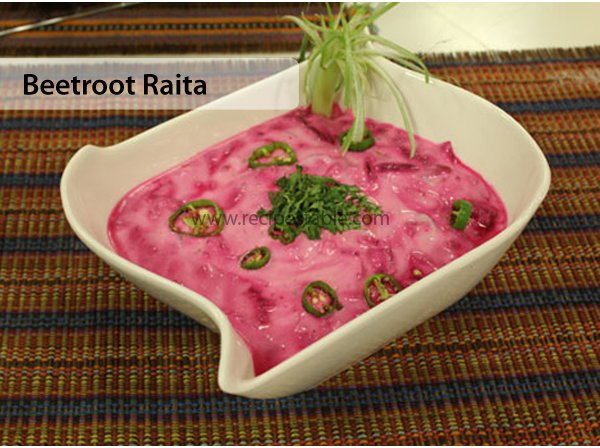
    Beetroot Raita

    It’s an awesome Yogurt dip(Raita) especially for Veggie lovers. Beatroot is also a great source of iron so give it to all who are suggested to take iron.Must try this Beetroot Raita Recipe, you’ll like it.

     Beetroot Raita Recipe
    Photo: Beetroot Raita Recipe

    Check it out the  Beetroot Raita Recipe here!!

    [divider]

    [one_fourth]Prep Time:10 minutes[/one_fourth] [one_fourth]Cook Time:15 minutes[/one_fourth] [one_fourth]Servings: 2[/one_fourth] [one_fourth_last]Difficulty Level: Easy[/one_fourth_last]

    [divider]

    [tabs type=”horizontal”] [tabs_head] [tab_title]Ingredients[/tab_title] [tab_title]Nutrition[/tab_title] [/tabs_head] [tab]

    • 1 medium beetroot
    • 1 cup yogurt
    • Salt to taste
    • 1 green chili, chopped finely
    • 1 teaspoon oil
    • 1/4 teaspoon black mustard seeds
    • A few cilantro leaves for garnishing
    • 1/2 teaspoon cumin powder
    • 1 teaspoon sugar

    [/tab] [tab]Yield: 2 servings

    Nutritional information is not yet available. [/tab] [/tabs]

    Directions:
    [tabs type=”horizontal”] [tabs_head] [tab_title]Step by Step Method[/tab_title] [tab_title]Serving Suggestions[/tab_title][/tabs_head] [tab]

    Step 1

    Cook the beetroot either in the microwave or in a pot with water.

    Step 2

    For the microwave, place it in a microwavable-pan of water 1 inch high, prick with fork and cook on high for 6 to 8 minutes until done.

    Step 3

    Peel off the skin.

    Step 4

    Grate the beetroot and put in a serving bowl.

    Step 5

    Add yogurt to it and mix well.

    Step 6

    Add sugar, salt and cumin powder to it and mix.

    Step 7

    Heat the oil in a pan, season it with black mustard seeds and the chopped green chilies.

    Step 8

    When the seeds start to sputter, remove from the stove and add the seasoned oil to the beetroot and yogurt mixture.

    Step 9

    Garnish the beetroot salad with coarsely chopped cilantro leaves. Beetroot Raita is ready to serve.

    [/tab] [tab]

    • Serve with paratha or any curry.

    [/tab] [/tabs]
    If you like Beetroot Raita Recipe and make it then let me know your feedback by commenting below.And if you know more innovative ways in which we can utilize this mouth watering Beetroot Raita, do share with us and we would be glad to give it a try.
  • Crunchy Fish Cutlets Recipe

    Crunchy Fish Cutlets

    This Crunchy Fish cutlets recipe is lightly different from usual ones. It will brighter out mood of all fish lovers. Use these fish cutlets as a starter or simply prepare a fish burger for evening tea.

    Crunchy Fish Cutlets Recipe
    Photo: Crunchy Fish Cutlets Recipe

    Check it out the Crunchy Fish Cutlets Recipe here!!

    [divider]

    [one_fourth]Prep Time:15 minutes+ Cooling [/one_fourth] [one_fourth]Cook Time:20 minutes[/one_fourth] [one_fourth]Servings: 5[/one_fourth] [one_fourth_last]Difficulty Level: Easy[/one_fourth_last]

    [divider]

    [tabs type=”horizontal”] [tabs_head] [tab_title]Ingredients[/tab_title] [tab_title]Nutrition[/tab_title] [/tabs_head] [tab]

    • 500 gm fish fillets
    • 2 green onions, chopped
    • 2 boiled potatoes, mashed
    • 4 green chilies, chopped
    • 1/2 cup breadcrumbs
    • 2 eggs, lightly beaten
    • 1 tablespoon butter
    • 1 tablespoon fresh coriander leaves, chopped
    • 1 tablespoon mint leaves, chopped
    • 1 teaspoon ginger garlic paste
    • 1 teaspoon pepper powder
    • salt to taste
    • Oil for deep frying

    [/tab] [tab]Yield: 5 servings

    Nutritional information is not yet available. [/tab] [/tabs]

    Directions:
    [tabs type=”horizontal”] [tabs_head] [tab_title]Step by Step Method[/tab_title] [tab_title]Serving Suggestions[/tab_title][/tabs_head] [tab]

    Step 1

    Boil fish flesh with little salt till they are cooked.

    Step 2

    Pour oil in a pan, as the oil becomes hot put onion, ginger, garlic & green chillies and half fry. You have to stir it continuously.

    Step 3

    Now add fish to it and mix well.

    Step 4

    Don’t add water to it.

    Step 5

    Make this mixture dry and Cook till it dry.

    Step 6

    Now add pepper powder. Fry well.

    Step 7

    Add smashed potatoes and mix well .

    Step 8

    Turn off the stove and sprinkle coriander and mint leaves.

    Step 9

    If you need salt, you can add as per the taste.

    Step 10

    Let it be cool for some time then make small round balls .

    Step 11

    Make patties with that.

    Step 12

    Take a bowl beat the eggs and in another plate take bread crumbs.

    Step 13

    Dip this balls in the egg mixture & then put bread crumbs on both sides of the cutlet.

    Step 14

    Now deep fry the cutlets in oil for 8-10 minutes or until golden brown.

    Step 15

    Then Remove from the heat and drain on paper towel. Crunchy Fish Cutlets are ready to serve.

    [/tab] [tab]

    • Serve with tomato ketchup.

    [/tab] [/tabs]
    If you like Crunchy Fish Cutlets Recipe and make it then let me know your feedback by commenting below.And if you know more innovative ways in which we can utilize this mouth watering Crunchy Fish Cutlets, do share with us and we would be glad to give it a try.

  • Street Food Favorite: The Flavorful Chicken Rolls Recipe!

    Chicken Rolls

    Chicken Rolls pack your favorite ingredients into a quick and easy recipe that makes chicken desirable again. You can prepare it in advance for guests. Give it a try!!

    Stuffed Chicken Rolls Recipe
    Photo: Chicken Rolls Recipe

    Check it out the Chicken Rolls Recipe here!!

    [divider]

    [one_fourth]Prep Time:10 minutes + cooling time[/one_fourth] [one_fourth]Cook Time:1 hour[/one_fourth] [one_fourth]Servings: 6[/one_fourth] [one_fourth_last]Difficulty Level: Easy[/one_fourth_last]

    [divider]

    [tabs type=”horizontal”] [tabs_head] [tab_title]Ingredients[/tab_title] [tab_title]Nutrition[/tab_title] [/tabs_head] [tab]

    • 1/2 kg chicken mince
    • 1 can chicken sausage, chopped
    • 1 small onion, chopped
    • 1 stalk celery, chopped
    • 1/2 cup Italian style spaghetti sauce
    • 1 egg
    • 1 small carrot, coarsely grated
    • 2 slices pan American cheese, cut into cubes
    • 1/4 cup raisins

    [/tab] [tab]Yield: 6 servings

    Nutritional information is not yet available. [/tab] [/tabs]

    Directions:
    [tabs type=”horizontal”] [tabs_head] [tab_title]Step by Step Method[/tab_title] [tab_title]Serving Suggestions[/tab_title][/tabs_head] [tab]

    Step 1

    Combine all ingredients with 3/4 tsp iodized fine salt and 1/4 tsp pepper.

    Step 2

    Mix thoroughly.

    Step 3

    Wrap every 3/4 cup of mixture in aluminum foil. Roll.

    Step 4

    Steam for 1 hour.

    Step 5

    Cool and chill overnight.

    Step 6

    Unwrap and slice. Chicken Rolls is ready to serve. Enjoy!

    [/tab] [tab]

    • Serve with your favorite dipping sauce.

    [/tab] [/tabs]
    If you like Chicken Rolls Recipe and make it then let me know your feedback by commenting below.And if you know more innovative ways in which we can utilize this mouth watering Chicken Rolls, do share with us and we would be glad to give it a try.

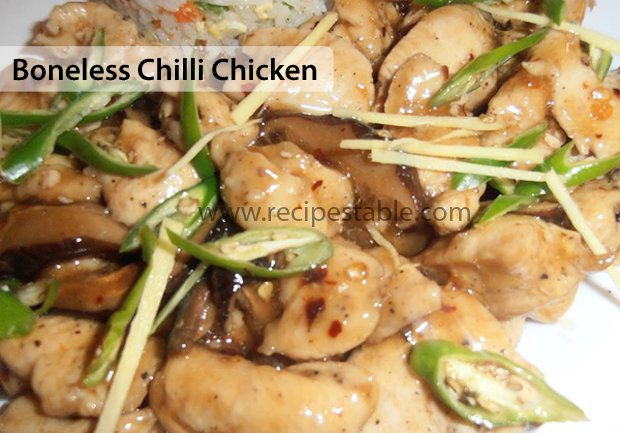
  • Make Restaurant-Style Boneless Chilli Chicken (It’s Easier Than You Think!)

    Boneless Chilli Chicken

    Boneless chicken are marinated in soya sauce, egg, cornflour, chili sauce and pepper, then deep fried and then seasoned again in sauces.

    It tastes hot, sweet and sour. A very simple dish to cook, but has lot of unhealthy stuff in the restaurant style dry chilli chicken, like ajinomotto, food color and lot of oil since they are deep fried.

    To make this Boneless chilli chicken, I have not used ajinimotto (chinese salt), no food color, yet tastes good. The quintessential Chinese chicken can now be savoured in the comfort of your homes with these few simple steps.Give it a try!!

    Boneless Chilli Chicken Recipe
    Photo: Boneless Chilli Chicken Recipe

    Check it out the Boneless Chilli Chicken Recipe here!!

    Boneless Chilli Chicken Recipe

    Prep Time 10 minutes
    Cook Time 30 minutes
    Total Time 1 hour
    Servings 4
    Author Bushrah | Recipestable

    Ingredients

    • 500 gm boneless chicken cut into cubes
    • 2 egg lightly beaten
    • 1/2 cup corn flour
    • 1 teaspoon garlic paste
    • 1 teaspoon ginger paste
    • 1 teaspoon pepper
    • salt to taste
    • Oil for deep frying

    For Sauce

    • 1 onions thinly sliced
    • 2 green chillies thinly sliced
    • 2 tablespoon vinegar
    • 1 tablespoon soy sauce
    • 1 tablespoon chilli sauce
    • 1/2 teaspoon red chili flakes
    • a pinch of salt or to taste

    For Garnishing

    • green chillies slit
    • ginger slices
    • green onion thinly sliced

    Instructions

    Method

    • Place chicken in a large bowl.
    • Add egg, cornflour, garlic and ginger paste, pepper and salt. Mix well to coat evenly.
    • Cover and marinate for 30 minutes ot blend flavors.
    • Heat oil in a deep pan oevr medium heat.
    • Deep-fry the chicken pieces over high heat to begin with and then lower the heat till chicken is cooked through.
    • Remove from the oil and drain on absorbent paper.
    • Heat 2 tablespoon oil in a wok or pan.
    • Add onions and stir-fry over high heat for 4-5 minutes or until they are translucent.
    • Add the green chillies and stir a few times.
    • Then add salt, soy sauce, vinegar, and chilli sauce.
    • Add fried chicken.
    • Stir to coat evenly. Cook for 2 minutes or until sauce is thickened.
    • Dish it out. Garnished with the green chillies and green onion. Delicious Boneless Chilli Chicken is ready to serve. ENJOY!!

    Notes

    Serving Suggestions:
    Serve with Steamed Rice or Fried Rice
    I have also posted Desi Chili Chicken Recipe  which is another easiest & tastiest version of making Chili Chicken. Do check it out as well.


    Put your own spin on it. And lemme know how it turns out. Post a photo on Facebook (Recipestable) or  on Twitter so I can see how lovely yours turn out.


    Happy Cooking!!

    If you like this post, Please Subscribe to my blog and let me know your feedback by commenting below.. I have lots more recipes to share with you.


  • Skip the Takeout Line: Make Restaurant-Style Chicken Club Sandwich at Home


    Chicken Club Sandwich

    This Club Sandwich is stacked high with chicken, cheese slices, mustard Mayo and fresh tomatoes goodness. This flavorful Chicken Club Sandwich will add brightness to even the coldest winter day–but are perfect for any time of year.

    This quick and easy to prepare club sandwich, makes a tasty meal for two. Also It’s a great picnic food or can be served at a small lunch gathering. Goes great with french fries.

    Chicken Club Sandwich Recipe
    Photo: Chicken Club Sandwich Recipe

    Check it out the Chicken Club Sandwich Recipe here!!

    [divider]

    [one_fourth]Prep Time:15 minutes[/one_fourth] [one_fourth]Cook Time:5 minutes[/one_fourth] [one_fourth]Servings: 4[/one_fourth] [one_fourth_last]Difficulty Level:Easy [/one_fourth_last]

    [divider]

    [tabs type=”horizontal”] [tabs_head] [tab_title]Ingredients[/tab_title] [tab_title]Nutrition[/tab_title] [/tabs_head] [tab]

    • 12 white bread slices, edges cut off
    • 1 cup cooked chicken, cut into slices
    • 2 teaspoon butter
    • 4 tablespoon mayonnaise
    • 1 teaspoon mustard paste
    • 1 tomato, thinly sliced
    • 4 cheese slices
    • 4 fried eggs
    • 4 lettuce leaves

    For Serving:

    • Tomato Sauce
    • French Fries

    [/tab] [tab]Yield: 4 servings

    Nutritional information is not yet available. [/tab] [/tabs]

    Directions:
    [tabs type=”horizontal”] [tabs_head] [tab_title]Step by Step Method[/tab_title] [tab_title]Serving Suggestions[/tab_title][/tabs_head] [tab]

    Step 1

    Spread butter on one side of bread slices.

    Step 2

    Toast on the hot griddle or pan.

    Step 3

    In a small bowl, mix together the mustard and mayonnaise.

    Step 4

    Spread mustard mayonnaise on one side of each bread slice.

    Step 5

    Place lettuce over a toast and cover with a slice of cheese and some cooked chicken.

    Step 6

    Cover with another toast and top with tomato slices.

    Step 7

    Put a fried egg over the tomato.

    Step 8

    Cover with remaining toast, buttered side down.

    Step 9

    Secure together with wooden-picks.

    Step 10

    Cut diagonally into half. Make the other sandwiches with the same method.

    Step 11

    Transfer into a serving platter. Chicken Club Sandwich is ready to serve. ENJOY!

    [/tab] [tab]

    • Serve with tomato sauce and mustard sauce on the side.

    [/tab] [/tabs]
    If you like Chicken Club Sandwich Recipe and make it then let me know your feedback by commenting below.And if you know more innovative ways in which we can utilize this mouth watering Chicken Club Sandwich , do share with us and we would be glad to give it a try.
  • Energy Bites Made Easy: Honey Date Balls Recipe (Fuel Your Day!)

    Honey Date Balls

    Honey, almonds and dates make these delish treats. Quick & easy. A great healthy snack or perfect for a lunch box or a hike!

    honey date balls
    Photo: Honey Date Balls Recipe

    Check it out the Honey Date Balls Recipe here!!

    [divider]

    [one_fourth]Prep Time:20 minutes[/one_fourth] [one_fourth]Cook Time:5 minutes[/one_fourth] [one_fourth]Servings: 25[/one_fourth] [one_fourth_last]Difficulty Level: Very Easy[/one_fourth_last]

    [divider]

    [tabs type=”horizontal”] [tabs_head] [tab_title]Ingredients[/tab_title] [tab_title]Nutrition[/tab_title] [/tabs_head] [tab]

    • 2 cups almonds, crushed
    • 2 cups pitted dates, preferably Medjool
    • ¼ cup raw Honey
    • 1/4 cup shredded coconut
    • melted butter, for forming balls

    [/tab] [tab]Yield: 25 balls.

    Nutritional information is not yet available. [/tab] [/tabs]

    Directions:
    [tabs type=”horizontal”] [tabs_head] [tab_title]Step by Step Method[/tab_title] [tab_title]Recipe Note’s[/tab_title][tab_title]Serving Suggestions[/tab_title][/tabs_head] [tab]

    Step 1

    Preheat oven to 170 degree C.

    Step 2

    Put almonds in a food processor. Process until finely chopped.

    Step 3

    Spread grinded almonds on a baking sheet and toast in oven for 3-4 minutes, or until fragrant and a shade darker.

    Step 4

    Now put dates into the food processor.

    Step 5

    Process for 2-3 minutes or until finely chopped.

    Step 6

    Take it out in a bowl. Add almonds.

    Step 7

    Stir in the honey. Mix together until well combined.

    Step 8

    Use melted butter to dampen your hands periodically, and shape mixture into 1-inch balls.

    Step 9

    Then roll in the coconut.

    Step 10

    Store in an air-tight container at room temperature for a few days.Delicious Honey Date Balls are ready to serve. ENJOY!!

    [/tab] [tab]

    • You can also freeze them for a couple of weeks.

    [/tab][tab]

    • Serve with a glass of milk.

    [/tab] [/tabs]
    If you like Honey Date Balls Recipe and make it then let me know your feedback by commenting below.And if you know more innovative ways in which we can utilize this sweet and mouth watering Honey Date Balls, do share with us and we would be glad to give it a try.

  • Juicy Perfection: The Easy Grilled Chicken Burger Recipe!

    Grilled Chicken Burger

    This Grilled chicken burger is packed with delicious flavor and are perfect for any night of the week. The process to preparing this amazing burger is simple- ground chicken is combined with a garlic, onion, hot and Worcestershire sauce and then formed into patties. Then simply grill. After the burgers are cooked they are placed onto buns and topped with a cheese slice.

    If you are looking for a great tasting recipe for chicken burger, give this one a try.

    Grilled Chicken Burger Recipe
    Photo: Grilled Chicken Burger Recipe

    Check it out the Grilled Chicken Burger Recipe here!!

    [divider]

    [one_fourth]Prep Time:15 minutes[/one_fourth] [one_fourth]Cook Time:15 minutes[/one_fourth] [one_fourth]Servings: 4[/one_fourth] [one_fourth_last]Difficulty Level: Easy[/one_fourth_last]

    [divider]

    [tabs type=”horizontal”] [tabs_head] [tab_title]Ingredients[/tab_title] [tab_title]Nutrition[/tab_title][tab_title]Diabetic Exchanges[/tab_title] [/tabs_head] [tab]

    For Burger Patties

    • 1 pound ground chicken
    • 1 onion, finely chopped
    • 1 tablespoon ginger garlic paste
    • 1 tablespoon Worcestershire sauce
    • 1 tablespoon hot sauce
    • 1 tablespoon lemon juice
    • 1 teaspoon dried parsley
    • 1/2  teaspoon crushed red chili
    • 1/2 teaspoon black pepper, freshly ground
    • salt to taste

    For Topping

    • tomato & cucumber slice
    • Low Fat mayonnaise
    • 1/2 cup torn leuttece leaves
    • 1/2 cup chili garlic or tomato suace

    Other Ingredients:

    • 1 Cup Cabbage Coleslaw, for serving
    • 4 cheese slices
    • 4 burger buns
    • French fries

    [/tab] [tab]

    Yield: 4 burgers

    Amount Per Serving: ( 1 serving = 1 burger without coleslaw)

    • Calories: 322
    • Fat: 12 g (4 g saturated fat)
    • Cholesterol: 79 mg
    • Sodium: 801 mg
    • Carbohydrate: 29 g
    • Fiber: 2 g
    • Protein: 25 g

    [/tab][tab]

    • 3 lean meat
    • 2 starch
    • 1 fat.

    [/tab] [/tabs]

    Directions:
    [tabs type=”horizontal”] [tabs_head] [tab_title]Step by Step Method[/tab_title][tab_title]Recipe Note’s[/tab_title] [tab_title]Serving Suggestions[/tab_title][/tabs_head] [tab]

    Step 1

    In a large bowl, combine the onion, lemon juice, parsley, ginger garlic paste, hot sauce, Worcestershire sauce, red chili, salt and pepper.

    Step 2

    Crumble chicken over the mixture and mix well.

    Step 3

    Shape into four round patties.

    Step 4

    Grill burgers, covered, over medium heat for 5 minutes on each side or until all juices run clear.

    Step 5

    Meanwhile, Toast burger buns.

    Step 6

    Spread mayonnaise on the surface of burger buns.

    Step 7

    Now put chicken patties on burger buns.

    Step 8

    Top with cheese slices, leuttec leaves, tomato or cucumber.

    Step 9

    Transfer into a platter. Delicious Grilled Chicken Burger is ready to serve.

    [/tab] [tab]

    • You can either fry the chicken burgers in the pan or cook them on the grill. If you decide to cook them on the grill, I would recommend brushing them with olive oil on both sides.
    • To make it even lighter, omit the rolls and use the burgers to top a salad!

    [/tab][tab]

    • Serve with coleslaw salad, tomato ketchup and French fries.

    [/tab] [/tabs]
    If you like Grilled Chicken Burger Recipe and make it then let me know your feedback by commenting below.And if you know more innovative ways in which we can utilize this mouth watering Grilled Chicken Burger, do share with us and we would be glad to give it a try.

  • Light & Refreshing: The Perfect Crispy Fish Burger for Dinner!

    Fish Burger

    Enjoy the irresistible taste of burger with the healthiest meat fish. Do Try this Fish burger recipe, you’ll love it!

    Check it out the Fish Burger Recipe here!!

    Fish Burger Recipe

    Prep Time 10 minutes
    Cook Time 15 minutes
    Total Time 25 minutes
    Servings 4
    Author Bushrah | Recipestable

    Ingredients

    • 300 gm boneless fish
    • 4 burger buns
    • 2 eggs
    • 1 cup cornflour
    • 1 cup bread crumbs
    • 1/2 cup mayonnaise
    • 2 tbsp mustard paste
    • 2 tbsp white vinegar
    • 1/2 tsp red chili powder
    • 1/2 tsp black pepper
    • salt to taste
    • oil for frying
    • lettuce leaves for garnishing

    Instructions

    Method

    • Pound fish into circular shape pieces.
    • Marinate fish with vinegar, black pepper, chili powder and salt.
    • Now roll each fish piece in cornflour. Turn to coat evenly.
    • Dip fish in beaten egg.Then roll in breadcrumbs.
    • Pressing gently.
    • Deep fry fish for 5-8 minutes or until golden.
    • Remove from the oil and drain on an absorbent paper.
    • Cut burger buns in half.
    • Slightly toast on a hot griddle or pan.
    • Remove from the heat.
    • Spread mayonnaise and mustard paste on them.
    • Place fried fish piece on it. Top with lettuce leaves.
    • Cover with another half of bun. Fish Burger is ready to serve. ENJOY 🙂

    Notes

    Serving Suggestions:
    Serve warm with fries and ketchup.

    If you like Fish Burger Recipe and make it then let me know your feedback by commenting below.

  • Rice Pakora Recipe

    Rice Pakora

    Rice Pakora is a tea time snack made with cooked Rice, Besan (Ground Flour) , onion and mild spices.Very easy to make tasty too. Try this Rice Pakora recipe, I’m sure you will definitely like them. You can use left over rice of lunch time to make Rice Pakora also.

    Rice Pakora Recipe
    Photo: Rice Pakora Recipe

    Check it out the Rice Pakora Recipe here!!

    [divider]

    [one_fourth]Prep Time:15 minutes[/one_fourth] [one_fourth]Cook Time:10 minutes[/one_fourth] [one_fourth]Servings: 6[/one_fourth] [one_fourth_last]Difficulty Level: Easy[/one_fourth_last]

    [divider]

    [tabs type=”horizontal”] [tabs_head] [tab_title]Ingredients[/tab_title] [tab_title]Nutrition[/tab_title] [/tabs_head] [tab]

    • 2 cups boiled rice
    • 1/2 cup gram flour
    • 1/2 cup chopped onion
    • 4 green chilies, thinly sliced
    • 2 tbsp fresh coriander leaves, chopped
    • 1 tsp red chili flakes
    • 1/2 tsp chat masala
    • salt to taste
    • oil for frying

    [/tab] [tab]Yield: 6 servings

    Nutritional information is not yet available. [/tab] [/tabs]

    Directions:
    [tabs type=”horizontal”] [tabs_head] [tab_title]Step by Step Method[/tab_title] [tab_title]Serving Suggestions[/tab_title][/tabs_head] [tab]

    Step 1

    In a bowl, combine together boiled rice, gram flour, onion, green chilies and coriander.

    Step 2

    Make a thick paste by using some water.

    Step 3

    Season with salt, chat masala and red chili flakes.

    Step 4

    Mix well and leave it for 10 minutes.

    Step 5

    Heat oil in a deep pan or wok.

    Step 6

    Put the 1 tbsp prepared batter in the form of Pakoras.

    Step 7

    Deep fry for 6-8 minutes or until Pakoras turn golden and crispy.

    Step 8

    Remove from the oil and drain on paper towel. Rice Pakora is ready to serve.

    [/tab] [tab]

    • Serve hot with Pakora Dipping Sauce.

    [/tab] [/tabs]
    If you like Rice Pakora Recipe and make it then let me know your feedback by commenting below.And if you know more innovative ways in which we can utilize this mouth watering Rice Pakora, do share with us and we would be glad to give it a try.

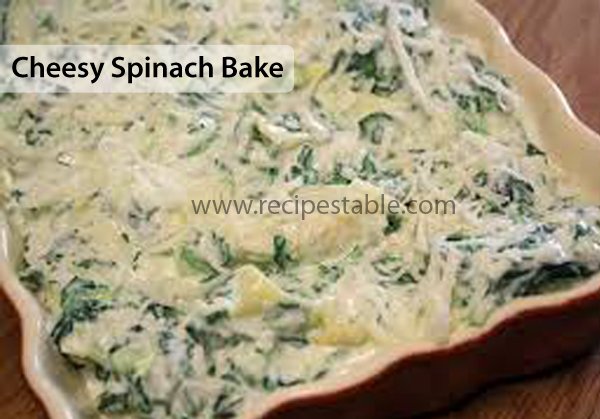
  • Cheesy Spinach Bake Recipe

    Cheesy Spinach Bake

    Cheesy and delicious Spinach Casserole. Looks terrible but taste absolutely awesome!!

    Cheesy Spinach Bake Recipe
    Photo: Cheesy Spinach Bake Recipe

    Check it out the Cheesy Spinach Bake Recipe here!!

    [divider]

    [one_fourth]Prep Time:10 minutes[/one_fourth] [one_fourth]Cook Time:25 minutes[/one_fourth] [one_fourth]Servings: 6[/one_fourth] [one_fourth_last]Difficulty Level: Easy[/one_fourth_last]

    [divider]

    [tabs type=”horizontal”] [tabs_head] [tab_title]Ingredients[/tab_title] [tab_title]Nutrition[/tab_title] [/tabs_head] [tab]

    • 2 packages (10 oz each) frozen chopped spinach, thawed and drained
    • 1 can (10-3/4 ounces) condensed cream of potato soup, undiluted
    • 2 cups shredded Monterrey Jack cheese
    • 1 cup sour cream
    • 1/2 cup grated Parmesan cheese

    [/tab] [tab]Yield: 6 servings

    Nutritional information is not yet available. [/tab] [/tabs]

    Directions:
    [tabs type=”horizontal”] [tabs_head] [tab_title]Step by Step Method[/tab_title] [tab_title]Serving Suggestions[/tab_title][/tabs_head] [tab]

    Step 1

    Place spinach in a large bowl.

    Step 2

    Stir in potato soup, sour cream.

    Step 3

    Transfer into a greased 11×7-inch. baking dish.

    Step 4

    Sprinkle with Parmesan and Monterrey Jack cheese.

    Step 5

    Bake, uncovered, at 325 degree F, for 30 minutes or until cheese is melted and bubbly. Cheesy Spinach Bake is ready to serve. Enjoy!!

    [/tab] [tab]

    • Serve warm with crusty bread.

    [/tab] [/tabs]
    If you like Cheesy Spinach Bake Recipe and make it then let me know your feedback by commenting below.And if you know more innovative ways in which we can utilize this mouth watering Cheesy Spinach Bake, do share with us and we would be glad to give it a try.

  • Samosa Recipe

    Samosa

    Samosa is a traditional treat in Pakistan and India at tea time and Ramadan.Give it a try!!

    Samosa Recipe
    Photo: Samosa Recipe

    Check it out the Samosa Recipe here!!

    [divider]

    [one_fourth]Prep Time:30 minutes[/one_fourth] [one_fourth]Cook Time:15 minutes [/one_fourth] [one_fourth]Servings: 8[/one_fourth] [one_fourth_last]Difficulty Level:Easy [/one_fourth_last]

    [divider]

    [tabs type=”horizontal”] [tabs_head] [tab_title]Ingredients[/tab_title] [tab_title]Nutrition[/tab_title] [/tabs_head] [tab]

    For Samosa Filling:

    • 1 cup mutton mince ( keema)
    • 1/2 cup green peas
    • 1 potato, grated
    • 1 tablespoon oil or ghee
    • 1 clove garlic, crushed
    • 1/4 teaspoon turmeric powder
    • 1/4 teaspoon freshly ground pepper
    • 1/4 teaspoon cumin powder
    • salt to taste

    For Samosa Pastry:

    • 1-1/2 cup plain flour
    • 1/2 cup butter
    • 1/2 cup warm milk
    • 1/2 teaspoon. salt

    Other ingredients

    • Oil for deep frying

    [/tab] [tab]Yield: 8 servings

    Nutritional information is not yet available. [/tab] [/tabs]

    Directions:
    [tabs type=”horizontal”] [tabs_head] [tab_title]Step by Step Method[/tab_title] [tab_title]Serving Suggestions[/tab_title][/tabs_head] [tab]

    Step 1
    To Make Samosa Filling:

    Heat oil in a frying pan. Saute garlic and lamb until browned.

    Step 2

    Stir in potato, peas, turmeric, and cook, stirring to prevent the mixture from sticking for about 5 minutes.

    Step 3

    Season and leave to cool.

    Step 4
    To Make Samosa Pastry

    Sift flour and salt into a bowl, rub in butter until mixture resembles bread crumbs.

    Step 5

    Mix in milk to make tacky dough.

    Step 6

    Flour hands, break off pieces of dough, size of a walnut.

    Step 7

    Roll out on well-floured board to make thin circle.

    Step 8

    In center of each circle, place a good teaspoon of filling.

    Step 9

    Dampen edges, fold over to make triangular patty.

    Step 10

    Deep fry a few at a time until golden brown. Samosa is ready to serve.

    [/tab] [tab]

    • Serve with Imli Chutney.

    [/tab] [/tabs]
    If you like Samosa Recipe and make it then let me know your feedback by commenting below.And if you know more innovative ways in which we can utilize this mouth watering Samosa, do share with us and we would be glad to give it a try.