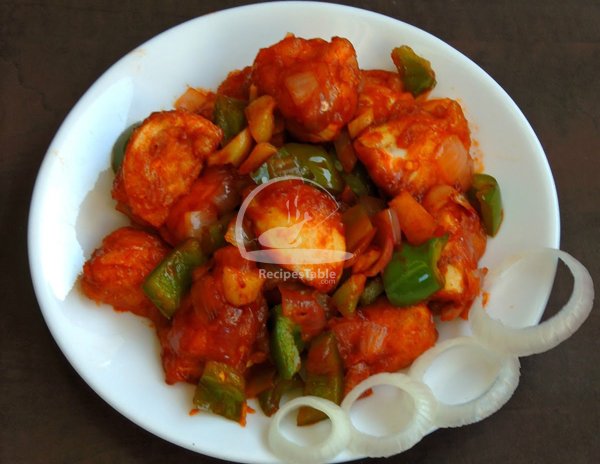
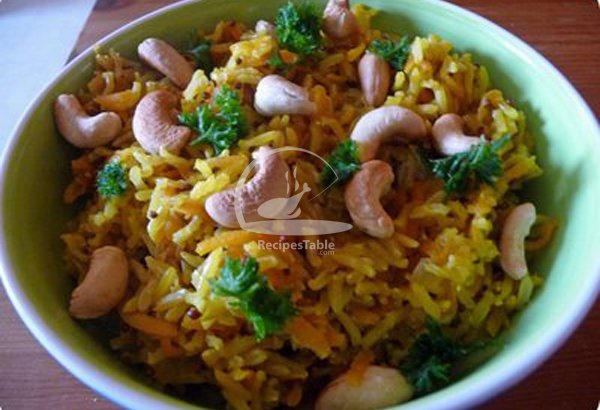
Blog

  • Cashew Nut Khichri Recipe

     Cashew Nut Khichri

    You are not in mood to cook? but you are feeling like making something that can be easily made and stuff your stomach then try this  Cashew Nut Khichri Recipe.
    Easily digest, take it when you get bored from all meaty and spicy dishes.Simple to cook and its very tasty and healthy as well. Your family will definitely like this and they will remember it for long.

    Cashew Nut Khichri Recipe by Rida Aftab
    Photo: Cashew Nut Khichri Recipe 

    Check it out the  Cashew Nut Khichri Recipehere!!

    Prep Time:10 minutes

    Cook Time:35 minutes

    Servings: 5

    Ingredients

    • 2 cups long grain rice
    • 2 cups chicken broth
    • 1 cup green lentils
    • 1/2 cup cooking oil
    • 50 gm cashew nuts
    • 1 onion, thinly sliced
    • 6 green chilies, thinly sliced
    • 4 cloves
    • 2 star anise
    • 2 cardamoms
    • 1 tbsp desiccated coconut
    • 1 tsp turmeric powder
    • 1 tsp cumin seeds
    • 1 tsp black pepper
    • 1 tsp salt


    Directions:

    1. Wash rice with few changes of water then soak for 30 minutes.
    2. Wash green lentils with few changes of water then soak for 30 minutes.
    3. Drain and set aside.
    4. Heat oil in a deep wok or skillet over medium heat.
    5. Put onion in hot oil and fry for 4-5 minutes or until golden brown.
    6. Now add cumin seeds and fry for 30 seconds.
    7. Add chicken broth, salt, turmeric powder, coconut, black pepper, star anise, cloves.
    8. Cook for 5 minutes then add green lentils.
    9. Cook for 10-15 minutes or until green lentil is half done.
    10. Now add rice and cook for 10 minutes or until cooked through.
    11. Turn the heat off.
    12. Take it out in a serving dish.
    13. Sprinkle fried cashew nuts and green chilies over it.
    14. Cashew Nut Khichri is ready to serve.
    • Serve hot with mint Raita.

    If you like  Cashew Nut Khichri Recipe and make it then let me know your feedback by commenting below.

  • Soft & Fluffy: The Best Buttermilk Rolls Recipe Ever!

    Buttermilk Rolls

    These buttermilk rolls are soft and fluffy and they’re perfect for a holiday dinner or any time you want to do something special for dinner.

    Buttermilk Rolls recipe
    Photo: Buttermilk Rolls Recipe

    Check it out the Buttermilk Rolls Recipe here !!

    [divider]

    [one_fourth]Prep Time:1 hour[/one_fourth] [one_fourth]Bake Time:20 minutes[/one_fourth] [one_fourth]Servings:20  [/one_fourth] [one_fourth_last]Difficulty Level: Medium [/one_fourth_last]

    [divider]

    [tabs type=”horizontal”] [tabs_head] [tab_title]Ingredients[/tab_title] [tab_title]Nutrition[/tab_title] [/tabs_head] [tab]

    • 2 ea Yeast Cakes
    • 1/4 cup Sugar
    • 1 1/2 cup Buttermilk; Lukewarm
    • 1/2 cup Shortening; Melted
    • 4 1 cup Flour; Sifted
    • 1 tsp Baking Soda
    • 1/4 cup Poppy Seeds

    [/tab] [tab]Yield: 20 rolls

    Nutritional information is not yet available. [/tab] [/tabs]

    Directions:
    [tabs type=”horizontal”] [tabs_head] [tab_title]Step by Step Method[/tab_title] [tab_title]Serving Suggestions[/tab_title][/tabs_head] [tab]

    Step 1

    Crumble yeast cakes into bowl.

    Step 2

    Add sugar, buttermilk, stirring until dissolved.

    Step 3

    Stir in butter. Mix and sift flour, salt and baking soda.
    Stir into first mixture.

    Step 4

    Allow to rise in a warm place about 1/2 hour.

    Step 5

    Shape as desired, bruch with additional melted butter.

    Step 6

    sprinkle with poppy seeds and allow to rise again on greased pans until about double in bulk.

    Step 7

    Bake about 20 minutes in hot oven 400 F. Buttermilk Rolls are ready to serve. Enjoy!

    [/tab] [tab]

    [/tab] [/tabs]

    If you like Buttermilk Rolls recipe and make it then let me know your feedback by commenting below.

  • Quick Baby Pizzas Recipe: Make Delicious & Fun Mini Pizzas at Home

    Quick Baby Pizzas

    This is a really quick pizza, takes literally 30 minutes from entering the kitchen to putting in oven. Do try it!!

    Bismillah, let’s get started!

    Check it out the Quick Baby Pizzas Recipe and printable version below!

    Quick Baby Pizzas Recipe

    Prep Time 15 minutes
    Cook Time 25 minutes
    Total Time 40 minutes
    Servings 8
    Author Bushrah | Recipestable

    Ingredients

    For Dough

    • 375 gm plain flour
    • 1 egg
    • 2 tsp oil
    • 1 tsp sugar
    • 1 tsp yeast
    • 1/4 tsp salt
    • Warm water as required

    For Filling

    • 300 gm boneless chicken
    • 4 black olives thinly sliced
    • 4 mushrooms thinly sliced
    • 1 cup sliced onion
    • 1/2 cup green bell pepper chopped
    • 1 cup pizza sauce
    • 1 tsp dried oregano
    • 1 tsp red chili flakes
    • 1 tsp ginger paste
    • 1 tsp garlic paste
    • 1 tsp chaat masala
    • 1/4 tsp chaat masala
    • 1/2 cup mozzarella cheese grated
    • 1/2 cup cheddar cheese grated

    Instructions

    Method

      To Make Pizza Dough

      • Place flour, egg, yeast, sugar, oil and salt in a bowl.
      • Knead a soft dough by using warm water.
      • Keep aside.

      To make Filling

      • Cut chicken into small pieces.
      • Then place in a medium bowl.
      • Add red chili powder, salt, ginger garlic paste and chaat masala.
      • Mix well.
      • Then cook in a pot for 15-20 minutes or all juice runs clear.
      • Remove from the heat.

      To Proceed

      • Now make small balls out of the dough.
      • Roll them with pin roll.
      • Spread pizza sauce each of them.
      • Put chicken, mushrooms, olives, capsicum, onions, and oregano,
      • Season with salt and pepper.
      • Sprinkle grated mozzarella and cheddar cheese over it.
      • Preheat oven to 200 degree C.
      • Bake prepared pizzas for 15 minutes or until well done.
      • Quick Baby Pizzas are ready to serve.

      Notes

      Serving Suggestions:
      Serve with your favorite dipping sauce.

      I have also posted Easy Naan Pizza recipe which is another easiest & tastiest version of making Pizza’s. Do check it out as well.

      [divide icon=”circle”]

      Put your own spin on it. And lemme know how it turns out. Post a photo on Facebook (Recipestable) or  on Twitter so I can see how lovely yours turn out.

      [divide icon=”circle”]

      Happy Cooking!!

      If you like this post, Please Subscribe to my blog and let me know your feedback by commenting below.. I have lots more recipes to share with you.

      [divide icon=”circle”]

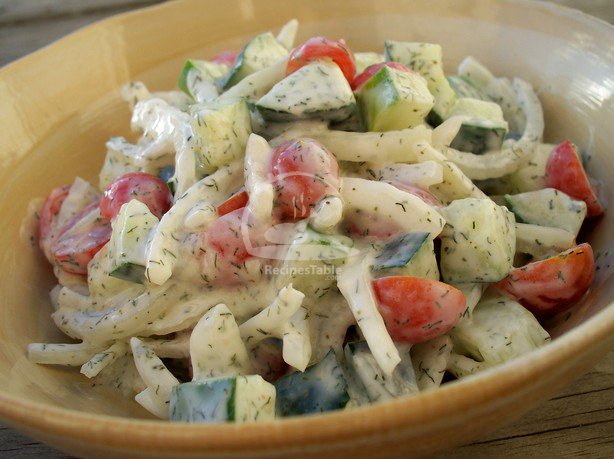
    • Easy Vegetable Cream Salad Recipe: Ready in Minutes (Perfect Side Dish!)

      Vegetable Cream Salad

      This Vegetable cream salad is prepared with fresh cream,  cabbage, cucumber, carrot, potato and pineapple. Try out this delicious and healthy salad and serve chilled to get more freshness. Do try this Vegetable Cream Salad Recipe !!

       Vegetable Cream Salad Recipe by Rida Aftab
      Photo: Vegetable Cream Salad Recipe 

      Check it out the  Vegetable Cream Salad Recipe here!!

      [one_fourth]Prep Time:10 minutes + chilling[/one_fourth] [one_fourth]Cook Time:not required[/one_fourth] [one_fourth]Servings:6 [/one_fourth] [one_fourth_last]Source:Chef Rida Aftab [/one_fourth_last]

      Ingredients

      For Vegetable Salad:

      • 1 cabbage, chopped
      • 1 boiled potato, chopped
      • 1 cucumber, chopped
      • 1 carrot, chopped
      • 1 cup sweet corn
      • 1 cup pineapple

      For Salad Dressing:

      • 1 cup fresh cream
      • 1 tbsp sugar
      • 1/4 tsp black pepper
      • a pinch of salt


      Directions:

      1. Place all chopped vegetables, sweet corn, pineapple in a large bowl.
      2. In a small bowl, mix together cream, sugar and black pepper.
      3. Pour this dressing over the vegetable salad.
      4. Mix well.
      5. Vegetable Cream Salad is ready to serve.


      Serve chilled with BBQ meal.

      If you like Vegetable Cream Salad Recipe by Rida Aftab  and make it then let me know your feedback by commenting below.

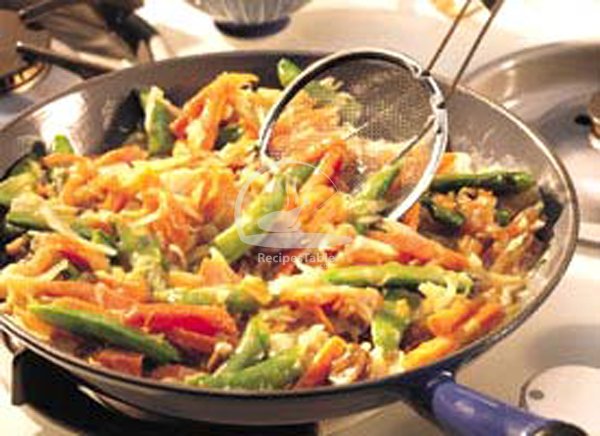
    • Quick & Easy Weeknight Dinner: Vegetable Chow Mein Recipe (Budget-Friendly!)

      Vegetable Chow Mein

      Vegetable Chow Mein is tasty and healthy dish. Its a medley of vegetables that are surrounded with noodles and sauce. For all the vegetarians out there who just can’t get enough of chow mein. Enjoy the delicious chow mein noodles with crunchy stir fried vegetables. You also can add some other vegetable of choice too.

      Vegetable Chow Mein Recipe by Chef Adeel
      Photo:Vegetable Chow Mein Recipe 

      Check it out the Vegetable Chow Mein Recipe here!!

      Prep Time:30 minutes

      Cook Time:20 minutes

      Servings:5

      Ingredients

      • 1 packet noodles, cooked
      • 1 cup mushrooms
      • 2 tbsp vinegar
      • 2 tbsp soy sauce
      • 2 tbsp Oil
      • 2 tbsp lemon juice
      • 2 tbsp red chili, crushed
      • 1 tsp ginger paste
      • 1 tsp garlic paste
      • 1 small onion, thinly sliced
      • 2 green bell pepper, thinly sliced
      • 2 carrots, thinly sliced
      • 3 spring onions, thinly sliced
      • 1/4 bunch of fresh coriander leaves, finely chopped
      • 1 tsp white sugar
      • 1 tsp black pepper, crushed
      • Salt to taste

      Method:

      1. Heat oil in a skillet or deep pan.
      2. Add Onion and ginger garlic paste.
      3. Cook for 1-2 minutes then add all vegetables.
      4. Stir fry for 2-3 minutes then put boiled noodles in it.
      5. Add lemon juice, vinegar, soy sauce, black pepper, red chili, sugar and salt.
      6. Stir fry on high heat for 4-5 minutes.
      7. Vegetable Chow Mein is ready to serve.
      8. Enjoy!

      If you like Vegetable Chow Mein Recipe and make it then let me know your feedback by commenting below.

    • Crispy on the Outside, Chewy on the Inside: The Perfect Coconut Macaroon Recipe!

      Coconut Macaroons

      Homemade coconut macaroons that are sweet, moist, and chewy on the inside with a delightfully crisp exterior. So easy to make, and so versatile – you’ll want to try all the variations included with this recipe.

      Coconut Macaroons Recipe
      Photo: Coconut Macaroons Recipe

      Check it out the Coconut Macaroons Recipe here!!

      [divider]

      [one_fourth]Prep Time:20 minutes[/one_fourth] [one_fourth]Bake Time:25 minutes[/one_fourth] [one_fourth]Servings: 12[/one_fourth] [one_fourth_last]Difficulty Level: Easy[/one_fourth_last]

      [divider]

      [tabs type=”horizontal”] [tabs_head] [tab_title]Ingredients[/tab_title] [tab_title]Nutrition[/tab_title] [/tabs_head] [tab]

      • 8 ounce desiccated coconut
      • 5 ounce caster sugar
      • 2 eggs
      • cherries for garnishing

      [/tab] [tab]Yield: 1 dozen

      Nutritional information is not yet available. [/tab] [/tabs]

      Directions:
      [tabs type=”horizontal”] [tabs_head] [tab_title]Step by Step Method[/tab_title] [tab_title]Serving Suggestions[/tab_title][/tabs_head] [tab]

      Step 1

      Preheat oven to 180 degree C.

      Step 2

      Line a baking tray with baking parchment. Set aside.

      Step 3

      Beat eggs until fluffy then stir in coconut and sugar.

      Step 4

      Leave it to 20 minutes then dip hands in cold water.

      Step 5

      Shape mixture into 16 ‘pyramids’, using your hands.

      Step 6

      Place on prepared baking tray.

      Step 7

      Top with cherries.

      Step 8

      Place baking tray in the preheated oven.

      Step 9

      Bake for 25-30 minutes or until golden.

      Step 10

      Remove from the sheets and let it cool on a wire rack.

      Step 11

      Then store in an airtight container to retain moisture. Coconut Macaroons are ready to serve.

      [/tab] [tab]

      • Serve with tea or coffee.

      [/tab] [/tabs]

      If you like Coconut Macaroons Recipe  and make it then let me know your feedback by commenting below.

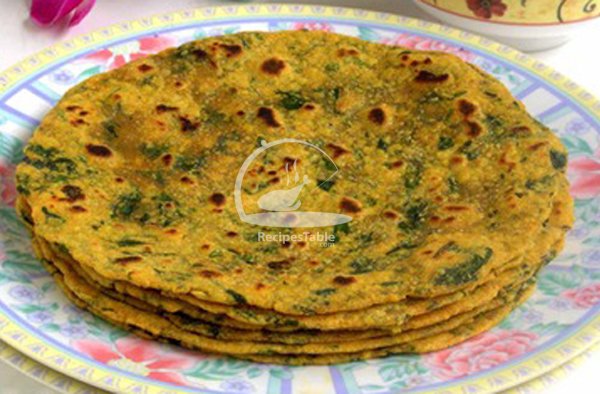
    • RECIPE: Spinach Paratha (Palak Paratha)

      Spinach Paratha

      Spinach paratha is another excellent variation of paratha where you can include some healthy greens in the paratha. This is a great “anytime” meal. Spinach Parathas are whole-wheat  flat bread stuffed with a spicy spinach filling.

      It doesn’t matter whether you are an expert or beginner, with this spinach paratha recipe you can prepare delicious and healthy spinach paratha in few minutes.  Its a perfect way to enjoy the goodness of spinach.

      Palak Paratha is a delicious and nutritious way of feeding spinach to the kids.

       Spinach Paratha Recipe
      Photo: Spinach Paratha Recipe

      Check it out the Spinach Paratha recipe here!!

      Prep Time:30 minutes

      Cook Time:15 minutes

      Servings: 4

      Difficulty Level: Medium

      INGREDIENTS

      For Dough:

      • 1 cup whole-wheat flour
      • 1/2 cup water
      • Pinch of salt

      For Spinach Filling:

      • 2 cups chopped spinach
      • Pinch of asafetida
      • 1/4 tsp salt
      • 1/2 tsp cumin seeds
      • 1/4 tsp red chilly flakes
      • 1/4 cup whole-wheat flour for rolling
      • Oil to cook

      Yield: 4 servings

      Directions:

      Step 1

      To Make Dough: Mix flour, salt and water together to make soft dough (if needed add more water).

      Step 2

      Knead the dough for a few minutes on a lightly greased surface to make soft, smooth and pliable dough.

      Step 3

      Set the dough aside and cover it with a damp cloth. Let the dough rest for at least ten minutes.

      Step 4

      To Make Paratha Filling: Heat the oil in a saucepan on medium-high heat. Oil is the right temperature when cumin cracks immediately after being put the oil.

      Step 5

      Add the asafetida and cumin seeds.

      Step 6

      After the cumin seeds crack, add the spinach.

      Step 7

      Stir-fry, making sure to press the spinach down so the water can evaporate.

      Step 8

      Cook the spinach until most of the water has evaporated. Spinach still should be moist and should be able to form a ball.

      Step 9

      Add the salt and pepper and mix well. Set aside until the spinach cools off.

      Step 10

      Divide the dough and spinach filling into 6 equal parts.

      Step 11

      Roll the dough into 3 inch circles.

      Step 12

      Put the filling in the center. Seal by pulling the edges together and make into a ball.

      Step 13

      Proceed to make all six balls. Each ball needs to settle for two minutes before you start rolling.

      Step 14

      Heat the griddle (Tawa) on medium high. Press the filled ball lightly on dry whole-wheat flour from both sides.

      Step 15

      Roll the ball light handed to make 6-inch circle.

      Step 16

      If the paratha sticks to the rolling pin or rolling surface, lightly dust the paratha with dry flour.

      Step 17

      Place the paratha over the griddle. After paratha start changing color and start puffing in different places flip the paratha over. You will notice some golden-brown spots.

      Step 18

      After few seconds, spread 1 tsp of oil on the paratha.

      Step 19

      Flip the paratha and lightly press the puffed areas of the paratha with a spatula.

      Step 20

      Flip again and press with the spatula making sure the paratha is golden-brown on both sides.

      Step 21

      Cool the parathas on a wire rack so they don’t get soggy. Spinach Paratha is ready to serve.

      Recipe Note’s

      1. These Parathas can be kept outside for up to 2 days wrapped in aluminum foil or in a closed container.
      2. For later use paratha can be refrigerated for 3-4 days.

      Serving Suggestions:

      • Serve with curd.

      If you like Spinach Paratha recipe and make it then let me know your feedback by commenting below.

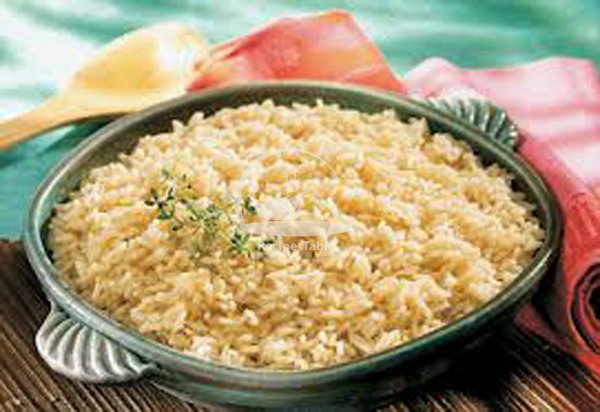
    • Flavored Rice Recipe

      Flavored Rice

      A wonderful rice recipe to make super-of-the-moment! A blend of delicious butter and spices _ cooks beautifully in a rice cooker. Must try this Flavored rice recipe and don’t forget to share your experience with us!!

       Flavored Rice Recipe
      Photo: Flavored Rice Recipe

      Check it out the Flavored Rice Recipe here!!

      [divider]

      [one_fourth]Prep Time:10 minutes[/one_fourth] [one_fourth]Cook Time:25 minutes[/one_fourth] [one_fourth]Servings:4 [/one_fourth] [one_fourth_last]Difficulty Level: Medium[/one_fourth_last]

      [divider]

      [tabs type=”horizontal”] [tabs_head] [tab_title]Ingredients[/tab_title] [tab_title]Nutrition[/tab_title] [/tabs_head] [tab]

      • 2 cups water
      • 1 cup white rice
      • 1 chicken bouillon cubes
      • 1 tablespoon butter
      • salt to taste

      [/tab] [tab]Yield: 4 servings

      Nutritional information is not yet available. [/tab] [/tabs]

      Directions:
      [tabs type=”horizontal”] [tabs_head] [tab_title]Step by Step Method[/tab_title] [tab_title]Serving Suggestions[/tab_title][/tabs_head] [tab]

      Step 1

      Place chicken bouillon cube in a small bowl.

      Step 2

      Stir in the water.

      Step 3

      Microwave for 2 minutes or until fully dissolved.

      Step 4

      Pour this mixture into a medium pot.

      Step 5

      Add butter.

      Step 6

      Stir in the rice.

      Step 7

      Bring rice to a boil then reduce heat to medium low.

      Step 8

      Cover and simmer for 20 minutes or until rice is cooked.

      Step 9

      Fluff rice with slotted spoon. Adjust the salt according to taste.

      Step 10

      Take it out in the serving platter. Flavored Rice is ready to serve. ENJOY!

      [/tab] [tab]

      [/tab] [/tabs]

      If you like Flavored Rice Recipe and make it then let me know your feedback by commenting below.

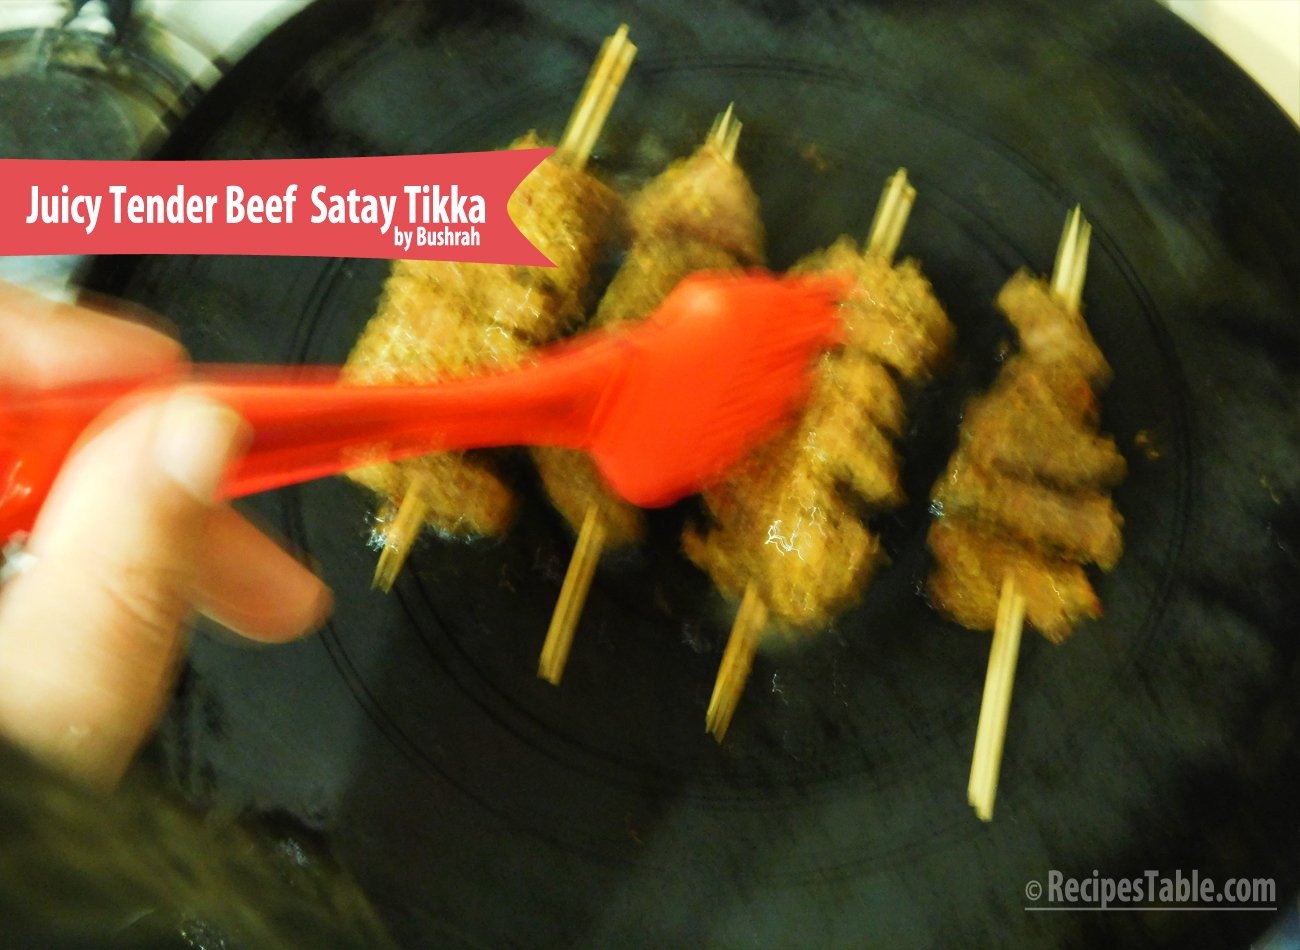
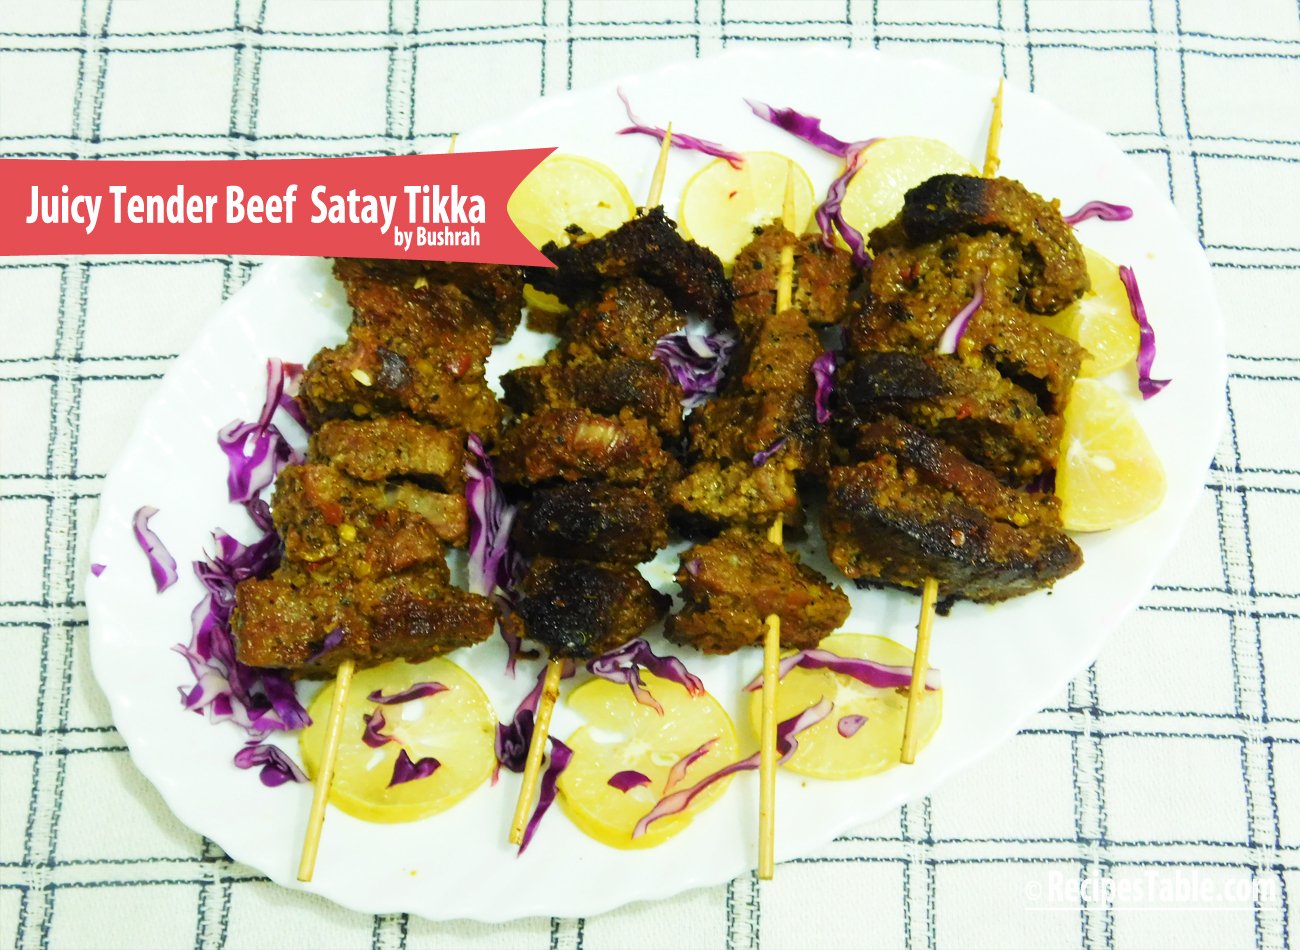
    • Juicy and Tender Beef Satay Tikka Recipe

      Juicy and Tender Beef Satay Tikka Recipe

      Juicy and Tender Beef Satay Tikka recipe
      Juicy and Tender Beef Satay Tikka
      Juicy and Tender Beef Satay Tikka recipe
      Juicy and Tender Beef Satay Tikka recipe
      Juicy and Tender Beef Satay Tikka
      Juicy and Tender Beef Satay Tikka
      Juicy and Tender Beef Satay Tikka
      Juicy and Tender Beef Satay Tikka


      Try this beef satay tikka recipe at your next BBQ party, the combination of honey and different spices give it an extra difference from your usual satay’s, its simple to make and requires few ingredients.


      Check it out the Beef Satay Tikka Recipe here!!

      [divider]

      [one_fourth]Prep Time: 10 minutes + marination[/one_fourth] [one_fourth]Cook Time:20 minutes[/one_fourth] [one_fourth]Servings: 4[/one_fourth] [one_fourth_last]Difficulty Level:Easy [/one_fourth_last]

      [divider]

      [tabs type=”horizontal”] [tabs_head] [tab_title]Ingredients[/tab_title] [tab_title]Nutrition[/tab_title] [/tabs_head] [tab]

      • 1kg boneless beef
      • 1 tbsp honey
      • 1 tbsp red chili powder 1/2 tsp
      • 1 tsp cumin powder
      • 1 tsp coriander powder
      • 2 tbsp lemon juice
      • 2 tbsp soy sauce
      • 2 tbsp cooking oil
      • salt to taste

      [/tab] [tab]Yield: 4 servings

      Nutritional information is not yet available. [/tab] [/tabs]

      Directions:
      [tabs type=”horizontal”] [tabs_head] [tab_title]Step by Step Method[/tab_title] [tab_title]Serving Suggestions[/tab_title][/tabs_head] [tab]

      Step 1

      Place beef in a large resealable plastic bag.

      Step 2

      In a small bowl, combine together the honey, red chili, cumin, coriander, soy sauce, lemon juice and salt.

      Step 3

      Pour this dressing over the beef.Shale to coat evenly.

      Step 4

      Place in the refrigerator for 8 hours or overnight.

      Step 5

      Discard marinade.

      Step 6

      Put beef on wooden or metal skewers.

      Step 7

      Grill for 15-20 minutes or until done.

      Step 8

      After grilling brush with oil. Beef Satay Tikka is ready to serve.

      [/tab] [tab]

      • Serve with mint sauce and salad.

      [/tab] [/tabs]
      Pin it For Later:

      Juicy Tender Beef Satay Tikka Recipe _ Pin it For Later
      Juicy Tender Beef Satay Tikka Recipe _ Pin it For Later
    • Stuffed Dates with Nuts and Honey

      Stuffed Dates with Nuts and Honey

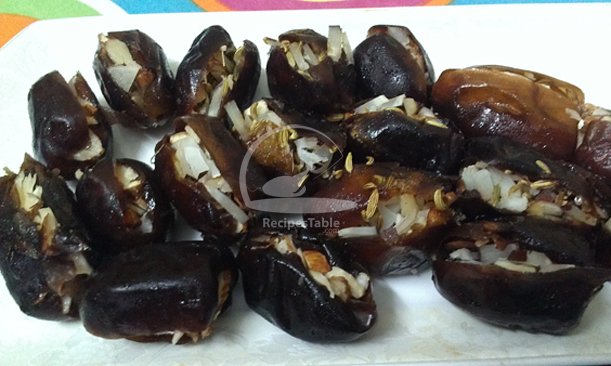
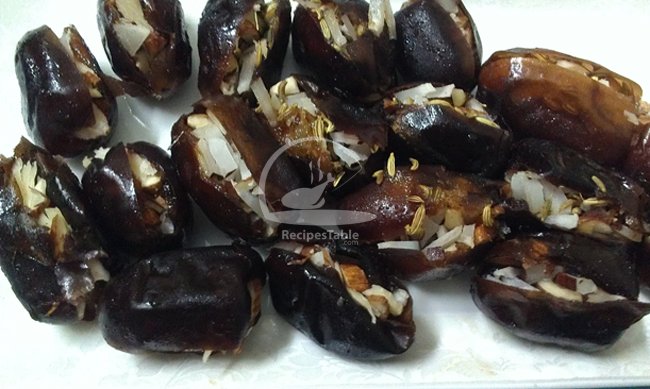
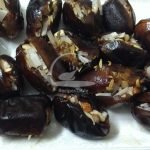
      Dates and dry nuts have health properties which are beneficial for our body. No iftar is ever complete without dates.This Stuffed Dates with Nuts and Honey recipe gives a double flavor when dates are stuffed with different nuts and honey.

      Stuffed Dates with Nuts
      Photo: Stuffed Dates wi th Nuts Recipe

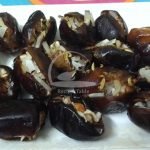
      A highly nutritious and delicious Iftar treat.Its time to discover how easy is to make these easy stuffed dates.Must Try this Stuffed Dates with Nuts and Honey recipe. Everyone must love these stuffed dates.

      Stuffed Dates with Nuts and Honey
      Photo: Stuffed Dates with Nuts and Honey

      Check it out the Stuffed Dates with Nuts and Honey recipe here!!

      [divider]

      [one_fourth]Prep Time:10 minutes[/one_fourth] [one_fourth]Cook Time:not required[/one_fourth] [one_fourth]Servings:9 [/one_fourth] [one_fourth_last]Difficulty Level: Very Easy[/one_fourth_last]

      [divider]

      [tabs type=”horizontal”] [tabs_head] [tab_title]Ingredients[/tab_title] [tab_title]Nutrition[/tab_title] [/tabs_head] [tab]

      • 18 dates, pitted
      • 3 tbsp chopped almonds
      • 3 tbsp chopped cashew nuts
      • 3 tbsp chopped pistachios
      • 2 tbsp dessicated coconut
      • 1 tsp sweet aniseed
      • 1 tsp honey

      [/tab] [tab]Yield: 9 servings

      Nutritional information is not yet available. [/tab] [/tabs]

      Directions:
      [tabs type=”horizontal”] [tabs_head] [tab_title]Step by Step Method[/tab_title] [tab_title]Recipe Note’s[/tab_title][tab_title]Serving Suggestions[/tab_title][/tabs_head] [tab]

      Step 1

      Wash dates properly. Drain and set aside.

      Step 2

      In a small bowl, mix together the coconut, almonds, pistachios, aniseed and honey.

      Step 3

      Now cut dates lengthwise to the centre and remove the stones.

      Step 4

      Stuff each date with honey-nuts mixture.

      Step 5

      Press them gently to encase the filling.

      Step 6

      Arrange dates in a serving platter. Delicious Stuffed Dates with Nuts are ready to eat.

      [/tab] [tab]

      • You can frost the dates with coconut flakes to give it a snow effect.
      • Dusting dates with a little icing sugar to prevent the paste from sticking to your hands.

      [/tab][tab]

      • You can serve them with a glass of milk your family and friends will surely thank you.

      [/tab] [/tabs]

      If you like Stuffed Dates with Nuts and Honey and make it then let me know your feedback by commenting below.

    • How to Boil a Perfect Egg

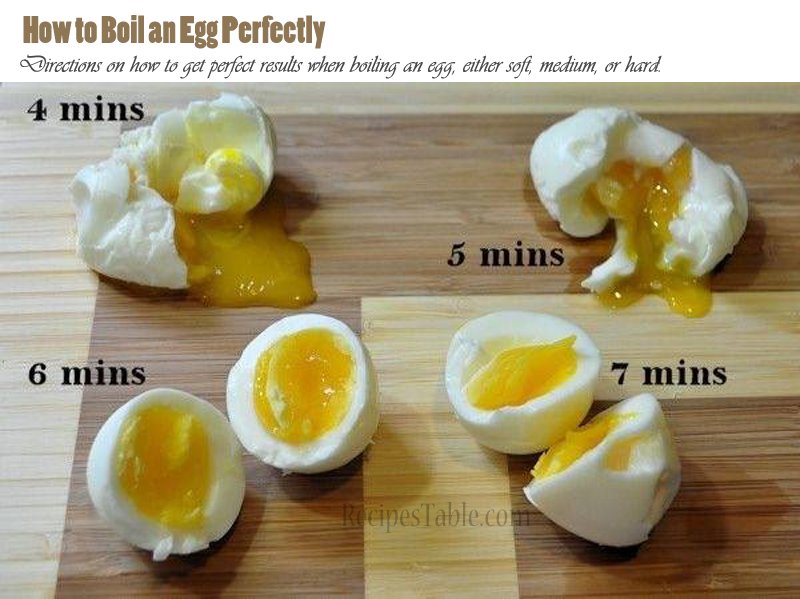
      How to Boil an Egg Perfectly…Every Time

      Now, you don’t need to be confused about boiling the eggs! Here is how to boil the perfect egg! Directions on how to get perfect results when boiling an egg, either soft, medium, or hard…every time. No more grey around your yolks!

      Infograhic: How to Boil an Egg Perfectly
      Infograhic: How to Boil an Egg Perfectly

      So, there you have it…a fail-proof method to ensure your boiled eggs turn out perfectly, every time. 

      And the next time you need to serve a boiled egg, you can feel confidant that the results will be eye- and tastebud-pleasing. 

      Happy cooking!

      View Egg  Recipes Here>>

      If you like this How to Boil a Perfect Egg Infographic then let me know your feedback by commenting below.

    • Tangy and Tart: This Lemon Chutney Recipe will Steal Your Heart!

      Lemon Chutney

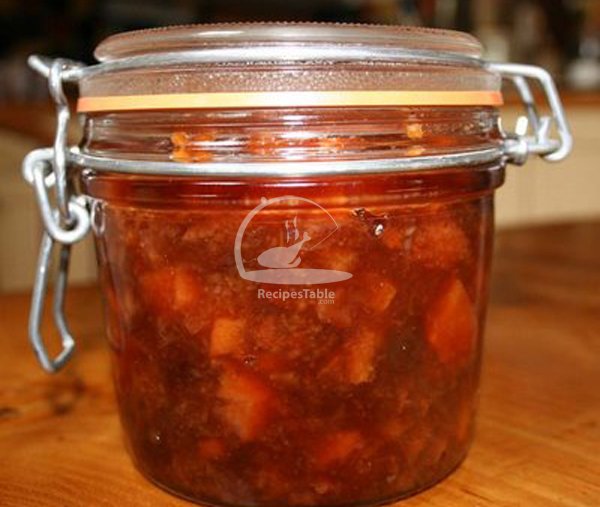
      This lively sweet-sour lemon chutney takes two days to make, but it’s worth every minute. Goes great with paratha, curry or dals!

       Lemon Chutney Recipe
      Photo: Lemon Chutney Recipe

      Check it out the Lemon Chutney Recipe here!!

      [divider]

      [one_fourth]Prep Time:1 day[/one_fourth] [one_fourth]Cook Time:20 minutes[/one_fourth] [one_fourth]Servings:4 [/one_fourth] [one_fourth_last]Difficulty Level:Medium [/one_fourth_last]

      [divider]

      [tabs type=”horizontal”] [tabs_head] [tab_title]Ingredients[/tab_title] [tab_title]Nutrition[/tab_title] [/tabs_head] [tab]

      • 8 large lemons, chopped
      • 2 onions,chopped
      • 1 cup vinegar
      • 500g sugar
      • 125g raisins
      • salt to taste
      • 30g mustard seed
      • 1 tsp ground ginger
      • 1/2 tsp cayenne pepper

      [/tab] [tab]Yield: 4 servings

      Nutritional information is not yet available. [/tab] [/tabs]

      Directions:
      [tabs type=”horizontal”] [tabs_head] [tab_title]Step by Step Method[/tab_title] [tab_title]Serving Suggestions[/tab_title][/tabs_head] [tab]

      Step 1

      Mix the onions and lemons with the salt, then leave to stand 24 hours.

      Step 2

      Next day, add the rest of the ingredients and cook till the skins are soft and the mixture is a chutney-like consistency.

      Step 3

      Now Lemon Chutney is ready.

      Step 4

      Pour into hot sterilized jars and seal.

      [/tab] [tab]

      • Enjoy with your favorite snacks.

      [/tab] [/tabs]

      If you like Lemon Chutney recipe and make it then let me know your feedback by commenting below.

    • Wrap Up Flavors: Make Delicious Chicken Paratha Rolls in Minutes!

      Chicken Paratha Rolls

      Now that Ramadan is on its way, lets copy down all the wonderful quick and delicious Ramadan recipes.

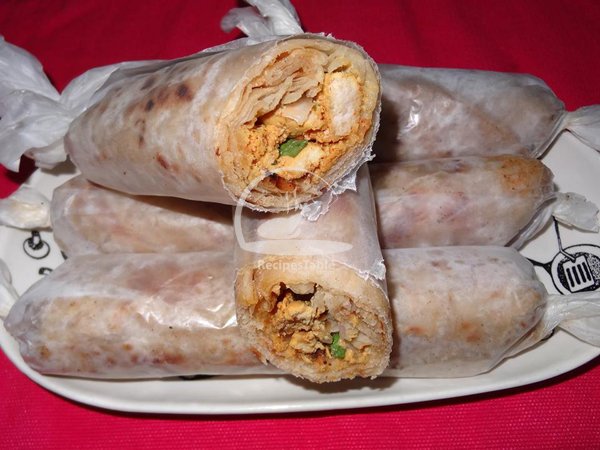
      This Chicken Paratha Rolls recipe is the most simple and easiest recipe that I have ever try. You just need to make a chicken,green chutney and mayonnaise and stuff the parathas with it and wrap. Now isn’t that temptingly simple?

      An easy recipe to make a simple chicken wraps.If you like then you can also add few vegetables and sauces, but that tikka flavor is great on its own. These tasty chicken rolls are great for a relaxed meal, and they’re really easy to m

      Chicken Paratha Rolls Recipe
      Photo: Chicken Paratha Rolls Recipe

      If you have any question about this Chicken Paratha Rolls recipe then you can ask by using comment box and we will clarify your confusion.

      Check it out the Chicken Paratha Rolls recipe here!!

      Prep Time:15 minutes

      Cook Time:20 minutes

      Servings: 4

      Difficulty Level:Easy

      Ingredients

      For Chicken:

      • 500 gm boneless chicken,cut into cubes
      • 4 tbsp yogurt, beaten
      • 1/2 tsp turmeric powder
      • 1/2 tsp garam masala powder
      • 1 tbsp red chili powder
      • 2 tbsp oil
      • salt to taste
      • 1/2 bunch fresh coriander,chopped
      • 4 tbsp green chutney
      • 4 tbsp mayonnaise

      For Parathas:

      • 1 cup flour
      • 1 cup white flour
      • Salt to taste
      • 2 tbsp ghee
      • Water as required

      Directions:

      Step 1

      To Make Chicken Filling:Marinate chicken boneless pieces in yogurt, salt, turmeric and chili powder and garam masala powder. Mix it and set it aside for 15 minutes. Add green coriander leaves in it.

      Step 2

      Now heat the oil and cook marinated chicken in it on low heat till the water dries and chicken become soft and tender.

      Step 3

      To Make Parathas: Take both flours and add ghee and salt in it. Knead it in a dough and put it aside for 1 hour. Make round parathas with the help of rolling pin and grease the pan and cook the parathas.

      Step: 4

      To Make Paratha Rolls:Now take paratha and put boneless chicken in it. Pour green chutney and mayonnaise on it and roll it tightly.

      Step 5

      Cut the roll from center. Delicious Chicken Paratha Rolls are ready to serve.

      Serving Suggestions:

      • Serve with Mustard Dipping Sauce and salad.

      If you like Chicken Paratha Rolls recipe and make it then let me know your feedback by commenting below.

    • Family Favorite: Easy Chicken Spring Rolls Recipe (Everyone Will Love!)

      Chicken Spring Rolls

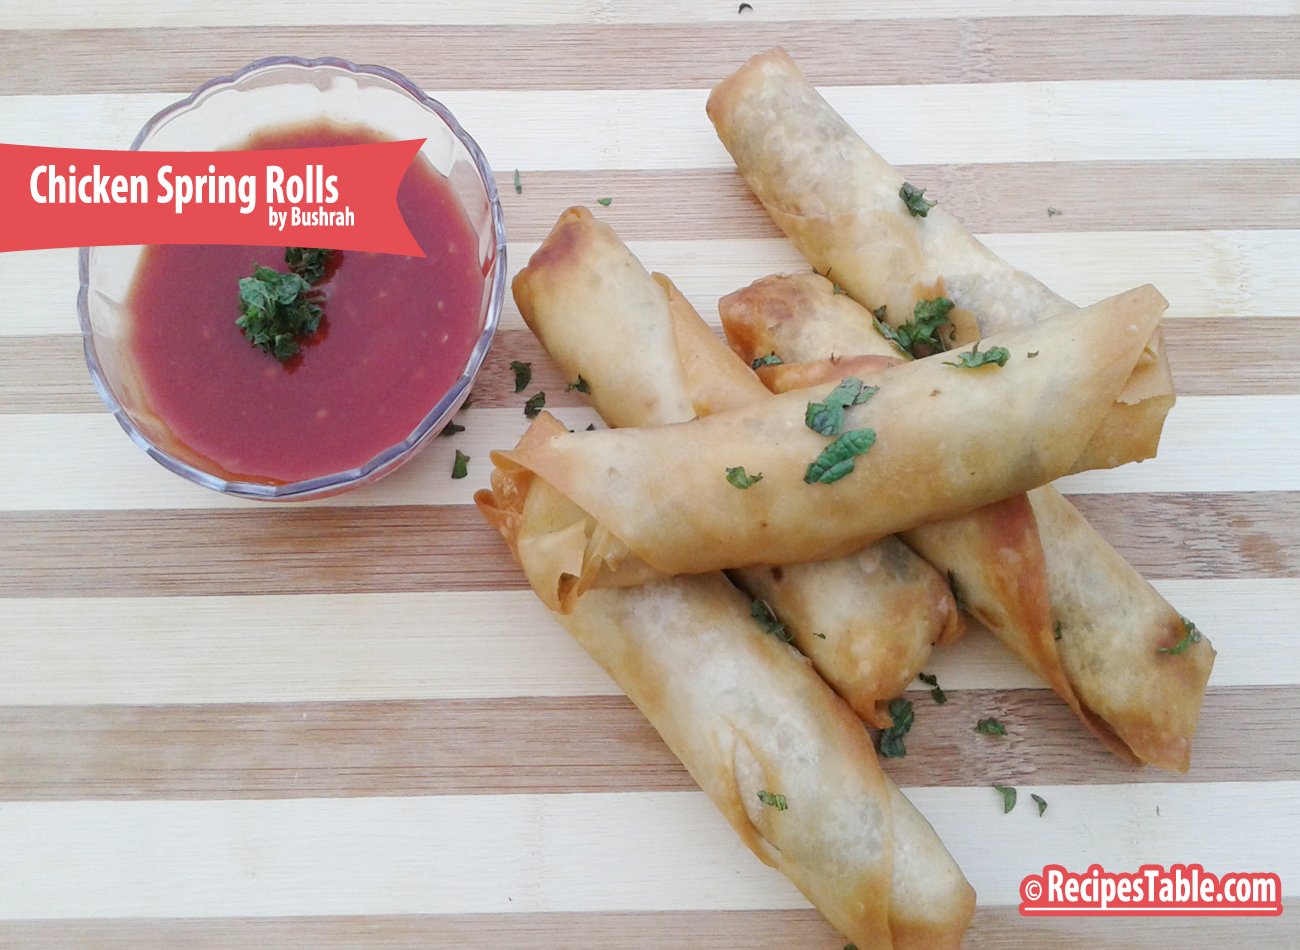
      Who doesn’t love a hot, fried Chicken spring rolls? Light, airy and crispy Chicken spring rolls. Making Chicken Spring Rolls yourself ensures a maximum freshness of flavour.

      Chicken Spring Rolls recipe
      Photo: Chicken Spring Rolls


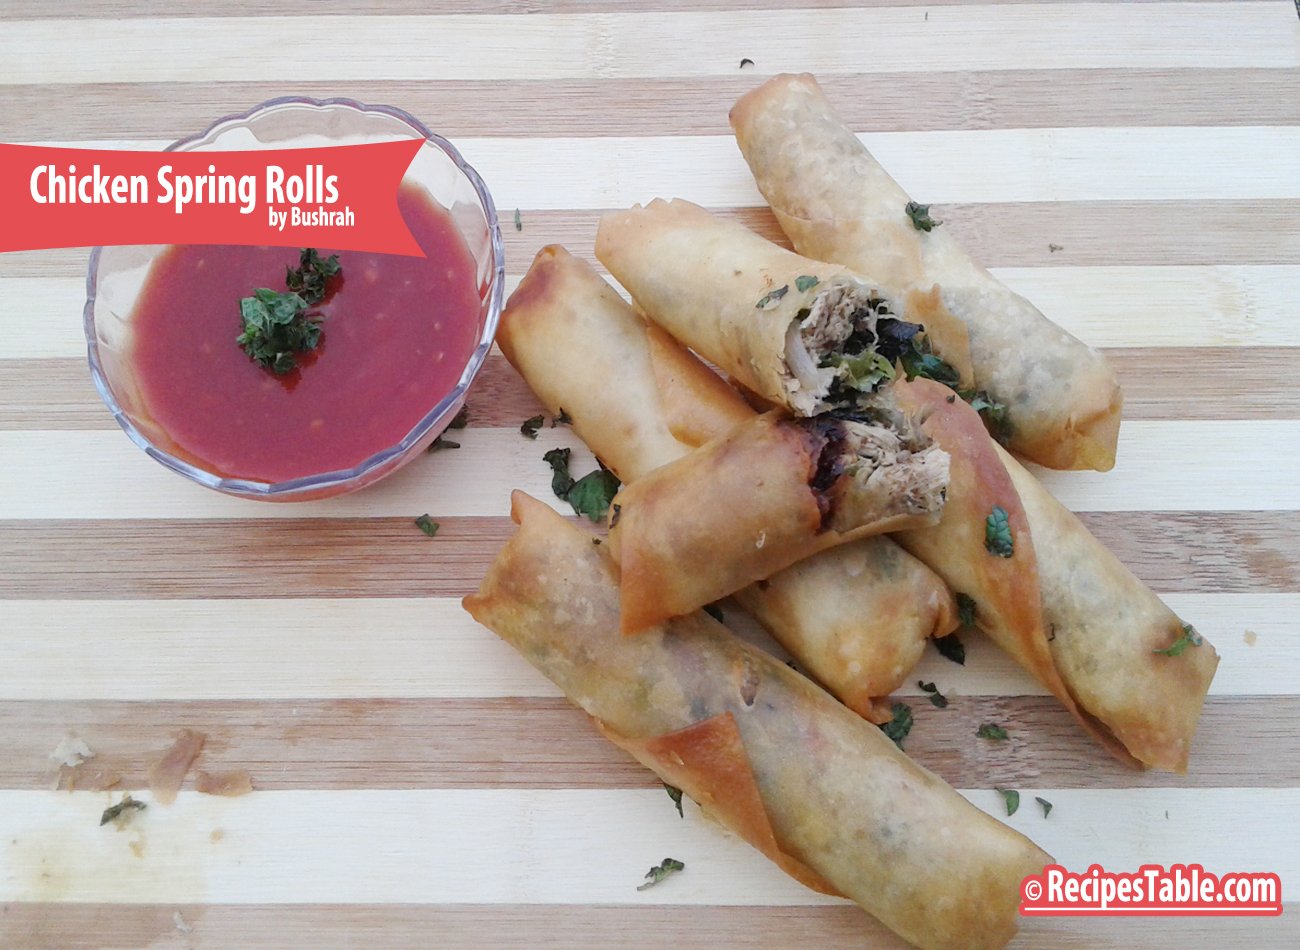
      Chicken Spring Roll are extremely crispy and delicious also easy to make, you can make these tempting rolls with in 30 minutes and can surprise your guest by using it as a snack. It also can be served as a something new item on your Iftar time. Once try out this Chicken spring Roll recipe and you will definitely get praise from your family.

       Chicken Spring Rolls
      Photo: Chicken Spring Rolls


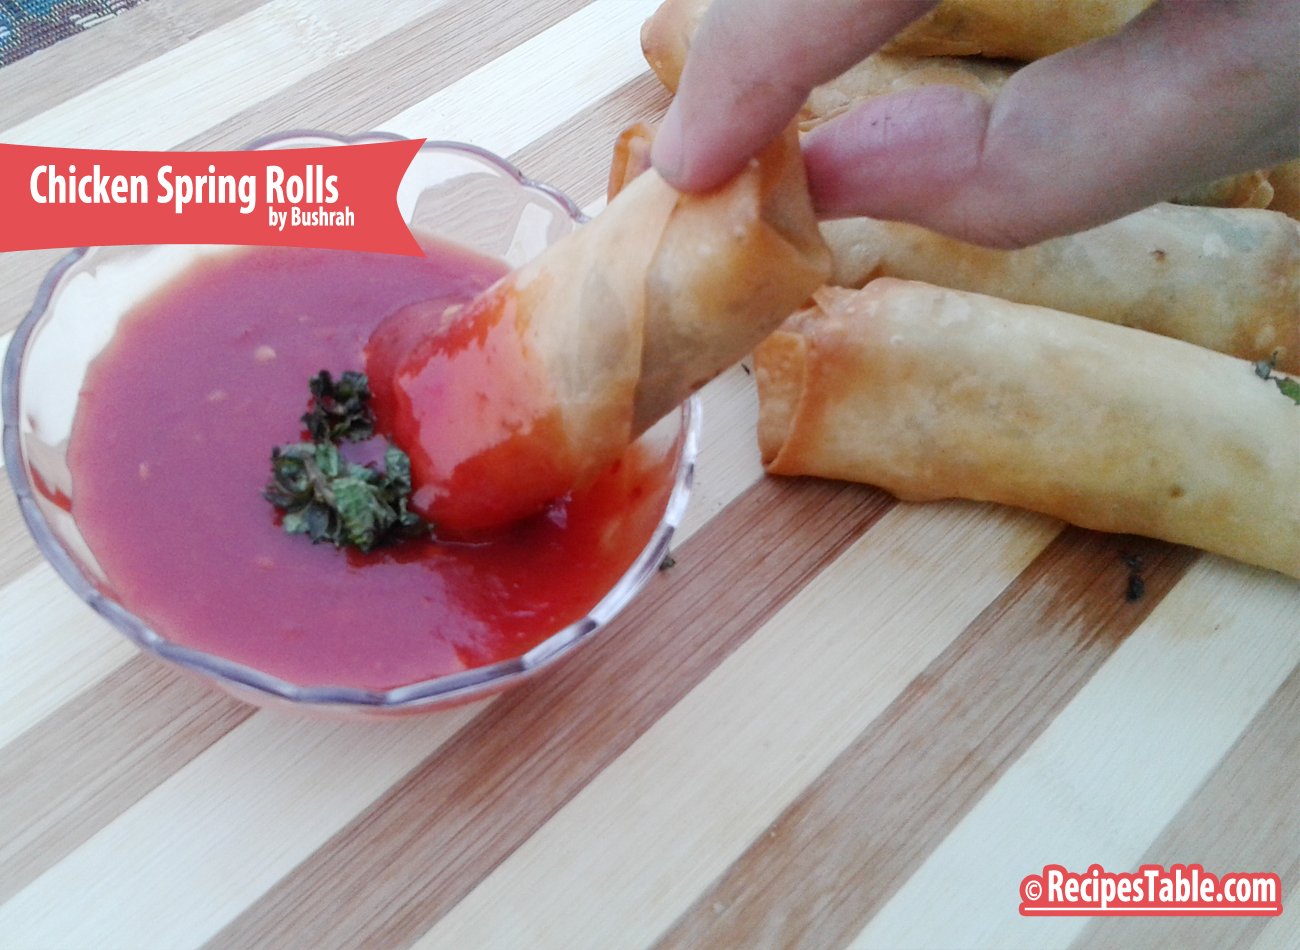
      This quick and easy appetizer or snack is filled with a hearty mix of chicken, cabbage, carrots, spring onion and tons of soy sauce. Give this Chicken Spring Rolls recipe a try.

      Chicken Spring Rolls
      Photo: Chicken Spring Rolls

      If you have any question about this Chicken Spring Rolls Recipe then you can ask by using comment box and we will clarify your confusion.

      Bismillah, let’s get started!

      Check it out the Chicken Spring Rolls Recipe and printable version below.

      Chicken Spring Rolls

      Making Chicken Spring Rolls yourself ensures a maximum freshness of flavour.Give this Chicken Spring Rolls recipe a try.
      Prep Time 15 minutes
      Cook Time 3 minutes
      Total Time 20 minutes
      Servings 8
      Author Bushrah | Recipestable

      Ingredients

      • 250 gm chicken
      • 1 packet ramen noodles
      • 1/2 cabbage finely julienne cut
      • 5 to 6 carrots grated
      • 4 spring onion sliced
      • black pepper to taste
      • salt to taste
      • 3 to 4 tbsp soy sauce
      • spring roll wrapper one pack
      • 3 to 4 tbsp oil

      Instructions

      Method

      • Boil the chicken pieces and shred them.
      • Then heat some oil and put the cabbage in it and fry it till it become soft but don’t over cook it.
      • Then do the same thing with carrots.
      • Do not fry the chicken, ramen noodles and spring onion. In the end mix all the ingredients together.
      • Make the rolls.
      • Heat oil in a deep pan over medium heat. Fry for 2-3 minutes or until crispy and golden brown. Chicken Spring Rolls is ready to serve.

      Notes

      Serving Suggestions:
      Serve these easy to make deep-fried spring rolls with your favorite dipping sauce!
      I have also posted Mini Chicken Rolls  Recipe which is another easiest & tastiest version of making rolls. Do check it out as well.


      Put your own spin on it. And lemme know how it turns out. Post a photo on Facebook (Recipestable) or  on Twitter so I can see how lovely yours turn out.


      If you like this post, Please Subscribe to my blog and let me know your feedback by commenting below.. I have lots more recipes to share with you.


    • Seafood Lovers Rejoice! Easy Fish Shashlik Recipe (Full of Flavor!)

      Fish Shashlik

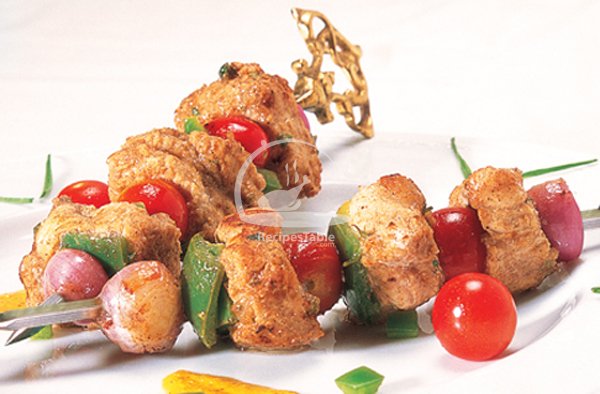
      Fish Shashlik is an easy to make mouthwatering chinese dish, in which spicy and aromatic pieces of fish are skewered on making it an eye catching dish. I really liked this marinade for the fish shashlik, a very pleasant smell.Must Try this Fish Shashlik recipe.

      If you have any question about this Fish Shashlik Recipe then you can ask by using comment box and we will clarify your confusion.
      Fish Shashlik Recipe
      Photo: Fish Shashlik Recipe

      Check it out the Fish Shashlik recipe here !!

      [divider]

      [one_fourth]Prep Time:30 minutes[/one_fourth] [one_fourth]Cook Time:15 minutes[/one_fourth] [one_fourth]Servings:4[/one_fourth] [one_fourth_last]Difficulty Level:Easy [/one_fourth_last]

      [divider]

      [tabs type=”horizontal”] [tabs_head] [tab_title]Ingredients[/tab_title] [tab_title]Nutrition[/tab_title] [/tabs_head] [tab]

      • 500 gm boneless fish fillets
      • 2 green bell pepper, cut into cubes
      • 2 onions, cut into cubes
      • 2 tomatoes, cut into cubes
      • 2 tbsp tomato ketchup
      • 2 tbsp chili sauce
      • 2 green chilies,
      • 2 tsp red chilies, crushed
      • 1 tsp mustard paste
      • 1 tsp garlic,minced
      • 1/2 tsp black pepper
      • salt to taste

      [/tab] [tab]Yield: 4 servings

      Nutritional information is not yet available. [/tab] [/tabs]

      Directions:
      [tabs type=”horizontal”] [tabs_head] [tab_title]Step by Step Method[/tab_title][tab_title]Recipe Note’s[/tab_title] [tab_title]Serving Suggestions[/tab_title][/tabs_head] [tab]

      Step 1

      Wash fish fillets properly and drain.

      Step 2

      Then cut into 1 inch pieces.

      Step 3

      Place tomato ketchup, chili sauce, red chili, mustard paste and garlic in a blender. Blend well.

      Step 4

      Put fish pieces and prepared paste in a large bowl.

      Step 5

      Season with salt and pepper.

      Step 6

      Add onion, green bell pepper and tomato. Mix well.

      Step 7

      Cover and marinate for 30 minutes.

      Step 8

      Drain and discard marinade.

      Step 9

      Thread alternate fish, onion, tomato and capsicum into shashlik stick.

      Step 10

      Cook on low flame for 10 minutes or until cooked thorough. Turning and basting occasionally.

      Step 11

      Heat remaining marinade in a sauce pan.

      Step 12

      Place shashlik sticks in a serving dish. Pour sauce over it. Fish Shashlik is ready to serve.

      [/tab]

      [tab]

      • Shashlik can be cooked on the grill as well as fried in a pan (about 3 minutes on each side).

      [/tab]

      [tab]

      • Serve with Fried Rice.

      [/tab] [/tabs]

      If you like Fish Shashlik recipe and make it then let me know your feedback by commenting below.

    • Sweet, Sour & Spicy Delight: Easy Egg Manchurian Recipe (Restaurant-Style!)

      Egg Manchurian

       Egg Manchurian is one of your favorite Chinese Dish? Then You should try this Egg Manchurian Recipe , hope you’ ll love it.

       Egg Manchurian Recipe
      Photo: Egg Manchurian Recipe

      Check it out the  Egg Manchurian recipe here!!

      [divider]

      [one_fourth]Prep Time:10 minutes[/one_fourth] [one_fourth]Cook Time:25 minutes[/one_fourth] [one_fourth]Servings:6 [/one_fourth] [one_fourth_last]Difficulty Level: Easy[/one_fourth_last]

      [divider]

      [tabs type=”horizontal”] [tabs_head] [tab_title]Ingredients[/tab_title] [tab_title]Nutrition[/tab_title] [/tabs_head] [tab]

      • 6 Hard boiled eggs
      • 4 green chilies, thinly sliced
      • 1 tbsp corn flour
      • 1/4 tbsp sugar
      • 2 tbsp soya sauce
      • oil for frying
      • salt to taste
      • 1 tbsp vinegar
      • 3 onions

      [/tab] [tab]Yield: 6 servings

      Nutritional information is not yet available. [/tab] [/tabs]

      Directions:
      [tabs type=”horizontal”] [tabs_head] [tab_title]Step by Step Method[/tab_title] [tab_title]Serving Suggestions[/tab_title][/tabs_head] [tab]

      Step 1

      Take onions and slice them lengthwise into nice thick pieces.

      Step 2

      Slit the green chilies into half and keep it aside.

      Step 3

      Take a small bowl, add corn flour in it and then add water.

      Step 4

      Make the smooth paste of this.

      Step 5

      Now take a frying pan, heat 3 tablespoon of oil in it.

      Step 6

      When the oil gets hot then add onions and sauté them until get golden brown.

      Step 7

      Now add the corn flour paste, sugar and vinegar, salt to taste and then mix it well.

      Step 8

      Saute them until the aroma begins to rise.

      Step 9

      Cut the boiled eggs into halves lengthwise and then add it to the paste.

      Step 10

      Add the green chilies and keep it to boil.

      Step 11

      Reduce the heat to low and keep it to simmer and then cook it for 2 minutes.

      Step 12

      Take off the pan from heat. Egg Manchurian is ready to serve.

      [/tab] [tab]

      [/tab] [/tabs]

      If you like Egg Manchurian Recipe  and make it then let me know your feedback by commenting below.