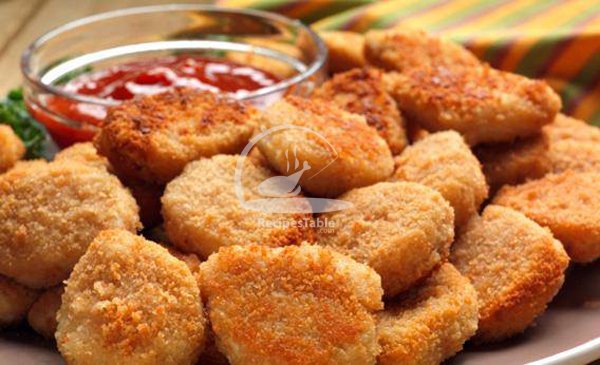
Who doesn’t love chicken nuggets? Now you can make at home.These are easy to make, and are more healthy than restaurant or store bought.Tangy dipping sauce perfectly complements these crisp, golden bites of chicken. Nuggets are favorite food of kids and adults. Make nuggets with this recipe and add a burst of flavor to this snack. Green chilies are used to develop a taste in Chili Nuggets. Once you make, it is definitely on top of the chart attracting every one.Give this chicken chilli Nuggets recipe a try and You’ll love them and never bought them again from restaurant!
So lets make Chicken Chilli Nuggets.
Photo: Chicken Chilli Nuggets Recipe
Bismillah, let’s begin!
Check it out the Chicken Chilli Nuggets Recipe and printable version below.
Soak bread slices in water or milk for few minutes. Then squeezed properly and keep aside.
Place chicken in a chopper or a food processor.Add bread slices, garlic powder, chicken powder, hot sauce, black pepper, red pepper, salt and parsley.
Cover and keep aside for 30 minutes or until mince is firm.
Shape mixture into nuggets, dip in egg and coat with breadcrumbs.
Heat oil in a deep pan over medium heat.
Fry Chicken Chilli nuggets for 4-5 minutes or until crispy and golden brown.
Remove from the oven and drain on paper towel. Delicious Chicken Chilli Nuggets are ready to serve. ENJOY!!
Notes
Recipe Note’s: To Freeze Chicken chilli Nuggets: After coating in bread crumbs, arrange them individually on a tray and place in the refrigerator. Once freeze keep them in freezer bag or in air tight container. When needed fry from frozen. You can freeze these Chicken Nuggets for 1 month. To Make Different Shapes of Nuggets: You can also shape mixture into fun shapes nuggets such as squares or squiggles etc.Serving Suggestions: Serve with Chilli Sauce or any dipping sauce.
Put your own spin on it. And lemme know how it turns out. Post a photo on Facebook (Recipestable) or on Twitter so I can see how lovely yours turn out.
Happy Cooking!!
Keep remember me in your Dua’s and Stay tuned for new content on the blog 🙂
If you like this post, Please Subscribe to my blog and let me know your feedback by commenting below.. I have lots more recipes to share with you.
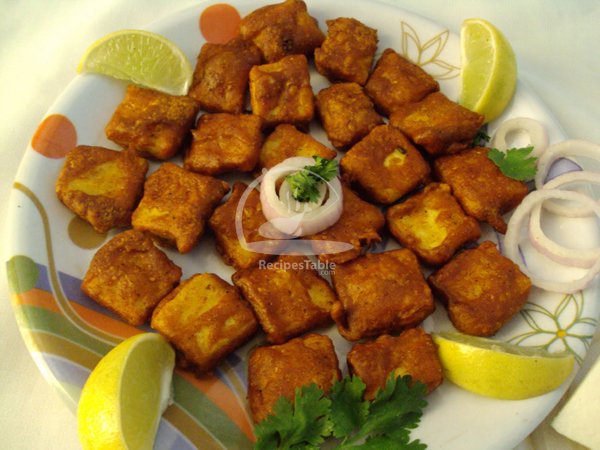
Discover a world of taste with every luscious bite. The crispy covering enhances the texture of these Baked Cheese Tikka’s.
Cheese lovers will surely make this Cheese Tikka recipe today in the evening. Served with tandoori roti and chutney this is a mouthwatering Cheese Tikka recipe that you will surely love to prepare, so lets make it.
Mix all of the ingredients together, (except the garnish ingredients.)
Step 2
Set aside for 30 minutes.
Step 3
About 20 minutes before serving, place the paneer cheese on a drip pan and bake in a 350 degree pre-heated oven for about 10 minutes.
Step 4
Remove from oven, brush with oil and bake for another 10 minutes.
Step 5
Alternatively, you can grill on a griller or a barbecue pit. Cheese Tikka is ready to serve.
[/tab] [tab]
Serve hot, garnished with lemon and onion rings.
[/tab] [/tabs]
If you like Cheese Tikka recipe and make it then let me know your feedback by commenting below.And if you know more innovative ways in which we can utilize this mouthwatering Cheese Tikka, do share with us and we would be glad to give it a try.
Boil potatoes then peel and mashed them properly.Now add milk, butter, fresh cream, garlic and oregano.Discover the Mouthwatering Butter Mashed Potatoes Recipe
Check it out the Butter Mashed Potatoes Recipe here!!
Prep Time:10 minutes
Cook Time:20 minutes
Servings:4
Ingredients
500 gm potatoes
1 cup milk
1/2 cup fresh cream
50 gm butter
2 cloves garlic, chopped
2 tbsp chopped parsley
1/2 tsp oregano
1/2 tsp black pepper
Salt according to taste
Directions:
Boil potatoes then peel and mashed them properly.
Now add milk, butter, fresh cream, garlic and oregano.
Season with salt and black pepper.
Mix well.
Take it out in a serving bowl.
Sprinkle chopped parsley over it.
Butter Mashed Potatoes are ready to serve.
Serve with Fried Chicken.
If you like Butter Mashed Potatoes Recipe and make it then let me know your feedback by commenting below.And if you know more innovative ways in which we can utilize this delicious Butter Mashed Potatoes , do share with us and we would be glad to give it a try.
Cover the dough with wet cloth and set aside for 20 minutes.
Step 4
Now make small balls and roll into shape of chapati.
Step 5
Heat griddle (tawa) over medium heat.
Step 6
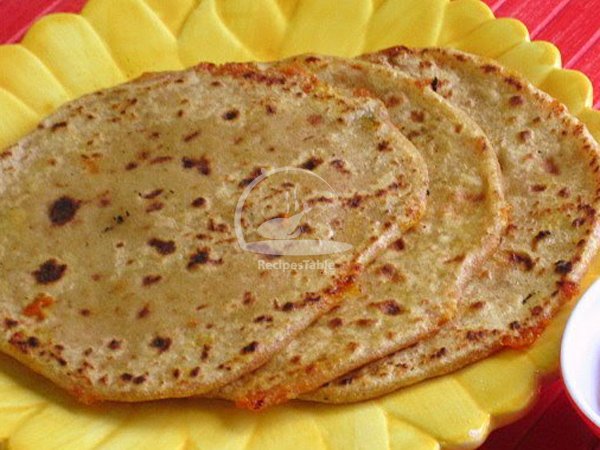
Cook carrot chapati on griddle. Spread butter on both sides of chapati. Carrot Chapati is ready to serve.
[/tab] [tab]
Serve with pickle and raita.
[/tab] [/tabs]
If you like Carrot Chapati recipe and make it then let me know your feedback by commenting below.And if you know more innovative ways in which we can utilize this mouthwatering Carrot Chapati, do share with us and we would be glad to give it a try.
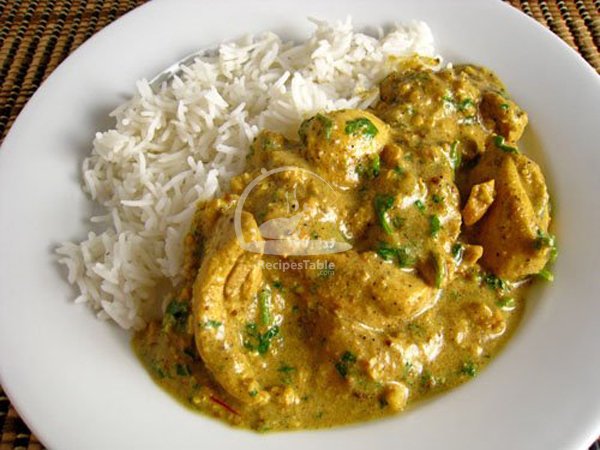
Tasty party food or delicious Chicken Curry. This Brown Chicken with Pepper is sure to please.Serve with jasmine or brown rice and stir-fried or steamed veggies. Must Try this Brown Chicken with Pepper Recipe and don’t forget to share your experience with us!!
Photo: Brown Chicken with Pepper Recipe
Check it out the Brown Chicken with Pepper Recipe here!!
Clean and wash chicken and marinate it with salt, black pepper, and turmeric powder for 1 hour.
Step 2
Heat oil in a deep pot over moderate heat.
Step 3
Add onion, cloves and fry for one minute then add garlic to this and fry for 1 minute again.
Step 4
Now add to this coriander and tomatoes.
Step 5
Cook for 5 minutes or until oil floats on top.
Step 6
Then add chicken, curry patha and 1 cup of water cook for few minutes.
Step 7
Dish it out. Brown Chicken with Pepper is ready to serve.
[/tab] [tab]
Serve with steamed vegetables, brown rice.
[/tab] [/tabs]
If you like Brown Chicken with Pepper recipe and make it then let me know your feedback by commenting below.And if you know more innovative ways in which we can utilize this mouthwatering Brown Chicken with Pepper, do share with us and we would be glad to give it a try.
Amritsari Fish is a popular street snack and Restaurant style starter fried Fish. Fish chunks marinated in spices and then deep fried; sprinkled with chaat masala.
It’s a tasty spicy fried fish that is sure to get you drooling.You can make this Amritsari Fish Recipe for lunch box,dinner any special occasion.Highly recommended to seafood lovers so, must try out and be the first to comment on this Amritsari Fish recipe!
Clean, wash and cut fish into one and a half inch size cubes.
Step 2
Apply salt, lime juice, ginger paste, garlic paste and red chilli powder. Keep aside for 20 minutes.
Step 3
Make a batter of gram flour, curd, egg, ajwain, salt and water.
Step 4
Keep marinated fish pieces dipped in this batter for 15 minutes.
Step 5
Heat oil in a karahi (wok) and deep fry the fish till golden brown and crisp.
Step 6
Sprinkle chaat masala over it and garnish with lemon wedges. Amritsari Fish is ready to serve.
[/tab] [tab]
Serve Amritsari fish hot with Chutney.
[/tab] [/tabs]
If you like Amritsari Fish Recipe and make it then let me know your feedback by commenting below.And if you know more innovative ways in which we can utilize this spicy and tasty Amritsari Fish, do share with us and we would be glad to give it a try.
A flat, Potato ( aloo) stuffed bread that is served for breakfast or as a street food in India and Pakistan during all times of the day. Give ot a try!
Aloo Paratha is extremely popular all over India and Pakistan that can be prepared for a breakfast or any time. Paratha dough stuffed with spiced mashed potatoes, and cooked with ghee. Goes great with your favourite chutney, dip and yogurt. It’s makes an excellent breakfast or brunch!
Photo: Aloo Paratha Recipe
Check it out the Aloo Paratha Recipe here!!
Prep Time:30 minutes
Cook Time: 15 minutes
Servings:4
Difficult Level: Easy
For Dough:
2 cups wheat flour
1 cup plain flour
water to knead
salt
For Filling:
4 potatoes, boiled and mashed
1 small onion, finely chopped
1 tsp red chili powder
1 tsp coriander seeds powder, roasted
1 tsp cumin seeds, roasted
1/2 tsp garam masala powder
3-4 green chilies, finely chopped
1/2 cup fresh coriander leaves,finely chopped
2 tbsp fresh mint leaves, finely chopped
salt to taste
For Frying:
oil for frying
Directions:
Step 1
To Make Paratha Dough: Mix wheat flour, 1/4 tsp salt, Luke warm water,and make soft dough.
Step 2
Leave it for 30 minutes.
Step 3
To Make Potato (Aloo) Filling: In a medium bowl,combine all ingredients of filling. Mix well then set aside.
Step 4
To Make Paratha: Take a small ball of dough and roll a thick roti about 4″ diameter.
Step 5
Place a handful of filling at center.
Step 6
Bring the ends to the center from 4 or 5 points.
Step 7
Overlap ends so they do not leave an opening. Press gently, dust with dry flour, and proceed to roll.
Step 8
Heat a griddle and place paratha on it. Add 1 tsp oil around paratha and cook until it turns golden brown.
Step 9
Repeat the same with other side of paratha. Aloo Paratha is ready to serve. ENJOY!!
Serve hot with mint chutney or raita .
If you like Aloo Paratha Recipe and make it then let me know your feedback by commenting below.And if you know more innovative ways in which we can utilize this spicy and Tasty Aloo Paratha, do share with us and we would be glad to give it a try.
This is a tasty smoothiealternative when you really feel like a sweet chocolatey hit.Try this mouthwatering Rich Chocolate Smoothie recipe
Check it out the Rich Chocolate Smoothie Recipe here!!
Prep Time:5 minutes
Cook Time: not required
Servings:1
Ingredients
1 cup yogurt
1 glass milk
1 tsp coffee powder
1 tsp cocoa powder
2 tsp sugar
4 tbsp cream
1 tbsp grated chocolate
1 cup ice, crushed
Directions:
Place yogurt, milk, coffee, cocoa powder, sugar, cream, and ice in a blender.
Process until smooth.
Pour into a serving glass.
Top with grated chocolate.
Rich Chocolate Smoothie is ready to serve.
Serve immediately.
Serve with Cookies, Biscuits or brownies.
If you like Rich Chocolate Smoothie Recipe and make it then let me know your feedback by commenting below.And if you know more innovative ways in which we can utilize this sweet and mouthwatering Rich Chocolate Smoothie, do share with us and we would be glad to give it a try.
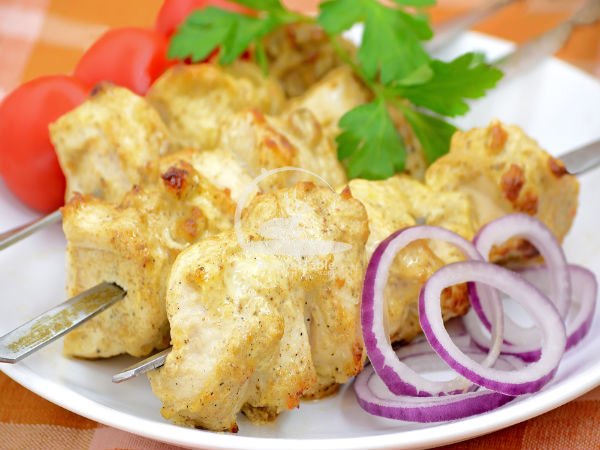
Love Chicken Kababs?? Here is super simple and mouthwatering “must-try” Reshmi Kebab Recipe. Bite size pieces of chicken are marinated in a fresh and flavourful spicy creamy sauce. You can grill the kababs on skewers in your oven or barbecue grill. In BBQ party where you make beef, mutton or lambs’ tikka, steak or kababs dishes, there You want to include minimum one white meat BBQ dish also. This reshmi kebab will be one of a flavorful addition of your BBQ party.
Don’t hold back that eager cook inside you. Just put on that apron and let me teach you how to make deliciously perfect Reshmi Kebab.
Don’t worry if you don’t have an oven or grill. You can also make these Reshmi kebab on stove by following this step by step recipe.
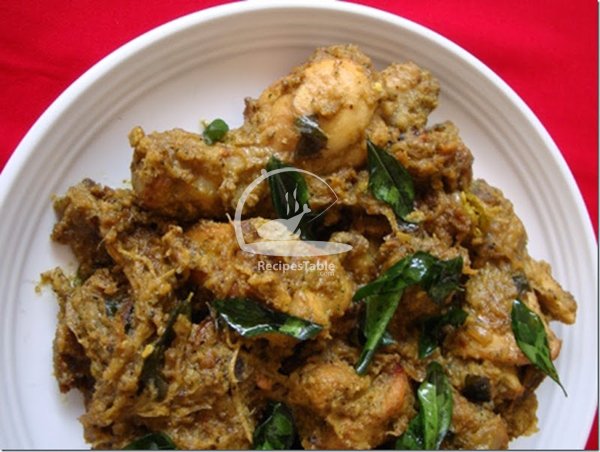
This easy and delicious Pepper Chicken recipe is made with tomatoes, onion, fragrant spices and robust peppercorns.One of the simple and easy chicken Curry. It goes great with almost all prime dishes like rice, chapati, paratha etc.
Add the mustard seeds and the fennel seeds powder.
Step 4
After few minutes, add the ginger garlic paste and cook on low heat for 1-2 minutes.
Step 5
Now add the onions and allow them to cook till they are golden brown in color.
Step 6
Then add the chicken pieces and mix well.
Step 7
Sprinkle the garam masala, red chilli powder, turmeric powder and the salt and allow to cook for some time.
Step 8
Then add the cumin seeds, coriander powder and pepper powder , mix well and allow to cook some more.
Step 9
When the chicken is half cooked, add the coriander leaves and the tomatoes and mix well.
Step 10
Cover the pan and let the chicken cook well.
Step 11.
Turn the heat off. Dish it out.Pepper Chicken is ready to serve.
[/tab] [tab]
Serve hot with chapati or parathas. Enjoy!
[/tab] [/tabs]
If you like Pepper Chicken recipe and make it then let me know your feedback by commenting below.And if you know more innovative ways in which we can utilize this mouthwatering Pepper Chicken, do share with us and we would be glad to give it a try.
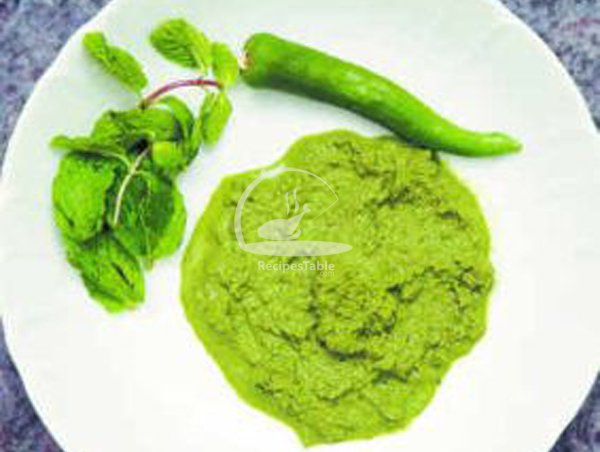
A complete culinary delight, Mirch Chutney are as unique as they sound.This spicy chutney makes a nice change from your usual chutney. A tangy blend of green coriander, lemon juice and green chilies. It’s perfect served straightaway with your main dish.
Cut the Stem part of Dhaniya and put rest leafy part to the grinder bowl.
Step 3
Take out stem of Green Chilies and add rest to the grinder bowl.
Step 4
Add ginger, Cumin seeds,hing,Salt and lemon juice.
Step 5
Process until smooth.Take it out in a small bowl. Mirch Chutney is ready to serve.
[/tab] [tab]
Serve with Dal,Rice, Curry or Stuffed Paratha, or any snacks item.
[/tab] [/tabs]
If you like Mirch Chutney Recipe and make it then let me know your feedback by commenting below.And if you know more innovative ways in which we can utilize this spicy and mouth watering Mirch Chutney, do share with us and we would be glad to give it a try.
Mango Rus(Aam Ka Rus) is a unique and refreshing way to enjoying the benefits of Mango. Cool , refreshing and energetic Summer Drink!! Must Try this Mango Rus Recipe, Hope you’ ll like it.
Place mango chunks in the blender.Process until smooth.
Step 3
Then strain into a medium bowl, discarding any fiber.
Step 4
Combine mango pulp and milk in a jug.Keep stirring until well combined.
Step 5
Place in a refrigerator for 6-8 hours or until chill. Mango Rus is ready to serve.
[/tab] [tab]
Serve chilled.
[/tab] [/tabs]
If you like Mango Rus recipe and make it then let me know your feedback by commenting below. And if you know more innovative ways in which we can utilize this sweet and mouth watering Mango Rus, do share with us and we would be glad to give it a try.
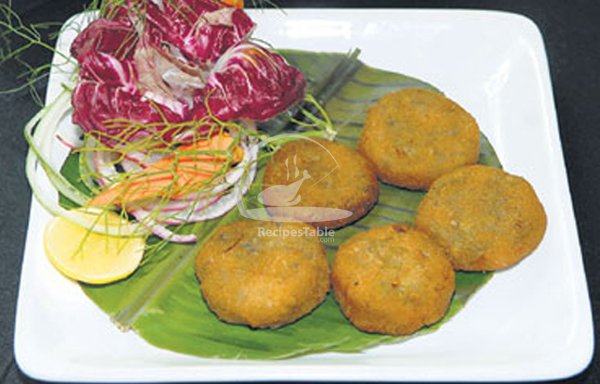
This Potato Peas Cutlets Recipe will help you add a twist to your Tea Time Snack. Must Try this Potato Peas Cutlets Recipe and don’t forget to share your experience with us!!
In a large bowl, combine boiled potatoes, mashed peas, green chilies, coriander leaves, black pepper,and salt.
Shape mixture into cutlets.
Break an egg and beat well.
Dip the cutlets in the egg and then roll it in the bread crumbs.
Deep fry in pre-heated oil over medium heat for 4-5 minutes or until golden brown.
Remove from the oil and drain on paper towel.
Garnish with Salad leaves. Potato Peas Cutlets are ready to serve.
Notes
Serving Suggestions: Serve with Tomato Chutney or mayo garlic sauce.
I have also posted Sesame Potato Cutlets Recipewhich is another easiest & tastiest version of making Veggie Cutlets. Do check it out as well. It’s finger lickin’ good. You’ll be coming back for more.
Put your own spin on it. And lemme know how it turns out. Post a photo on Facebook (Recipestable) or on Twitter so I can see how lovely yours turn out.
Happy Cooking!!
If you like this post, Please Subscribe to my blog and let me know your feedback by commenting below.. I have lots more recipes to share with you.
Eid-ul-Adha does not complete with out BBQ dishes. Especially most eaten and enjoying Mutton tikka is everyone’s favorite dish. Here is a wonderful Mutton Baked Tikka recipe for your BBQ party just check it out.
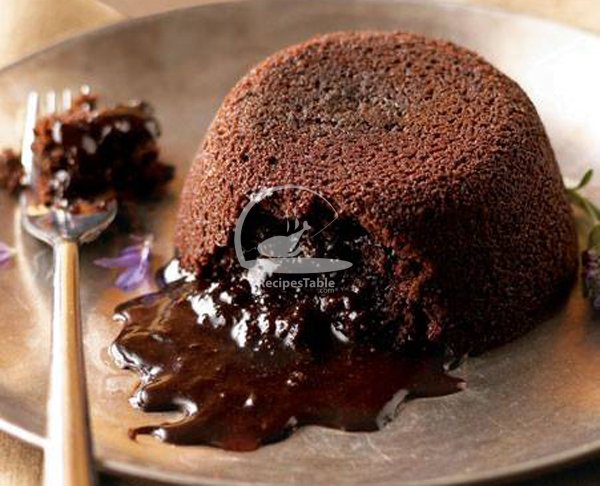
Molten Lava cakes also known as chocolate lava cakes. They are rich individual chocolate cakes with oozing molten centers. Try this Molten Lava Cakes recipe and make these rich and impressive single-serving chocolate cakes.Decadent and delicious, these are the ideal dessert for any Special Occasion.
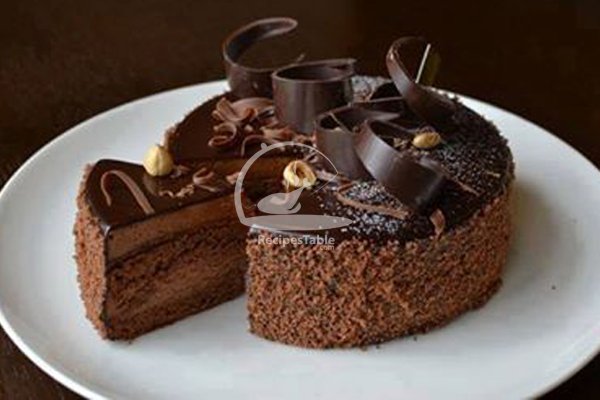
This rich and decadent Chocolate mousse cake is the ultimate CHOCOLATY DELIGHT.Chocolate cake with chocolate moussefilling and topped off with dark chocolate ganache. Must Try this Chocolate Mousse Cake recipe; everyone will think you bought it at a bakery!
Photo: Chocolate Mousse Cake Recipe
Check it out the Chocolate Mousse Cake Recipe here!!
In a large bowl, mix together sugar, flour, cocoa powder, baking powder and salt.
Step 4
Add milk, eggs, oil and vanilla. Stir with spatula for few minutes or until the batter is smooth and no lumps remain.
Step 5
Now add baking soda and mix well.
Step 6
Stir in the boiling water.
Step 7
Pour batter equally into prepared baking pans.
Step 8
Bake in the preheated oven for 30-35 minutes or until a tooth-pick inserted in the center comes out clean.
Step 9
Let it cool for 10 minutes then remove from the pans
to wire racks.
Step 10
Allow to cool completely.Chocolate Cake Sponge is ready 🙂
To Make The Chocolate Mousse:
Meanwhile cake is oven, let’s prepare the Chocolate Mousse.
Step 1
Place heavy cream in a large bowl. Beat for 10-12
minutes or until it forms stiff peaks.
Step 2
Place in the refrigerator until set.
Step 3
Take a small bowl, add egg yolk and sugar in it. Beat 3-4 minutes or until it becomes thick and pale in color and the sugar fully dissolved.
Step 4
Keep aside.
Step 5
Take a small pan and fill it with an inch of water.
Step 6
Bring it to a simmer.
Step 7
Place a small heat-proof bowl over the saucepan.
Step 8
Add the chocolate, water, and butter. Stir and cook on very low heat for few minutes or until the chocolate is melted.
Step 9
Spoon 1/4 of the chocolate mixture into the egg yolk
mixture. Stir until well combined.
Step 10
Pour the egg yolk mixture back into the small bowl over the simmering water in the saucepan with the remaining chocolate mixture.
Step 11
Stir in the vanilla extract.
Step 12
Keep stirring and cook over low heat for 2-3 minutes or until the mixture thickens.
Step 13
Let it cool for few minutes; stirring frequently.
Step 14
Place egg whites in another small bowl. Beat until it forms stiff peaks.
Step 15
Fold the egg white in the cooled chocolate mixture.
Step 16
Now fold into the whipped heavy cream.
Note: Be careful not to over mix otherwise the heavy cream will lose its texture.
To Assemble The Cake
Step 1
Cut the top dome texture of the cake sponges. This will help you to get a flat and even surface.
Step 2
Arrange the bottom layer of the cake in the spring form pan.
Step 3
Pour the thick chocolate mousse over the cake sponge.
Step 4
Spread evenly with a spatula.
Step 5
Now cover the pan with cling wrap or any plastic covering.
Step 6
Place the pan in the refrigerator for 20 minutes or until set.
Step 7
Remove the pan and gently place the second cake sponge on top of the mousse.
Step 8
Cover again and keep in the refrigerator for 30 minutes or until firm or set.
To Make Chocolate Ganache
Step 1
Place the chocolate in a medium bowl.
Step 2
Heat the heavy cream in a small sauce pan over medium heat.
Step 3
Bring just to a boil.
Step 4
When the cream has come to a boil, immediately pour over the chopped chocolate and stir until smooth.
Step 5
Stir in the 1/2 teaspoon of vanilla essence.
Step 6
Let it cool slightly.
Step 7
When cool, pour the chocolate ganache in the the center of the cake, it will slowly spread itself.
Step 8
Finally, cover the cake and refrigerate overnight or until the cake sets.
To Decorate The Chocolate Mousse Cake:
Step 1
When the cake has set, decorate the cake with chocolate curls and hazelnuts or walnuts.
Step 2
Slide the cake out of the pan and transfer to a cake plate. Mouthwatering Chocolate Mousse Cake is ready to eat!! ENJOY 😉
[/tab]
[tab]
Tip To Assemble the Cake: You will need a spring-form pan or a cake ring to hold everything neatly as the cake sets. So that you can later easily un-mold your cake once the mousse has set without ruining the delicate layers. If you don’t have a spring-form or cake ring, you can do this in a regular pan, make sure it is the same size as your cake. Serving out of a regular pan can be a bit tricky though as it will be hard to lift out the cake neatly with that soft creamy mousse in the middle.
Tip To Make Chocolate Mousse: If you want the mousse layer to show neatly and evenly through the cake, take an offset spatula or cut out a small rectangular piece off a tetra pack or hard paper and run it over the mousse around the circumference of the cake to remove the excess mousse, and give it a smoother finish.
Tip To Decorate The Cake: You can top the cake with whipped cream, cherries any type of nuts or leave it as is.
Tip To Make Chocolate Ganache: While making Chocolate ganache,don’t over boil the cream because if it boils for a few seconds, it will boil out of the pot.
Tip To Make Thicker Ganache: If you want a thicker consistency for piping the ganache, just let it cool for a longer time.
[/tab]
[tab]
Serve as a dessert after any meal or birthday party or any other special occasion.
[/tab] [/tabs]
If you like Chocolate Mousse Cake recipe and make it then let me know your feedback by commenting below.