Very easy to make, nutritious, and delicious _ Moist inside and crunchy outside, these are great with oven fries or roasted veggies and low-fat homemade tartar sauce. You can make these fish sticks in about the same amount of time it takes to bake a box of the frozen kind. DO try it!!
So Ramadan is coming up and we are all gearing up for it. Not only spiritually but also deliciously!! After a couple of random posts I will be posting over all the dishes that are very popular during Ramadan in our household and will share the recipes and other stories with you all.. so look forward to this space!!!
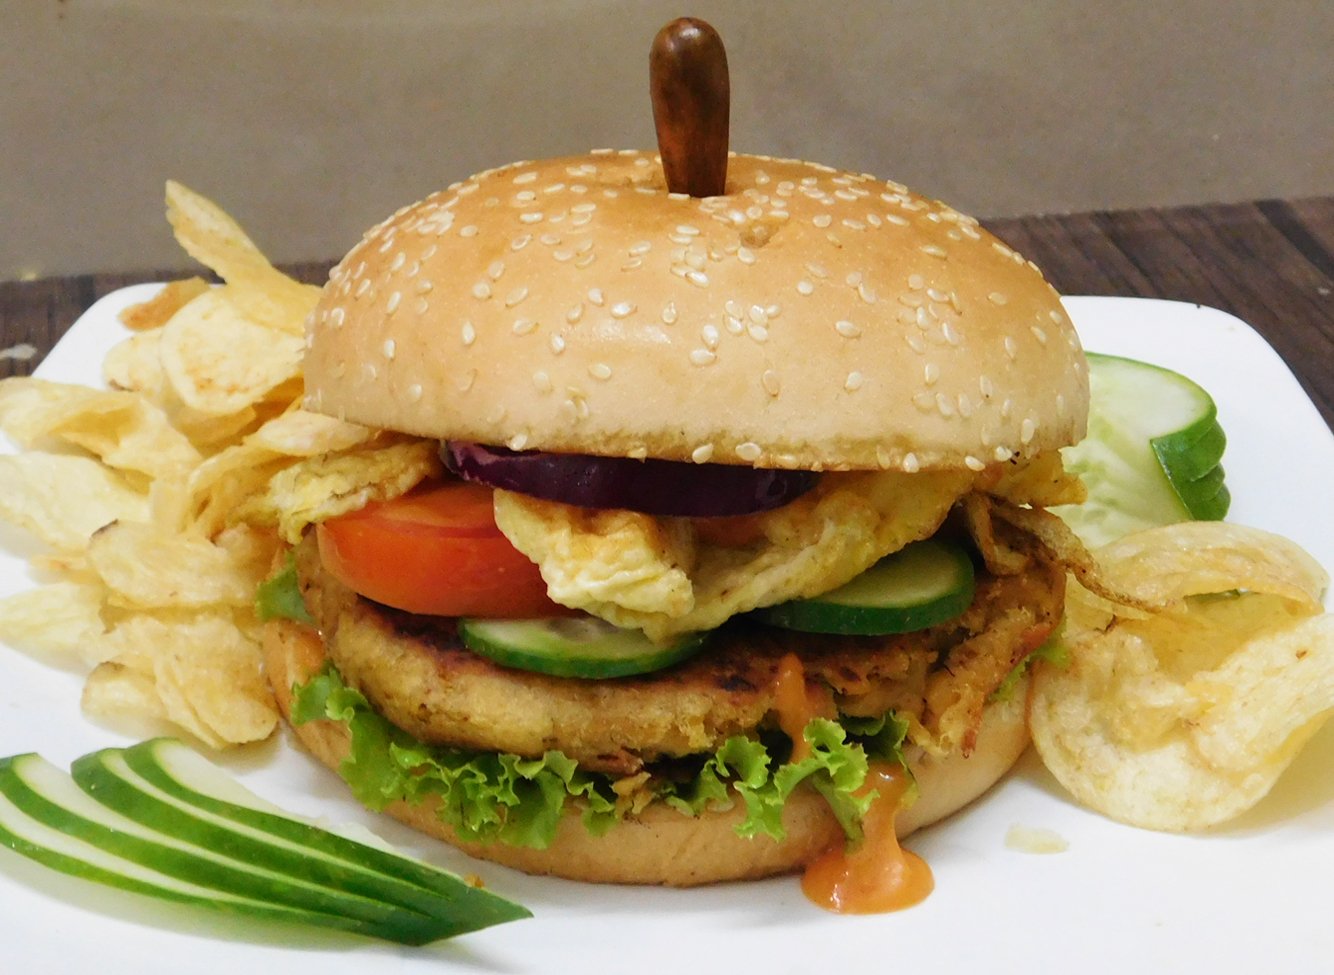
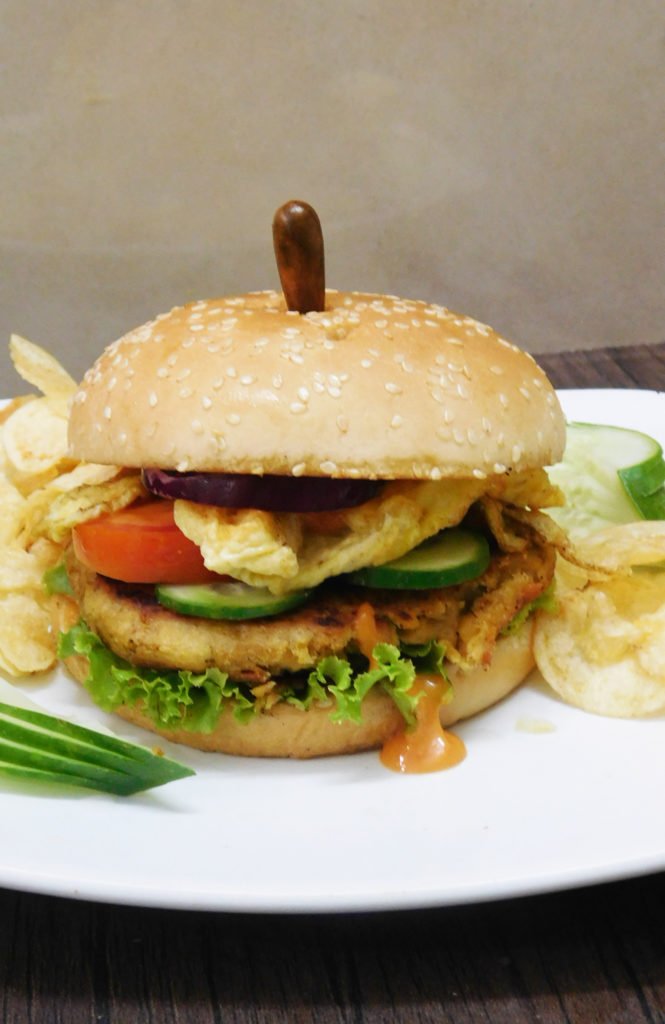
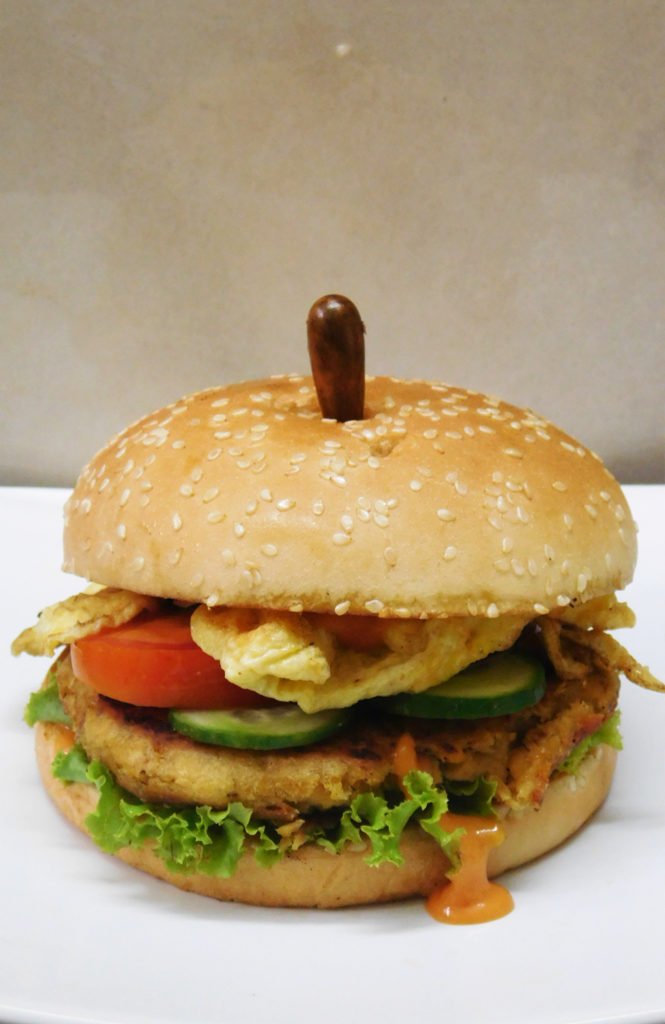
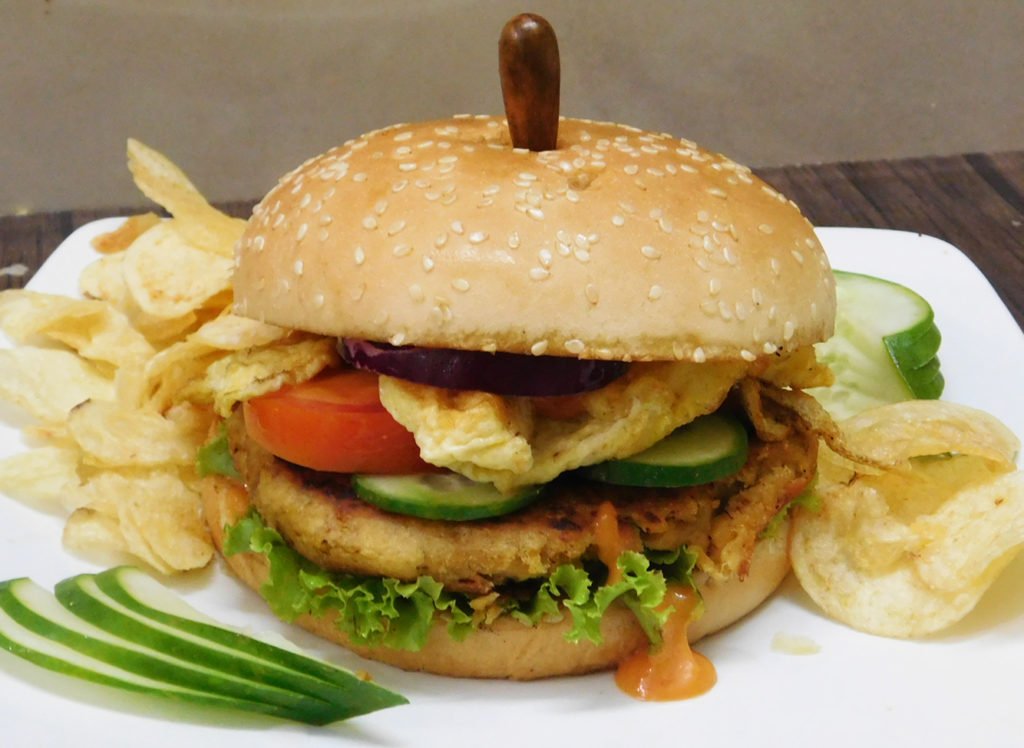
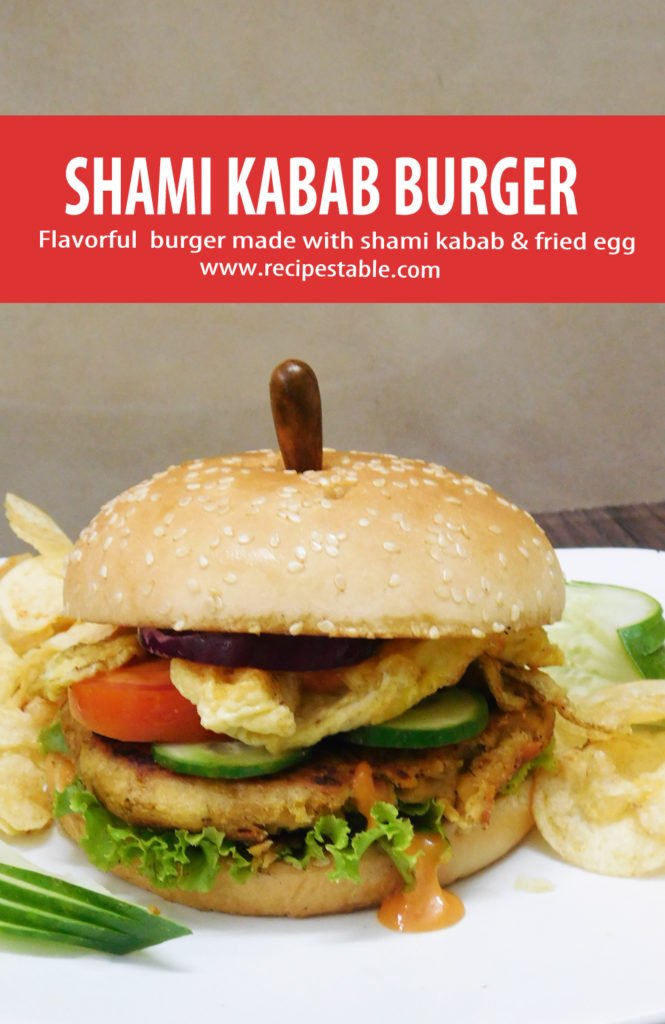
My Mom made some Shami Kababs for a dinner party few weeks ago and had some left, so during one of the weekdays, I made these shami kabab burgers which weren’t just filing but very delicious as well. My Brother kept asking for more but I only had a few shami kababs left. This is a very simple and filling snack that is worth trying!
Shami Kabab Burger Recipe
Shami Kabab Burger Recipe
Shami Kabab Burger Recipe
If you want something astonishing but healthy for your your family then this do try this Shami Kabab Burger Recipe. It contains lentil and meat which is high in vitamins, protein and minerals.
Check it out the Shami Kabab Burger Recipe and printable version below!!
If you want something astonishing but healthy for your your family then this do try this Shami Kabab Burger Recipe. It contains lentil and meat which is high in vitamins, protein and minerals.
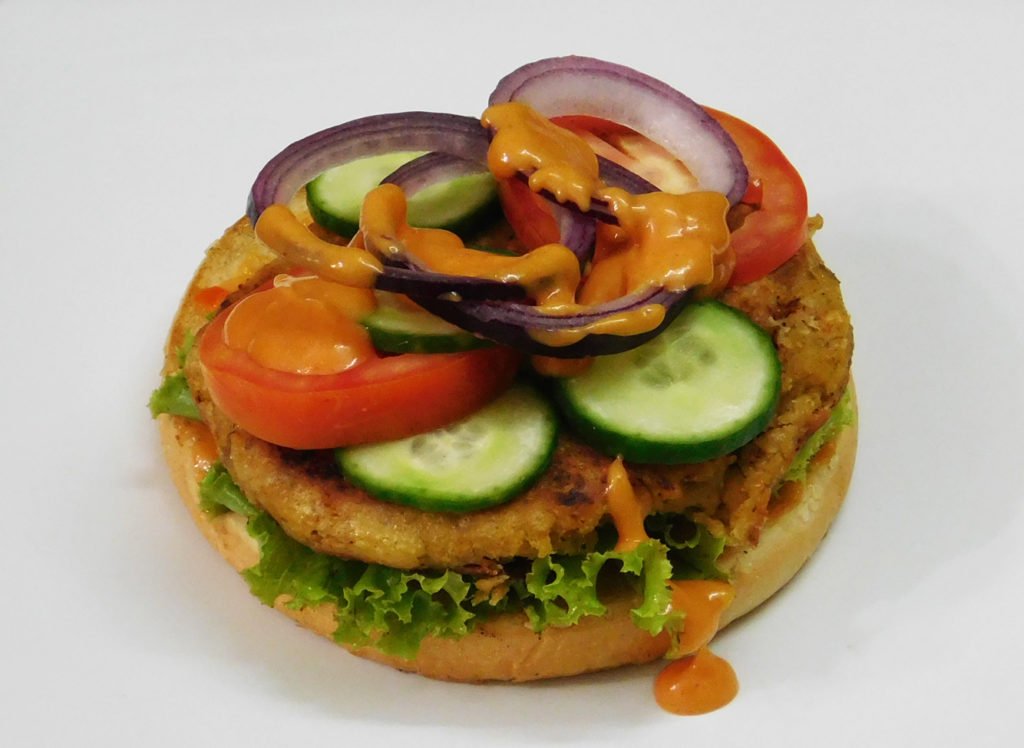
Toast burger buns and spread mayonnaise over them.
Place shami kababs, lettuce and onion over the buns.
Drizzle with ketchup and green chutney.
Place some cheese on one side of the bun and toast till cheese melts away.
Place the cheesed bun on the top.
Cut into halves. Shami Kabab Burger is ready to serve. ENJOY!!
Notes
Serving Suggestions: Serve with chips and ketchup.
Pin It For Later
If you like this Shami Kabab Burger Recipe, Please Subscribe to my blog. I have lots more recipes to share with you. And If you make it then let me know your feedback by commenting below.
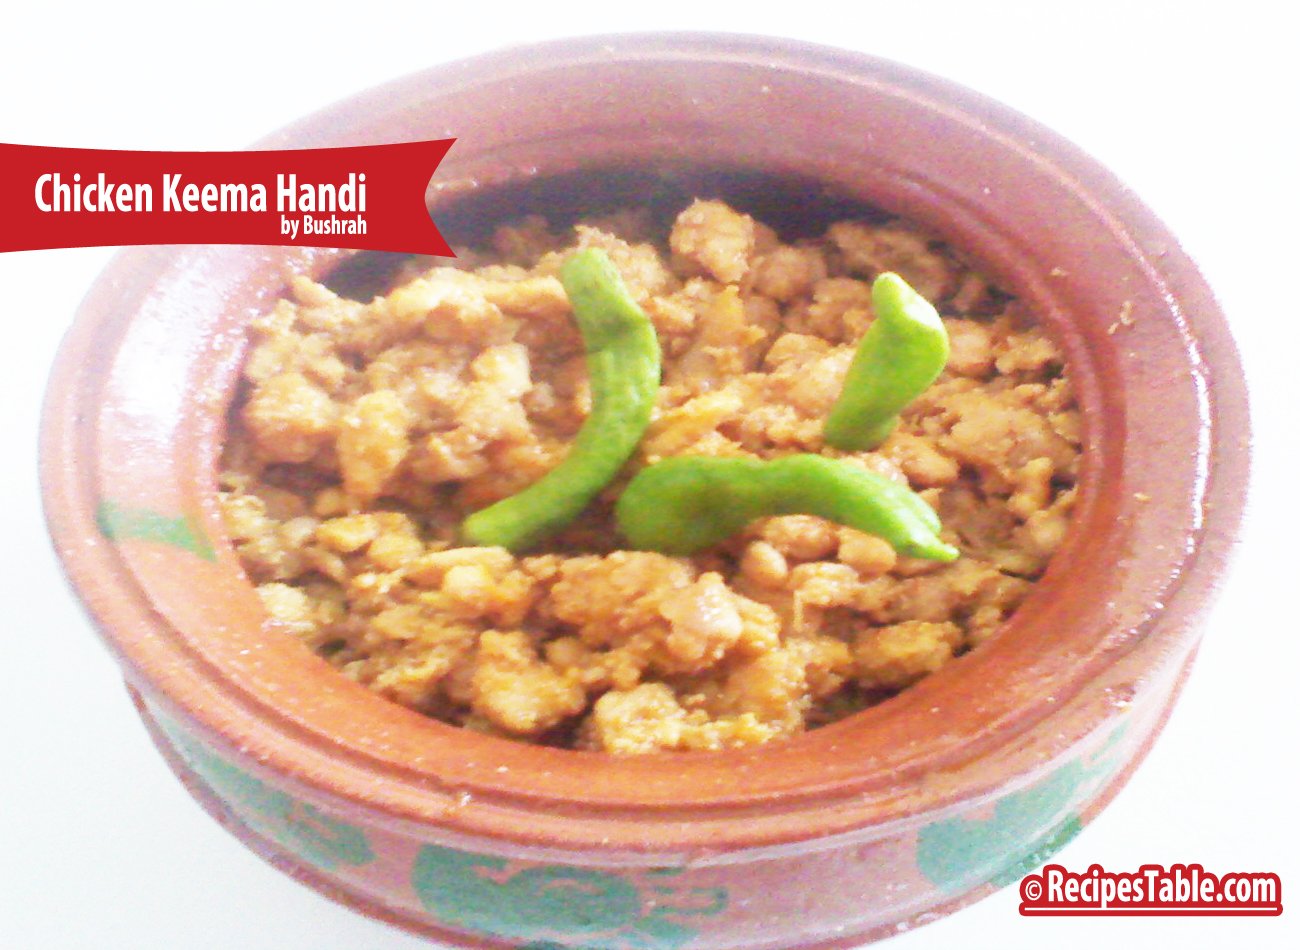
A delicious and simple Chicken Keema Handi Recipe to follow in week days. Chicken Keema Handi is a distinct taste then normal mince cooking.Goes great with Garlic Rice or Chapati.
Photo: Chicken Keema Handi
Check it out the Chicken Keema Handi Recipe here!!
Saute onion in hot oil until they turn to light pink in color.
Add ginger garlic paste and cook for 30 seconds. Now add tomatoes, red chili, coriander powder, cumin powder, turmeric powder and salt.
Cook for 4-5 minutes or until all water dries up.
Now add chicken mince (keema) and cook well for 15-20 minutes or until chicken is no longer pink.
Now add lemon juice and put on dum for 5 minutes or until well done.
Garnish with coriander leaves and green chilies. Chicken Keema Handi is ready to serve. ENJOY!!
Notes
Serve with Garlic Rice or Chapati.
If you like Chicken Keema Handi recipe and make it then let me know your feedback by commenting below.And if you know more innovative ways in which we can utilize this mouth watering Chicken Keema Handi, do share with us and we would be glad to give it a try.
This Jam Filled Butter Cookies Recipe is an easy thumbprint cookie with a fruit jam center. Whip up these simple jam drops in just a few minutes, they make wonderful any-time treats.
Photo: Jam Filled Butter Cookies Recipe
Check it out the Jam Filled Butter Cookies Recipe here!!
Take a bowl, cream together the butter, white sugar and egg yolks.
Stir in the flour a little bit at a time until a soft dough forms.
Roll dough into 1 inch balls or cut with a cookie cutter.
If dough is too soft, refrigerate for 15 to 20 minutes.
Place balls 2 inches apart onto ungreased cookie tray.
Use your finger or an instrument of similar size to make a well in the center of each cookie.
Fill the hole with 1/2 teaspoon of preserves.
Bake in the preheated oven for 8-10 minutes or until golden brown on the bottom.
Remove from cookie sheets to cool on wire racks.
Store in an airtight jar or container. Jam Filled Butter Cookies are ready to serve. ENJOY!
Notes
Serving Suggestions: Serve with Tea.
I have also posted Nankhatai recipewhich are another easiest & tastiest version of making cookies at home. Do check it out as well. It’s finger lickin’ good. You’ll be coming back for more.
Put your own spin on it. And lemme know how it turns out. Post a photo on Facebook (Recipestable) or on Twitter so I can see how lovely yours turn out.
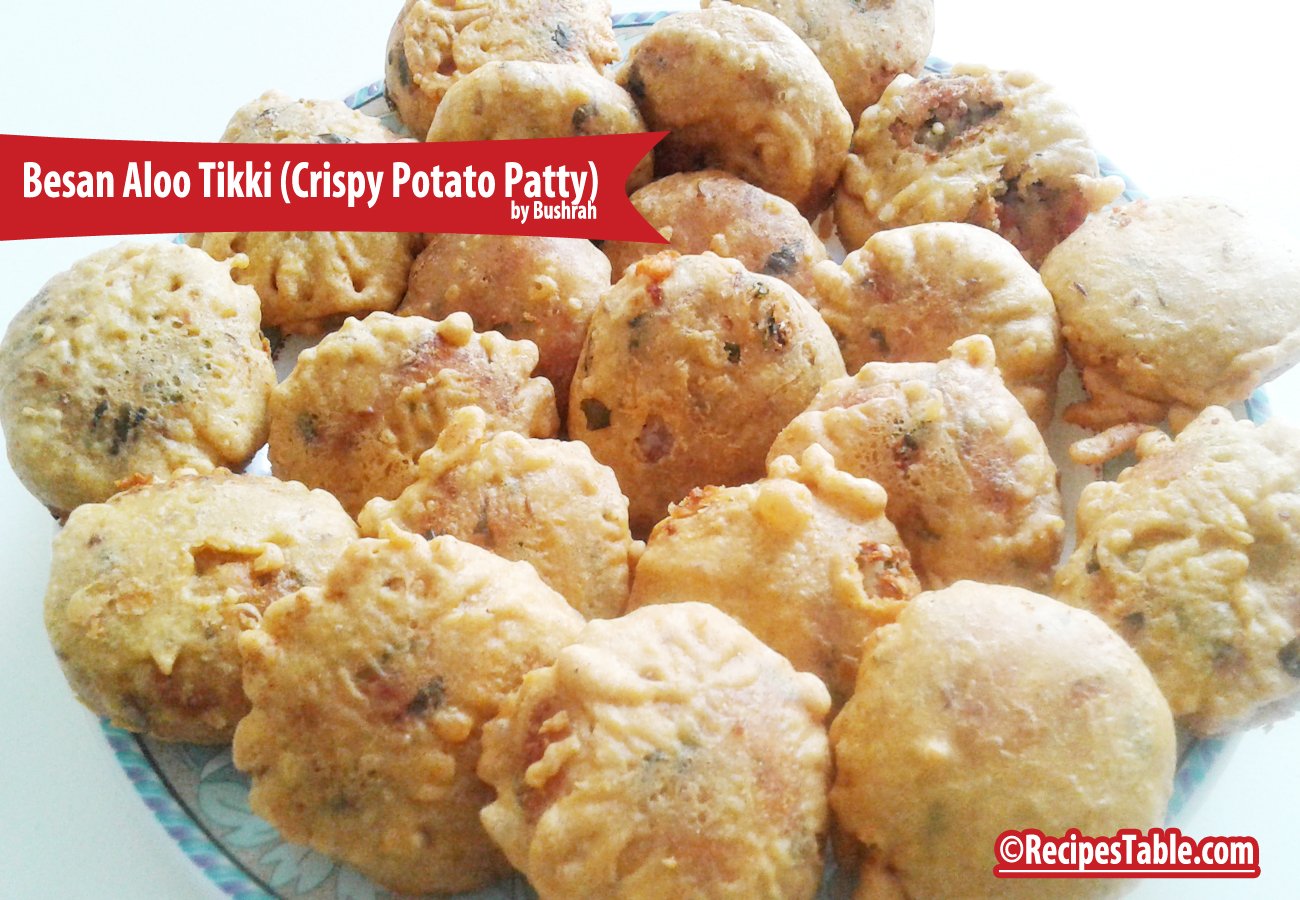
Besan Aloo Tikki with crisp outside soft inside is a real treat to taste buds at anytime. Serve this delicious Besan Aloo Tikki as a starter or can be serve at tea-time with the sauce or chutney of your choice.
Add green chilies, green onion, cumin powder, red chili and salt. Mix until well combined.
Make thick batter with besan and lil water in a separate bowl.
Divide the potato mixture into equal portions.
Shape each portion into round thick cutlet (tikki).
Heat the oil in a deep pan over medium heat.
Dip each cutlet (tikki) in the batter then fry for 5-8 minutes or until it turns to golden brown in colour from both the side.
Remove from the oil and absorbent on kitchen paper. Besan Aloo Tikki is ready to serve. ENJOY!!
Notes
Serve with your favorite chutney.
If you like Besan Aloo Tikki Recipe and make it then let me know your feedback by commenting below.And if you know more innovative ways in which we can utilize this mouth watering Besan Aloo Tikki, do share with us and we would be glad to give it a try.
Are you a Spicy snacks lover? Today I am sharing Stuffed Mirch Pakora Recipe, all time favorites and very easy to make. Start off your meal with this crunchy starter.
Photo: Stuffed Mirch Pakora
You can make these stuffed Mirch Pakoras as a Iftar time snacks in Ramadan, they hardly take around half an hour to prepare and serve .
Photo: Stuffed Mirch Pakora
It is also goes great with hot cup of tea on rainy days. Serve hot with tamarind chutney and green chilli chutney or tomato chutney , or tomato sauces .
Check it out the Stuffed Mirch Pakora Recipe and printable version below!!
Today I am sharing Stuffed Mirch Pakora Recipe, all time favorites and very easy to make. Start off your meal with this crunchy starter.
Prep Time 5 minutesminutes
Cook Time 10 minutesminutes
Total Time 15 minutesminutes
Servings 4
Author Bushrah | Recipestable
Ingredients
8large size green chiliesslit vertically and deseeded.
For Stuffing
2tablespoonmint chutney
2tablespoontamarind pulp
2tablespoonpomegranate seedsAnardana, crushed
1/2teaspoonred chili
1/2teaspooncumin powder
salt to taste
For The Batter
1/2cupchickpea flourbesan
1/2cuprice flour
1/2teaspoonred pepper
1/4teaspooncarom seedsajwain, optional
salt to taste
Other Ingredients
oil for frying
Instructions
Directions
To Make Stuffing
In a bowl, mix together the mint chutney, tamaring pulp, pomegranate seeds, red chili, cumin powder and salt.
Set aside.
To Make Batter
In another small bowl, combine the chickpea flour,rice flour, red pepper, carom seeds and salt.
Add enough water to make a thick batter and set aside.
To Proceed
Divide stuffing into 8 equal portions.
Stuff each chilli with a portion of the stuffing.
Heat oil in a large pan over medium heat.
Dip the stuffed chillies in the flour batter.
Deep fry pakoras in hot oil for 4-5 minutes or until they turn golden brown in colour from all sides.
Drain on absorbent paper. Stuffed Mirch Pakora is ready to serve.
Notes
Serving Suggestions: I served them with mango Chutney to mild the taste.
I have also posted Chips Pakora Recipe which is another easiest version of making tea time snack or lunch box item . Do check it out as well.
[divider]
If you like Stuffed Mirch Pakora Recipe , Please Subscribe to my blog. I have lots more recipes to share with you. And If you make it then let me know your feedback by commenting below.
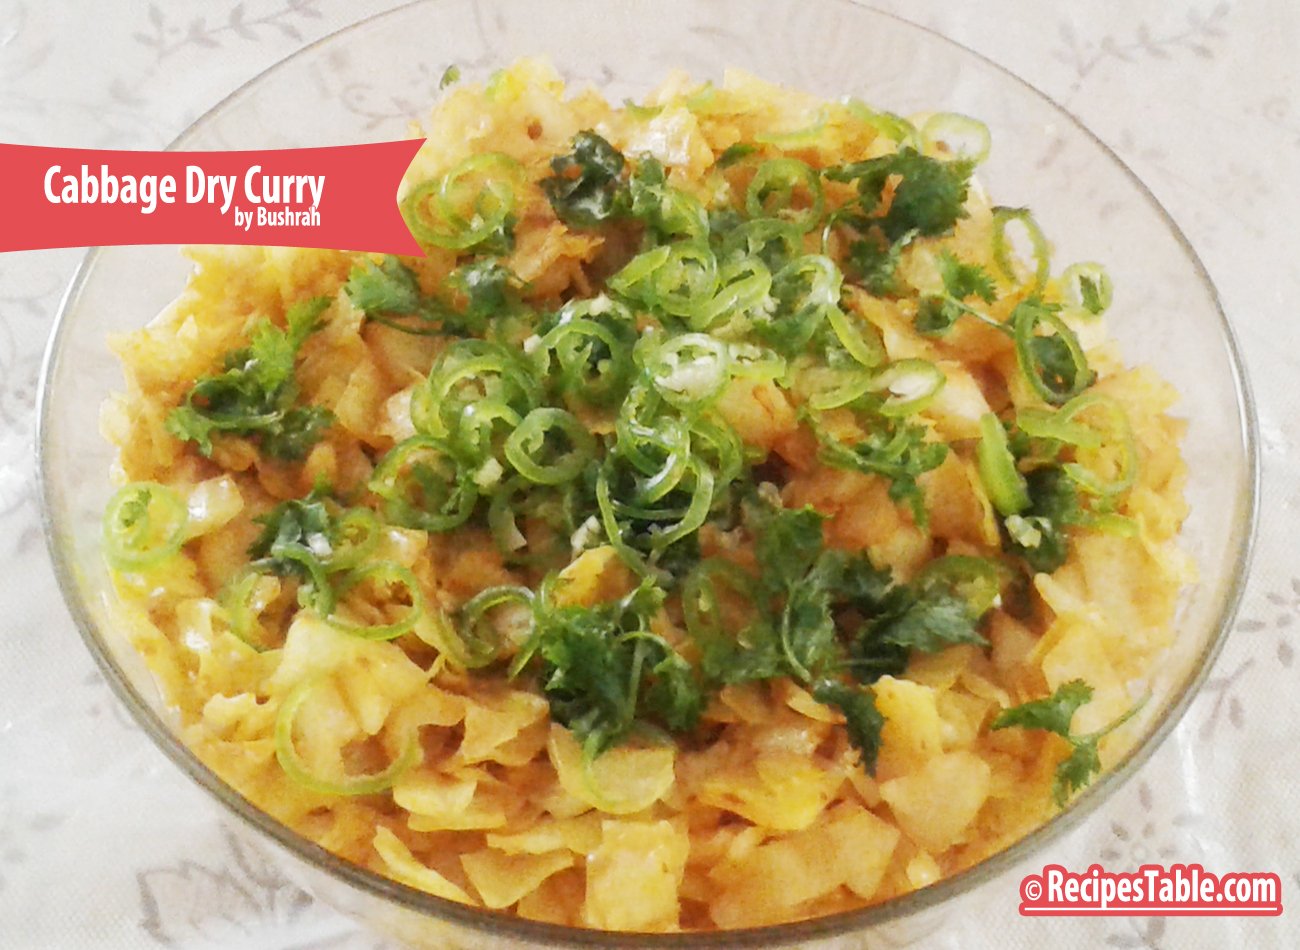
Cabbage is one of my favorite vegetables because it’s super versatile and it will keep for a long time in my crisper. Although cabbage may be good for weight loss because of its high water content, it has many other (more important) advantages, too.
Photo: Cabbage Dry Curry[/caption]
Today, I present to you a Weight watcher’s Recipe with a simple list of ingredients. An easy to make Cabbage Dry Curry recipe, that will not only nourish your body but will also please your palette. Do try it!!
Now add rai, tomatoes, red pepper, cumin powder and salt.
Add a little water and cook for a while.
Now add cabbage. Cover the lid and cook for 10 minutes.
Remove the lid and cook on full heat to dry out the water.
Dish it out. Garnish with green chilies and coriander leaves. Cabbage Dry Curry is ready to serve. ENJOY!!
Notes
The left overs can be used as a filling for a grilled sandwich that will make for a quick lunch box or after school snack for your kid.
Serving Suggestions:Serve with Oats chapati or brown rice.
If you like Cabbage Dry Curry Recipe and make it then let me know your feedback by commenting below.
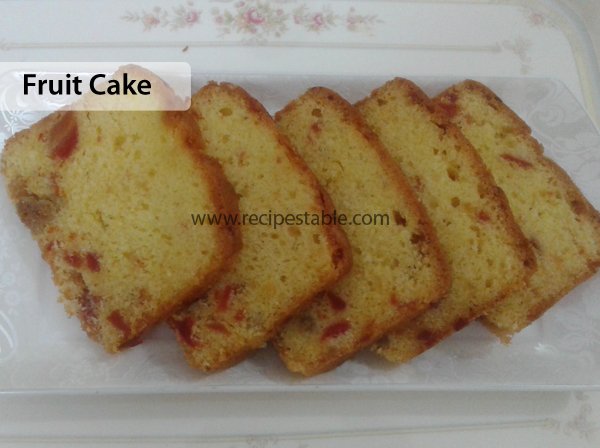
An quick and easy fruit cake recipe for tea time. Best eaten fresh. Enjoy this yummy fruit cake flavored with orange zest, vanilla essence and black currant.
Making Smiley Face Fries at home is not a big deal. You can easily make smiley faces with a knife or a teaspoon or other sharp instrument on them.Do try this Smiley Face Fries Recipe and put a smile on your kid’s face with these fun-shaped potatoes that have a crispy crunchy flavor.
Photo: Smiley Face Fries Recipe
Bismillah, let’s get started!
Check it out the Smiley Face Fries Recipe and printable version below!
Do try this smiley face fries recipe and put a smile on your kid’s face with these fun-shaped potatoes that have a crispy crunchy flavor.
Prep Time 10 minutesminutes
Cook Time 15 minutesminutes
Total Time 25 minutesminutes
Servings 6
Author Bushrah @ Recipestable
Ingredients
6round potatoes
1teaspoonherb seasoning
1teaspoonsalt
1/4teaspoongarlic powder
oil for frying
chaat masala for sprinklingoptional
Instructions
Method
Wash and peel potatoes.
Cut the potatoes in circles, with each circle measuring about 1/4 cm thick.
Make smiles on the potatoes by using the edge of a teaspoon.
Using an ice-pick, bore two holes in the potatoes for the eyes.
Sprinkle the herb seasoning, garlic powder and salt over the potato slices.
Stir to coat evenly.
Leave it for few minutes to blend flavors.
Now heat oil in a pan over medium high heat.
Add potatoes and fry for 10-12 minutes or until crispy and golden brown.
Remove from the oil and drain on kitchen paper.
Sprinkle Chaat masala over it. Smiley Face Fries are ready to serve. ENJOY!!
Notes
Serving Suggestions: Serve with your favorite dipping sauce.
I have also posted Curly Fries Recipewhich is another easiest & tastiest version of making Crispy Fries at home. Do check it out as well. It’s finger lickin’ good. You’ll be coming back for more.
Put your own spin on it. And lemme know how it turns out. Post a photo on Facebook (Recipestable) or on Twitter so I can see how lovely yours turn out.
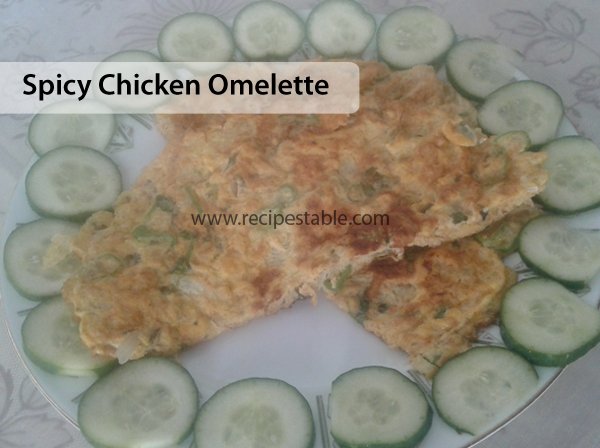
If you’re in a hurry, try this Spicy Chicken Omelette Recipe that can be enjoyed any time of day. Combine chicken and egg for a delightful main dish that’s ready in just 25 minutes!
Perfect for breakfast, lunch or dinner, be creative with you flavor combinations and add tomato, herbs, mushroom, or even olives!
Photo: Spicy Chicken Omelette Recipe
Check it out the Spicy Chicken Omelette Recipe here!!
In a small bowl, whisk together the eggs and milk.
Season with salt and pepper. Mix well.
Melt butter in a non-stick pan over medium heat. Add chicken, green onion and green chili. Cook and stir for 1-2 minutes then pour egg mixture over it.
As eggs set at the edges, with spatula, gently lift cooked portion to allow uncooked egg to flow underneath.
Cook on low flame for 2 minutes or until almost set.
Sprinkle cheese on half of the omelette.
Fold other half over cheese.
Remove from the heat and transfer into a platter.
Cut omelette in half. Spicy Chicken Omelette is ready to serve. ENJOY!!
If you like Spicy Chicken Omelette Recipe and make it then let me know your feedback by commenting below.And if you know more innovative ways in which we can utilize this mouth watering Spicy Chicken Omelette, do share with us and we would be glad to give it a try.
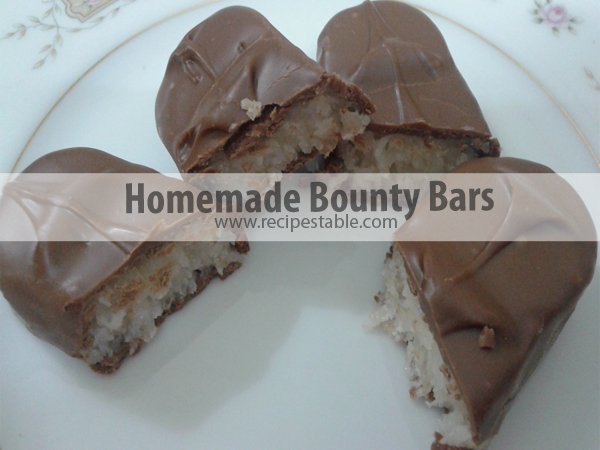
Do you love Chocolate Bars? Have you ever thought of making your own versions at home? Homemade bounty bars are so easy to make – you only need 3 ingredients!
Photo: Homemade Bounty Bars Recipe
So these may not be the best looking bounty bars ever, but they taste just like the real thing! Trust me when I say that it doesn’t matter what they look like. But first of all, if you’ve never had a bounty bar before, they are amazing, especially if you like coconut.
The sweet coconut filling is not as hard to make as you might think, a simple combination of coconut and condensed milk will recreate the filling of the classic chocolate bar.
Photo: Homemade Bounty Bars Recipe
Bounty bars are one of my brother favorite chocolates, so I wanted to surprise him with these. When a friend posted a simple recipe for homemade Bounty bars, I had to try it.They are so easy to make, it literally only takes 30 seconds to mix the ingredients together, and then a few minutes to shape the bars and coat them in chocolate.
When he found them in the fridge and tried them, he had to come and tell me how they tasted just like the real thing. So if a true bounty bar fan can’t tell the difference, well then these must be pretty close to the real thing. Perfect for the holiday season or any occasion!
Check it out the Homemade Chocolate Bars Recipe and printable version below!!
Have you ever thought of making your own versions at home? They are so easy to make – you only need 3 ingredients. Do try my Homemade Bounty Bars Recipe, you’r kids will love it.
Prep Time 50 minutesminutes
Cook Time 2 minutesminutes
Total Time 52 minutesminutes
Servings 12
Author Bushrah | Recipestable
Ingredients
3cupssweetened shredded coconut
3cupsmilk or plain chocolate
1-1/2can condensed milk
Instructions
Directions
Place coconut in a large bowl.
Pour the condensed milk over the coconut and stir until evenly mixed.
Make a thick and sticky paste.
Take handfuls of the coconut mixture and shape into bars.
Arrange on a lined baking tray and put in the refrigerator for 1 hour to firm up.
Meanwhile, melt the chocolate in the microwave.
Let it cool.
Spoon the chocolate over the coconut bars and leave on a wire rack to harden.
Place a plate under the wire rack to catch excess chocolate.
Once a little set, put onto some grease proof paper and place in the fridge to set. Your Homemade Chocolate Bars are ready to enjoy!!
Notes
Notes: You can make them as big or as small as you like. The coconut will not go too firm but it will hold it’s shape.Serving Suggestions: Serve with a glass of milk.
If you like this Homemade Chocolate Bars Recipe,Please Subscribe to my blog. I have lots more recipes to share with you. And If you make it then let me know your feedback by commenting below.
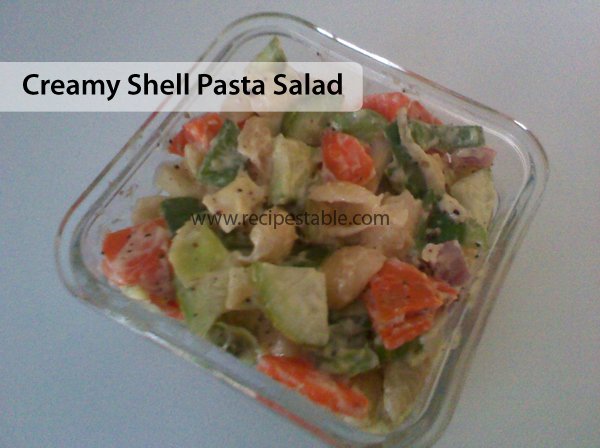
Looking for a Creamy Shell Pasta Salad Recipe? This Creamy Shell Pasta Salad is just the thing for summer. It’s creamy, flavorful and delicious.Hope you try it and love it.
Photo: Creamy Shell Pasta Salad Recipe
Check it out the Creamy Shell Pasta Salad Recipe here!!
Cook pasta according to package directions; drain and rinse in cold water.
Toast carrots and broccoli in a pan for 1-2 minutes.
Remove from the heat and let it cool.
Place pasta, broccoli, carrot, cheese, cucumber, and egg in a large bowl. Mix well.
In a small bowl, whisk the dressing ingredients.
Pour dressing over the salad and toss to coat evenly.
Creamy Shell Pasta Salad is ready to serve. ENJOY!!
If you like Creamy Shell Pasta Salad Recipe and make it then let me know your feedback by commenting below.And if you know more innovative ways in which we can utilize this mouth watering Creamy Shell Pasta Salad, do share with us and we would be glad to give it a try.
I invented this Mango Pineapple Smoothie recipe one day, when I had leftover mangoes and pineapple chunks. A spoonful of pineapple ice cream added the sweetness and special flavor with a tropical flare. You may use frozen pineapple juice ice cubes instead for more of a slush drink.
Do try This Mango Pineapple Smoothie recipe and make the vitamin-rich fruit smoothie for a quick breakfast or an afternoon snack.
Photo: Mango Pineapple Smoothie Recipe
Check it out the Mango Pineapple Smoothie Recipe here!!
Place yogurt, pineapple juice, pineapple chunks mango, milk and Ice cream in a blender. Blend until smooth.
Pour into 4 glasses.
Drizzle with honey. Mango Pineapple Smoothie is ready to drink. ENJOY!! 🙂
Notes
You can add any flavor of ice cream.
Serve Immediately.
If you like Mango Pineapple Smoothie Recipe and make it then let me know your feedback by commenting below.And if you know more innovative ways in which we can utilize this sweet and mouth watering Mango Pineapple Smoothie, do share with us and we would be glad to give it a try.
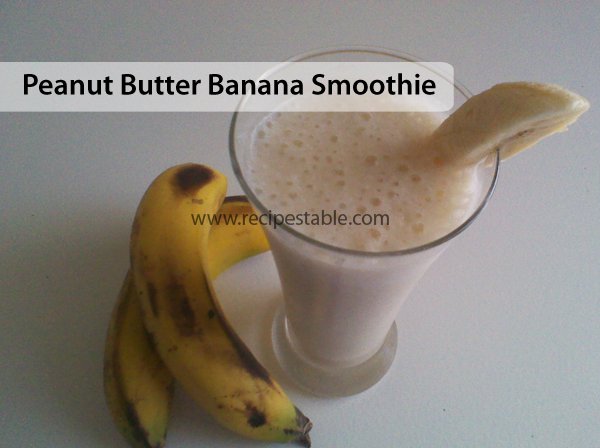
The perfect pair _ Bananas, milk, peanut butter, honey, and ice are all you need to make this filling yet refreshing smoothie. Not only will it taste like a treat but you’ll get a good dose of potassium, protein, and fiber to boot. This Peanut Butter Banana Smoothie Recipe might just become your new favorite breakfast recipe!
Photo: Peanut Butter Banana Smoothie Recipe
Bismillah, let’s get started!
Check it out the Peanut Butter Banana Smoothie Recipe and printable version below.
Not only will it taste like a treat but you’ll get a good dose of potassium, protein, and fiber to boot.This Peanut Butter Banana Smoothie Recipe might just become your new favorite breakfast recipe!
Prep Time 5 minutesminutes
Total Time 5 minutesminutes
Servings 4
Author Bushrah | Recipestable
Ingredients
4bananasbroken into chunks
2cupsmilk
1/2cuppeanut butter
2tbsphoneyor to taste
ice cubes as required
Instructions
Method
Place bananas, milk and peanut butter in a blender jug.
Add honey, and ice cubes.
Process for 30 seconds or until smooth.
Pour into four glasses.
Top each glass with a banana slice.Peanut Butter Banana Smoothie is ready to serve.
Notes
Recipe Note’s: If the smoothies seem too thick, just add another tablespoon or two of milk.Serving Suggestions: Serve with cookies.
I have also posted Mango Lime Smoothie Recipewhich is another easiest & tastiest version of making Smoothie. Do check it out as well.
Put your own spin on it. And lemme know how it turns out. Post a photo on Facebook (Recipestable) or on Twitter so I can see how lovely yours turn out.
If you like this post, Please Subscribe to my blog and let me know your feedback by commenting below.. I have lots more recipes to share with you.
This modern and Buffalo Chicken Cheese Balls Recipe is full of buffalo chicken, Hot Sauce, mozzarella, and cheddar cheese! Great as an appetizer or light lunch.
Among all the chicken favorites Chicken Cheese Balls are not only very easy to cook but also flavorful, moist, cheesy and crunchy at the same time. Be it a casual lunch idea for family or a small home party; Buffalo Chicken Cheese Balls are sure to please your family and guests alike. It also makes a delicious lunch box item for the children. Buffalo chicken cheese balls tastes better if served with Garlic Sauce or Tomato ketchup.
Photo: Buffalo Chicken Cheese Balls Recipe
These Buffalo Chicken Cheese Balls are one of the best foods ever created. They are incredibly easy to make and they taste out of this world delicious! Not to mention my picky eatin.
I didn’t get a very good shot of the buffalo chicken cheese balls.. I was too eager to get on with it and eat them! Some day I’ll learn to be more patient. (InshaAllah) 🙂
Photo: Buffalo Chicken Cheese Balls Recipe
Here is a really simple, quick yet a better recipe to try this weekend.
So let us start!! Ready ??
Check it out the Buffalo Chicken Cheese Balls Recipe and printable version below!!
This modern and Buffalo Chicken Cheese Balls Recipe is full of buffalo chicken, Hot Sauce, mozzarella, and cheddar cheese! Great as an appetizer or light lunch.
Prep Time 15 minutesminutes
Cook Time 5 minutesminutes
Total Time 20 minutesminutes
Servings 9
Author Bushrah | Recipestable
Ingredients
3cupsboiled & shredded chicken
2green onionsfinely chopped
1/2cuphot pepper sauce
1cupCheddar cheesegrated
1cupMozzarella cheese
1cupall-purpose flour
3eggslightly beaten
1cupplain bread crumbs
oil for frying
Instructions
Directions
In a large bowl, mix together the chicken, green onions, Cheddar cheese, Mozarella cheese and hot sauce.
Now shape the mixture into 1.5 inch balls.
Put the flour, eggs and bread crumbs in three separate dishes.
Dip and coat each ball in flour, then egg then bread crumbs.
Place the breaded chicken balls onto a plate while breading the rest; do not stack.
Heat oil in a deep pan over medium heat.
Fry the breaded balls in the hot oil for 1-2 minutes or until lightly browned.
Remove from the oil and drain on kitchen paper.Buffalo Chicken Cheese Balls are ready to serve. ENJOY!!
Notes
Serving Suggestions: Serve with Your Favorite Dipping Sauce.
If you like this Buffalo Chicken Cheese Balls Recipe, Please Subscribe to my blog. I have lots more recipes to share with you. And If you make it then let me know your feedback by commenting below.
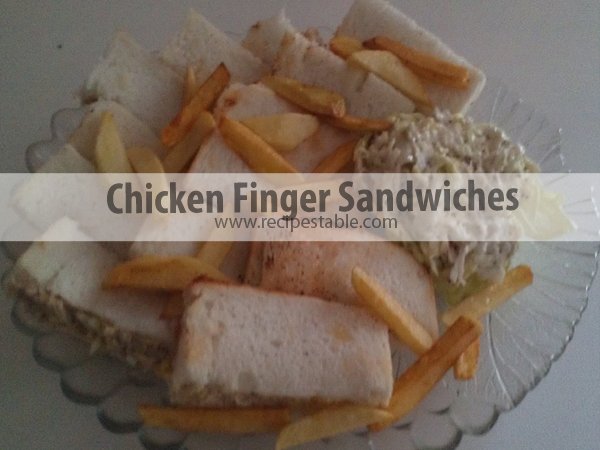
This delicious Chicken Finger Sandwiches recipe is always a favorite sandwich. So easy to make and so delicious. With ketchup and [highlight]herbs seasoning[/highlight] for color and tang, this dressed-up chicken salad is wonderful on bread fingers or served on a lettuce leaf.
Finger sandwiches are the easiest and most requested party food. It’s a lovely way to serve sandwiches and a great way to use up leftover chicken, or great to take as lunch as a normal sandwich. Perfect for afternoon tea.
Photo: Chicken Finger Sandwiches Recipe
The weekend was full of foodie experiences. A few days ago, I decided to do a tea party with a my childhood friend and her child’s and made these as one of the finger foods. They were a HUGE hit with her little girls. They are just so dainty and are perfect for little tea parties (or family gathering, birthdays, .. etc..) plus, they are SUPER easy to make.
The secret of this recipe is fresh herbs. You can make a variety of sandwiches as well, using egg salad, chicken salad, or tuna as layers– just make sure you chop or process the ingredients up enough so it spreads easily.
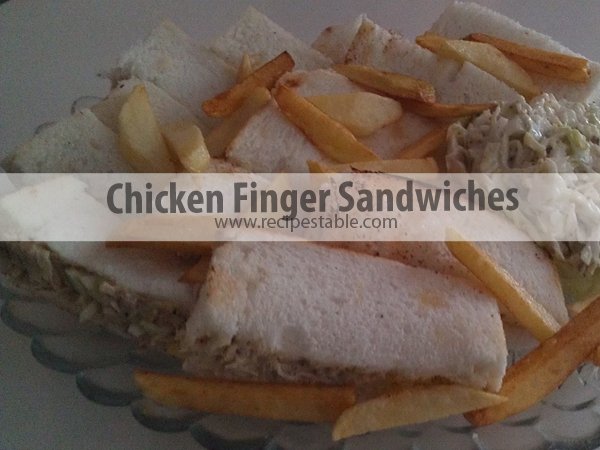
Photo: Chicken Finger Sandwiches Recipe
Note: These can be served immediately but in my opinion they taste best when refrigerated at least 2 hours– they will easily keep if made a day ahead of time.
Check it out the Chicken Finger Sandwiches Recipe and printable version below!!
This delicious Chicken Finger Sandwiches recipe is always a favorite sandwich. It’s a lovely way to serve sandwiches and a great way to use up leftover chicken, or great to take as lunch as a normal sandwich.
Prep Time 15 minutesminutes
Cook Time 5 minutesminutes
Total Time 20 minutesminutes
Servings 6
Author Bushrah | Recipestable
Ingredients
2cupsboiled chickenshredded
1/2cupmayonnaise
1tablespooncream cheese
1tablespoontomato ketchup
1teaspoonfresh herbschopped
1/2teaspoonfreshly ground black pepper
salt according to taste
12sliceswhite breadcrusts removed
butter as required
Instructions
Directions
In a mixing bowl, Combine together the mayonnaise, and cream cheese.
Add shredded chicken and mix well.
Season with herbs, salt and pepper.
Toast bread slices with butter.
Spoon the mixture over half the bread slices and cover with the remaining slices.
Slice each sandwich into thirds to make three fingers.
Transfer into a serving platter. Garnish with lettuce leaves. Chicken Finger Sandwiches are ready to serve. ENJOY!!
Notes
Serving Suggestions: Serve with French Fries, Ketchup and Coleslaw.
If you likethis Chicken Finger Sandwiches Recipe, Please Subscribe to my blog. I have lots more recipes to share with you. And If you make it then let me know your feedback by commenting below.