Tag: Quick and Easy

  • Recipe: Sweet Warqi Roti

    Sweet Warqi Roti

    Punjabi Style  Sweet Warqi Roti _ tasty and yummy. Try this Sweet Warqi Roti recipe. It’s a Lunch box recipe for kids also i am sure your kids will like it!!

    Sweet Warqi Roti recipe
    Photo: Sweet Warqi Roti Recipe

    Check it out the Sweet Warqi Roti Recipe and printable version here!!

    Sweet Warqi Roti Recipe

    Prep Time 30 minutes
    Cook Time 20 minutes
    Total Time 50 minutes
    Servings 4
    Author Bushrah @ Recipestable

    Ingredients

    • 1-1/2 cup plain flour
    • 4 tablespoon caster sugar
    • 4 tablespoon ghee or clarified butter
    • 3 tablespoon cashew nuts
    • 3 tablespoon chopped almonds
    • 1 teaspoon cardamom Powder
    • saffron few strands
    • few silver warq
    • milk for kneading the dough

    Instructions

    Method

    • Sieve flour and add all ingredients except sliver warq.
    • Knead to a fairly soft dough. Keep for 1/2 an hour.
    • Make small balls roll them put ghee and fold it over into a semi circle.
    • Put more ghee over the upper surface and fold.
    • Then fold length wise press it with fingers and roll into a round circle and cook on tawa.
    • Remove cover with warq. Sweet Warqi Roti is ready to serve. Enjoy!

    Notes

    Serving Suggestions:
    Serve with whipped cream, butter or tea.
    Put your own spin on it. And lemme know how it turns out. Post a photo on Facebook (Recipestable) or on Twitter so I can see how lovely yours turn out.


    Happy Cooking!!

  • Authentic Dhaba-Style Chicken Karahi Recipe!

    Dhaba Chicken Karahi

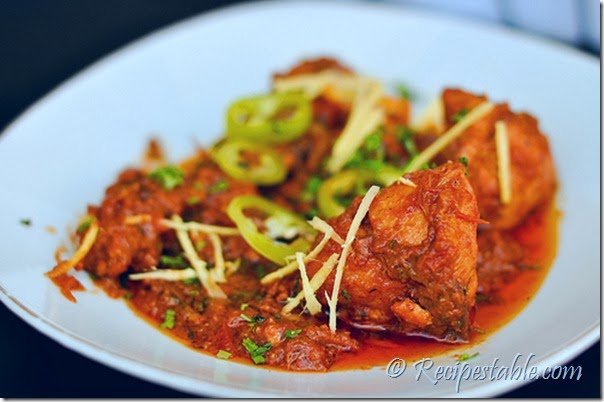
    This version of Chicken Karahi is mostly made at roadside shacks (dhaba) in Pakistan and it is truly yummy. Its unique and really tasty. Make this dish when you are short of curry while having guests at your place. Quick Budget recipe. Try this Dhaba Chicken Karahi Recipe and don’t forget to share your experience with us!!

    Dhaba Chicken Karahi recipe
    Photo: Dhaba Chicken Karahi recipe

    Check it out the Dhaba Chicken Karahi recipe and printable version here!!

    Dhaba Chicken Karahi recipe

    Prep Time 10 minutes
    Cook Time 35 minutes
    Total Time 45 minutes
    Servings 8
    Author Bushrah @ Recipestable

    Ingredients

    • 1-1/2 kg chicken
    • 1 kg tomatoes chopped
    • 1 cup oil or ghee
    • 1 inch piece of ginger thinly sliced
    • 4 green chilies thinly sliced
    • 5 tablespoon ginger garlic water
    • 1 tablespoon lemon juice
    • 1 tablespoon crushed red chillies
    • 1 teaspoon cumin powder
    • 1 teaspoon coriander powder
    • 1 teaspoon black pepper crushed
    • salt to taste

    Instructions

    Method

    • Take a pan and put oil, fry chicken in this oil until turns a reddish colour.
    • Take a wok and put chopped tomatoes with little bit of water and cook until tomato cooks well.
    • When tomatoes are done, put fried chicken along crushed red chillies, salt and ginger garlic water (take a bowl and put roughly chopped ginger garlic and water, and use this water) and fry well.
    • Now add green chillies, ginger, black pepper, cumin seeds and coriander seeds and oil (which we used to fry chicken) and fry well.
    • Then add lemon juice and cook for 5 minutes on very low heat. Dhaba Chicken Karahi is ready to serve.

    Notes

    Serving Suggestions:
    Serve with naan, salad and chutney.
    I have also posted Karahi Butter Chicken (Makhani Karahi) recipe which is another easiest & tastiest version of making Karahi at home. Do check it out as well.  It’s finger lickin’ good. You’ll be coming back for more. 


    Put your own spin on it. And lemme know how it turns out. Post a photo on Facebook (Recipestable) or  on Twitter so I can see how lovely yours turn out.


    Happy Cooking!!

  • Dhaka Karahi Recipe

    Dhaka Karahi 

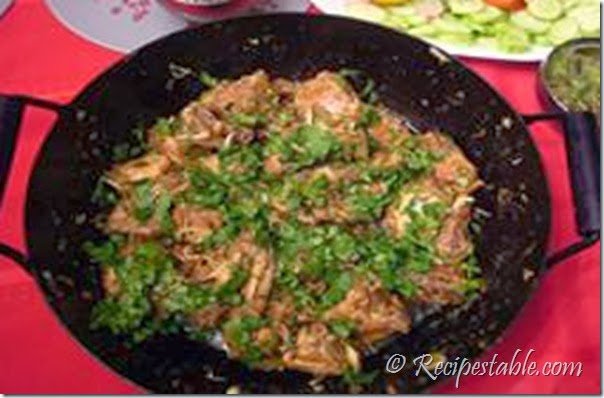
    Like all Dhakan recipes simple ingredients are used. Dhaka chicken karahi does have a distinct and wonderful flavour, Crushed spices are used instead of powder and tomatoes, green chillies are added towards the end, that are soft yet whole. Enjoy it with naan, chapatti or rice. Try this Dhaka Karahi Recipe nd don’t forget to share your experience with us !!

    Dhaka Karahi Recipe by Chef Zakir
    Photo: Dhaka Karahi Recipe

    [one_fourth]Prep Time: 10 minutes[/one_fourth] [one_fourth]Cook Time: 25 minutes[/one_fourth] [one_fourth]Servings: 6[/one_fourth] [one_fourth_last]Difficulty Level: Easy[/one_fourth_last]

    Ingredients


    • 1 kg chicken, cut into small pieces
    • 1/2 cup oil
    • 1 cup water
    • 2 onions, finely chopped
    • 1-1/2 tbsp garlic paste
    • 1-1/2 tbsp ginger paste
    • 4 tomatoes, finely chopped
    • 1 tsp hot spices powder
    • 2 tbsp red chili flakes
    • 1 tbsp crushed coriander
    • 1 tbsp crushed cumin
    • salt to taste

    For Garnishing:

    • 1 medium piece of ginger, thinly sliced
    • 5 green chilies, thinly sliced
    • 1/4 bunch fresh coriander, finely chopped


    Directions:

    1. Heat oil in a deep pan or Karahi.
    2. Add ginger garlic paste in it.
    3. Cook for 1 minute then put chicken in it.
    4. Cook for5-8 minutes or until no longer pink.
    5. Then add crushed cumin,crushed coriander, red chili flakes and salt.
    6. Reduce heat to low and let it simmer to 10 minutes.
    7. Then add sliced ginger, onions and tomatoes.
    8. Stir together.
    9. Cook for 10 minutes or until all vegetables are tender.
    10. Sprinkle hot spices powder over it.
    11. Garnish with green chilies and coriander leaves.
    12. Dhaka Karahi is ready to serve.
    13. Serve with naan, chapati or rice.
  • Cabbage Paratha Recipe

    Cabbage Paratha Recipe

    Cabbage Paratha

    A simple paratha recipe with grated cabbage as stuffing. It is an easy to prepare cabbage paratha recipe. It is so versatile and healthy that it can be served in breakfast, lunch or dinner. The additional benefit of green vegetable in a discreet way makes it ideal to be served to kids who are fussy about veggies in curries and dals. Try this Cabbage Paratha recipe, it’s perfect for a lazy dinner night!

    Cabbage Paratha Recipe
    Photo: Cabbage Paratha Recipe

    [divider]

    [one_fourth]Prep Time: 25 minutes[/one_fourth] [one_fourth]Cook Time: 20 minutes[/one_fourth] [one_fourth]Servings: 5[/one_fourth] [one_fourth_last]Difficulty Level: Medium[/one_fourth_last]

    [divider]

    [tabs type=”horizontal”] [tabs_head] [tab_title]Ingredients[/tab_title] [tab_title]Nutrition[/tab_title] [/tabs_head] [tab]

    • 4 cups whole wheat flour
    • 250 gm cabbage
    • 2 green chilies, finely chopped
    • 2 tablespoon ghee or clarified butter
    • 2 tablespoon coriander leaves
    • 1 teaspoon cumin seeds
    • 1 teaspoon red pepper
    • 1/2 teaspoon garam masala powder
    • salt to taste

    [/tab] [tab]Yield: 5 servings

    Nutritional information is not yet available. [/tab] [/tabs]

    Directions:
    [tabs type=”horizontal”] [tabs_head] [tab_title]Step by Step Method[/tab_title] [tab_title]Serving Suggestions[/tab_title][/tabs_head] [tab]

    Step 1

    Shred the cabbage finely.

    Step 2

    Put it in a large bowl, sprinkle some salt over it and keep aside.

    Step 3

    Chop chillies and coriander very fine and add to cabbage.

    Step 4

    Put garam masala, red pepper, cumin seeds, wheat flour, add little water and knead well.

    Step 5

    Heat a griddle (tawa), roll out paratha of kneaded flour, use ghee for roasting. Roast well. Cabbage Paratha is ready to serve.

    [/tab] [tab]

    • This cabbage paratha is best enjoyed with a bowl of plain yogurt.
    • You can also serve with pickles, dals etc.

    [/tab] [/tabs]

    If you like Cabbage Paratha  recipe and make it then let me know your feedback by commenting below.

  • A Veggie Lover’s Dream: Easy and Flavorful Karahi Bhindi Recipe!

     Karahi Bhindi

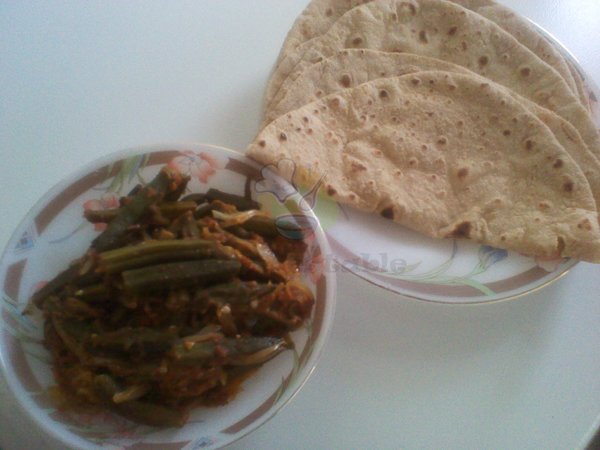
     Karahi Bhindi  is a tangy and delicious recipe made of ladyfinger and a blend of other Indian spices. It is a great recipe for vegetarians. If prepared correctly with patience, this vegetable gives a delightful taste. Try this Karahi Bhindi Recipe, hope you’ll love it.

    karahi bhindi recipe
    Photo: karahi bhindi recipe

    [divider]

    [one_fourth]Prep Time: 15 minutes[/one_fourth] [one_fourth]Cook Time: 30 minutes[/one_fourth] [one_fourth]Servings: 5[/one_fourth] [one_fourth_last]Difficulty Level: Easy [/one_fourth_last]

    [divider]

    [tabs type=”horizontal”] [tabs_head] [tab_title]Ingredients[/tab_title] [tab_title]Nutrition[/tab_title] [/tabs_head] [tab]

    • 500 gm Lady finger,washed and pat dry
    • 2 onion, thinly sliced
    • 2 tomato, finely chopped
    • 2 green Chilies, thinly sliced
    • 1 teaspoon red chili powder
    • 1 teaspoon cumin powder
    • 1/2 teaspoon dried mango powder
    • 1/2 teaspoon coriander powder
    • 1/2 teaspoon garam masala powder
    • 1/4 teaspoon turmeric powder
    • few coriander leaves, finely chopped
    • salt to taste
    • Vegetable oil as required

    [/tab] [tab]Yield: 5 servings

    Nutritional information is not yet available. [/tab] [/tabs]

    Directions:
    [tabs type=”horizontal”] [tabs_head] [tab_title]Step by Step Method[/tab_title] [tab_title]Serving Suggestions[/tab_title][/tabs_head] [tab]

    Step 1

    Slit lady finger into thin slices.

    Step 2

    Take a karahi with oil and heat it. Fry ladyfinger slices until they turn crispy and golden brown.

    Step 3

    Keep fried ladyfinger separate.

    Step 4

    Leave about 2 tbsp oil in karahi and drain the rest.

    Step 5

    Add cumin seeds and green chillies and fry for about 30 seconds.

    Step 6

    Add onion slices and chopped tomato, fry again until light brown.

    Step 7

    Add mango powder, red chili, gram flour and fry for 3 to 4 minutes.

    Step 8

    Now add fried ladyfinger and remaining ingredients. Mix them properly.

    Step 9

    Heat for few seconds and remove from the flame.

    Step 10

    Garnished with chopped coriander leaves. Karahi Bhindi is ready to serve.

    [/tab] [tab]

    • Serve with chapati.

    [/tab] [/tabs]

    If you like Karahi Bhindi Recipe  and make it then let me know your feedback by commenting below.

  • Mixed Vegetable Bread Rolls Recipe

    Mixed Vegetable Bread Rolls

    Try this Mixed Vegetable Bread Rolls Recipe and enjoy it as an evening snack. It can be prepared on birthday parties, Ramadan.

    Mixed Vegetable Bread Rolls Recipe
    Photo: Mixed Vegetable Bread Rolls Recipe

    Check it out the Mixed Vegetable Bread Rolls Recipe here!!

    [divider]

    [one_fourth]Prep Time:30 minutes[/one_fourth] [one_fourth]Cook Time:10 minutes[/one_fourth] [one_fourth]Servings: 6[/one_fourth] [one_fourth_last]Difficulty Level: Easy[/one_fourth_last]

    [divider]

    [tabs type=”horizontal”] [tabs_head] [tab_title]Ingredients[/tab_title] [tab_title]Nutrition[/tab_title] [/tabs_head] [tab]

    • 6 Bread Slices
    • 1 Potato
    • 1 Carrot
    • 4 tbsp Fresh Peas
    • 2 Green Chillies
    • 1/4 tsp Ginger-Garlic Paste
    • 1/2 tsp Garam Masala
    • Cilantro few Sprigs
    • Salt to taste
    • 2 tbsp Bread Crumbs
    • Oil for Deep Frying

    [/tab] [tab]Yield: 6 servings

    Nutritional information is not yet available. [/tab] [/tabs]

    Directions:
    [tabs type=”horizontal”] [tabs_head] [tab_title]Step by Step Method[/tab_title] [tab_title]Serving Suggestions[/tab_title][/tabs_head] [tab]

    Step 1

    Peel and finely chop the carrot.

    Step 2

    Remove stems, wash and finely chop the green chiles.

    Step 3

    Wash, separate cilantro leaves and finely chop them.

    Step 4

    Boil the potato in enough water till it turns soft.

    Step 5

    Cool the potato to room temperature and peel the potato.

    Step 6

    Roughly chop the boiled potato.

    Step 7

    In a sauce pot, add half a cup of water and chopped carrot.

    Step 8

    Boil till the carrot turns soft, add the frozen or fresh green peas and remove from heat.

    Step 9

    Strain the carrots and peas if necessary and cool them to room temperature.

    Step 10

    Heat quarter tsp of oil in a pan, add ginger garlic paste and green chilies.

    Step 11

    When raw smell of the ginger garlic paste is gone after a few seconds, remove from heat, cool the mixture a bit and add garam masala to the pot.

    Step 12

    In a mixing bowl, add boiled potato, carrot, peas, above spice mixture, cilantro and salt.

    Step 13

    Mash the mixture with help of a masher into paste.

    Step 14

    Leave some of the peas and carrots pieces intact.

    Step 15

    Divide the mixture into around 5 equal portions.

    Step 16

    Take a wide bowl full of water.

    Step 17

    Chop the edges off of the bread slices.

    Step 18

    Damp a muslin cloth and cover one bread slice at a time with the cloth.

    Step 19

    Dip the covered bread slice in the water for a second and remove.

    Step 20

    Squeeze the bread slice wrapped in muslin clothe between the palms to remove excess water.

    Step 21

    Take each portion of the mixed vegetable stuffing and place it on the damp bread slice.

    Step 22

    Roll one side of the damp bread slice over the stuffing till it touches the opposite side and pinch with wet fingers to seal the edges.

    Step 23

    Repeat the same with remaining bread slices and the stuffing.

    Step 24

    Roll each stuffed bread roll in bread crumbs and keep aside.

    Step 25

    Heat oil in a small pan on medium heat, slowly place the stuffed bread rolls into hot oil.

    Step 26

    Fry the bread rolls on both sides till they turn dark golden brown in color.

    Step 27

    Remove the bread rolls onto absorbent paper. Mixed Vegetable Bread rolls are ready to serve.

    [/tab] [tab]

    • Serve with chili sauce or ketchup.

    [/tab] [/tabs]
    If you like Mixed Vegetable Bread Rolls Recipe and make it then let me know your feedback by commenting below.And if you know more innovative ways in which we can utilize this mouth watering Mixed Vegetable Bread Rolls, do share with us and we would be glad to give it a try.

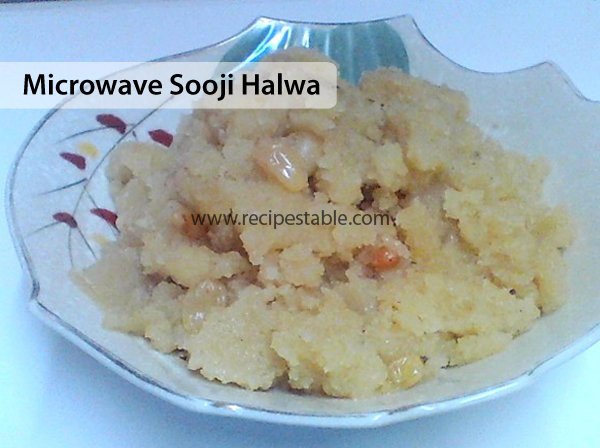
  • The Perfect Dessert in Minutes: Easy Microwave Sooji Halwa Recipe!

    Microwave Sooji Halwa

    A traditional dessert made instantly in the microwave. When comes to making dessert, Microwave makes it more simpler and delivers a great outcome.

    Today’s recipe for Sooji ka Halwa is very easy to make and a huge favorite among all. Try this Microwave Sooji Halwa Recipe, hope you’ll like it.

    Microwave Sooji Halwa Recipe
    Photo: Microwave Sooji Halwa Recipe

    Check it out the  Microwave Sooji Halwa Recipe here!!

    [divider]

    [one_fourth]Prep Time: 5 minutes[/one_fourth] [one_fourth]Cook Time: 10 minutes[/one_fourth] [one_fourth]Servings: 6 [/one_fourth] [one_fourth_last]Difficulty Level: Easy[/one_fourth_last]

    [divider]

    [tabs type=”horizontal”] [tabs_head] [tab_title]Ingredients[/tab_title] [tab_title]Nutrition[/tab_title] [/tabs_head] [tab]

    • 1-1/2 cup milk
    • 1 cup sooji or semolina – roasted
    • 1 cup sugar
    • 1/2 cup ghee , clarified butter
    • 1/4 tsp green cardamom powder
    • Nuts like cashew nuts and raisins- to garnish

    [/tab] [tab]Yield: 6 servings

    Nutritional information is not yet available. [/tab] [/tabs]

    Directions:
    [tabs type=”horizontal”] [tabs_head] [tab_title]Step by Step Method[/tab_title] [tab_title]Serving Suggestions[/tab_title][/tabs_head] [tab]

    Step 1

    Take a microwave safe bowl and place sooji and ghee in it. Cook on High for 2 minutes.

    Step 2

    Add milk, sugar and cardamom powder and mix. Cook covered on micro High for 3 minutes.

    Step 3

    Let it stand for a minute.

    Step 4

    Garnish with cashew nuts and raisins. Microwave Sooji Halwa is ready to serve.

    [/tab] [tab]

    • Serve hot as a dessert after meal.

    [/tab] [/tabs]

    If you like Microwave Sooji Halwa Recipe and make it then let me know your feedback by commenting below.And if you know more innovative ways in which we can utilize this sweet and mouth watering Microwave Sooji Halwa, do share with us and we would be glad to give it a try.

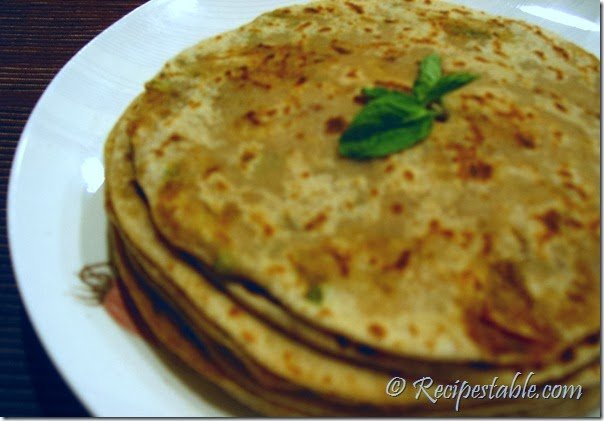
  • Potato Cumin Paratha Recipe

    Potato Cumin Paratha

    Potato Paratha,all time favorite and popular paratha. Yes, this one has cumin in it. This Potato Cumin Paratha taste delicious with fresh, thick cream or a knob of unsalted, home-made butter. Check it out the Potato Cumin Paratha recipe!!

    Potato Cumin Paratha recipe
    Photo: Potato Cumin Paratha Recipe

    [divider]

    [one_fourth]Prep Time: 30 minutes[/one_fourth] [one_fourth]Cook Time: 20 minutes[/one_fourth] [one_fourth]Servings: 4 [/one_fourth] [one_fourth_last]Difficulty Level: Medium[/one_fourth_last]

    [divider]

    [tabs type=”horizontal”] [tabs_head] [tab_title]Ingredients[/tab_title] [tab_title]Nutrition[/tab_title] [/tabs_head] [tab]

    For Paratha:

    • 2 cups wheat flour
    • 2 tablespoon oil
    • 1/2 teaspoon salt
    • warm water (to prepare dough)
    • Ghee or butter for frying

    For Paratha Filling:

    • 2 boiled potatoes, mashed
    • 4 green chilies, finely chopped
    • 4 tablespoon chopped coriander
    • 4 tablespoon cumin seeds, roasted
    • 1 tablespoon lemon juice
    • 1/2 teaspoon salt
    • 1/2 teaspoon red pepper flakes

    [/tab] [tab]Yield: 4 servings

    Nutritional information is not yet available. [/tab] [/tabs]

    Directions:
    [tabs type=”horizontal”] [tabs_head] [tab_title]Step by Step Method[/tab_title] [tab_title]Serving Suggestions[/tab_title][/tabs_head] [tab]

    Step 1

    Mix all the ingredients of filling in a bowl, expect cumin seeds.

    Step 2

    Take another bowl and mix flour, salt, sugar and oil. Then add water and knead the dough for 6-8 minutes.

    Step 3

    When it get smooth stop and cover it with a damp cloth for 30 minutes.

    Step 4

    After that make small balls from the dough.

    Step 5

    Take a wheat dough ball, flatten it with your palm.

    Step 6

    Fill it with 3 tbsp filling and close it again. Now dust it with cumin seeds from both sides.

    Step 7

    Flatten it in a round disk of 5 inch.

    Step 8

    Heat up the griddle (tava) and gently place the rolled out paratha over it.

    Step 9

    Cook it from one side for 4-5 minutes over medium flame. Then add ghee over it and fry it from both sides until pink.

    Step 10

    So make all parathas with same procedure. Potato Cumin Paratha is ready to serve.

    [/tab] [tab]

    • Serve with cumin yogurt sauce.

    [/tab] [/tabs]

    If you like Potato Cumin Paratha recipe and make it then let me know your feedback by commenting below.

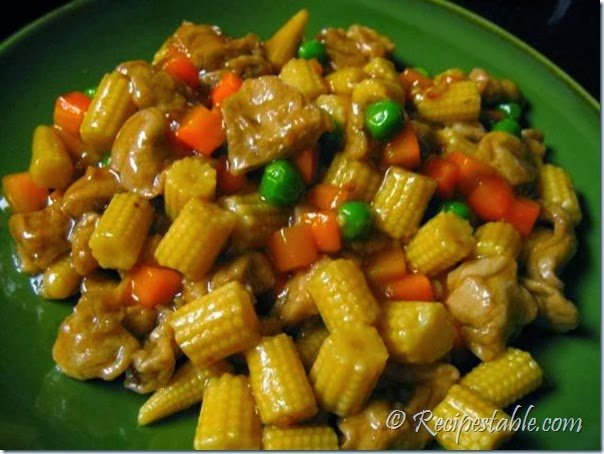
  • Baby Corn Masala Recipe

    Baby Corn Masala

    An unique combination of baby corn with delectable spicy flavours.  This Baby corn masala is a tasty vegetarian dish. Baby Corn Masala is very yummy and does not require much time to get cooked. The foodies will surely love it. Definitely worth to try this simple but tasty recipe.
    Try this baby corn masala recipe, a rich peanut based delicious gravy, perfect for roti, chapati and pulao. ..!!

    Baby Corn Masala recipe
    Photo: Baby Corn Masala Recipe

    [divider]

    [one_fourth]Prep Time:10 minutes[/one_fourth] [one_fourth]Cook Time: 35[/one_fourth] [one_fourth]Servings: 5 [/one_fourth] [one_fourth_last]Difficulty Level: Easy [/one_fourth_last]

    [divider]

    [tabs type=”horizontal”] [tabs_head] [tab_title]Ingredients[/tab_title] [tab_title]Nutrition[/tab_title] [/tabs_head] [tab]

    • 500 gm Baby Corn, peeled
    • 4 cups Water
    • 1 Onion,finely chopped
    • 2 tomatoes,finely chopped
    • 1 tsp red chili powder
    • 1/4 tsp turmeric powder
    • 1/2 tsp cumin seeds
    • 1/2 tsp fenugreek seeds
    • 1/2 tsp onion seeds
    • 1/2 tsp mustard seeds
    • 1/2 tsp aniseed
    • 4 tbsp vegetable oil
    • 1/4 cup fresh coriander Leaves,finely chopped
    • 1 cup peanuts,roasted & ground
    • salt to taste

    [/tab] [tab]Yield: 5 servings

    Nutritional information is not yet available. [/tab] [/tabs]

    Directions:
    [tabs type=”horizontal”] [tabs_head] [tab_title]Step by Step Method[/tab_title] [tab_title]Serving Suggestions[/tab_title][/tabs_head] [tab]

    Step 1

    Place baby corn in a bowl and Cut into 1-inch pieces.

    Step 2

    In a pressure cooker, put baby corn along with salt, water and turmeric powder. Cook for 10 minutes or until soft and tender.

    Step 3

    Remove from the heat and set aside.

    Step 4

    Heat 4 tbsp oil in a deep skillet or wok over high heat.

    Step 5

    Add cumin seeds, onion seeds, aniseed, fenugreek seeds and mustard seeds in it.

    Step 6

    Fry for 1` minute or until seeds start to crackle.

    Step 7

    Add chopped onion; cook and saute for 3-4 minutes or until raw smell of onions goes out.

    Step 8

    Then add chopped tomato and cook for 2 minutes. Season with salt and red chili. Cook for 2 more minutes.

    Step 9

    Put cooked baby corn and remaining water in it.

    Step 10

    Sprinkle fresh coriander leaves over it. Baby Corn Masala is ready to serve.

    [/tab] [tab]

    • Serve hot with roti.

    [/tab] [/tabs]

    If you like baby corn masala recipe and make it then let me know your feedback by commenting below.

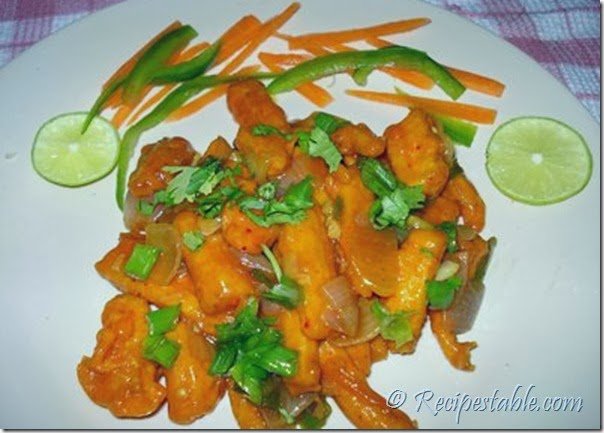
  • Skip the Takeout: Easy & Delicious Baby Corn Manchurian Recipe!

    Baby Corn Manchurian

    This is a crispy, crunchy and a dry version of baby corn Manchurian.  Glossy, juicy baby corn Manchurian recipe, perfect for fried rice and as a starter. Try this Baby Corn Manchurian recipe and don’t forget to share your experience with us!!

    Baby Corn Manchurian recipe
    Photo: Baby Corn Manchurian Recipe

    [divider]

    [one_fourth]Prep Time: 10 minutes[/one_fourth] [one_fourth]Cook Time: 30 minutes[/one_fourth] [one_fourth]Servings: 5[/one_fourth] [one_fourth_last]Difficulty Level: Easy [/one_fourth_last]

    [divider]

    [tabs type=”horizontal”] [tabs_head] [tab_title]Ingredients[/tab_title] [tab_title]Nutrition[/tab_title] [/tabs_head] [tab]

    • 20 Baby corn
    • 2 onions, finely chopped
    • 2 cloves garlic, finely chopped
    • 4 green chilies, finely chopped
    • 1/2 cup corn flour
    • 1/4 rice flour
    • 1/4 cup tomato sauce
    • 2 tablespoon cashew peanut powder
    • 2 tablespoon chopped green onion
    • 2 teaspoon ginger garlic paste
    • 2 teaspoon chili garlic sauce
    • 1 teaspoon soy sauce
    • oil for deep frying
    • salt to taste

    [/tab] [tab]Yield: 5 servings Nutritional information is not yet available. [/tab] [/tabs]

    Directions:
    [tabs type=”horizontal”] [tabs_head] [tab_title]Step by Step Method[/tab_title] [tab_title]Serving Suggestions[/tab_title][/tabs_head] [tab]

    Step 1

    Boil baby corns in a little salty water.

    Step 2

    Take a bowl and mix corn flour, rice flour, tomato sauce, ginger-garlic paste, a little salt and the parboiled baby corns.

    Step 3

    Pour oil in a pan and heat it. Now fry the baby corns.

    Step 4

    Remove them from the pan and drain out excess oil on clean paper towels.

    Step 5

    Pour 3 tbsp oil in a pan and heat it. Add onions, green chillies and garlic, saute until golden brown.

    Step 6

    Add the deep-fried baby corns, soya sauce, tomato sauce, chilli-garlic sauce and salt to it.

    Step 7

    Fry for about 10 minutes over medium heat. Baby Corn Manchurian is ready to serve.

    [/tab] [tab]

    [/tab] [/tabs]

    If you like Baby Corn Manchurian recipe and make it then let me know your feedback by commenting below.

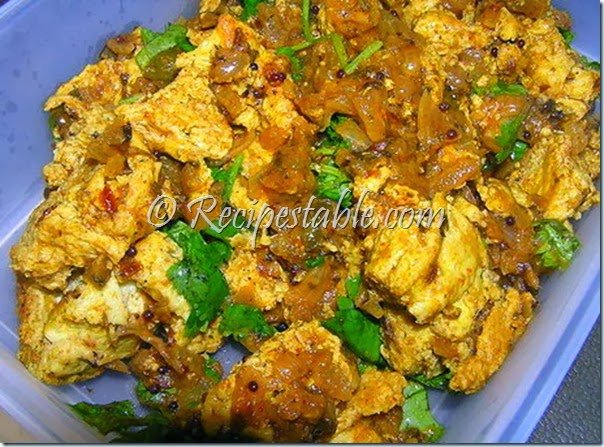
  • Steamed Egg Cubes Curry Recipe

    If you are bored eating regular style of egg curries and looking for a variation, you should definitely try this out. Usually we use boiled eggs in egg curries. But in this Steamed Egg Cubes Curry recipe, we steam the eggs initially and then we cut the steamed eggs into small cubes.

    If you like this Steamed Egg Cubes Curry recipe and make it then let me know your feedback by commenting below.

    Steamed Egg Cubes Curry Recipe
    Photo: Steamed Egg Cubes Curry Recipe

    [divider]

    [one_fourth]Prep Time: 10 minutes[/one_fourth] [one_fourth]Cook Time: 30 minutes[/one_fourth] [one_fourth]Servings: 2[/one_fourth] [one_fourth_last]Difficulty Level: Easy [/one_fourth_last]

    [divider]

    [tabs type=”horizontal”] [tabs_head] [tab_title]Ingredients[/tab_title] [tab_title]Nutrition[/tab_title] [/tabs_head] [tab]

    • 4 eggs, lightly beaten
    • 1 onion, chopped
    • 3 green chilies, chopped
    • 1 teaspoon ginger garlic paste
    • 1 teaspoon red chili powder
    • 1 teaspoon coriander powder
    • 1/2 teaspoon cumin and mustard seeds
    • 1/4 teaspoon garam masla powder
    • a pinch of turmeric powder
    • 2 tablespoon chopped fresh coriander
    • 2 tablespoon cooking oil
    • salt to taste

    [/tab] [tab]Yield: 2 servings

    Nutritional information is not yet available. [/tab] [/tabs]

    Directions:
    [tabs type=”horizontal”] [tabs_head] [tab_title]Step by Step Method[/tab_title] [tab_title]Serving Suggestions[/tab_title][/tabs_head] [tab]

    Step 1

    Take a bowl and spray little oil and pour beaten eggs. Add little salt and mix well.

    Step 2

    Take a pressure cooker and pour half cup of water.

    Step 3

    Keep the bowl in the cooker and close the lid. Do not put the whistle.
    Let it steam for 15 minutes.

    Step 4

    Meanwhile, heat oil in a saucepan over medium heat. Add cumin seeds and mustard seeds.

    Step 5

    Fry for few seconds and then add finely chopped onion and green chilies.

    Step 6

    After few minutes add turmeric powder, ginger garlic paste and salt.

    Step 7

    Fry until the onions are gold brown and then add red chili powder, coriander powder and garam masala powder. Mix well and cook for few more minutes.

    Step 8

    Now take the bowl out of cooker and cut the eggs into small cubes. Add them to the onion mixture and mix well.

    Step 9

    Now add one cup of water, cover with a lid and cook on a low flame for about 5 minutes.

    Step 10

    Once all the water is absorbed, turn off the heat. Garnish with fresh coriander leaves. Steamed Egg Cubes Curry is ready to serve.

    [/tab] [tab]

    • Serve with paratha.

    [/tab] [/tabs]

  • Nankhatai Recipe (Eggless Buttery Cookies)

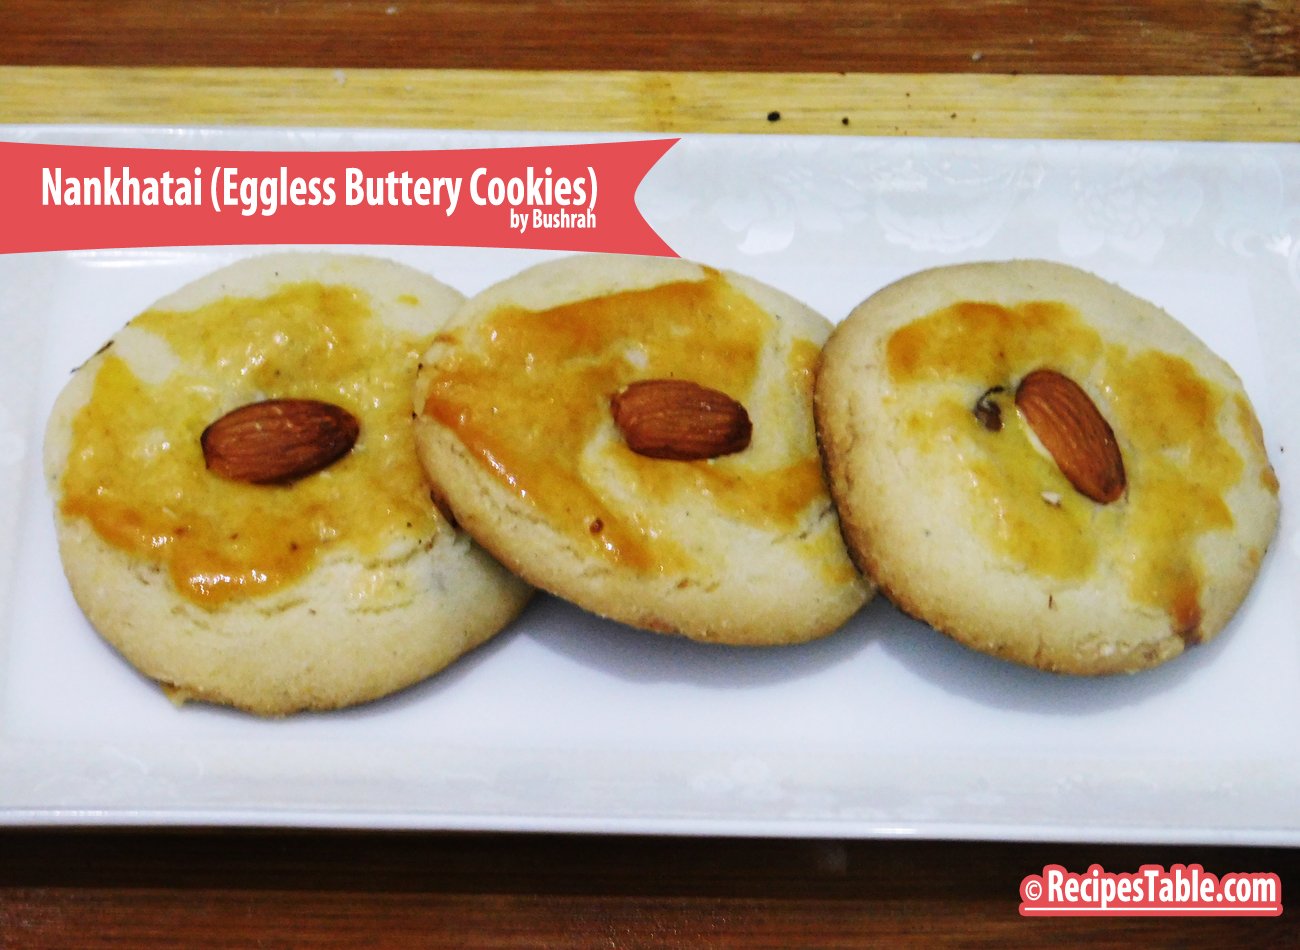
    Light and flaky shortbread, flavored with cardamom and vanilla will just melt away in your mouth!

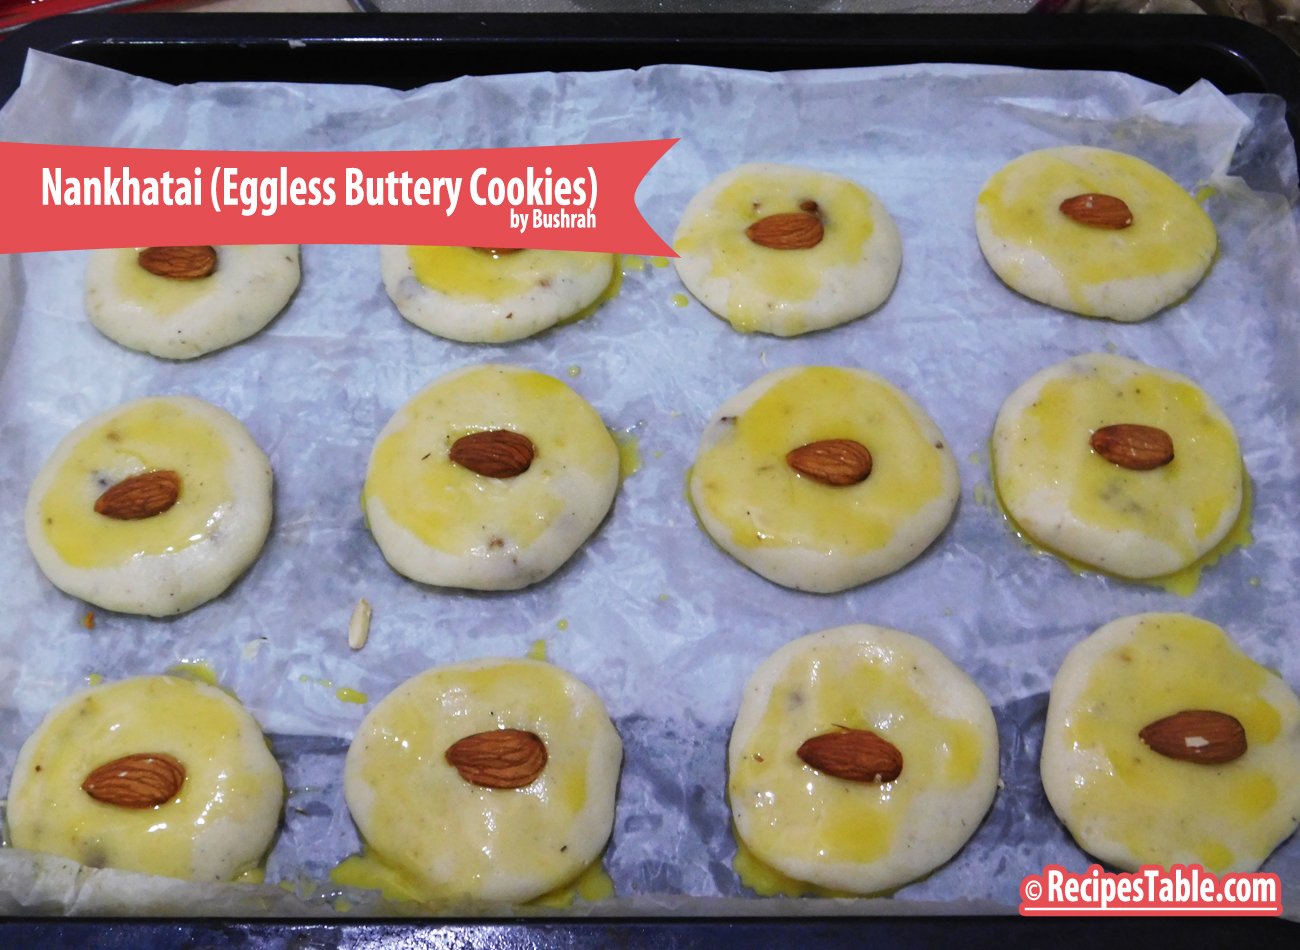
    Nankhatai recipe (Eggless Buttery Cookies)
    Nankhatai (Eggless Buttery Cookies)

    Nankhatai (Eggless Buttery Cookies)

    Nan Khatai is a popular sweet snack which is equally liked by kids as well as elders. I am a huge fan of these nan khatais.  It’s the NanKhatai recipe you would want when you suddenly crave for cookies. 

    Does this recipe rings a bell? Khasta nankhatais from your favorite bakery shop – so what does Khasta mean? Khasta means light and flaky and Nankhatai is referred to as a shortbread or biscuits. This is super easy fail proof recipe that has been tested and tried many times in my kitchen.

    nankhatai2

    Nan Khatai are simple to make if you ask me.Nothing complicated and no fancy ingredients. No baking soda and baking powder added in this recipe. Does this make you walk away from the recipe? Please wait and learn the secret to these khasta nankhatai recipe. Secret to these flaky nankhatai is the amount of ghee/butter that goes in them. No water or milk is added to this recipe.

    nankhatai4

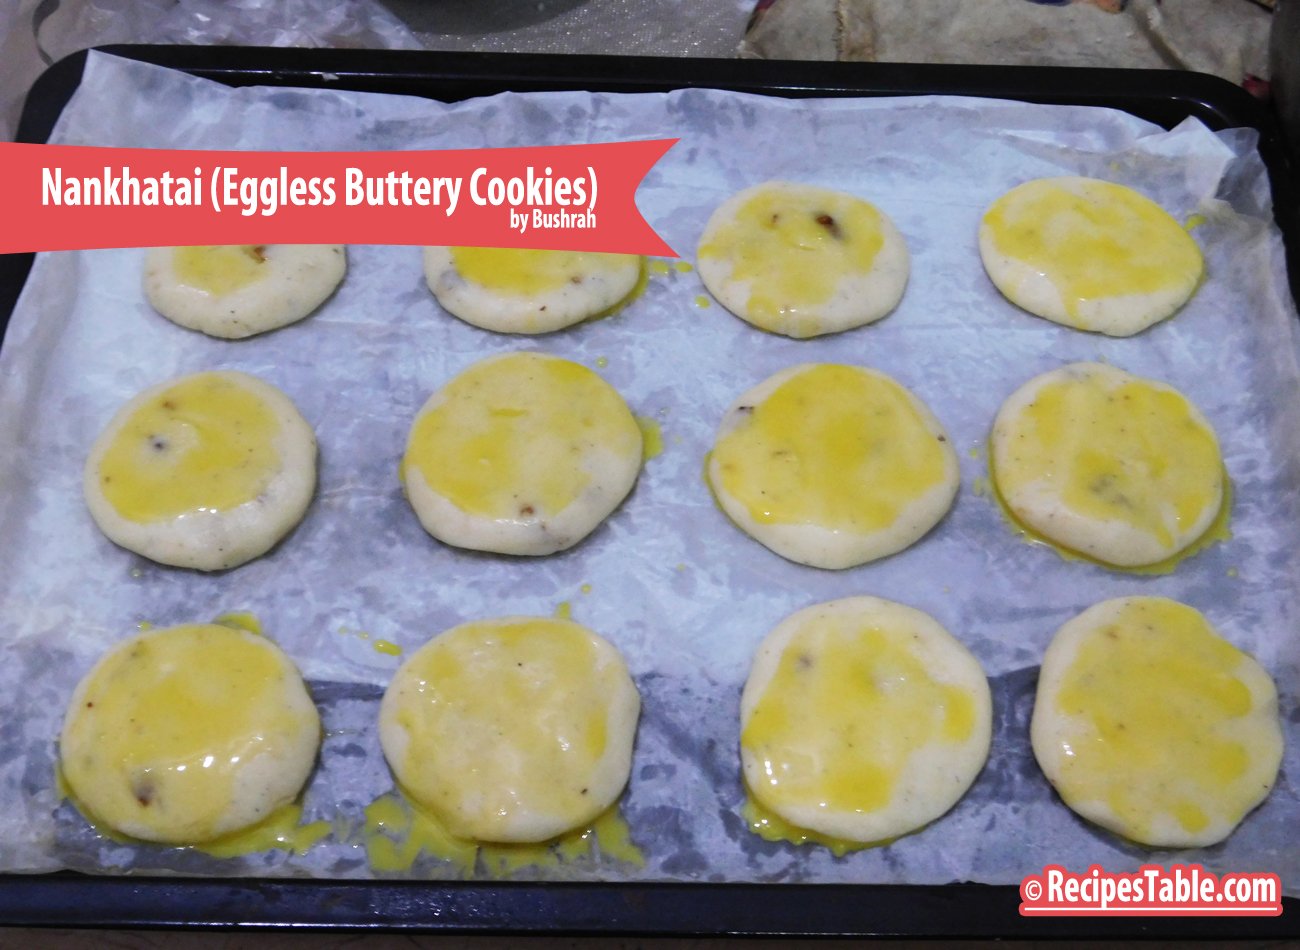
    Bake these goodies for 12- 15 minutes. Depending on the oven, cooking time may vary. Unlike other cookies, nankhatais will not brown up and when taken out of the oven they will still be soft and gooey.

    nankhatai3

    No worries, allow them to sit for 5-10 minutes on the counter and they will become firm. When completely cooled, store in an airtight container and enjoy with your evening tea!!

    nankhatai1

    This Nan khatai Cookies Recipe especially for all those who are new in baking. These cookies prepare easily and serve with afternoon tea. Do try it!!

    Check it out the Nankhatai (Eggless Buttery Cookies Recipe and printable version here!!

    Nankhatai (Eggless Buttery Cookies)

    Light and flaky Indian shortbread, flavored with cardamom and vanilla will just melt away in your mouth!
    Prep Time 20 minutes
    Cook Time 15 minutes
    Total Time 35 minutes
    Servings 18
    Author Bushrah | Recipestable

    Ingredients

    • 1-1/4 cup plain flour
    • 1/4 cup semolina fine sooji
    • 3/4 cup butter or ghee should be at room temperature not melted
    • 1/2 cup +1 tablespoon superfine Sugar
    • 1 teaspoon Vanilla
    • a pinch of Cardamom Powder
    • few almonds pistachios and cashew nuts, for sprinkling

    Instructions

    • Assemble all the ingredients.
    • Cream the butter and sugar till it turns fluffy.
    • Stir in the vanilla, flour and sooji. Make smooth dough of this mixture.
    • Stir in the vanilla and cardamom powder.
    • Knead a soft dough. Butter or ghee is the secret to light/flaky (khasta) nankhatai’s.
    • Roll the dough into a big circle.
    • Roll out medium sized balls and put a almond or cashew nut on the top of each piece.
    • (One way is to use a cookie cutter and cut out the nan khatais.
    • Other way and the original way to shape nan khatais is to take a small dough ball in your hand.)
    • Preheat oven at 150 degree C.
    • Place nankhatai cookies on a greased baking tray.
    • Bake in the preheated oven for 12-15 minutes.
    • Remove from oven and place on the counter and allow them to cool.
    • They will still be soft when you remove the tray from oven.
    • NanKhatai is ready to serve. ENJOY!!

    Notes

    Recipe Note’s:
    Once cooled store in an air tight container. These cookies stays good for about 2 weeks.
    Serving Suggestions:
    Serve with tea.
    Put your own spin on it. And lemme know how it turns out by sharing a picture  on Instagram, Facebook (Recipestable) or Twitter with this hashtag #Recipestable so I can see how lovely yours turn out.


    Happy Baking!!

    If you like this post, Please Subscribe to my blog and let me know your feedback by commenting below.. I have lots more recipes to share with you.

  • Peas Stuffed Paratha Recipe

    Peas Stuffed Paratha

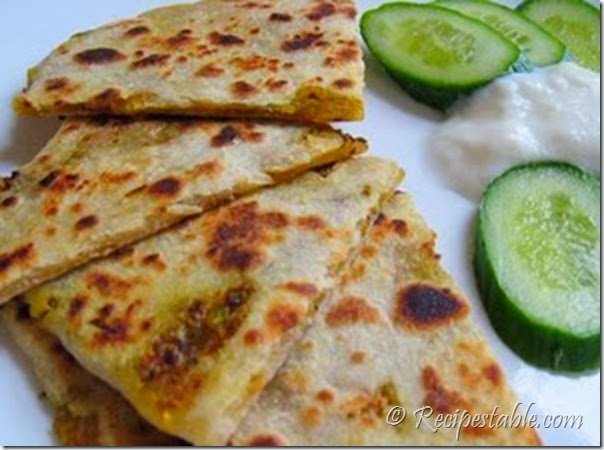
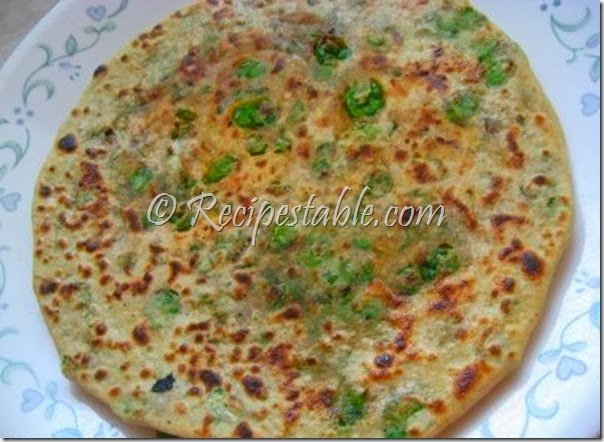
    Stuffed paratha with green peas _  sound yummy!!! This Peas Stuffed Paratha is a very delicious, healthy and filling breakfast. A must try Peas Stuffed Paratha recipe. If you like this Peas Stuffed Paratha recipe and make it then let me know your feedback by commenting below.

    Peas Stuffed Paratha recipe
    Photo: Peas Stuffed Paratha Recipe

    [divider]

    [one_fourth]Prep Time: 30 minutes[/one_fourth] [one_fourth]Cook Time: 20 minutes[/one_fourth] [one_fourth]Servings:4 [/one_fourth] [one_fourth_last]Difficulty Level: Medium [/one_fourth_last]

    [divider]

    [tabs type=”horizontal”] [tabs_head] [tab_title]Ingredients[/tab_title] [tab_title]Nutrition[/tab_title] [/tabs_head] [tab]

    For Dough

    • 1 cup Wheat flour
    • Salt to taste
    • Water to knead

    For Peas Stuffing

    • 1 cup Cooked Peas (pureed)
    • 1 tsp Green Chili paste
    • Salt to taste
    • 1/2 tsp Cumin powder
    • 1/2 tsp Garam Masala
    • 1/4 tsp Dried Mango Powder
    • Salt to taste

    For Cooking

    • Oil for frying

    [/tab] [tab]Yield:4 servings

    Nutritional information is not yet available. [/tab] [/tabs]

    Directions:
    [tabs type=”horizontal”] [tabs_head] [tab_title]Step by Step Method[/tab_title] [tab_title]Serving Suggestions[/tab_title][/tabs_head] [tab]

    Step 1

    Take wheat flour in a bowl and add salt to it. Knead the flour into soft dough, adding the desired quantity of water. Keep it aside.

    Step 2

    In a pan, add the all the ingredients given for peas stuffing and make it into a dry paste.

    Step 3

    Make lemon size balls out of the dough.

    Step 4

    Roll them into small circles and stuff about a tsp of the dried paste in the center. Cover the stuffing from all the sides.

    Step 5

    Dust the stuffed balls in flour and roll out into thin rotis.

    Step 6

    Heat a pan or griddle on medium heat. Put paratha on the hot griddle and cook both the sides. Peas Stuffed Paratha is ready to serve.

    [/tab] [tab]

    • Serve with curd.

    [/tab] [/tabs]

  • The Everyday Curry: Easy & Delicious Aloo Tarkari Recipe!

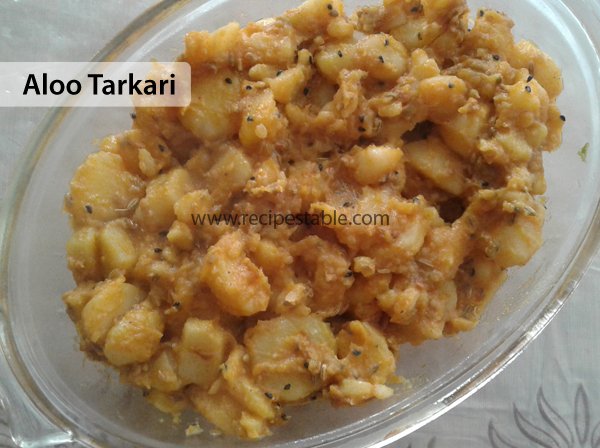
    Aloo Tarkari

    Aloo Tarkari is an excellent potatoes dish that is not only tasty but also a hale and hearty dish as potatoes are full of potassium. Taking potatoes twice a month is good for everyone so take it in the form of some delicious dish. It cooks quickly and easily and will make a great  breakfast if served with paratha or puri. So bookmark this Aloo Tarkari recipe for your Breakfast menu.

     Aloo Tarkari Recipe
    Photo: Aloo Tarkari Recipe

    Check it out the Aloo Tarkari recipe here!!

    [divider]

    [one_fourth]Prep Time: 10 minutes[/one_fourth] [one_fourth]Cook Time: 35 minutes[/one_fourth] [one_fourth]Servings: 5 [/one_fourth] [one_fourth_last]Difficulty Level: Easy [/one_fourth_last]

    [divider]

    [tabs type=”horizontal”] [tabs_head] [tab_title]Ingredients[/tab_title] [tab_title]Nutrition[/tab_title] [/tabs_head] [tab]

    • 500 gm potatoes
    • 1 tsp cumin seeds, roasted
    • 1/2 tsp nigella seeds
    • 1/2 tsp aniseed’s
    • 1/2 tsp black seeds (kalonji)
    • 1 tsp whole red chili, crushed
    • 1/2 tsp turmeric powder
    • 1/4 cup oil or ghee
    • Salt to taste

    [/tab] [tab]Yield: 5 servings

    Nutritional information is not yet available. [/tab] [/tabs]

    Directions:
    [tabs type=”horizontal”] [tabs_head] [tab_title]Step by Step Method[/tab_title] [tab_title]Serving Suggestions[/tab_title][/tabs_head] [tab]

    Step 1

    Wash potatoes, remove the peel. Cut into small cubes.

    Step 2

    Heat oil in a large skillet, add nigella seeds, aniseed’s and cumin seeds.

    Step 3

    When start crackling, add potato and 1 glass of water in it.

    Step 4

    Season with salt and red chili.

    Step 5

    Bring to a hard boil and simmer until potatoes are soft and tender.

    Step 6

    Mash potatoes a little bit. Cook for 3-4 minutes.

    Step 7

    When ready, takeout in a serving bowl. Aloo Tarkari is ready to serve.

    [/tab] [tab]

    • Enjoy with Puri and any pickle.

    [/tab] [/tabs]

    If you like Aloo Tarkari Recipe  and make it then let me know your feedback by commenting below.And

  • Flavorful Prawns & Fluffy Rice: The Perfect Prawn Pulao Recipe!

    Prawn Pulao:

    For all the prawn lovers here is a delicious Prawn pulao recipe. Enjoy prawn pulao cooked in stock and spices. Stock makes it rich, healthier and adds more flavors in it. This dish will blow your mind very delicious and healthy prawn pulao recipe. This is a great low fat dinner with a punch. It’s fast, easy and highly recommended recipe that you should must try on this weekend or any day. Check it out the Prawn Pulao recipe here!!

    Prawn Pulao Recipe
    Photo: Prawn Pulao Recipe

    [divider]

    [one_fourth]Prep Time: 10 minutes[/one_fourth] [one_fourth]Cook Time: 50 minutes[/one_fourth] [one_fourth]Servings: 3[/one_fourth] [one_fourth_last]Difficulty Level: Medium[/one_fourth_last]

    [divider]

    [tabs type=”horizontal”] [tabs_head] [tab_title]Ingredients[/tab_title] [tab_title]Nutrition[/tab_title] [/tabs_head] [tab]

    • 200 gms rice
    • 100 gms ghee or butter
    • 3.5 gm ginger
    • 150 gms tomato
    • 960 ml hot water
    • 450 gms prawn
    • 10 gms garam masala
    • 5 gms chilli powder
    • 2 gms green cardamom
    • 4 gms cloves
    • 1 gm peppercorns
    • 2 gms cinnamon
    • Salt to taste

    [/tab] [tab]Yield: 3 servings

    Nutritional information is not yet available. [/tab] [/tabs]

    Directions:
    [tabs type=”horizontal”] [tabs_head] [tab_title]Step by Step Method[/tab_title] [tab_title]Serving Suggestions[/tab_title][/tabs_head] [tab]

    Step 1

    Heat ghee in a large skillet over medium heat.

    Step 2

    Add tomatoes, garam masala, chilli, ginger and salt and cook for five minutes, stirring all the time.

    Step 3

    Add prawns and cook over a low fire in a covered pan till the prawns are ready.

    Step 4

    In another vessel, boil 3 pints of water and add the rice with cardamoms, cloves, peppercorns and cinnamon tied in muslin and boil uncovered till the rice is cooked.

    Step 5

    Drain in a colander.

    Step 6

    In a fire-proof dish, put a layer of rice, then a layer of curry and then another layer of rice.

    Step 7

    Cover and put in a slow oven for 10 minutes. Prawn Pulao is ready to serve.

    [/tab] [tab]

    • Serve hot with curry.

    [/tab] [/tabs]

  • Flavorful Fish Biryani: A Seafood Lover’s Delight!

    Fish is probably my favorite protein and this Fish Biryani recipe is one of a kind. It is easy to make, extremely flavorful and even those who do normally enjoy fish will LOVE this meal and request second helpings. It just shattered my belief that fish biryani cannot compete with the taste of other biryani’s. So here I am sharing a simple and delicious fish biryani recipe which has unique taste. Makes a complete and nutritious meal. Perfect for seafood lovers. Check it out the Fish Biryani  recipe here!!
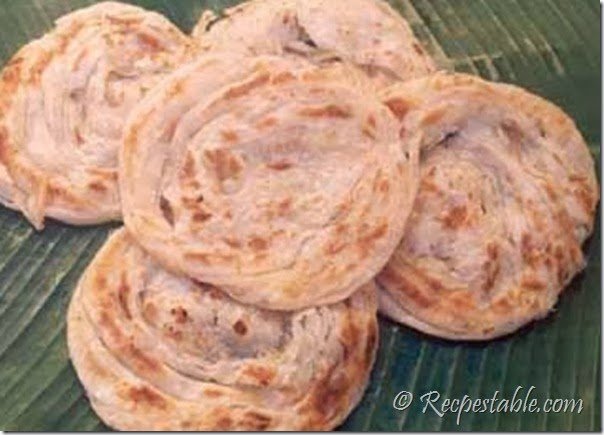
    Fish Biryani recipe
    Photo: Fish Biryani Recipe

    [divider]

    [one_fourth]Prep Time: 30 minutes[/one_fourth] [one_fourth]Cook Time: 40 minutes[/one_fourth] [one_fourth]Servings: 4 [/one_fourth] [one_fourth_last]Difficulty Level: Easy[/one_fourth_last]

    [divider]

    [tabs type=”horizontal”] [tabs_head] [tab_title]Ingredients[/tab_title] [tab_title]Nutrition[/tab_title] [/tabs_head] [tab]

    • 1 pound fish fillets, halibut or cod
    • 3 cups hot half-cooked rice
    • 1 large tomato, peeled and thinly sliced
    • 3/4 cup yogurt
    • 2 cloves garlic, crushed
    • 3 tablespoons melted butter
    • 1-1/2 teaspoon salt
    • 1 teaspoon grated ginger
    • 2 teaspoon chopped mint leaves
    • 2 teaspoon coriander powder
    • a pinch of ground cinnamon
    • a pinch of ground cloves
    • a pinch of ground cardamom

    [/tab] [tab]Yield: 4 servings

    Nutritional information is not yet available. [/tab] [/tabs]

    Directions:
    [tabs type=”horizontal”] [tabs_head] [tab_title]Step by Step Method[/tab_title] [tab_title]Serving Suggestions[/tab_title][/tabs_head] [tab]

    Step 1

    In a small bowl, mix together the yogurt, ginger garlic, salt, coriander powder, mint leaves, cinnamon powder, cloves, and cardamom powder.

    Step 2

    Pour yogurt mixture over the fish fillets. Spread evenly. Cover and set aside for 1 hour to marinate.

    Step 3

    Lightly grease a heavy casserole dish and alternate layers of rice, fish and tomato, ending with a layer of rice.

    Step 4

    Sprinkle on melted butter.

    Step 5

    Cover tightly and seal casserole edges with aluminum foil.

    Step 6

    Place in a 300° oven for 35 to 40 minutes. Remove from the oven. Fish Biryani is ready to serve.
    [/tab] [tab]

    • Serve with salad and zeera yogurt.

    [/tab] [/tabs]