Blog

  • Bakery-Style at Home: The Perfect Chocolate Glazed Brownies Recipe!

    Chocolate Glazed Brownies

    Brownies with chocolate glaze icing . Yummy. Believe me it is so delicious i love it so much Try this Chocolate Glazed Brownies  recipe from a member of the Recipestable Community.
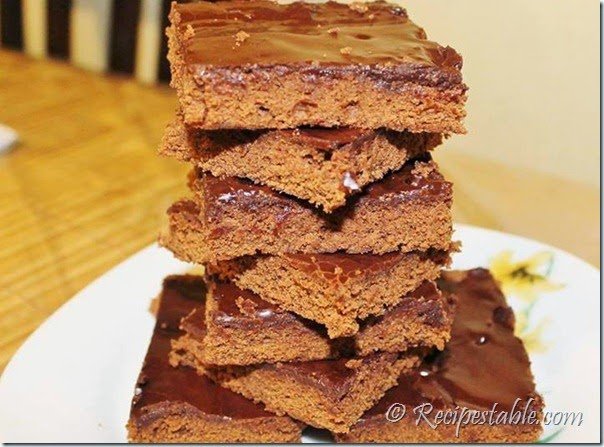
    Chocolate Glazed Brownies recipe
    Photo: Chocolate Glazed Brownies Recipe

    [divider]

    [one_fourth]Prep Time: 30 minutes[/one_fourth] [one_fourth]Cook Time: 20 minutes[/one_fourth] [one_fourth]Servings: 6 [/one_fourth] [one_fourth_last]Difficulty Level: Easy [/one_fourth_last]

    [divider]

    [tabs type=”horizontal”] [tabs_head] [tab_title]Ingredients[/tab_title] [tab_title]Nutrition[/tab_title] [/tabs_head] [tab]

    • 1 cup castor sugar
    • 1/2 cup butter, (must be at room temperature)
    • 1/3 cup cocoa powder
    • 3/4 cup plain flour
    • 1/2 cup chopped walnuts
    • 2 eggs, lightly beaten
    • 1 teaspoon vanilla essence
    • 1/2 teaspoon baking powder
    • a pinch of salt

    For Chocolate Glaze Icing

    • 4 tablespoon icing sugar, heaped
    • 1-1/2 tablespoon cocoa powder
    • 1 tablespoon water

    [/tab] [tab]Yield: 6 servings

    Nutritional information is not yet available. [/tab] [/tabs]

     Directions
    [tabs type=”horizontal”] [tabs_head] [tab_title]Step by Step Method[/tab_title] [tab_title]Serving Suggestions[/tab_title][/tabs_head] [tab]

    Step 1

    Preheat oven at 360 degree F or 180 degree C.

    Step 2

    Cream the butter then add cocoa powder. Mix until it becomes smooth paste.

    Step 3

    Then add sugar and mix until well combined.

    Step 4

    In a separate bowl, beat eggs. Stir in tht vanilla essence.

    Step 5

    Fold it into the cocoa batter.

    Step 6

    Stir in the flour and salt.

    Step 7

    Fold into walnuts.

    Step 8

    Pour batter in a greased baking tray. Spread evenly.

    Step 9

    Bake in the preheated oven for 20 minutes or until the tooth pick come out clean.

    Step 10

    Take it out from the oven and let it cool for 5 minutes in a baking pan.

    Step 11

    Now make chocolate glaze icing while cake is cooling for 5 minutes.

    Step 12

    To Make Chocolate Glaze: Mix all the ingredients and make a thick paste. Mix well.

    Step 13

    Spread evenly on the brownies.

    Step 14

    Let it cool and then cut into the pieces. Chocolate Glazed Brownies are ready to serve. ENJOY!!

    [/tab] [tab]

    • Serve with a glass of milk or as a dessert.

    [/tab] [/tabs]

    If you like Chocolate Glazed Brownies recipe and make it then let me know your feedback by commenting below.
  • Red Radish Raita Recipe

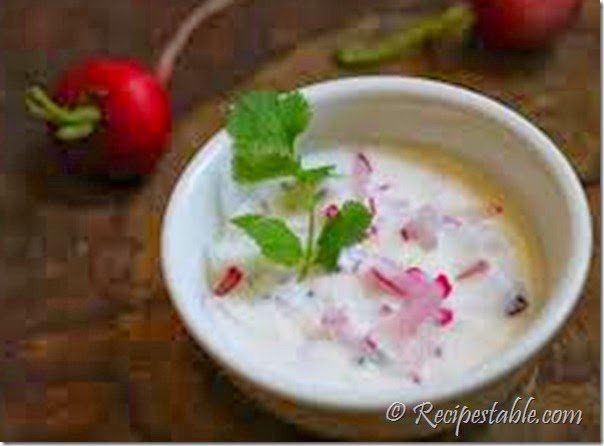
    Red Radish Raita

    This raita is good for health and a great summer treat that’s packed with a lot of nutrients that come from radish and lots of calcium that comes from the yogurt. Super Easy and Healthy raita with red radishes. Its really a easiest one with thick yogurt and grated red radish. Check it out the Red Radish Raita Recipe here!!

    Red Radish Raita recipe
    Photo: Red Radish Raita Recipe

    [divider]

    [one_fourth]Prep Time: 10 minutes[/one_fourth] [one_fourth]Cook Time:2 minutes[/one_fourth] [one_fourth]Servings: 4[/one_fourth] [one_fourth_last]Difficulty Level: Easy[/one_fourth_last]

    [divider]

    [tabs type=”horizontal”] [tabs_head] [tab_title]Ingredients[/tab_title] [tab_title]Nutrition[/tab_title] [/tabs_head] [tab]

    • 1 bunch red radish
    • 1 green chilli
    • 1 cup of yogurt
    • 1/2 tsp sugar
    • Salt to taste
    • Few fresh coriander leaves

    For tarka/tempering:

    • 1 tbsp olive oil
    • 1/4 tsp mustard seeds

    [/tab] [tab]Yield: 3 servings Nutritional information is not yet available. [/tab] [/tabs]

    Directions:
    [tabs type=”horizontal”] [tabs_head] [tab_title]Step by Step Method[/tab_title] [tab_title]Serving Suggestions[/tab_title][/tabs_head] [tab]

    Step 1

    Wash and grate radish.

    Step 2

    Chop chilli and coriander leaves. Mix all the ingredients in a bowl.

    Step 3

    Heat oil in a small pan, add mustard seeds.

    Step 4

    When they crackle, add the tarka to the bowl and mix.

    Step 5

    If desired you can add crushed peanuts to this raita. Red Radish Raita is ready to serve.

    [/tab] [tab]

    • Serve with Pulao, Biryani or any kind of curry.

    [/tab] [/tabs]

    If you like Red Radish Raita recipe and make it then let me know your feedback by commenting below.
  • Cool Down with This Easy Pineapple Lassi Recipe (Great for Digestion!)

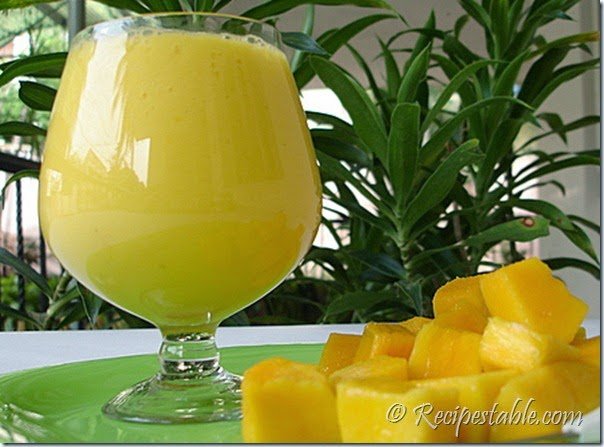
    Pineapple Lassi

    If you’ve never heard of a lassi, it’s a drink made with yogurt, spices, and sometimes fruit or other ingredients. It’s super light, super fresh, and just plain revitalizing. Pineapples are very rich in fiber that aids in weight loss and promotes healthy tummy by flushing wastes through the gut.
    Try this healthy and delicious drink with pineapple, cardamom powder and low-fat yogurt. It is great for a quick breakfast or pre workout snack to supply you with enough energy to last for longer hours. What I LOVE about this drink is how the tart plain yogurt really adds a bright zing.

    Pineapple Lassi Recipe
    Photo: Pineapple Lassi Recipe

    Seriously, after a super hard workout, this drink is HEAVEN. Check it out the Pineapple Lassi recipe here!!

    [divider]

    [one_fourth]Prep Time: 5 minutes[/one_fourth] [one_fourth]Cook Time: 0 minutes[/one_fourth] [one_fourth]Servings: 4[/one_fourth] [one_fourth_last]Difficulty Level: Easy[/one_fourth_last]

    [divider]

    [tabs type=”horizontal”] [tabs_head] [tab_title]Ingredients[/tab_title] [tab_title]Nutrition[/tab_title] [/tabs_head] [tab]

    • 2 cups natural yogurt
    • 3 cups pineapple juice
    • 1/2 cup pineapple chunks
    • 2 tbsp sugar
    • a pinch of cardamom powder
    • ice cubes as required

    [/tab] [tab]Yield: 4 servings

    Nutritional information is not yet available. [/tab] [/tabs]

    Directions:
    [tabs type=”horizontal”] [tabs_head] [tab_title]Step by Step Method[/tab_title] [tab_title]Serving Suggestions[/tab_title][/tabs_head] [tab]

    Step 1

    Place all ingredients in a blender or food processor.

    Step 2

    Process until smooth.

    Step 3

    Pour into serving glasses.

    Step 4

    Top with Pineapple slices. Delicious Pineapple Lassi is ready to serve. Enjoy !!
    [/tab] [tab]

    • Serve with cookies.

    [/tab] [/tabs]

    If you like Pineapple Lassi recipe and make it then let me know your feedback by commenting below.
  • Lauki Chana Dal Recipe

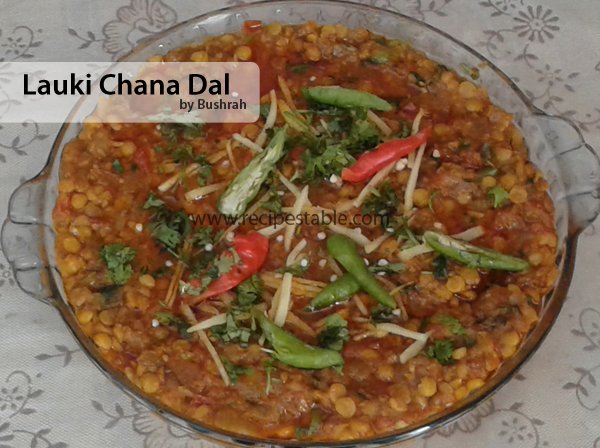
    Lauki Chana Dal

    A healthy Vegetarian curry recipe made with bottle gourd (lauki) and bengal gram. Goes great with steamed rice or chapati.

    Lauki Chana Dal Recipe
    Photo: Lauki Chana Dal Recipe

    Check it out the Lauki Chana Dal recipe here !!

    [divider]

    [one_fourth]Prep Time: 20 minutes[/one_fourth] [one_fourth]Cook Time: 1 hour [/one_fourth] [one_fourth]Servings: 5[/one_fourth] [one_fourth_last]Difficulty Level: Medium [/one_fourth_last]

    [divider]

    [tabs type=”horizontal”] [tabs_head] [tab_title]Ingredients[/tab_title] [tab_title]Nutrition[/tab_title] [/tabs_head] [tab]

    • 250 gm bottle gourd
    • 1 cup Split Bengal gram
    • 4 tbsp ghee or oil
    • 1 onion,finely chopped
    • 2 tomatoes, finely chopped
    • 1 tsp garlic paste
    • 1 tsp ginger paste
    • 1/2 tsp cumin seeds
    • A pinch of asafoetida
    • 1/4 tsp turmeric powder
    • 1/2 tsp coriander powder
    • 1 tsp red chilli powder
    • 1/2 tsp garam masala powder
    • 1 tbsp lemon juice
    • Salt to taste

    For Garnishing:

    • 2 green chillies, thinly sliced
    • 4 tbsp coriander leaves, chopped

    [/tab] [tab]Yield: 5 servings

    Nutritional information is not yet available. [/tab] [/tabs]

    Directions:
    [tabs type=”horizontal”] [tabs_head] [tab_title]Step by Step Method[/tab_title] [tab_title]Serving Suggestions[/tab_title][/tabs_head] [tab]

    Step 1

    Wash split Bengal gram and soak for at least 1 hour.

    Step 2

    Peel bottle gourd and cut into 1/2 inch cubes.

    Step 3

    In a skillet, add salt, turmeric powder,red chilli powder,coriander powder, bottle gourd, split Bengal gram and 4 cups of water.

    Step 4

    Bring to a boil then reduce heat to low. Cook over medium heat for 1 hour or until done.

    Step 5

    Heat oil or ghee in a pan, add onion and cumin seeds. Saute for 1 minute or until translucent.

    Step 6

    When they change color, add asafoetida, ginger-garlic paste and sauté for a minute.

    Step 7

    Then add tomatoes and cook until soft and pulpy.

    Step 8

    Now add boiled Bengal gram and lemon juice; stir occasionally.Cover the lid and simmer for 4-5 minutes.

    Step 9

    Sprinkle Garam Masala over it.

    Step 10

    Garnish with coriander leaves and green chilies. Lauki Chana Dal is ready to serve.

    [/tab] [tab]

    • Serve hot with roti.

    [/tab] [/tabs]

    If you like Lauki Chana Dal recipe and make it then let me know your feedback by commenting below.
  • Ramadan Delight: Crispy & Crunchy Pakistani Chicken Pakora Recipe!

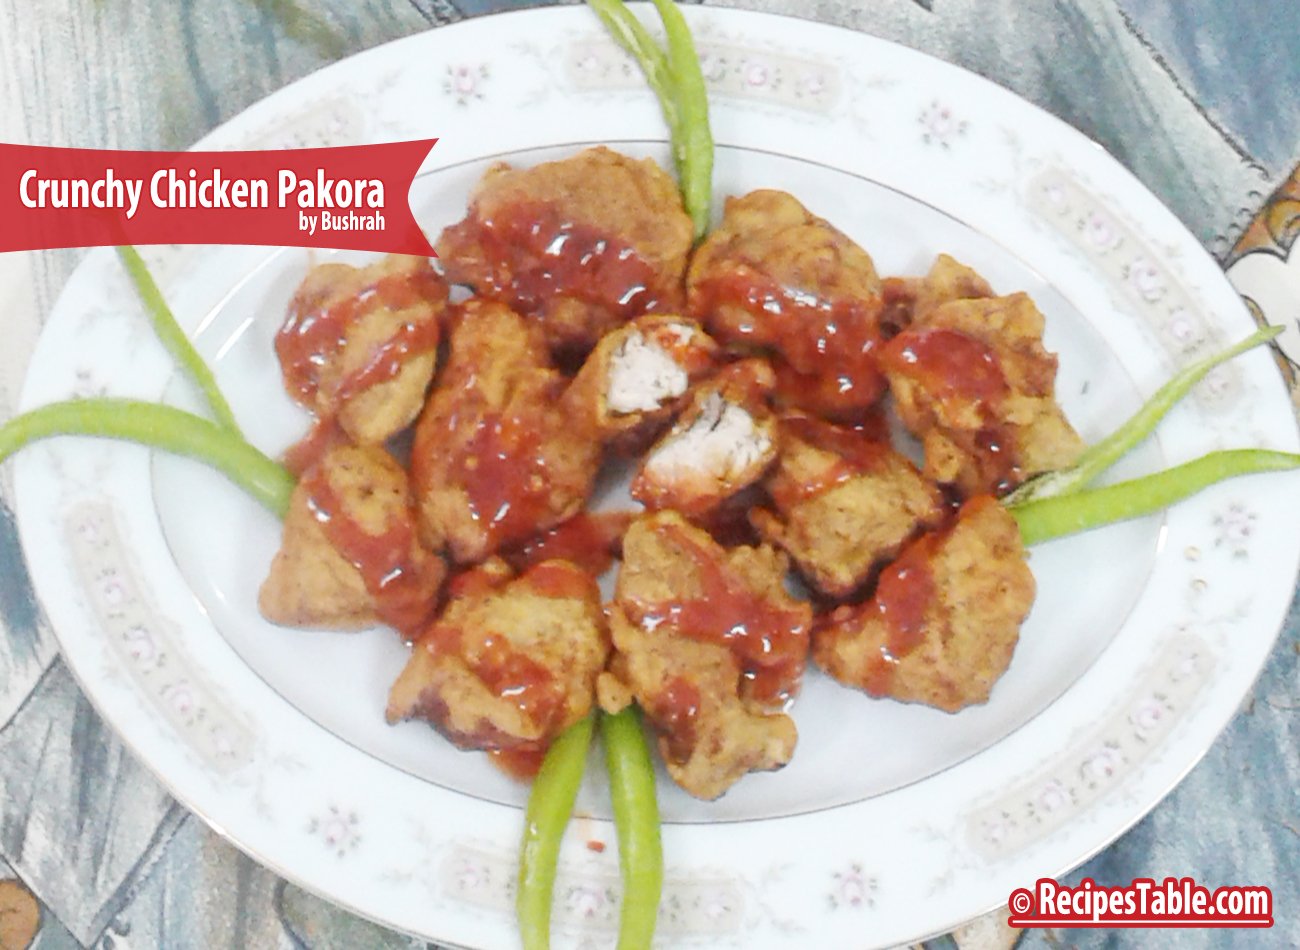
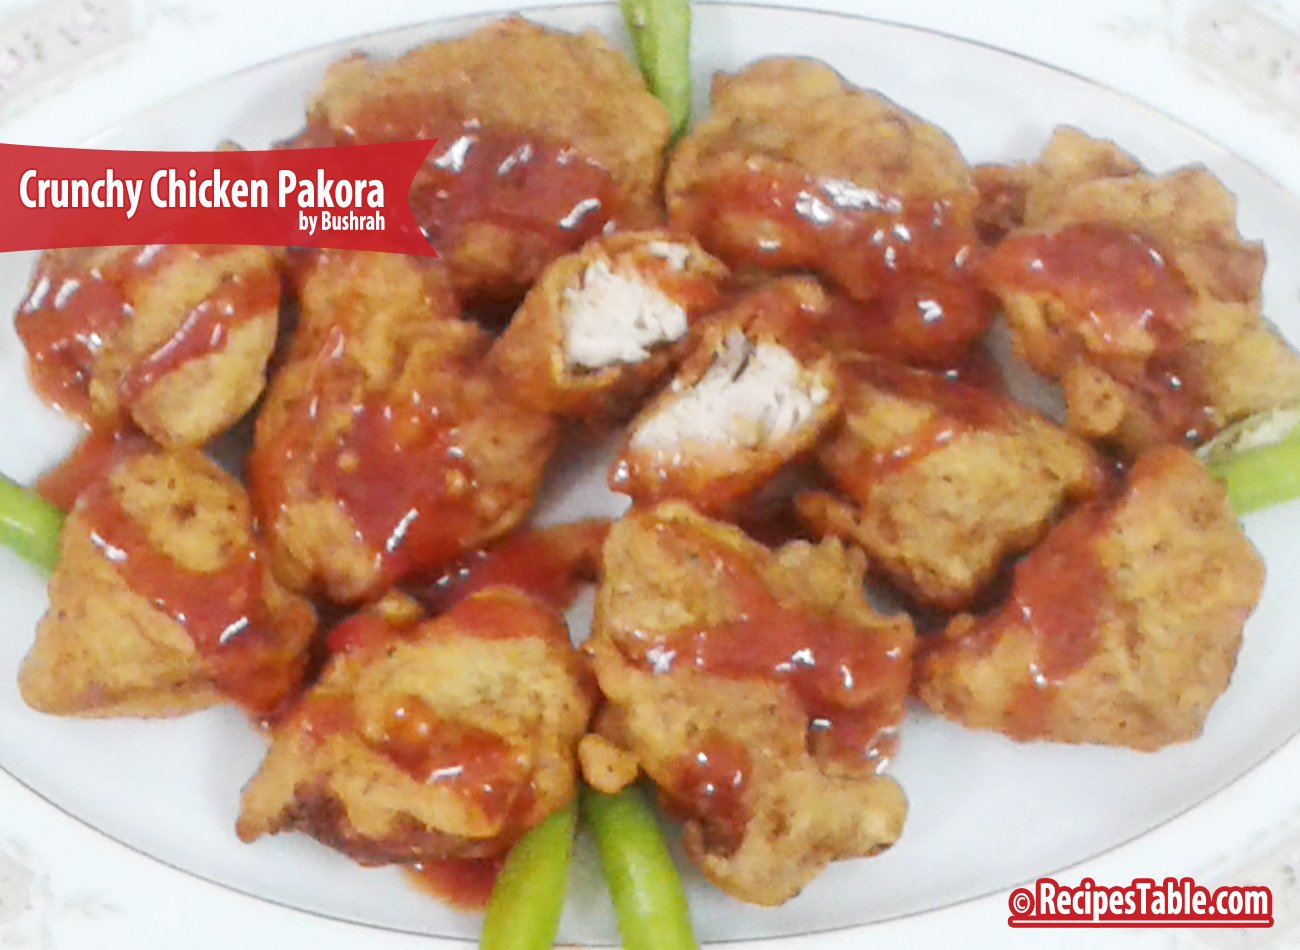
    Crunchy Chicken Pakora

    Chicken Pakora is a famous snack of Pakistani cuisine and every one like to eat it. In this recipe key ingredient of pakora is chicken chunks. Its a most wonderful recipe as a snacks with easy effort to make in Ramadan and tea party.

    Crunchy Chicken Pakora recipe
    Photo: Crunchy Chicken Pakora recipe

    These Chicken pakoras have good crispy, salty taste and texture. Always great to have in all seasons. Serve these Crunchy Chicken pakoras to your guests and get appreciation.

    Crunchy Chicken Pakora recipe
    Photo: Crunchy Chicken Pakora

    Check it out the Crunchy Chicken Pakora recipe here!!

    Prep Time: 10 minutes

    Cook Time: 15 minutes

    Servings: 5

    Difficulty Level: Easy

    Ingredients

    • 16 small chunks of chicken breast
    • 1 large onion
    • 1 inch a piece of ginger
    • 1 clove garlic
    • 2 jalapeño pepper
    • 1 teaspoon lemon juice
    • 2 teaspoon plan yogurt
    • 1/2 cup gram flour (besan)
    • 1/4 cup rice flour
    • 2 tablespoon cornflour
    • a pinch of baking soda
    • 1/2 teaspoon red chilli flakes
    • salt to taste

    Directions:

    Step 1

    Place yogurt, onion, ginger, garlic, lemon juice and jalapeño pepper in a blender. Blend  until fine.

    Step 2

    Take it out in a mixing bowl. Add chicken, red chili and salt. Mix well.

    Step 3

    Marinate the chicken for 1 hour to blend flavors.

    Step 4

    Now add gram-flour, rice flour, and cornflour and little water in the batter. Batter should be thin as honey.

    Step 5

    Heat oil in a deep pan over medium heat.  Fry chicken pieces under low heat to a medium brown.

    Step 6 

    Remove from the oil and drain on paper towel to drain excess oil. Crunchy Chicken Pakora is ready to serve.

    1. Serve hot with ketchup or mint chutney.
    2. Enjoy it as an appetizer or snack.

    If you like Crunchy Chicken Pakora Recipe  and make it then let me know your feedback by commenting below.
  • Never Soggy Again! Easy Samosa Recipe with Foolproof Tips

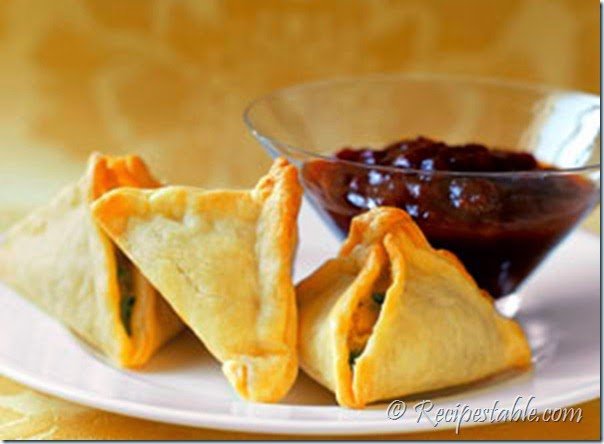
    Easy Samosa

    An easy little vegetable samosa that makes a delicious, inexpensive lunch from store cupboard ingredients.I know what you’re thinking, “but it’s just so much easier!” Check it out the Easy Samosa recipe here!!

    Easy Samosa recipe
    Photo: Easy Samosa Recipe

    Prep Time:20 minutes
    Cook Time: 20 minutes
    Servings: 8
    Difficulty Level: Easy

    For Samosa pastry:

    • 250 gm plain flour
    • 2 tsp salt
    • 3 tbsp vegetable oil
    • 80 ml warm water

    For Samosa Filling:

    • 1 Potato,finely diced
    • 1 carrot,finely diced
    • 2 cloves garlic, crushed
    • 1 Onion,finely chopped
    • 1 Cup frozen peas
    • 1 tbsp vegetable oil
    • 2 tsp curry powder
    • Salt, Pepper to taste
    • 100 ml vegetable stock

    For Frying:

    • oil for deep frying

    [/tab] [tab]Yield: 8 servings

    Nutritional information is not yet available. [/tab] [/tabs]

    Directions:
    [tabs type=”horizontal”] [tabs_head] [tab_title]Step by Step Method[/tab_title] [tab_title]Serving Suggestions[/tab_title][/tabs_head] [tab]

    Step 1

    For Filling: Heat the oil in a frying pan, add the onion and garlic, mix in the spices and fry until soft.

    Step 2

    Add the vegetables, seasoning and stir well until coated.

    Step 3

    Add the stock, cover and simmer for 30 minutes until cooked. Set aside and let allow to cool.

    Step 4

    For Dough: Mix flour and salt into a large bowl.

    Step 5

    Make a well into the center and add the oil and enough water to make a firm dough.

    Step 6

    Knead the dough on a floured surface until smooth and roll into a ball. Cover in plastic wrap and set aside at room temperature for 30 minutes.

    Step 7

    Divide the pastry into 12 equal pieces.

    Step 8

    Roll each piece into a ball and roll out into a circle of 15 cm.

    Step 9

    Divide this circle into two equal pieces with a knife.

    Step 10

    Brush each edge with a little water and form a cone shape around your fingers, sealing the dampened edge.

    Step 11

    Fill the cases with a tbsp of filling and press the two dampened edges together to seal the top of the cone.

    Step 12

    Deep fry the samosas in hot oil until crisp and brown take out and drain on a paper towel. Easy Samosa is ready to serve.

    [/tab] [tab]

    • Serve hot with ketchup or tamarind sauce.

    [/tab] [/tabs]
    If you like Easy Samosa recipe and make it then let me know your feedback by commenting below.
  • Gajar Ka Raita Recipe

    Gajar Ka Raita

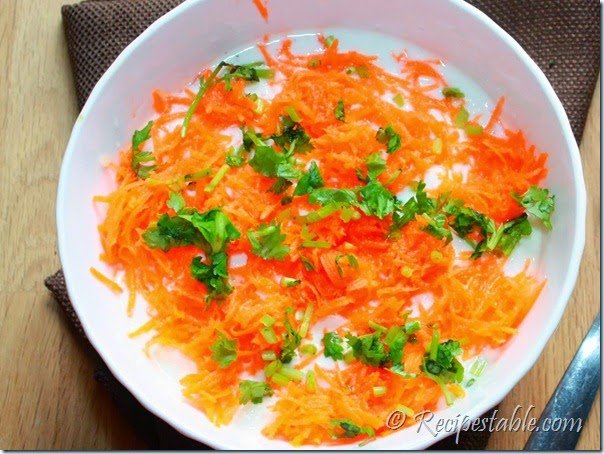
    Easy raita with carrots (gajar) as main ingredient. Rainbow Carrots (gajar) are used to make this easy Raita, giving it a visual appeal. This hot and cold salad with an interesting and simple dressing is ideal for summer. Check it out the Gajar Ka Raita recipe here!!

    Gajar Ka raita recipe
    Photo: Gajar Ka raita Recipe

    [divider]

    [one_fourth]Prep Time: 5 minutes[/one_fourth] [one_fourth]Cook Time: 5 minutes[/one_fourth] [one_fourth]Servings: 12[/one_fourth] [one_fourth_last]Difficulty Level: Easy[/one_fourth_last]

    [divider]

    [tabs type=”horizontal”] [tabs_head] [tab_title]Ingredients[/tab_title] [tab_title]Nutrition[/tab_title] [/tabs_head] [tab]

    • 5 carrots, cut into 1-inch matchsticks
    • 1 small carrot, cut into thin strips for garnish
    • 1 quart plain whole-milk yogurt
    • 3 tablespoons freshly squeezed lemon juice
    • 3 tablespoons vegetable oil
    • 2 teaspoons black or brown whole cumin seeds
    • 1 tablespoon whole fennel seeds
    • Salt to taste
    • 1/2 cup fresh mint leaves, torn into medium pieces

    [/tab] [tab]Yield: 12 servings

    Nutritional information is not yet available. [/tab] [/tabs]

    Directions:
    [tabs type=”horizontal”] [tabs_head] [tab_title]Step by Step Method[/tab_title] [tab_title]Serving Suggestions[/tab_title][/tabs_head] [tab]

    Step 1

    Combine 5 cups carrots, yogurt, and lemon juice in a medium bowl.

    Step 2

    Heat the oil in a very small skillet over medium-high heat until very hot.

    Step 3

    Add the cumin and fennel seeds, and let fry until they pop, about 5 seconds.

    Step 4

    Immediately pour the oil and the seeds over the carrot mixture.
    Stir to combine.

    Step 5

    Salt to taste; add mint and toss.

    Step 6

    Garnish with mint leaves and carrot strips. Gajar Ka Raita is ready to serve. Enjoy!

    [/tab] [tab]

    • Serve with biryani, paratha or any curry.

    [/tab] [/tabs]
    If you like Gajar Ka Raita recipe and make it then let me know your feedback by commenting below.
  • Chicken Nizami Recipe

    Chicken Nizami

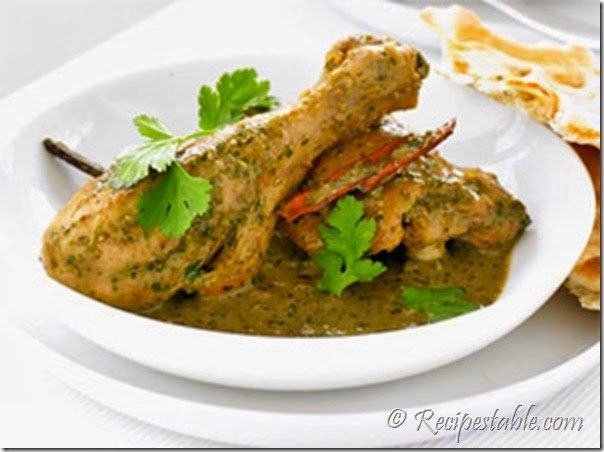
    Chicken Nizami is a wonderful chicken dish that is cooked with cashew nuts, peanuts, sesame seeds, coconut, yogurt, and spices and garnished with coriander, lemons, garam masala that really makes this a mouthwatering and rich chicken dish that all must try. This is one recipe that I loved to make because of it’s unusual taste. Check it out the Chicken Nizami recipe here!!

    Chicken Nizami Recipe
    Photo: Chicken Nizami Recipe

    [divider]

    [one_fourth]Prep Time: 20 minutes[/one_fourth] [one_fourth]Cook Time: 50 minutes[/one_fourth] [one_fourth]Servings: 4 [/one_fourth] [one_fourth_last]Difficulty Level: Medium[/one_fourth_last]

    [divider]

    [tabs type=”horizontal”] [tabs_head] [tab_title]Ingredients[/tab_title] [tab_title]Nutrition[/tab_title] [/tabs_head] [tab]

    • 1-1/2 Kg Chicken, cut into 8 large pieces
    • 1/2 cup water
    • 1/4 cup cooking oil
    • 1/4 cup coconut, soaked In 1/2 cup hot water
    • 1 medium onion, finely chopped
    • 4 green chilies, thinly sliced
    • 2 Inch piece Of cinnamon
    • 2 bay leaves
    • 4 tablespoon yogurt
    • 4 tablespoon whipped cream
    • 1 tablespoon hot milk
    • 1 teaspoon ginger garlic paste
    • 1/4 teaspoon saffron
    • few coriander leaves, finely chopped

    Dry Masala:
    (Grind all of them)

    • 2 tablespoon coconut desiccated
    • 1 teaspoon cumin seeds
    • 1 teaspoon poppy seeds
    • 1/4 teaspoon turmeric powder
    • 3 cardamoms
    • 4 cloves
    • 10 dried red chilies

    [/tab] [tab]Yield: 4 servings

    Nutritional information is not yet available. [/tab] [/tabs]

    Directions:
    [tabs type=”horizontal”] [tabs_head] [tab_title]Step by Step Method[/tab_title] [tab_title]Serving Suggestions[/tab_title][/tabs_head] [tab]

    Step 1

    Put together all the ingredients from the cumin seeds to the cinnamon and grind to a fine paste.

    Step 2

    Extract the milk from the soaked coconut and set aside.

    Step 3

    Heat the saffron for 2 seconds in the microwave or on a griddle, crush it, and soak it in the hot milk.

    Step 4

    Heat the oil and fry the onion till it is golden-brown. Add the ginger-garlic paste and fry for a couple of minutes.

    Step 5

    Add the ground paste and bay leaves. Let it simmer for 5 minutes.

    Step 6

    Put in the chicken pieces and 1/2 a cup of water and continue cooking, for approximately 20 minutes, over a low heat.

    Step 7

    When the chicken is almost cooked, add the coconut milk, green chillies,coriander leaves and yoghurt. Cook till the chicken is tender.

    Step 8

    Add the cream and saffron. Simmer for 3 minutes. Chicken Nizami is ready to serve.

    [/tab] [tab]

    • Serve with rice or naan!

    [/tab] [/tabs]
    If you like Chicken Nizami recipe and make it then let me know your feedback by commenting below.
  • Homemade Goodness: Easy Mince Pizza Recipe (Better Than Takeout!)


    Goodbye to restaurant style pizzas, I really mean it…I can’t tell you how often I get asked to make pizza at home.

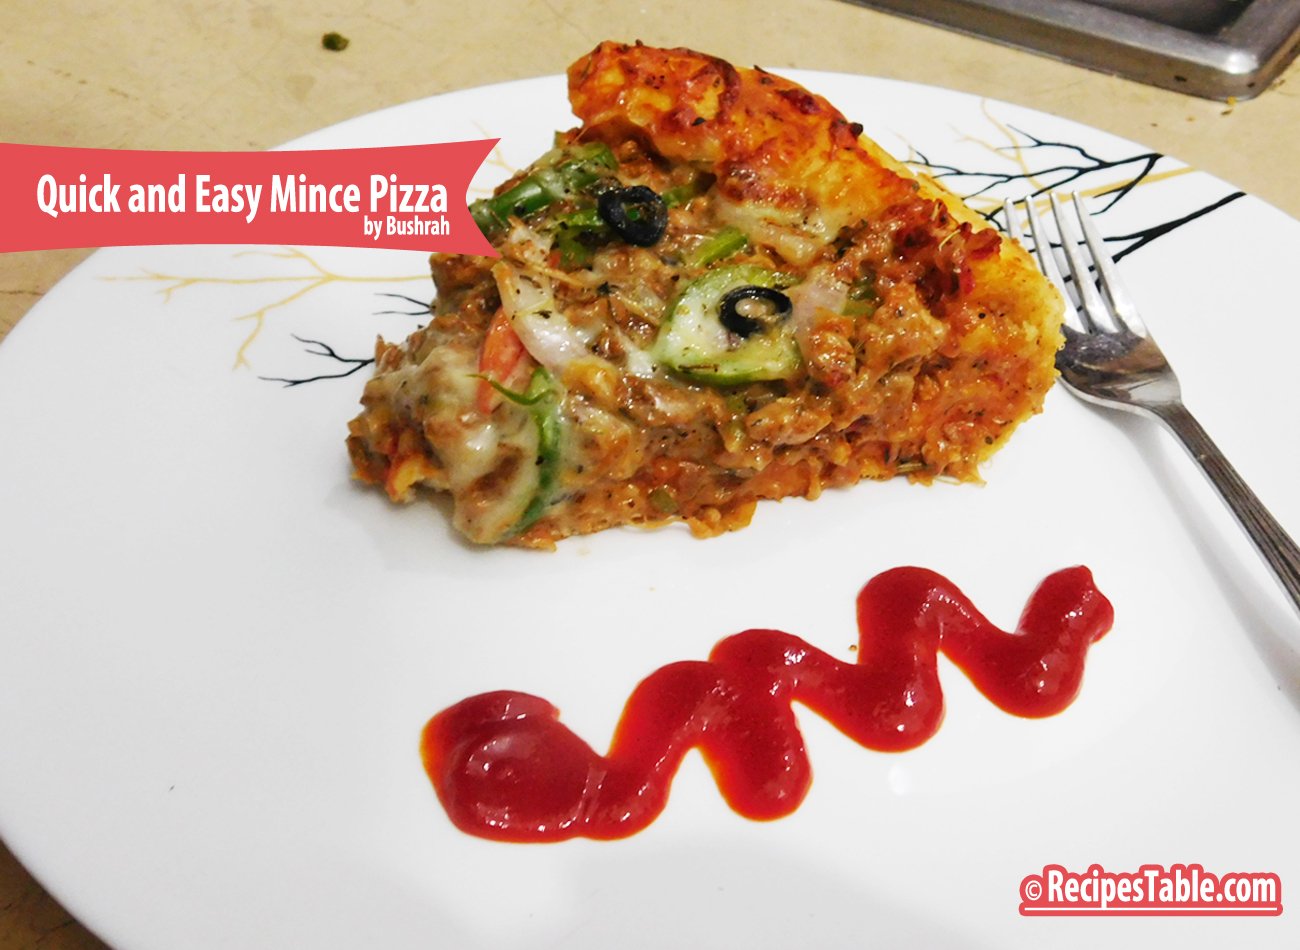
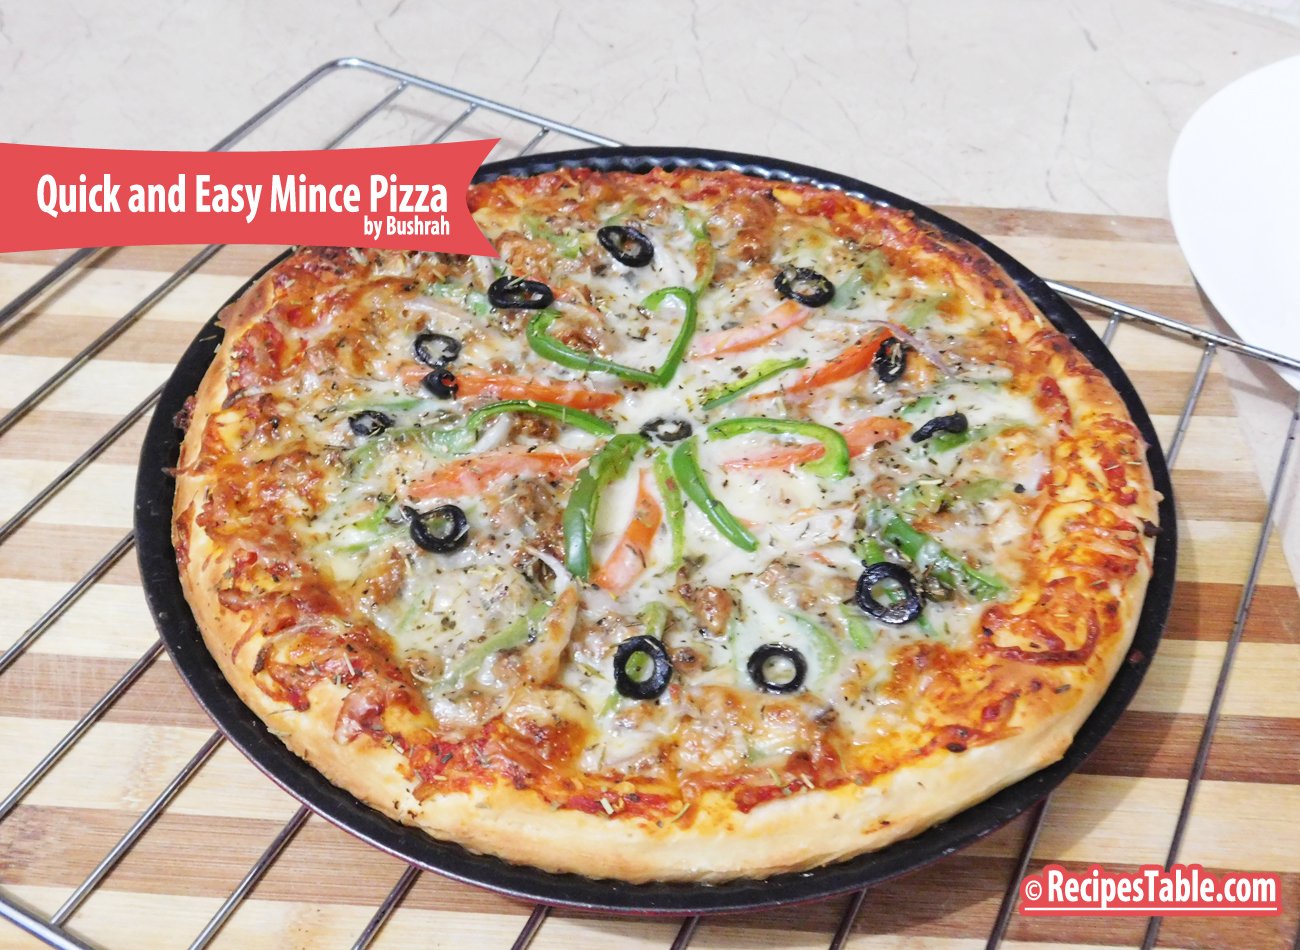
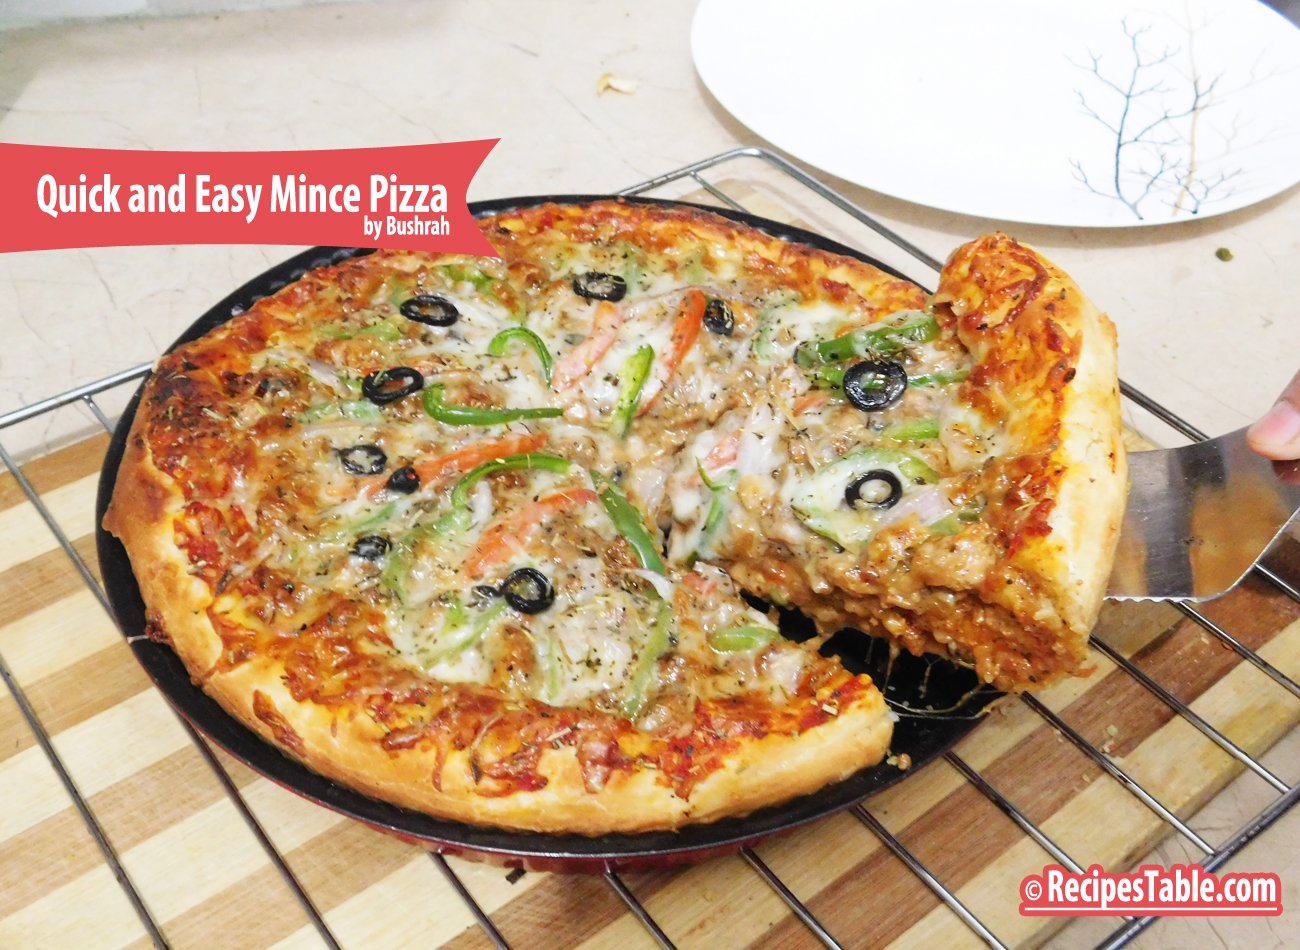
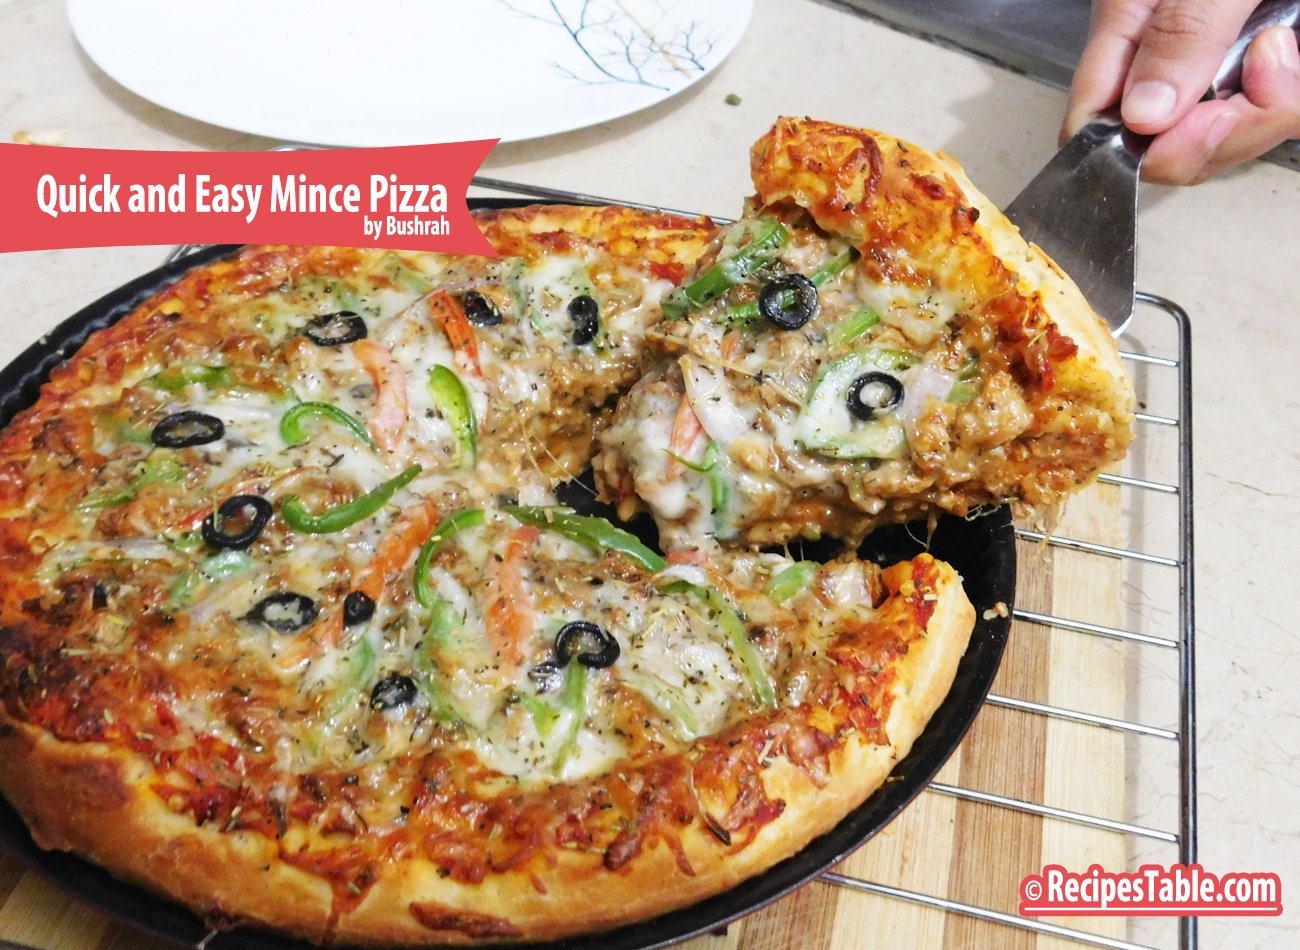
    Quick and Easy Mince Pizza


    Quick and Easy Mince Pizza
    Quick and Easy Mince Pizza

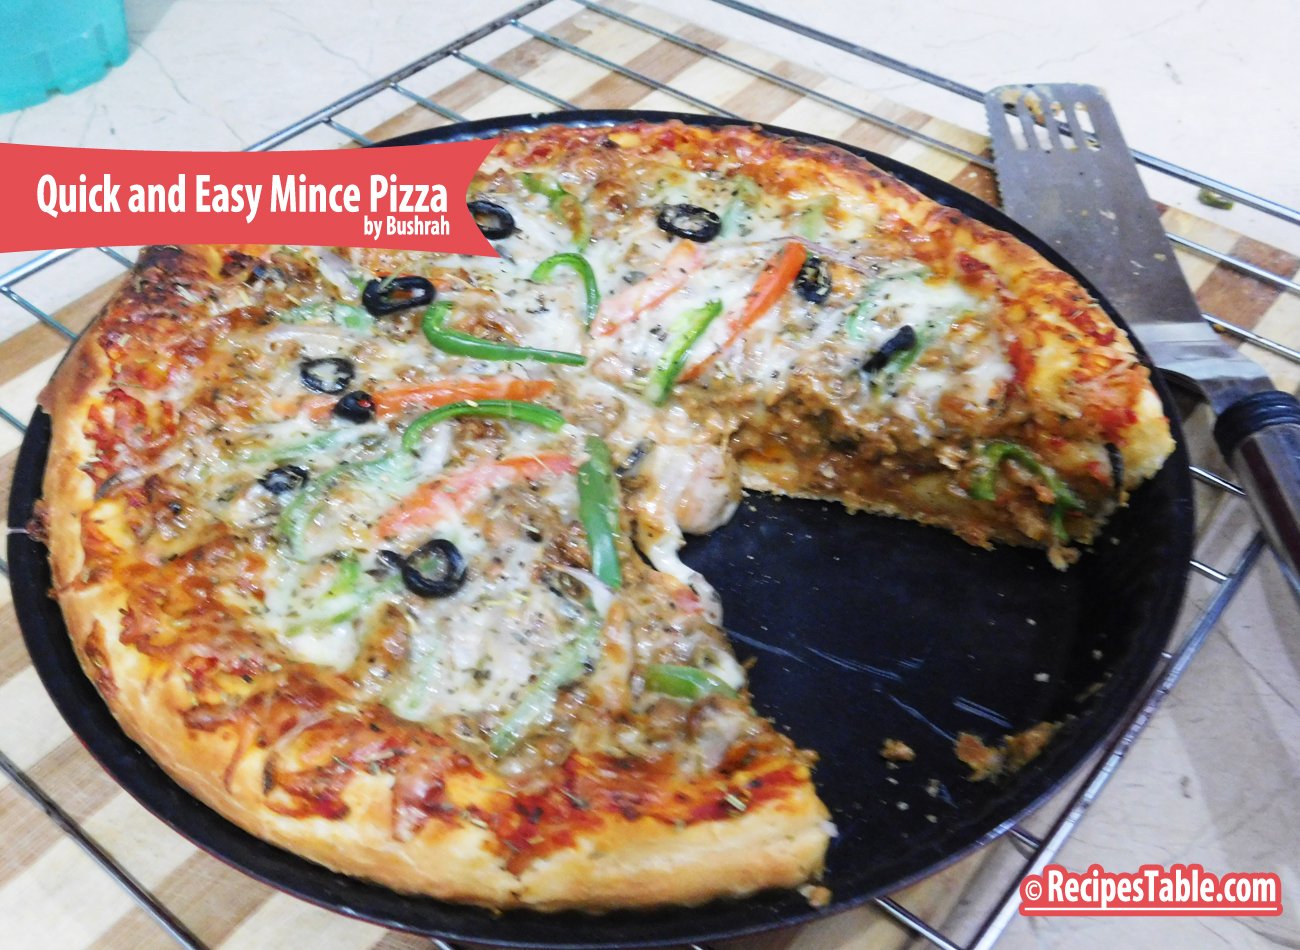
    I made this pizza last night for a quick dinner. I had been roaming around with the recipe for making the perfect pizza for so long and the thought of topping the pizza crust with minced triggered me last night all of a sudden. I had no other choice but to execute my idea.
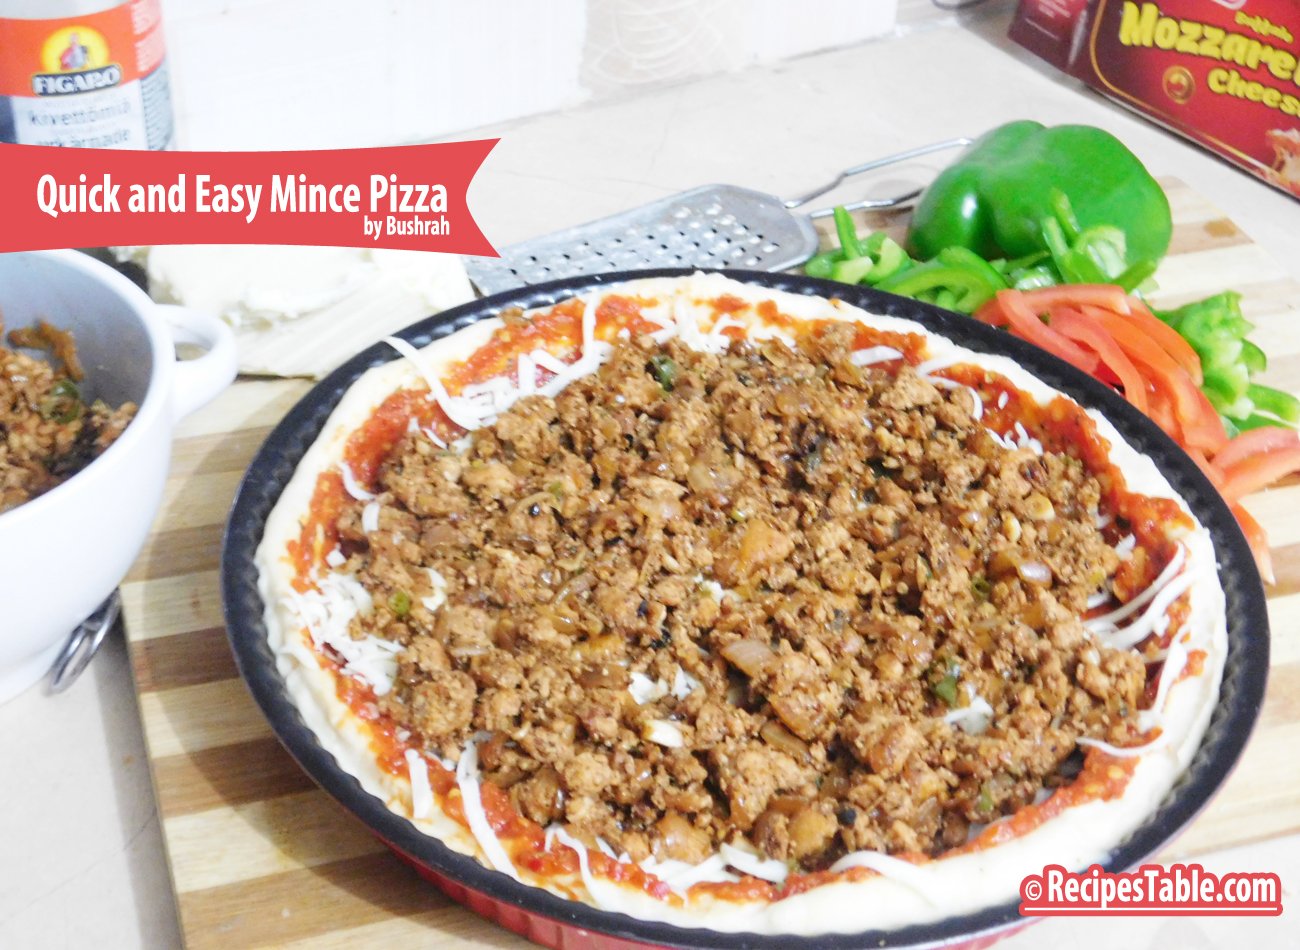
    When it came to top the pizza crust, I went a little overboard and made ground chicken sauce.Topped the crust with the ground chicken and then with veggies, olives generously sprinkled mozzarella cheese and herbs and baked it in the oven for 30 minutes. For the entire 30 minutes, I literally peeped into the oven window and enjoyed the amazing show of crust puffing up, ground chicken getting browned and the cheese getting melted, what a divine pleasure it was!!!
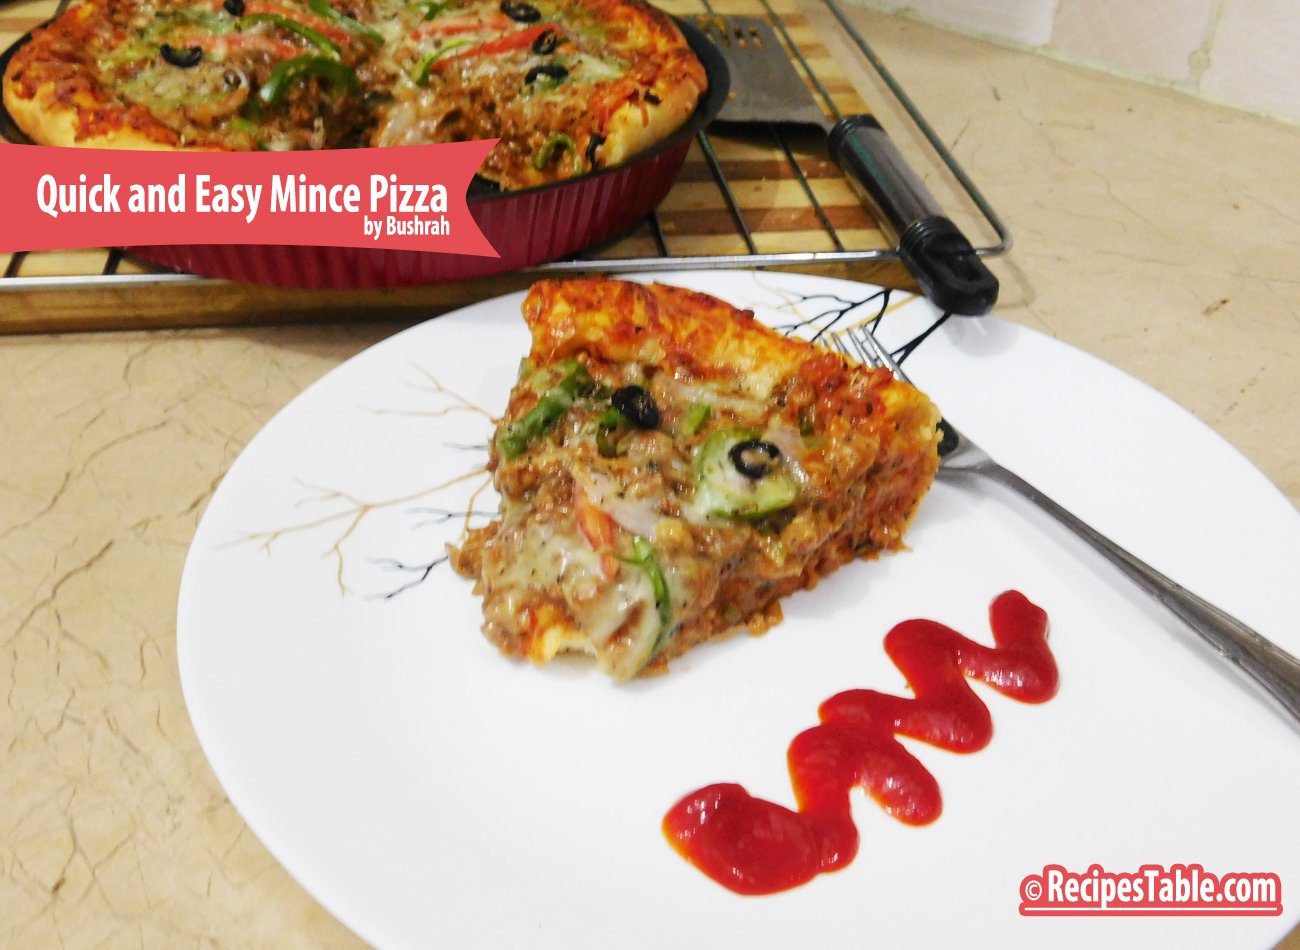
    Each step I did with so much passion and waited so eagerly to have a bite of this pizza. As the pizza came out perfectly baked with a soft crust and the mince topping on it along with the melted golden cheese on it, the mere sight of it made me go wild. I screamed out of joy and I burned my tongue out of greed!


    Quick and Easy Mince Pizza
    Quick and Easy Mince Pizza
    Quick and Easy Mince Pizza
    Quick and Easy Mince Pizza
    Quick and Easy Mince Pizza
    Quick and Easy Mince Pizza
    Quick and Easy Mince Pizza
    Quick and Easy Mince Pizza
    Quick and Easy Mince Pizza
    Quick and Easy Mince Pizza

    For this recipe I used pre-made pizza base, sauce and toppings.The fresh and juicy taste of fried mince, Italian pizza sauce, and vegetables are really an awesome treat for your tongue. Make a try and enjoy the original taste:-)

    fried mince

    Do try it. It’s a quick meal with most ingredients from the cupboard. My family really like it. It’s homemade pizza, so women are going to like it. It’s topped with ground chicken sauce, so men are going to love it. It has cheese on it, so kids are going to enjoy it of course in a messy way. After finishing up the pizza, everyone is going to go wild!!!

    Good with minced lamb, too.


    Bismillah, let’s begin!

    Check it out the Easy Mince Pizza Recipe and printable version below!

    Quick and Easy Mince Pizza Recipe

    This Easy Mince Pizza Recipe is for all those who want to prepare pizza at home but have not tried yet because making dough is not a quick process.It will reward you with infallible pizzas every time.
    Prep Time 15 minutes
    Cook Time 30 minutes
    Total Time 45 minutes
    Servings 6
    Author Bushrah | Recipestable

    Ingredients

    For Mince

    • 500 gm chicken mince
    • 6 mushrooms thinly sliced
    • 1 medium onion chopped
    • 1 teaspoon ginger garlic paste
    • 2 green chilies minced
    • 1 tablespoon cooking oil
    • 1 teaspoon crushed red chili
    • 1/2 teaspoon oregano
    • 1/2 teaspoon dried basil
    • 1/4 teaspoon rosemary optional
    • salt to taste

    For Pizza Filling & Topping

    • 1 large ball of premade pizza dough
    • 1-1/2 cup cooked chiken mince
    • 1 cup pizza sauce
    • 1/2 cup cheddar cheese
    • 1/2 cup Mozzarella cheese
    • 1 small onion thinly sliced
    • 1 small capsicum thinly sliced
    • 1 small tomato deseeded & thinly sliced
    • 4 olives thinly sliced
    • 1 teaspoon herb seasoning
    • 2 pinch oregano

    Instructions

    • Start making the mince by heating some oil in a pan over medium heat.
    • Then saute onion and cook for 3-4 minutes until translucent.
    • Now add ginger-garlic paste and cook for a minute without browning, then add the minced meat and green chilies.
    • Cook and stir well for few minutes or until lightly browned.
    • Season with salt, pepper, basil and rosemary.
    • Add mushrooms and cook for 5 minutes or until all water dries up and mince is cooked thoroughly.
    • Roll out the dough in the circle or a desired shape (I use my deep dish pizza pan, 3×12″ ), Pushing gently until fairly thin and prick the dough all over with a fork.
    • Spread on the sauce almost to the edges and sprinkle on the oregano.
    • Top generously with the shredded cheddar cheese, chicken mince, arrange some onion and pepper, tomato slices, olives over it.
    • Grate on Mozzarella to taste and sprinkle herb seasoning then place in the oven to bake for 30 minutes, or until the crust is puffy, crisp and slightly blistered.
    • Take out of oven, let sit for a few minutes, then slice, sprinkle with red pepper flakes and serve warm.

    Notes

    Serving Suggestions:
    So easy, and delicious with a glass of fresh lemonade.
     I have also posted Lunch Box Pizzas which is another easiest & tastiest version of making Pizza. Do check it out as well.

    [


    Put your own spin on it. And lemme know how it turns out. Post a photo on Facebook (Recipestable) or  on Twitter so I can see how lovely yours turn out.

    [divide icon=”circle”]

    Happy Pizza Making!!

    If you like this post, Please Subscribe to my blog and let me know your feedback by commenting below.. I have lots more recipes to share with you.

    [divide icon=”circle”]


  • Beat the Heat : Homemade Pistachio Falooda for Summer Parties!

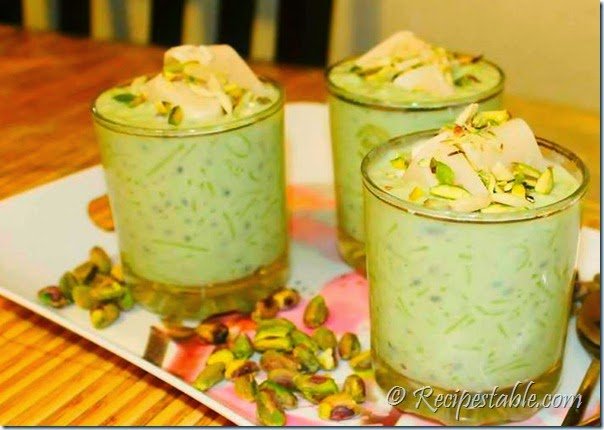
    Homemade Pistachio Falooda

    Falooda is an Indian and Pakistani recipe. It is cardamom flavored milk dessert with nuts, basil seeds, sev and ice cream topping. You need to plan some elements like soaking basil seeds and boiling-chilling milk ahead of time while making falooda. But all the effort is worth when you enjoy a glass of falooda. And yes making it at a home is also cheap. Wow!! Homemade cool, creamy falooda.

    I am so excited to share Homemade Pistachio falooda recipe with you guys today. Must try this Homemade Pistachio Falooda recipe and don’t forget to share your experience with us!!

    Homemade Pistachio Falooda recipe
    Photo: Homemade Pistachio Falooda Recipe

    [divider]

    [one_fourth]Prep Time: 10 minutes + chilling[/one_fourth] [one_fourth]Cook Time: 35 minutes [/one_fourth] [one_fourth]Servings: 4 [/one_fourth] [one_fourth_last]Difficulty Level: Medium[/one_fourth_last]

    • 75 gram falooda sev
    • 2 cups +2 tbsp water
    • 2 cups milk
    • 3 tablespoon sugar
    • 2 tablespoon chopped pistachios
    • 1 tablespoon raisins
    • 1 tablespoon basil seeds
    • 1/2 teaspoon pistachios essence
    • a pinch of green food color
    • a pinch of cardamom powder
    • 12 almonds
    • 12 raisins
    • ice cream as required

    [/tab] [tab]Yield: 4 servings Nutritional information is not yet available. [/tab] [/tabs]

    Directions:
    [tabs type=”horizontal”] [tabs_head] [tab_title]Step by Step Method[/tab_title] [tab_title]Serving Suggestions[/tab_title][/tabs_head] [tab]

    Step 1

    Soak basil seed in water for around 1 hour.

    Step 2

    Take a large pot, add water. Bring to a boil.

    Step 3

    Then add falooda sev and cook for 4-5 minutes or until they are tender and soft.

    Step 4

    Now strain and keep aside.

    Step 5

    Boil milk in a saucepan. Add sugar and mix well.

    Step 6

    Stir in the pistachios, green food color, basil seeds and cardamom powder.

    Step 7

    Cook and stir on low heat or until milk is thickened.

    Step 8

    Now add the cooked falooda sev to the milk.

    Step 9

    Cook and keep simmering for 10 minutes or until all the flavors get incorporated.

    Step 10

    Allow to cool completely.

    Step 11

    Refrigerate for 6 hours or until chilled.

    Step 12

    Divide milk mixture into four glasses.

    Step 13

    Topped with a dollop of ice cream, dry fruits.Homemade Pistachio Falooda is ready to serve.

    [/tab] [tab]

    • Serve chilled with Ice Cream.

    [/tab] [/tabs]

    If you like Homemade Pistachio Falooda recipe and make it then let me know your feedback by commenting below.
  • Sajji Pulao Recipe: Your New Favorite Rice Dish

    Sajji Pulao

    Some people always look something new to make, for such people we are giving amazingly delicious recipe which you might eat in dine out but not at home. This is Sajji Pulao that is not difficult at all, so in next get together surprise your guest with this rice and chicken dish. 

    Bismillah, let’s begin!

    Check it out the Sajji Pulao Recipe and printable version below!

    Sajji Pulao Recipe

    This is Sajji Pulao that is not difficult at all, so in next get together surprise your guest with this Sajji Pulao pulao recipe
    Prep Time 15 minutes
    Cook Time 1 hour
    Total Time 2 hours
    Servings 6
    Author Bushrah | Recipestable

    Ingredients

    For Sajji

    • 1 whole chicken
    • 1/2 cup vinegar
    • 2 tbsp oil
    • 2 tsp garlic paste
    • 2 tsp red chili powder
    • 1 tsp chaat masala
    • 1/2 tsp salt

    For Pulao

    • 1 kg basmati rice
    • 250 gm tomatoes
    • 250 gm onions
    • 100 gm dried plum
    • 4 bay leaves
    • 4 tbsp green chili paste
    • 2 tsp black cumin
    • 2 tsp salt
    • 1 tsp whole black pepper
    • 1/2 cup Oil or butter

    Instructions

    Method

      To Make Chicken Sajji

      • Marinate whole chicken with vinegar, chaat masala, salt, garlic, red chili powder and oil.
      • Place in a refrigerate for 6 hours or overnight.
      • Now preheat oven to 200 degree c.
      • Bake marinated chicken in the preheated oven for 40 minutes or until chicken is tender.

      To Make Pulao

      • Heat oil in a large skillet over medium high heat.
      • Fry onions for 4-5 minutes or until golden brown.
      • Add black cumin, chopped tomato, whole black pepper, salt and bay leaves.
      • Stir well.
      • Now add 2 glasses of water, dried plums, green chili paste and soaked rice in it.
      • As the water gets dry from the rice put the chicken sajji on it.
      • Cover the skillet and leave it for 30 minutes.
      • Delicious Sajji Pulao is ready to serve. ENJOY!!

      Notes

      Serving Suggestions:
      Serve with Mint Raita and Salad.

      I have also posted Meatball and Pea Pulao which is another easiest & tastiest version of making Pulao. Do check it out as well.

      [divide icon=”circle”]

      Put your own spin on it. And lemme know how it turns out. Post a photo on Facebook (Recipestable) or  on Twitter so I can see how lovely yours turn out.

      [divide icon=”circle”]

      Happy Cooking!!

      If you like this post, Please Subscribe to my blog and let me know your feedback by commenting below.. I have lots more recipes to share with you.

      [divide icon=”circle”]

    • 5-Minute Pick-Me-Up: Make Delicious Saffron Pista Milk!

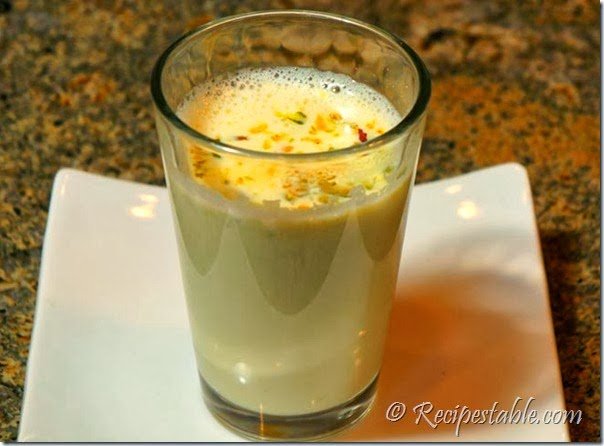
      Saffron Pista Milk

      Let’s see the Saffron Pista Milk recipe to remember our childhood. Check it out the Saffron Pista Milk recipe here!!

      Saffron Pista Milk Recipe
      Photo: Saffron Pista Milk Recipe

      [divider]

      [one_fourth]Prep Time: 10 minutes + chilling[/one_fourth] [one_fourth]Cook Time: 20 minutes[/one_fourth] [one_fourth]Servings: 4 [/one_fourth] [one_fourth_last]Difficulty Level: Easy [/one_fourth_last]

      [divider]

      [tabs type=”horizontal”] [tabs_head] [tab_title]Ingredients[/tab_title] [tab_title]Nutrition[/tab_title] [/tabs_head] [tab]

      • 4 cups milk
      • 10-15 almonds
      • 1/6 cup pistachios
      • a few saffron strands
      • 1/4 tbsp cardamon powder
      • 1/4 cup sugar
      • water as required

      [/tab] [tab]Yield: 4 servings

      Nutritional information is not yet available. [/tab] [/tabs]

      Directions:
      [tabs type=”horizontal”] [tabs_head] [tab_title]Step by Step Method[/tab_title] [tab_title]Serving Suggestions[/tab_title][/tabs_head] [tab]

      Step 1

      Boil the milk in a heavy bottomed pan. Continue heating even after the milk boils.

      Step 2

      Heat about a liter of water in another pan and add the almonds and the pistachios.

      Step 3

      Continue heating until the almonds expand.

      Step 4

      Drain off the water and wash the nuts with cold water. The skin of the almonds and the pistachios can be easily removed now.

      Step 5

      Now grind the almonds and pistachios into a smooth paste and add it to the milk and stir well.

      Step 6

      Add the saffron strands,sugar and cardamon powder and mix well.

      Step 7

      Continue heating the milk for a few more minutes.

      Step 8

      When the milk becomes a little thicker than before,cool it .

      Step 9

      Refrigerate it for 2-4 hours and serve it cold. Saffron Pista Milk is ready to serve. Enjoy!

      [/tab] [tab]

      • Serve with cookies or any biscuits.

      [/tab] [/tabs]

      If you like Saffron Pista Milk recipe and make it then let me know your feedback by commenting below.
    • The Perfect Brunch: Easy Hash Brown Pizza Omelette Recipe!

      Hash Brown Pizza Omelette

      Hash brown Pizza Omelette is a layer of grated potatoes, tomato sauce, topped with eggs, cheese and vegetables creates this simple yet very creative and delicious dish that I learned from my khaala. A  simple and delightful change to your regular omelette that I promise you will fall in love with this Hash brown Pizza Omelette recipe. I can’t emphasize enough how much this Hash brown Pizza Omelette recipe is a must try. Check it out the Hash brown Pizza Omelette recipe here!

      [divider] [one_fourth]Prep Time: 10 minutes[/one_fourth] [one_fourth]Cook Time:20 minutes[/one_fourth] [one_fourth]Servings: 3[/one_fourth] [one_fourth_last]Difficulty Level: Easy[/one_fourth_last] [divider] [tabs type=”horizontal”] [tabs_head] [tab_title]Ingredients[/tab_title] [tab_title]Nutrition[/tab_title] [/tabs_head] [tab]

      • 3 mediums potatoes, peeled and grated
      • 6 large eggs
      • 1/3 cup milk
      • 3 mushrooms, thinly sliced
      • 1 small onion, chopped.
      • 1 small tomato, thinly sliced
      • 1 small green pepper, chopped
      • 1/4 cup mozzarella cheese, grated
      • 1/4 cup cheddar cheese, grated
      • 2 tablespoon oil or butter
      • 2 tablespoon tomato sauce
      • 2 tablespoon chili garlic sauce
      • 1/4 teaspoon red chili flakes
      • 1/4 teaspoon dry parsley, crushed
      • 1/4 teaspoon oregano
      • salt and pepper according to taste

      [/tab] [tab]Yield: 3 servings Nutritional information is not yet available. [/tab] [/tabs] Directions: [tabs type=”horizontal”] [tabs_head] [tab_title]Step by Step Method[/tab_title] [tab_title]Serving Suggestions[/tab_title][/tabs_head] [tab]

      Step 1

      Heat oil in a nonstick frying pan over medium heat.

      Step 2

      Spread the grated potato all over the pans evenly.

      Step 3

      Sprinkle with salt and pepper.

      Step 4

      Cover with a lid and cook on medium heat for 5-8 minutes or until the bottom of the potatoes turns a light golden color.

      Step 5

      The potatoes will all come together into one layer and will be easy to flip.

      Step 6

      Flip the grated potatoes and cover again for 3 minutes on a medium heat.

      Step 7

      Meanwhile, In a large bowl, beat the eggs with the milk, salt, red chili flakes, parsley and oregano.

      Step 8

      Spread tomato and chili garlic sauce over the potatoes.

      Step 9

      Pour the eggs over it and cover again for 2 minutes or until the eggs start to set.

      Step 10

      When the eggs start to cook from the edges, top with cheese. Reserve 2 tablespoon cheese.

      Step 11

      Sprinkle with the green peppers, onions, mushrooms and tomatoes.

      Step 12

      Then top with the remaining cheese.

      Step 13

      Put the lid on and cook on low heat for 2-3 minutes or until the egg cooked through and the cheese has melted and bubbly.

      Step 14

      Remove from the pan and slide onto your serving plate. Hash Brown Pizza Omelette is ready to serve.

      [/tab] [tab]

      • Serve with bread or chili garlic sauce.

      [/tab] [/tabs] If you like Hash Brown Pizza Omelette recipe and make it then let me know your feedback by commenting below.
    • Crispy Chicken Pakora Recipe

      Crispy Chicken Pakora

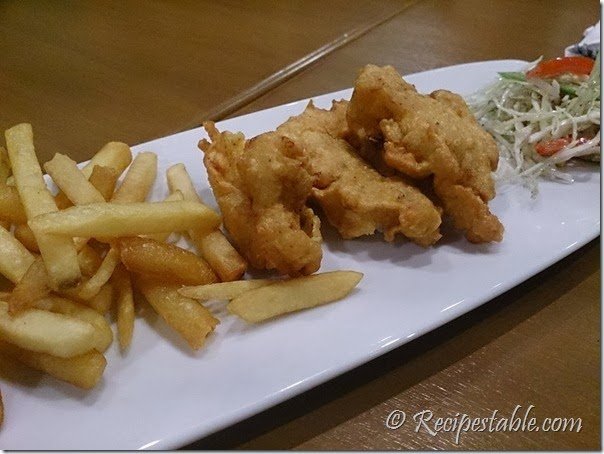
      Marinated chicken pieces dip in egg then coat in the seasoned flour mixture. Its a fast supper to make or great for party nibbles. Restaurant Style Crispy chicken pakora is now prepared at home with this Crispy Chicken Pakora recipe. It tastes best served sizzling hot with your favorite sauces. Check it out the Crispy Chicken Pakora recipe here!!’

      Crispy Chicken Pakora Recipe
      Photo: Crispy Chicken Pakora Recipe

      [divider]

      [one_fourth]Prep Time:10 minutes[/one_fourth] [one_fourth]Cook Time: 20 minutes[/one_fourth] [one_fourth]Servings: 8 [/one_fourth] [one_fourth_last]Difficulty Level: Easy [/one_fourth_last]

      [divider]

      [tabs type=”horizontal”] [tabs_head] [tab_title]Ingredients[/tab_title] [tab_title]Nutrition[/tab_title] [/tabs_head] [tab]

      • 1 kg boneless chicken
      • 1/2 cup chickpea flour
      • 1/2 cup all purpose flour
      • 1/2 cup cornflour
      • 1/2 cup rice flour
      • 2 eggs, lightly beaten
      • 4 tablespoon vinegar
      • 2 tablespoon garlic powder
      • 2 tablespoon soy sauce
      • 2 tablespoon chicken powder
      • 1 tablespoon red chilli powder
      • salt according to taste
      • Oil for deep frying

      [/tab] [tab]Yield: 8 servings

      Nutritional information is not yet available. [/tab] [/tabs]

      Directions:
      [tabs type=”horizontal”] [tabs_head] [tab_title]Step by Step Method[/tab_title] [tab_title]Serving Suggestions[/tab_title][/tabs_head] [tab]

      Step 1

      Place chicken in a large bowl, Add vinegar, soy sauce , garlic powder, chicken powder, chili powder and salt. Mix well.

      Step 2

      Cover and marinate for half an hour.

      Step 3

      Place all flours in a shallow dish or tray. Add red pepper, and salt according to your taste. Mix well.

      Step 4

      Dip the marinated chicken pieces in the beaten eggs.

      Step 5

      Then coat them with the spice mixture by pressing the pieces properly in the spice mixture.

      Step 6

      Remove extra spice mixture from the pieces by shaking them.

      Step 7

      Heat oil in a deep pan over medium heat. Deep fry the chicken pieces on medium flame for 20 minutes or until they turn crispy and golden brown

      Step 8

      Remove from the pan. and drain on paper towel. Crispy Chicken Pakora is ready to serve. ENJOY!!

      [/tab] [tab]

      • Serve with any sauce, coleslaw salad and french fries.

      [/tab] [/tabs]

      If you like Crispy Chicken Pakora recipe and make it then let me know your feedback by commenting below.
    • Easy Apple Sheet Cake: A Delicious Fall Treat in Minutes!

      Apple Sheet Cake

      Apple Sheet Cake is an easy and delicious cake recipe that is moist, tender, and topped with a sugar butter frosting. Very light and not overly sweet. This sheet cake is a favorite on cold winter nights. It’s moist and flavorful but definitely not low-calories. Use this tasty apple sheet cake recipe to make festive snack cakes for your next party. They require a little prep and decorating but are oh-so-good. This apple sheet cake is a good choice for a morning cake, but we also liked it as a dessert, served with whipped cream or vanilla ice cream. Must try this Apple Sheet Cake recipe and don’t forget to share your experience with us!!

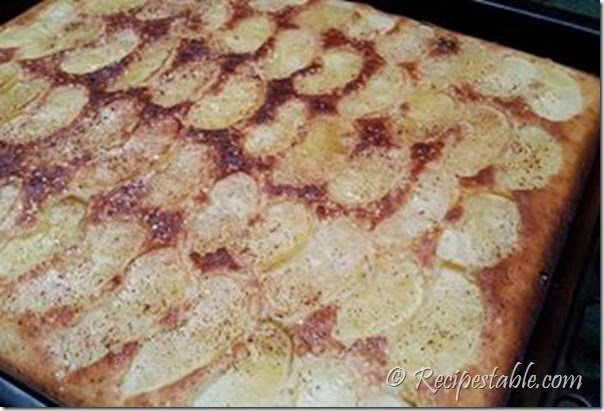
      Apple Sheet Cake Recipe
      Photo: Apple Sheet Cake Recipe

      [divider]

      [one_fourth]Prep Time: 30 minutes[/one_fourth] [one_fourth]Cook Time: 30 minutes[/one_fourth] [one_fourth]Servings: 12[/one_fourth] [one_fourth_last]Difficulty Level: Medium [/one_fourth_last]

      [divider]

      [tabs type=”horizontal”] [tabs_head] [tab_title]Ingredients[/tab_title] [tab_title]Nutrition[/tab_title] [/tabs_head] [tab]

      For Pastry:

      • 3 cups all-purpose flour
      • 1 cup milk
      • 1/2 cup shortening
      • 1-1/2 tsp baking powder
      • 1 tsp salt

      For Apple Filling:

      • 3 pounds apples, peeled, cored and thinly sliced
      • 1 cup white sugar
      • 1/2 cup butter
      • 2 tbsp all purpose flour
      • 1 tsp cinnamon powder

      For Frosting:

      • 2-1/2 cups confectioners’ sugar
      • 1/3 cup butter, softened
      • 3 tbsp milk
      • 1/2 tsp vanilla extract

      [/tab] [tab]

      Yield: 1 – 10×15 inch sheet pan

      • Calories: 260 kcal
      • Carbohydrates: 40.1 g
      • Cholesterol: 17 mg
      • Fat: 10.7 g
      • Fiber: 1.8 g
      • Protein: 2.2 g
      • Sodium: 164 mg

      [/tab] [/tabs]

      Directions:
      [tabs type=”horizontal”] [tabs_head] [tab_title]Step by Step Method[/tab_title] [tab_title]Serving Suggestions[/tab_title][/tabs_head] [tab]

      Step 1

      Preheat oven to 200 degrees C.

      Step 2

      Place 3 cups flour, bakingpowder and salt in a large bowl.

      Step 3

      Add shortening. Mix to the consistency of coarse crumbs.

      Step 4

      Stir in 1 cup cold milk slowly until completely blended.

      Step 5

      Divide dough into two balls.

      Step 6

      Roll out one ball of dough to fit a 15 x 10 inch pan with some dough extending over the edge of the pan.

      Step 7

      Place apples, sugar, cinnamon and 2 tablespoon flour in a large bowl.

      Step 8

      Place apple filling in an even layer over prepared crust.

      Step 9

      Thinly slice 1/2 cup butter and evenly distribute over the apples.

      Step 10

      Roll out the remaining dough and place over the apple filling.

      Step 11

      Seal edges and prick the top all over with a fork.

      Step 12

      Bake in the preheated oven for 30 minutes.

      Step 13

      To make the frosting:
      In a small bowl,mix together the confectioners’ sugar, 3 tablespoons milk, vanilla extarct and 1/3 cup butter. Beat until smooth and creamy.

      Step 14

      Allow sheet cake to cool for 5 minutes before frosting. Apple Sheet Cake is ready to serve.

      [/tab] [tab]

      • Serve with tea or coffee.

      [/tab] [/tabs]

      If you like Apple Sheet Cake recipe and make it then let me know your feedback by commenting below.
    • Skip the Takeout: Make Restaurant-Style Hareesa at Home!

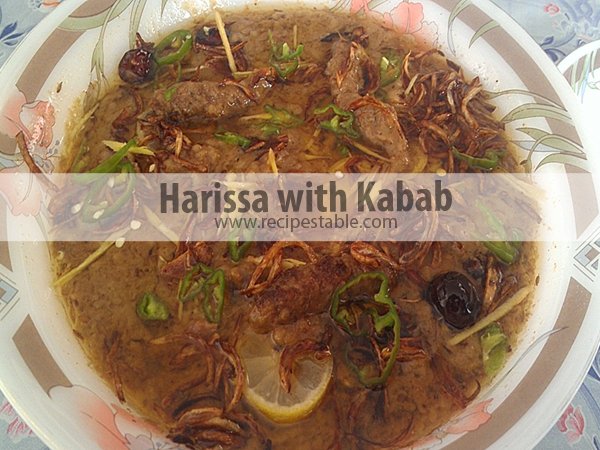
      Harissa with Kabab

      Harissa is a traditional Kashmiri dish made with wheat and grains. The specialty of this dish is kabab are added in it for more delicate taste and texture. It’s a favorite spicy dish in our country and the most cooked dish on gatherings and parties.

       Harissa with kabab Recipe
      Photo: Harissa with kabab Recipe

      This is my Rubina Khala’s ( my aunt) fabulous Harissa with kabab recipe that has become one of my absolute favorites and a must-have whenever we when we have a family gathering or family dinner. I recently asked for the recipe and added my twist.Truly delicious, very filling and energy boosting.

      I love to eat Harissa any time; if only i din’t have to give away my last energy stirring it, I would have really made it every day!!

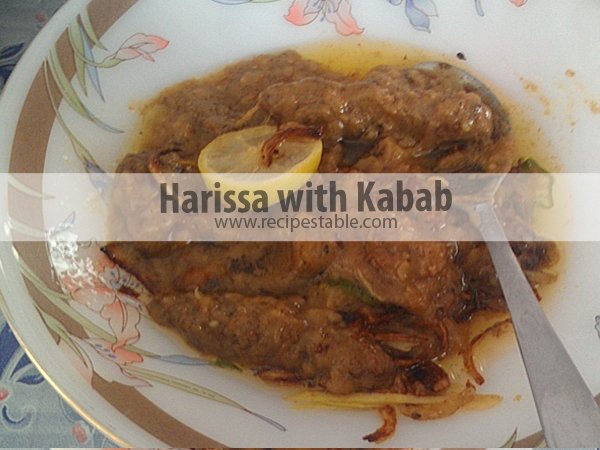
       Harissa with kabab Recipe
      I love to eat Harissa any time. 😛

      Way of eating harissa depends on the region as well. Some people eats it directly with spoon and some people eats it with naan bread.  Perfect dinner idea for Bakra Eid. Do try it, I hope you enjoy these as much as my family does.

      Check it out the Harissa with Kabab Recipe and printable version below!!

      Harissa with Kabab

      Harissa is a traditional Kashmiri dish made with wheat and grains. The specialty of this dish is kabab are added in it for more delicate taste and texture. It’s a favorite spicy dish in our country and the most cooked dish on gatherings and parties.
      Prep Time 30 minutes
      Cook Time 2 hours
      Total Time 2 hours 30 minutes
      Servings 8
      Author Bushrah | Recipestable

      Ingredients

      • For Harissa
      • 1 kg mutton
      • 2 onion thinly sliced
      • 1 whole garlic bulb don’t peel
      • 2 inch piece of ginger peeled and chopped
      • 1 cup clarified butter or desi ghee
      • 3/4 cup wheat crushed
      • 1/2 cup rice
      • 1/2 cup whole moong daal whole green lentil
      • 1 teaspoon red chili powder
      • 1 teaspoon garam masala powder
      • 1 teaspoon coriander powder
      • 1/2 teaspoon turmeric powder haldi
      • salt according to taste

      For Kabab

      • 750 gm mince keema
      • 1 tablespoon ginger garlic paste
      • 1 onion chopped
      • 3 tablespoon seekh kabab masala
      • 1/2 teaspoon red chili crushed
      • salt to taste
      • oil for frying

      Instructions

      Directions

      • Soak rice and wheat together and boil until mushy.
      • Soak moong in warm water.
      • Put all the kabab ingredients except oil in a chopper or food processor. Process until well combined.
      • Take it out in a mixing bowl and make finger size kabab.
      • Heat oil in a shallow pan over medium heat. Shallow fry kababs until turned golden brown.
      • Remove from the oil and keep aside
      • Take a large pot, add meat ,onion, ginger, garlic, turmeric powder, coriander powder, red pepper and salt.
      • Add 2 cups of water. Bring to a boil and cook until meat is tender and it has enough soup in it.
      • Discard garlic and onion.
      • Add moong daal in it and cook until meat is all mushy.
      • Add rice and wheat in it. Cook and stir for 15 minutes or until well combined.
      • Blend with a hand blender and add all spice powder. Cook and stir for 20 minutes or until you have haleem like Consistency.
      • Now put kababs in it.
      • Make tarka (bighaar) with clarified butter. Add a pinch of turmeric and cayenne to give color.
      • Put tarka on the harissa.
      • Dish it out. Garnish with green chillies. lemon wedges and coriander leaves. Delicious Harissa with Kabab is ready to serve. Enjoy!!

      Notes

      Serving Suggestions:
      Serve with naan or tandoori roti.

      I have also posted Nihari Recipe which is another tastier version of Lahori Food. Do check it out as well.

      [divider]

      If you like this Harissa with Kabab recipe, Please Subscribe to my blog. I have lots more recipes to share with you. And If you make it then let me know your feedback by commenting below.