Tag: Quick and Easy

  • Easy & Delicious Homemade Pizza Rolls Recipe: Perfect for Parties or Snacks!

    A tasty dinner option for busy nights and with few simple ingredients , prep has never been easier! Take your pizza and give it a roll!
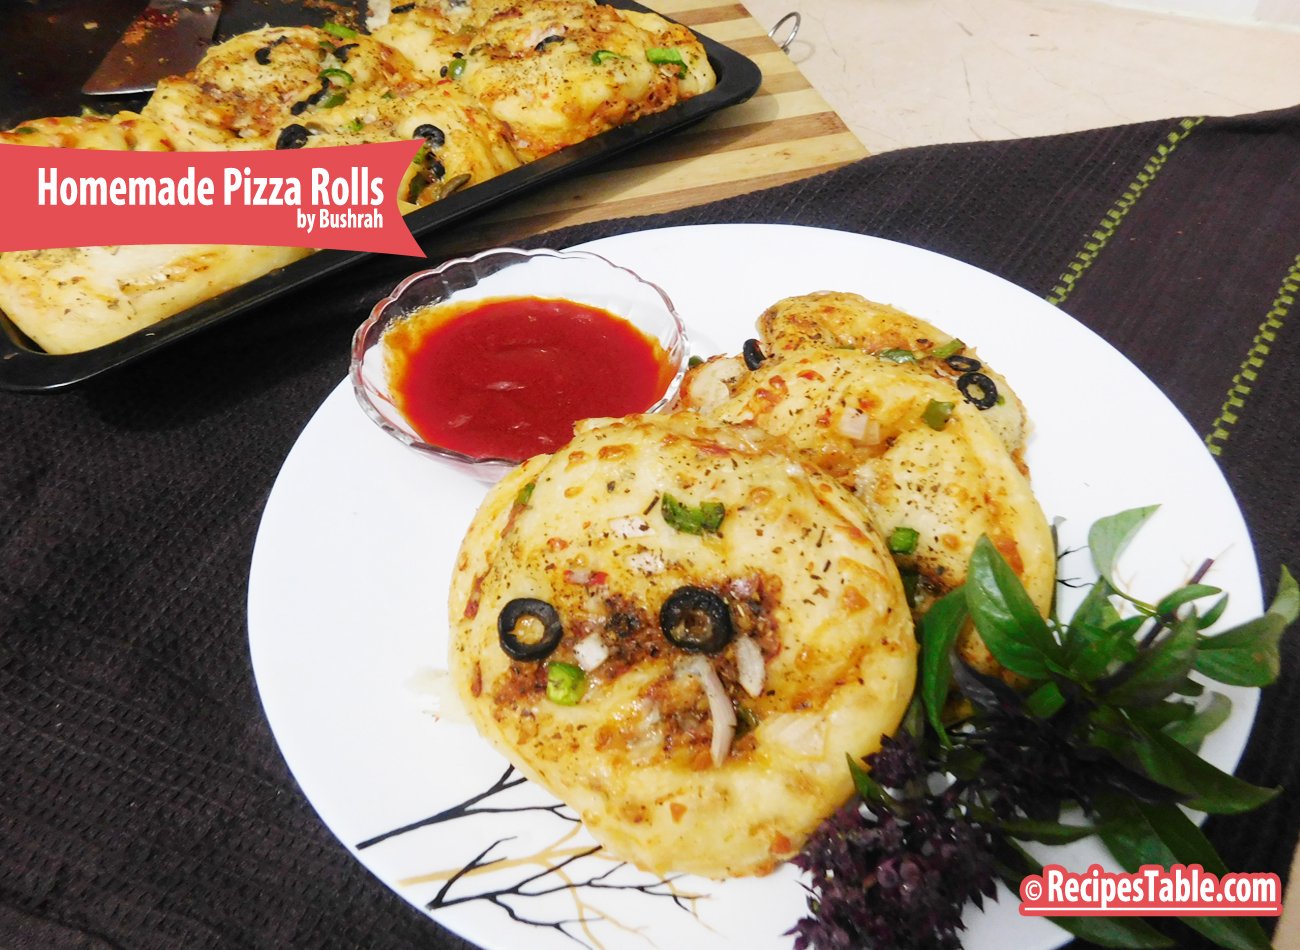
    Homemade Pizza Rolls
    Homemade Pizza Rolls

    Homemade Pizza Rolls

    Does anyone remember those mini pizza bites…? Am I the only one that gobbled up two to three every day as a tea time snack? Well, guess what. These are sooooo much better! And easy to make!

    Homemade Pizza Rolls
    Homemade Pizza Rolls

    They would be perfect for the friends pizza party because you can fill them individually with a vast array of toppings. They’d also be perfect as an appetizer with a glass of lemonade. In fact, I don’t really know of a time that these pizza rolls is not appropriate, do you?

    I didn’t think so.
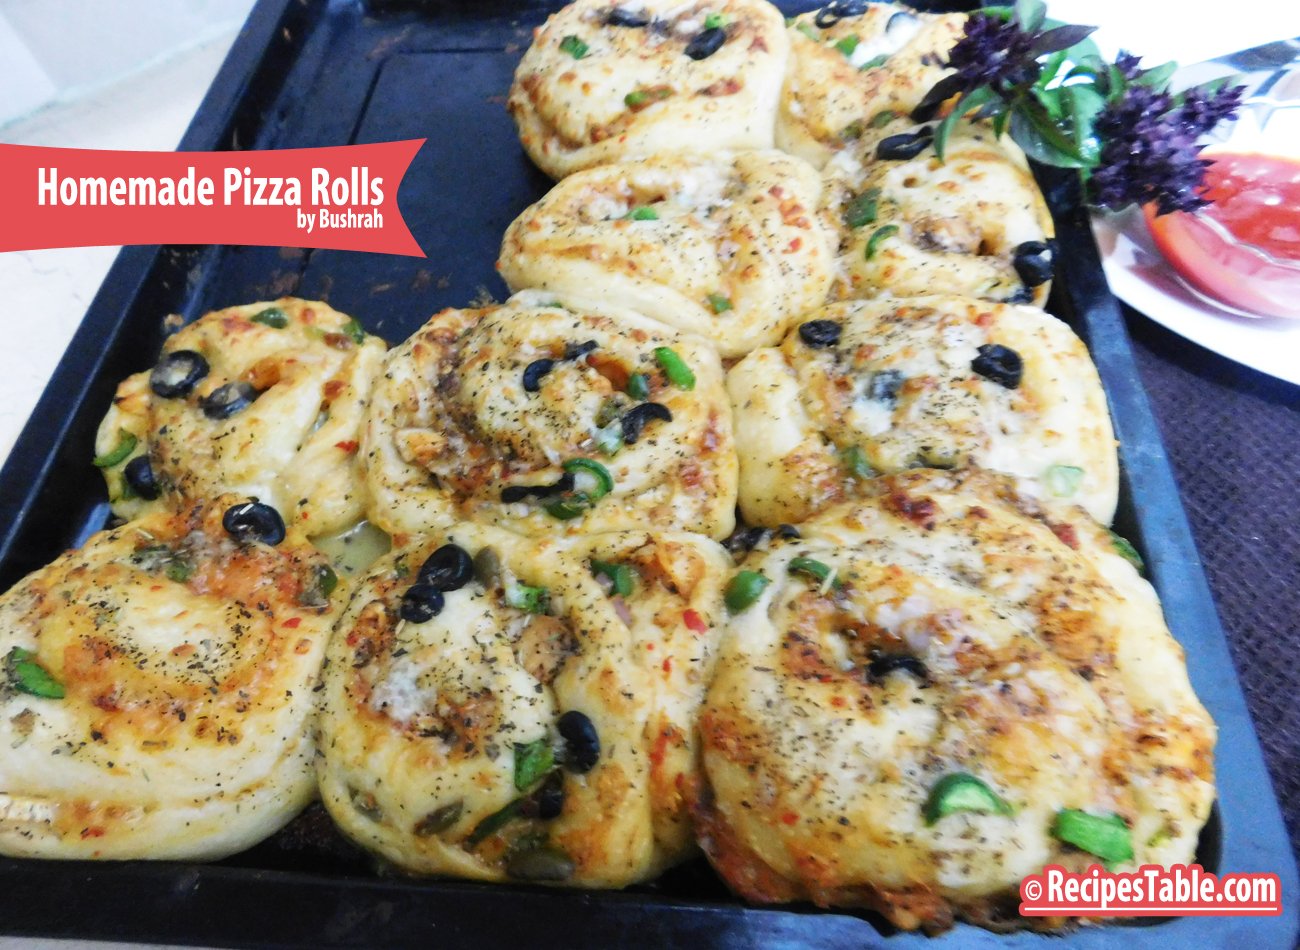
    Homemade Pizza Rolls
    Homemade Pizza Rolls

    This Homemade Pizza Roll Recipe is perfect and my family favorites. I used my favorite pizza dough recipe to make these rolls and they turned out beautifully in just over an hour, start to finish. Super fast. You could also make the dough ahead of time and freeze it, which is what I do often!
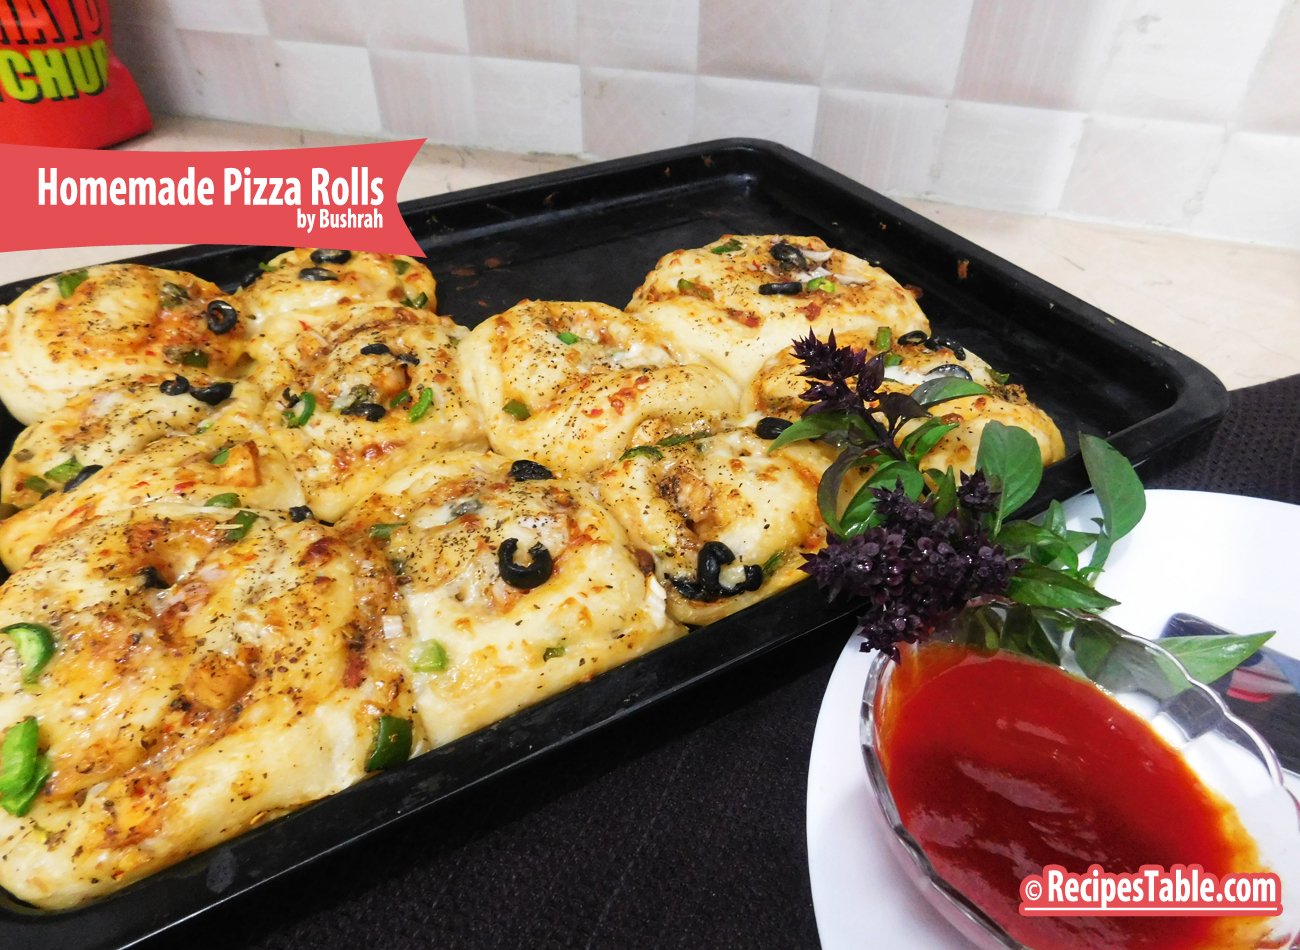
    Homemade Pizza Rolls
    Homemade Pizza Rolls

    Let it be known that although the recipe calls for whole wheat flour, more often times than not, I just use all white flour. What can I say? I’m a carb purist.

    All you is roll out the Pizza dough, then fill with whatever toppings you choose, rolled into a spiral then baked. I kept things simple with pizza sauce, chicken and mozzarella cheese, few veggies but you could totally go crazy here and add sauteed mushrooms, goat cheese, pepperoni, bits of sausage and even scrambled eggs and cheese. The options are endless!
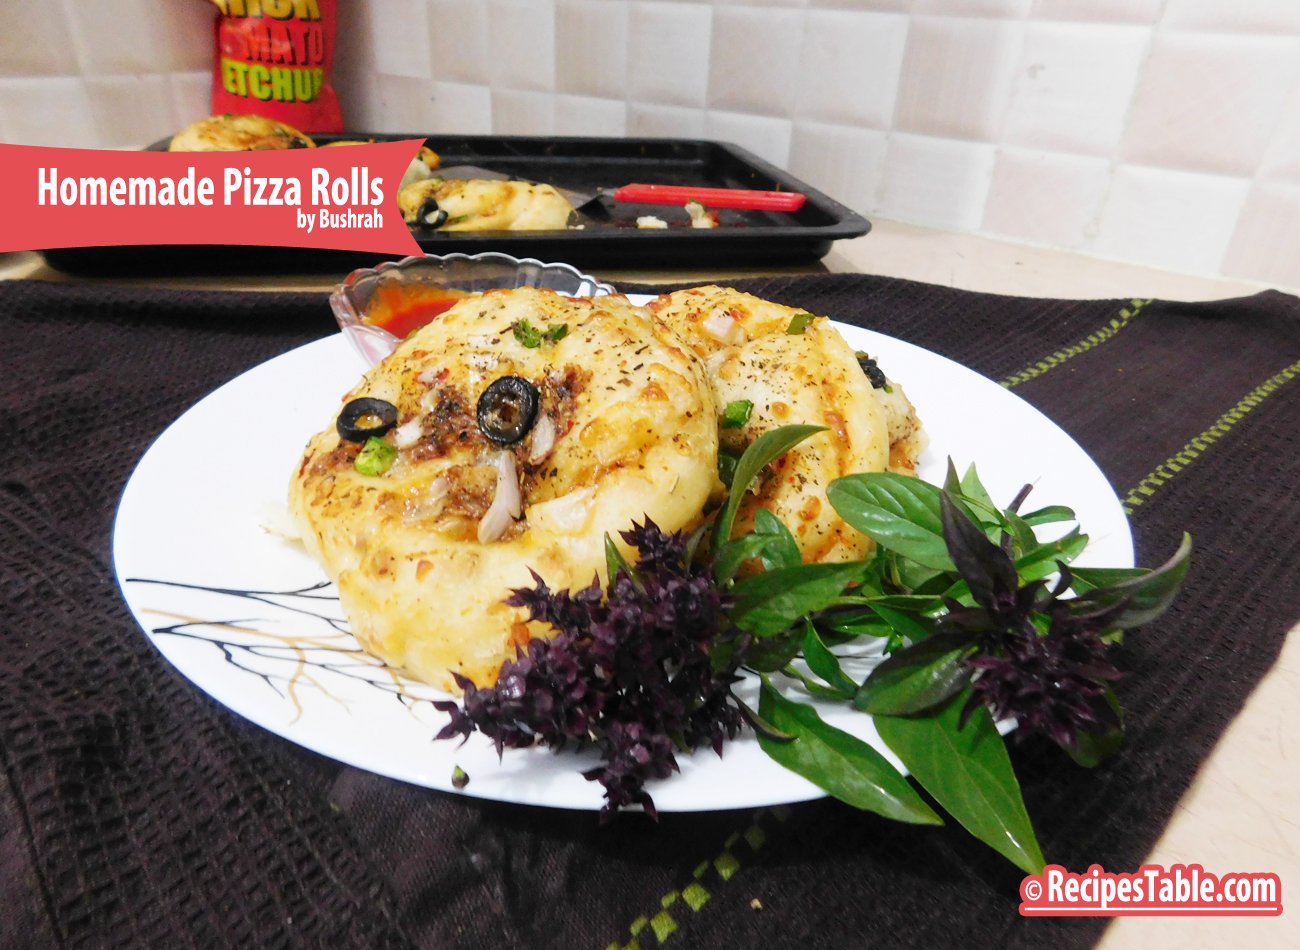
    Homemade Pizza Rolls
    Homemade Pizza Rolls

    Pizza sauce is my favorite part about the pizza (besides a crispy crust) and the cheese is Fatima’s & Wahab’s favorite. I fill these pizza rolls with just a little bit of sauce to make them happy and I serve with extra sauce to make me happy. 🙂

    Dip until your heart is content!

    Check it out the printable version Homemade Pizza Rolls Recipe here!!

    Homemade Pizza Rolls

    A tasty dinner option for busy nights and with few simple ingredients , prep has never been easier! Take your pizza and give it a roll!
    Prep Time 10 minutes
    Cook Time 43 minutes
    Total Time 1 hour 13 minutes
    Servings 9
    Author Bushrah @ Recipestable

    Ingredients

    • 1 lb pizza dough
    • 1/2 cup pizza sauce
    • 1/2 cup cooked chicken pieces or mince
    • 1 cup grated Mozzarella Cheese
    • 1/2 cup grated Cheddar Cheese
    • 1 green bell pepper chopped
    • 4-5 black olives chopped
    • 1 teaspoon dried oregano
    • 1 teaspoon dried basil
    • a pinch of red pepper flakes

    Instructions

    • Line a 9×9 baking dish with parchment paper and keep aside.
    • Lightly flour a work surface and roll the dough into an 8×12 rectangle.
    • Spread the pizza sauce over the dough to the edges.
    • Top with the chicken or mince, then 1/2 of the mozzarella cheese, green pepper and olives.
    • Sprinkle oregano and basil over it.
    • Starting on the long side, roll the dough up to form a log.
    • Trim the edges if uneven, then cut the dough into 9 equal slices.
    • Place the slices, cut side down, in the prepared baking dish, making 3 rows of 3 rolls each.
    • Cover the dish with foil and let it sit to rise for 30 minutes.
    • Meanwhile, preheat the oven to 375ºF.
    • Place the rolls in the preheated oven, still covered, and bake for 20 minutes.
    • Remove the foil and return the pan to the oven and bake for an additional 20 minutes.
    • The rolls should be browned and the cheese melted.
    • Sprinkle the remaining 1/2 cup of mozzarella and red pepper flakes over the top of the rolls, then return to the oven until the cheese is melted, about 3 minutes.
    • Let the rolls cool slightly in the pan, then top with the remaining basil.
    • Delicious Homemade Pizza Rolls are ready to serve. ENJOY!

    Notes

    Recipe Note’s:
    You may use whole wheat pizza dough instead of white flour.
    If you prefer, you can bake these rolls in two muffin pans or even a 9×13 baking pan.

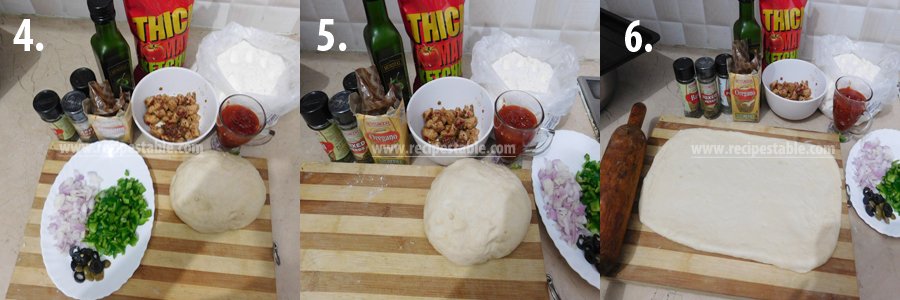
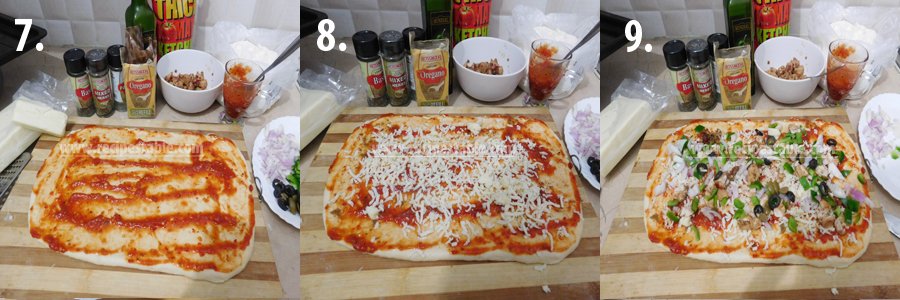
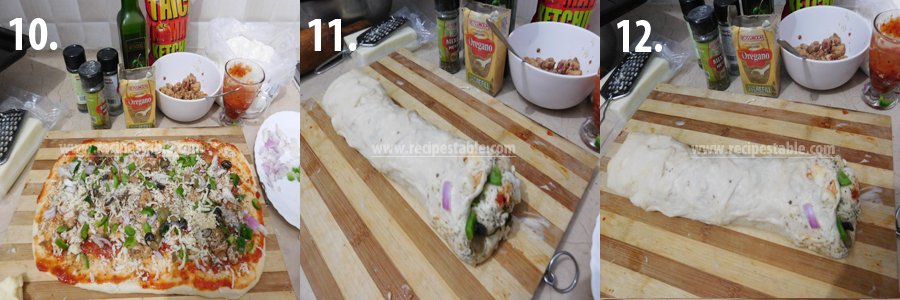
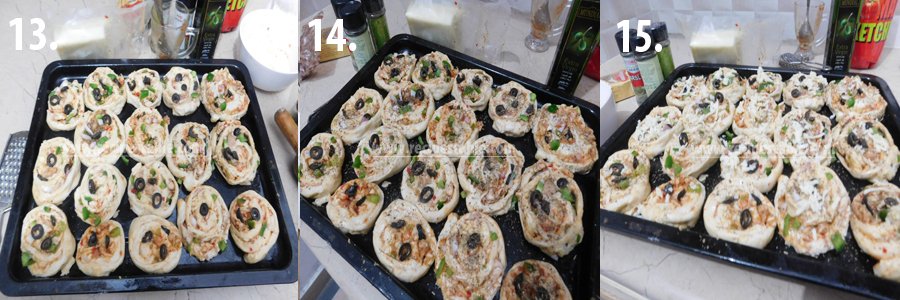
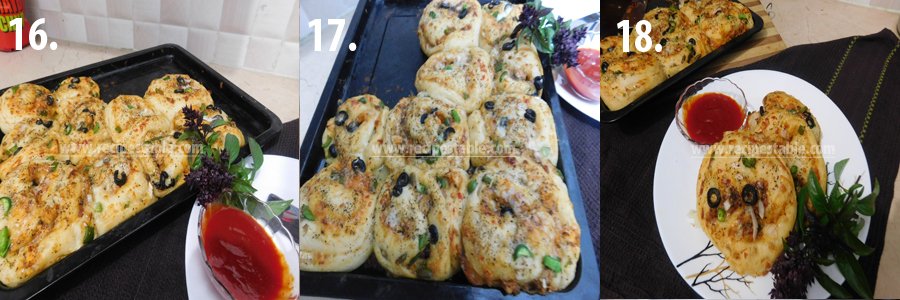
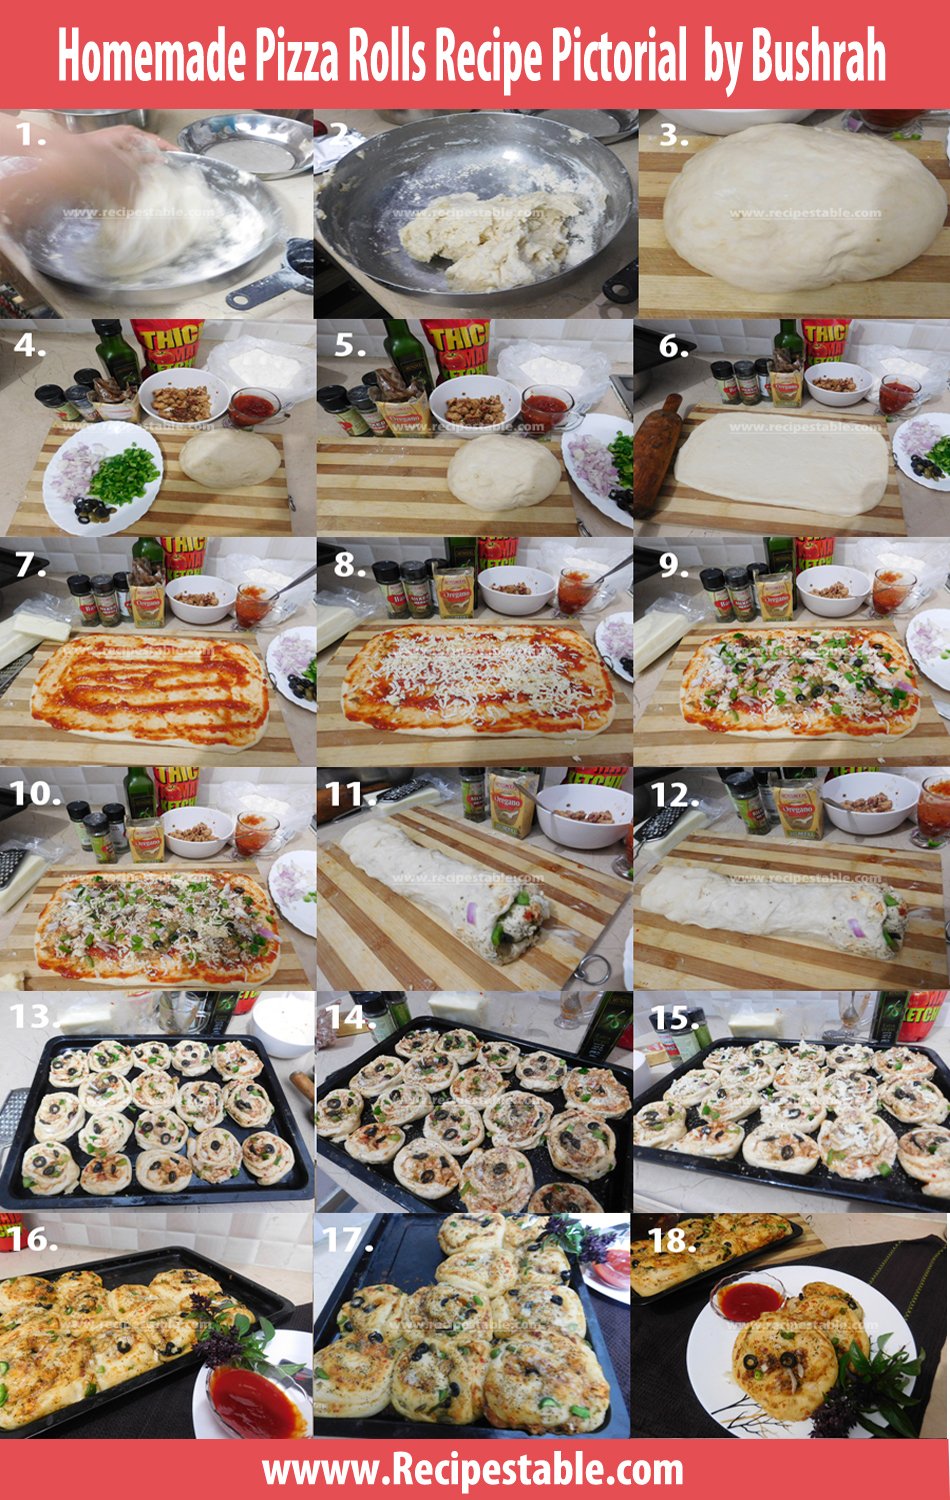
    Homemade Pizza Rolls Recipe with Step by Step Pictorial 
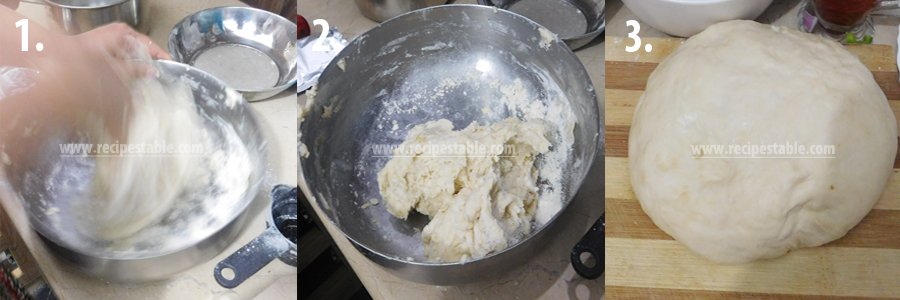
    Homemade Pizza Rolls Step. No: 1
    Homemade Pizza Rolls Step. No: 1
    Homemade Pizza Rolls Step. No: 2
    Homemade Pizza Rolls Step. No: 2
    Homemade Pizza Rolls Step. No: 3
    Homemade Pizza Rolls Step. No: 3
    Homemade Pizza Rolls Step. No: 4
    Homemade Pizza Rolls Step. No: 4
    Homemade Pizza Rolls Step. No: 5
    Homemade Pizza Rolls Step. No: 5
    Homemade Pizza Rolls Step. No: 6
    Homemade Pizza Rolls Step. No: 6

    Pin it For Later

    Homemade Pizza Rolls Recipe Pictorial
    Homemade Pizza Rolls Recipe Pictorial

    If you have any question about this Homemade Pizza Rolls Recipe  then you can ask by using comment box and I will clarify your confusion.

    I have also posted Mini Pizza Cups Recipe  and Two Cheese Pizza Recipe which are another easiest & tastiest version of making Pizza. Do check it out as well.  It’s finger lickin’ good. You’ll be coming back for more.


    Put your own spin on it. And lemme know how it turns out. Post a photo on Facebook (Recipestable) or  on Twitter so I can see how lovely yours turn out.

    Follow my blog with Bloglovin


    Happy Baking!!

    If you like this post, Please Subscribe to my blog and let me know your feedback by commenting below.. I have lots more recipes to share with you.
  • Think Outside the Pan: Double Pan Pizza Recipe (Next-Level Homemade Pizza!)

    Double Pan Pizza

    Bismillah, let’s begin!

    Check it out the Double Pan Pizza recipe and printable version below!

    Double Pan Pizza Recipe

    Prep Time 45 minutes
    Cook Time 30 minutes
    Total Time 1 hour 15 minutes
    Servings 6
    Author Bushrah | Recipestable

    Ingredients

    For Pizza Dough

    • 2 cups wheat flour
    • 2 cups refined flour
    • 1 egg
    • 3 tbsp milk powder
    • 2 tbsp yeast
    • 1 tbsp sugar
    • 1 tsp salt
    • 1 tsp fresh coriander
    • a pinch of onion seeds
    • 2 pinch crushed red chili
    • 2-1/2 cps Luke warm water or milk

    For Pizza Topping

    • 1 cup boneless chicken cut into cubes
    • 1 cup onion cut into cubes
    • 1 capsicum cut into cubes
    • 8 mushrooms
    • 1 packet Mozzarella Cheese
    • 2 tbsp garlic minced
    • 2 tbsp garlic sauce
    • 1 tbsp red chili crushed
    • 1 tsp black pepper
    • 1/2 tsp mustard seeds
    • 1 tsp salt

    For Pizza Sauce

    • 2 cups tomato paste
    • 4 tbsp olive oil
    • 2 tbsp garlic minced
    • 2 tbsp sugar
    • 2 tbsp coriander leaves
    • 1 tbsp red chili crushed

    Instructions

    To Make Pizza Sauce

    • Heat oil in a pan.
    • Add garlic and cook for 30 seconds.
    • Then add all sauce ingredients.
    • Mix well.
    • Cook on medium heat for 10 minutes or until sauce is thickened.

    To Make Pizza Topping

    • Heat oil in an another pan.
    • Saute garlic in it.
    • Put chicken to the pan and fry for for 5 minutes.
    • Then add red chili, onion seed and black pepper, salt.
    • Mix well.

    To Make Pizza Dough

    • In a large bowl, combine together flour, green coriander, milk powder, yeast, sugar, salt, crushed red chili, mustard seeds and egg.
    • Knead a dough by using warm water or warm milk.
    • Leave it for 45 minutes.

    To Proceed

    • Take a simple frying pan and spread the pizza dough on it.
    • Cover the pan with a lid and cook for 2-3 minutes.
    • Press it a little bit with a cloth like chapatti, to cook properly.
    • When it starts rising/cooking, turn it over.
    • Spread prepared pizza sauce over the cooked side of dough.
    • Place chicken, onion, capsicum and mushrooms on it.
    • Sprinkle mozzarella cheese over it.
    • Cover the pan again and let it cook on low flame for 15 minutes or until cheese melts.
    • Double Pan Pizza is ready to serve.

    Notes

    Serve hot with Mexican Tomato Sauce.

    I have also posted My Favorite French Bread Pizza which is another easiest & tastiest version of making Pizza. Do check it out as well.


    Put your own spin on it. And lemme know how it turns out. Post a photo on Facebook (Recipestable) or  on Twitter so I can see how lovely yours turn out.


    Happy Pizza Making!!

    If you like this post, Please Subscribe to my blog and let me know your feedback by commenting below.. I have lots more recipes to share with you.

  • Creamy & Comforting: Make Delicious Chicken Tikka Masala in Minutes!

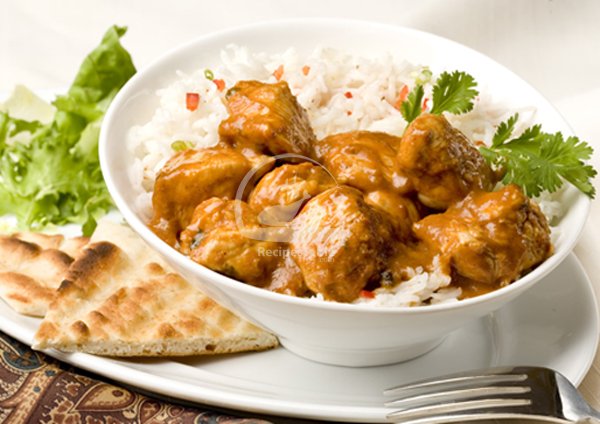
    Chicken Tikka Masala

    An easy and delicious Chicken Tikka Masala recipe – Chicken cooked in yogurt and spices and then served in a tomato cream sauce. Goes great with Tandoori Naan or Plain Rice. Give it a try !!

    Chicken Tikka Masala Recipe
    Photo: Chicken Tikka Masala Recipe

    Check it out the Chicken Tikka Masala Recipe here !!

    [divider]

    [one_fourth]Prep Time:10 minutes[/one_fourth] [one_fourth]Cook Time:35 minutes[/one_fourth] [one_fourth]Servings: 5[/one_fourth] [one_fourth_last]Difficulty Level: Easy[/one_fourth_last]

    [divider]

    [tabs type=”horizontal”] [tabs_head] [tab_title]Ingredients[/tab_title] [tab_title]Nutrition[/tab_title] [/tabs_head] [tab]

    • 1 kg boneless chicken breast, cut into about 2-inch pieces
    • 1 Onion, finely chopped
    • 1 tbsp garlic paste
    • 1 tbsp ginger paste
    • 1/2 cup Oil
    • 1 tsp coriander powder
    • 1 tsp cumin powder
    • 1 tsp turmeric
    • 1/2 tsp cayenne pepper
    • 2-3 tomatoes. finely chopped
    • 1/2 cup plain yogurt
    • 1 tbsp vinegar
    • 2 tbsp lemon juice
    • 1 tsp garam masala powder
    • 1/2 cup water
    • salt to taste

    For Garnishing:

    • 1/2 cup fresh coriander leaves, finely chopped
    • 3-4 green chilies

    [/tab] [tab]Yield: 5 servings

    Nutritional information is not yet available. [/tab] [/tabs]

    Directions:
    [tabs type=”horizontal”] [tabs_head] [tab_title]Step by Step Method[/tab_title] [tab_title]Serving Suggestions[/tab_title][/tabs_head] [tab]

    Step 1

    Add the onion, garlic and ginger to a food processor or blender and process until smooth.

    Step 2

    Add a little water if necessary.

    Step 3

    Heat the oil in a pan or karahi over medium heat.

    Step 4

    Add the coriander, cumin, turmeric and cayenne and lightly toast in the oil until fragrant, 10-15 seconds.

    Step 5

    Add the onion puree and sauté, stirring frequently, for 5-8 minutes until cooked down.

    Step 6

    Stir in the tomatoes and simmer for 3-4 minutes.

    Step 7

    Then add the chicken,yogurt, water, salt and pepper.

    Step 8

    Reduce heat to low,covered and cooked for 30 minutes or until chicken is cooked through.

    Step 9

    Remove from the heat and transfer into a serving dish.

    Step 10

    Adjust seasoning ,sprinkle garam masala powder over it.

    Step 11

    Garnish with chopped coriander leaves and green chilies. Now Chicken Tikka Masala is ready to serve.

    [/tab] [tab]

    • Serve with hot naan or rice.

    [/tab] [/tabs]
    If you like Chicken Tikka Masala recipe and make it then let me know your feedback by commenting below.And if you know more innovative ways in which we can utilize this mouth watering Chicken Tikka Masala, do share with us and we would be glad to give it a try.

  • Better than Takeout Chinese Chicken Fried Rice Recipe

    It’s my favorite fried rice again ! And I am sure it’s also the favorites of many of you out there. Because no one, simply no one I have heard of who doesn’t fancy a fried rice so far. And today version is further topped with salmon cubes and edamame beans ! And with the plus fact that it’s more protein packed than usual because there’s simply more eggs than rice in this fried rice !

    Also for the fact that I am trying to reduce my rice intake, so this plate of fried rice uses one whole chunk of salmon and 2 full eggs but only contains slightly more than 1/2 cup of short grain rice. So you can visualize yourself enjoying the ingredients rather than eating fried rice then. Lol.

    But I must reiterate that it’s still a fried rice nevertheless because it was intended to be one, and a very tasty one too ! Because salmon and edamame beans are healthy and delicious foods to begin with, so they can never go wrong with the scrambled eggs and Japanese short grain rice.

    Recently I saw someone sharing some thoughts about posting recipes that I find it very meaningful and true. It goes on to say something liked ~ instead of sharing very elaborate recipes which you would need to go to great strengths to produce that excellent food, why not share some down to earth and simple recipes which the majority of us can follow or even improvise to an even better one which would in turn benefit more people. And I am so in agreement with this. So here I am, sharing this quick and fuss free recipe here ! Hope you will like it too !

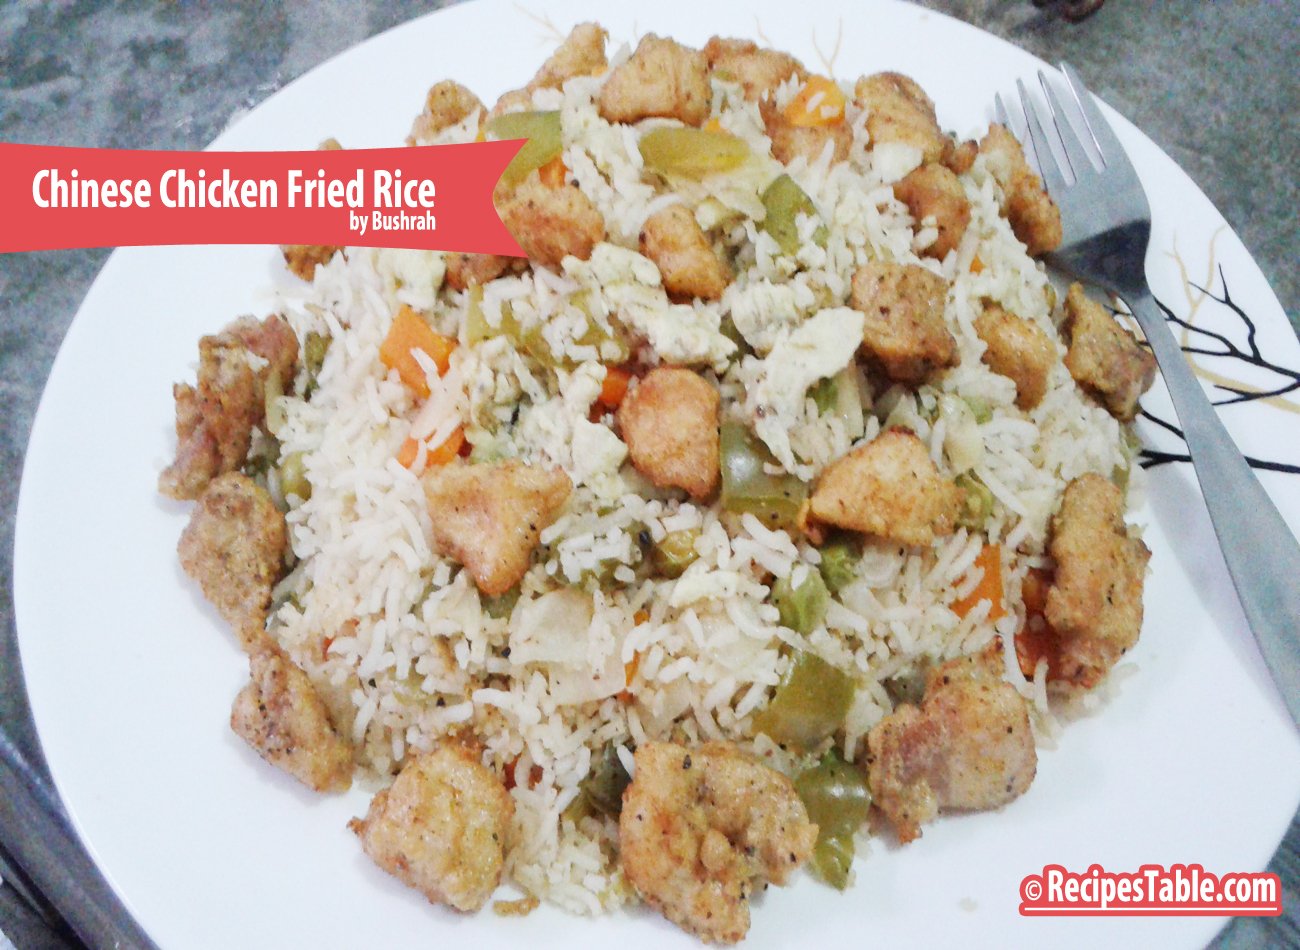
    Try this Chinese Chicken fried rice recipe ~ just like they serve in the restaurants. Chicken, eggs,carrots, pea pods, rice and soy sauce is all you need. !!

    Chinese Chicken Fried Rice

    Chinese Chicken Fried Rice[/caption]

    Bismillah, let’s begin!

    Check it out the Chinese Chicken Fried Rice Recipe and printable version below.

    Chinese Chicken Fried Rice Recipe

    Prep Time 20 minutes
    Cook Time 25 minutes
    Total Time 45 minutes
    Servings 8
    Author Bushrah | Recipestable

    Ingredients

    • 6 cups cooked white rice
    • 3 cups cooked chicken cut into cubes
    • 1/2 cup fresh pea pods
    • 3 eggs lightly beaten
    • 1 green onion chopped
    • 1 large carrots diced
    • 1 green bell pepper diced
    • 1 red bell pepper diced
    • 4 tbsp soy sauce
    • 1 tbsp sesame oil
    • salt and pepper to taste

    Instructions

    Method

    • Heat oil in a large wok or skillet over medium heat. Crack in eggs, stirring quickly to scramble eggs.
    • Add chicken; cook and stir for 2-3 minutes or until crispy.
    • Stir in green onion, carrots, pea pods and bell peppers.
    • Stir-fry 5 minutes or until vegetables crisp-tender.
    • Add rice and mix thoroughly.Drizzle with soy sauce.
    • Cover and cook another 5 minutes or until heated through.
    • Dish it out. Delicious Chinese Chicken Fried Rice is ready to serve.

    Notes

    Serving Suggestions:
    Serve with Chicken Manchurian.

    I have also posted Vegetable Fried Rice Recipe which is another easiest & tastiest version of making Fried Rice. Do check it out as well.


    Put your own spin on it. And lemme know how it turns out. Post a photo on Facebook (Recipestable) or  on Twitter so I can see how lovely yours turn out.


    Happy Cooking!!

    If you like this post, Please Subscribe to my blog and let me know your feedback by commenting below.. I have lots more recipes to share with you.
  • Sizzling & Flavorful: The Perfect Pan-Fried Chicken Tikka Recipe

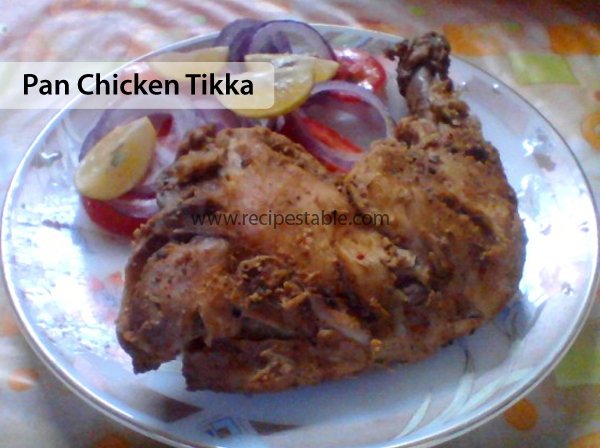
    Pan Chicken Tikka

    A very delicious, rich flavoured and wonderful Pan Chicken Tikka recipe. It makes a compelling main dish for most party meals, so try out this great tasting all time favourite recipe.

    Pan Chicken Tikka Recipe
    Photo: Pan Chicken Tikka Recipe

    Check it out the Pan Chicken Tikka Recipe here!!

    [divider]

    [one_fourth]Prep Time:15 minutes + marination[/one_fourth] [one_fourth]Cook Time:25 minutes[/one_fourth] [one_fourth]Servings: 4[/one_fourth] [one_fourth_last]Difficulty Level:Very Easy [/one_fourth_last]

    [divider]

    [tabs type=”horizontal”] [tabs_head] [tab_title]Ingredients[/tab_title] [tab_title]Nutrition[/tab_title] [/tabs_head] [tab]

    • 4 large chicken pieces
    • 1 cup plain yogurt
    • 2 tablespoon oil or butter
    • 2 tablespoon lemon juice
    • 1 teaspoon ginger garlic paste
    • 1 teaspoon cumin seeds, roasted & crushed
    • 1 teaspoon coriander powder, roasted & crushed
    • 1 teaspoon garam masala powder
    • 1 teaspoon green chili paste
    • 1 teaspoon red chili, crushed
    • Salt to taste

    [/tab] [tab]Yield:4 servings

    Nutritional information is not yet available. [/tab] [/tabs]

    Directions:
    [tabs type=”horizontal”] [tabs_head] [tab_title]Step by Step Method[/tab_title] [tab_title]Serving Suggestions[/tab_title][/tabs_head] [tab]

    Step 1

    Cut 2 long slits on each side of each part of the chicken leg.

    Step 2

    In a blender, combine together the yogurt, lemon juice, cumin, coriander, ginegr garlic paste, green chili pwaste, red chili and salt.

    Step 3

    Process until smooth.

    Step 4

    Spread this paste over the chicken pieces evenly.

    Step 5

    Cover and marinate chicken pieces for 2 hours or over-night.

    Step 6

    Heat oil in a large shallow pan over medium heat.

    Step 7

    Put chicken in the hot pan and cover with lid.

    Step 8

    Cook on low flame for 20 minutes or until chicken is no longer pink and all juices run clear, do not use water.

    Step 9

    Transfer into a serving platter.

    Step 10

    Garnish with salad leaves, tomatoes and ring onions.Delicious Pan Chicken Tikka is ready to serve.

    [/tab] [tab]

    • Serve with raita and paratha.

    [/tab] [/tabs]
    If you like Pan Chicken Tikka Recipe  and make it then let me know your feedback by commenting below.And if you know more innovative ways in which we can utilize this mouthwatering Pan Chicken Tikka, do share with us and we would be glad to give it a try.

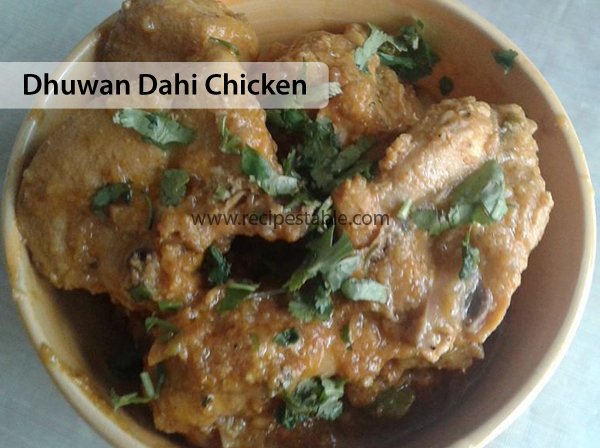
  • A Twist on Classic Chicken: The Flavorful Dhuwan Dahi Chicken Recipe!

    Dhuwan Dahi Chicken

    A nice and delcious smoked Chicken curry. The greatest Dhuwan Dahi Chicken Recipe for those of us who want that wonderful smoke flavor, moist and tender, with no hassle at the grill or smoker.  Give it a try, You’ll like it.

    Dhuwan Dahi Chicken Recipe
    Photo: Dhuwan Dahi Chicken Recipe

    Check it out the Dhuwan Dahi Chicken Recipe here!!

    [divider]

    [one_fourth]Prep Time:5 minutes[/one_fourth] [one_fourth]Cook Time:40 minutes[/one_fourth] [one_fourth]Servings: 3[/one_fourth] [one_fourth_last]Difficulty Level:Easy [/one_fourth_last]

    [divider]

    [tabs type=”horizontal”] [tabs_head] [tab_title]Ingredients[/tab_title] [tab_title]Nutrition[/tab_title] [/tabs_head] [tab]

    • 500 gm boneless chicken
    • 2 medium onion, chopped
    • 1-1/2 cups plain yogurt
    • 4 tablespoon ghee or oil
    • 2 teaspoon ginger paste
    • 1 teaspoon garlic paste
    • 3 green cardamoms
    • 4 green chilies, thinly sliced
    • 2 teaspoon red pepper
    • 1 teaspoon coriander powder
    • 1 teaspoon cumin powder
    • 1/2 teaspoon turmeric powder
    • 1 teaspoon garam masala powder
    • salt according to taste
    • a piece of coal

    For Garnishing:

    • Few coriander leaves

    [/tab] [tab]Yield:3 servings

    Nutritional information is not yet available. [/tab] [/tabs]

    Directions:
    [tabs type=”horizontal”] [tabs_head] [tab_title]Step by Step Method[/tab_title] [tab_title]Serving Suggestions[/tab_title][/tabs_head] [tab]

    Step 1

    Heat oil in a wok or pot over medium heat.

    Step 2

    Sauté onion in hot oil until transculant.

    Step 3

    Now add ginger garlic paste. Cook and stir for 1 minutes or until aromatic.

    Step 4

    Add cardamom pods, chili powder, salt, coriander powder, turmeric powder and cumin powder.

    Step 5

    Stir well.

    Step 6

    Put chicken into the pot. Cook and stir for 10 minutes or until chicken is no longer pink.

    Step 7

    Now add yogurt. Cover the pot and cook on low heat for 10 minutes or until oil comes on top.

    Step 8

    Dish it out in a heat proof dish.

    Step 9

    Sprinkle garam masala over it.

    Step 10

    Garnish with green chilies and coriander leaves.

    Step 10

    Put a piece of onion skin in the middle of the dish and place the burnt coal on it.

    Step 11

    Drop a little bit of oil on the coal.

    Step 12

    Immediately cover the dish.

    Step 13

    put the dish in the preheated oven for 20 minutes or until chicken is tender.

    Step 14

    Remove the dish from the oven.

    Step 15

    Discard coal. Delicious Dhuwan Dahi Chicken is ready to serve.

    [/tab] [tab]

    • Serve with rice, chapati or naan.

    [/tab] [/tabs]
    If you like Dhuwan Dahi Chicken Recipe and make it then let me know your feedback by commenting below.And if you know more innovative ways in which we can utilize this  mouthwatering Dhuwan Dahi Chicken, do share with us and we would be glad to give it a try.

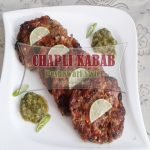
  • Peshawari Chapli Kabab Recipe with a Twist!

    Peshawari Chapli Kabab 

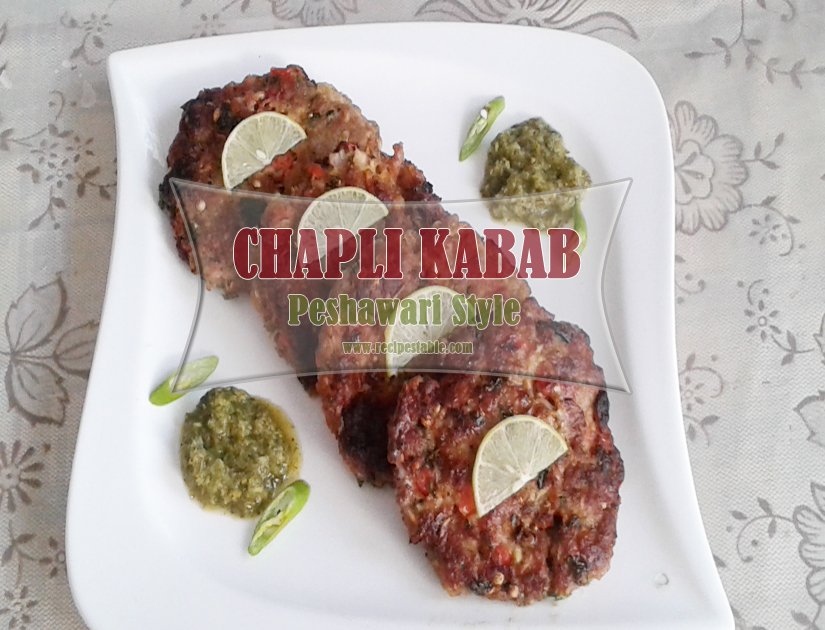
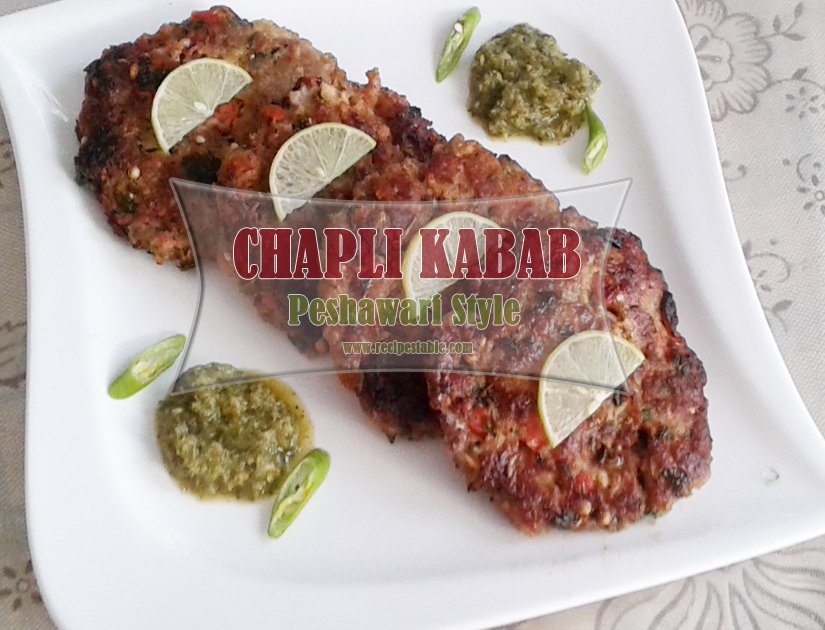
    Impress your friends and family with this special Chapli Kabab Peshawari Style recipe. These Chapli Kabab are a warming combination of crushed spices and pomegranate seeds in mince. The result is tender, juicy and spicy Chapli Kabab.

    An appetizing side dish with a main course or as snack food. Superb Chapli Kabab recipe for Ramadan and eid dinner or lunch.Give this  a try and don’t forget to share your experience with us !!

    Authentic Peshawari Style Chapli Kabab
    Authentic Peshawari Style Chapli Kabab

    Authentic Peshawari Style Chapli Kabab
    Authentic Peshawari Style Chapli Kabab

    Authentic Peshawari Style Chapli Kabab
    Authentic Peshawari Style Chapli Kabab

    Authentic Peshawari Style Chapli Kabab
    Authentic Peshawari Style Chapli Kabab

    Check it out the Peshawari Kebab Recipe here!

    Chapli Kabab Peshawari Style Recipe

    Prep Time 15 minutes
    Cook Time 20 minutes
    Total Time 35 minutes
    Servings 6
    Author Bushrah | Recipestable

    Ingredients

    • 500 gm mince meat
    • 1 large tomato seeded & chopped
    • 1 large onion finely chopped
    • 1 large egg lightly beaten
    • 2 scrambled eggs
    • 2 green onion finely chopped
    • 4 green chilies finely chopped
    • 2 tablespoon Maize flour makai ka atta
    • 2 tablespoon chopped coriander leaves
    • 2 tablespoon chopped mint leaves
    • 1 tablespoon ginger garlic paste
    • 1 tablespoon pomegranate seeds crushed
    • 1 teaspoon cumin seeds roasted & crushed
    • 1 teaspoon coriander seeds roasted & crushed
    • 1 teaspoon red chili
    • salt to taste
    • oil for shallow fry

    Instructions

    Method

    • Place onion, green onion,green chilies, ginger garlic paste, fresh coriander in a food processor. Give vegetables a good blend not too much otherwise onion will leave its water.
    • Now add mince and all remaining ingredients(except cornflour, tomato and scrambled eggs). Process again until very fine.
    • Take it out in a large bowl.
    • Add scramble egg, cornflour and finely chopped tomatoes.Mix it with hands until well combined.
    • Wet your hand with water and shape mince mixture into patties.
    • Heat oil in a shallow pan or an iron griddle over medium heat.
    • Shallow fry kebabs on both side on very low heat until golden brown.
    • Transfer into a serving platter. Delicious Peshawari Style Chapli Kabab is ready to serve.

    Notes

    Serving Suggestions:
    Serve with naan or paratha along with mint raita or any sauce of your choice.

    Recipe Note’s:

    1. Maize flour is the main ingredient of Peshawari Kebab it’s main purpose is to soften the patties and absorb excess moisture of material. If you don’t have maize flour replace it with parched gram, if u run out of both types then least choice is of simple wheat flour there might be little bit difference of flour but the purpose can b fulfilled.
    2. Mince Tips: Your mince should be dry and have less fats. Use colander to make sure there is no water content in it.If you use meat with fat it will get shrink while frying..
    3. Kebab Shape Tip: You can shape kebabs round, oval its your choice.
    4. Cooking Tip: While Frying kebabs, cover the frying pan so mince is cooked in its own water and in steam.
    5. Freezing Tip: If you want to freeze these Peshawari Kebabs; don’t add tomatoes in it. Tomatoes will leave water and your kebabs will get break. Don’t thaw cook from frozen on low heat covering your pan so meat tenders perfectly. OR you can freeze them semi cooked and when needed bake them in oven.

    I have also posted Mutton Seekh kabab  which is another easiest & tastiest version of making Kabab at home. Do check it out as well.  It’s finger lickin’ good. You’ll be coming back for more.


    Put your own spin on it. And lemme know how it turns out. Post a photo on Facebook (Recipestable) or  on Twitter so I can see how lovely yours turn out.


    Happy Cooking!

    If you like this post, Please Subscribe to my blog and let me know your feedback by commenting below.. I have lots more recipes to share with you.
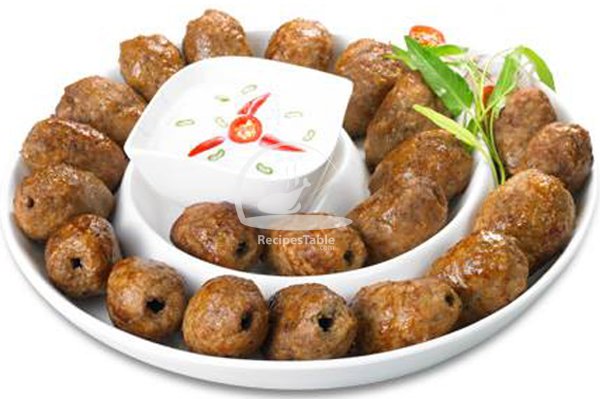
  • Restaurant-Style Chicken Gola Kabab: Make Them at Home for Eid!

    Chicken Gola Kabab

    Gola Kabab is one of the hit BBQ item liked and prepared in feasts even in wedding’s ceremony its included very much with parathas. Best recipe of Eid BBQ party for whole family.
    Try out this astonishing Chicken Gola Kabab recipe. It is one of the premium side dish to present to your extraordinary guests. It is an overwhelming dish and does not call for any superfluous effort to make.

    Chicken Gola kabab Recipe
    Photo: Chicken Gola kabab Recipe

    Check it out the Chicken Gola kabab Recipe here!!

    [divider]

    [one_fourth]Prep Time:10 minutes + marination[/one_fourth] [one_fourth]Cook Time:20 minutes[/one_fourth] [one_fourth]Servings:4 [/one_fourth] [one_fourth_last]Difficulty Level: Easy[/one_fourth_last]

    [divider]

    [tabs type=”horizontal”] [tabs_head] [tab_title]Ingredients[/tab_title] [tab_title]Nutrition[/tab_title] [/tabs_head] [tab]

    • 500 gm chicken mince
    • 4 green chilies
    • 1 medium onion, chopped
    • 2 tablespoon ghee or butter
    • 1 tablespoon raw papaya paste
    • 1 tablespoon ginger garlic paste
    • 1 teaspoon red pepper
    • 1 teaspoon garam masala powder
    • 1 teaspoon cumin seeds, roasted and crushed
    • 1/4 teaspoon mac powder
    • 1/4 teaspoon cardamom powder
    • 1/4 teaspoon nutmeg powder
    • salt according to taste

    [/tab] [tab]Yield: 4 servings

    Nutritional information is not yet available. [/tab] [/tabs]

    Directions:
    [tabs type=”horizontal”] [tabs_head] [tab_title]Step by Step Method[/tab_title] [tab_title]Serving Suggestions[/tab_title][/tabs_head] [tab]

    Step 1

    Put mince along with all ingredients in a chopper or food processor.

    Step 2

    Process until well combined and smooth.

    Step 3

    Take it out in a bowl.

    Step 4

    Cover and put in the refrigerator for 2 hours to blend flavors.

    Step 5

    Now put mince mixture on square skewers and shape into gola kababs.

    Step 6

    Grill or BBQ for 10 minutes or until cooked thorough.

    Step 7

    Remove from the skewers and transfer into a serving platter.Delicious Chicken Gola Kabab is ready to serve.

    [/tab] [tab]

    • Serve with naan, paratha and jalapeno sauce.

    [/tab] [/tabs]
    If you like Chicken Gola Kabab Recipe and make it then let me know your feedback by commenting below.And if you know more innovative ways in which we can utilize this mouthwatering Chicken Gola Kabab, do share with us and we would be glad to give it a try.

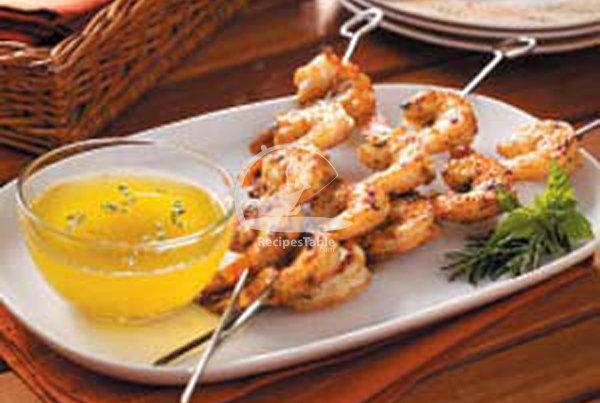
  • The Perfect Party Appetizer: Easy Shrimp Skewers Recipe!

    Shrimp Skewers

    These tender Shrimp skewers make a delicious party time appetizer or an easy backyard family dinner. Great if you want to feed a crowd – simply double or triple the recipe. Give it a try, you’ll love it.

     Shrimp Skewers Recipe
    Photo: Shrimp Skewers Recipe

    Check it out the Shrimp Skewers Recipe here!

    [divider]

    [one_fourth]Prep Time:10 minutes + marination[/one_fourth] [one_fourth]Cook Time:10 minutes[/one_fourth] [one_fourth]Servings: 4[/one_fourth] [one_fourth_last]Difficulty Level: Easy[/one_fourth_last]

    [divider]

    [tabs type=”horizontal”] [tabs_head] [tab_title]Ingredients[/tab_title] [tab_title]Nutrition[/tab_title] [/tabs_head] [tab]

    • 2 lbs large shrimp, peeled and deveined (12 to 15 shrimp per lb)
    • 2 tbsp kosher salt
    • 2 tbsp sugar
    • 1/4 cup olive oil
    • 1 tbsp lemon peel, grated
    • 1/4 cup fresh flat-leaf parsley, chopped
    • 2-3 garlic cloves, peeled and minced to taste
    • 1/2 tsp fresh ground pepper

    [/tab] [tab]Yield: 4 servings

    Nutritional information is not yet available. [/tab] [/tabs]

    Directions:
    [tabs type=”horizontal”] [tabs_head] [tab_title]Step by Step Method[/tab_title] [tab_title]Serving Suggestions[/tab_title][/tabs_head] [tab]
    Step 1

    In a bowl, mix salt and sugar; add shrimp and stir to coat.

    Step 2

    Cover and chill 45 mins to 1 hour.

    Step 3

    Rinse shrimp well and drain; also rinse and dry bowl.

    Step 4

    Return shrimp to bowl; add olive oil, parsley, lemon peel, garlic and pepper. Mix to coat.

    Step 5

    Thread shrimp on soaked wooden skewers.

    Step 6

    Grill over hot coals or high heat turning once, until shrimp are bright pink and opaque but still moist-looking, 5 to 6 minutes. Shrimp Skewers is ready to serve.

    [/tab] [tab]

    • Serve with sweet and sour sauce.

    [/tab] [/tabs]
    If you like Shrimp Skewers Recipe and make it then let me know your feedback by commenting below.And if you know more innovative ways in which we can utilize this mouthwatering Shrimp Skewers, do share with us and we would be glad to give it a try.

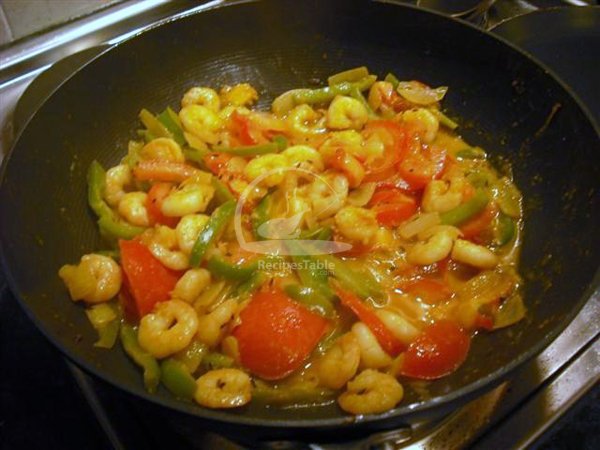
  • The Secret to Juicy Prawns & Flavorful Sauce: Prawn Jalfrezi Recipe!

    Prawn Jalfrezi

    Having had a few days of rich heavy food, my family wanted me to cook something lighter. It’s full of flavour and very filling and a simple recipe I would recommend to anyone. Give this Prawn Jalfrezi Recipe a try, you’ love it.

    Prawn Jalfrezi Recipe
    Photo: Prawn Jalfrezi Recipe

    Check it out the Prawn Jalfrezi Recipe here!!

    [divider]

    [one_fourth]Prep Time:10 minutes[/one_fourth] [one_fourth]Cook Time:30 minutes[/one_fourth] [one_fourth]Servings:3 [/one_fourth] [one_fourth_last]Difficulty Level:Easy [/one_fourth_last]

    [divider]

    [tabs type=”horizontal”] [tabs_head] [tab_title]Ingredients[/tab_title] [tab_title]Nutrition[/tab_title] [/tabs_head] [tab]

    • 500 gm prawns, peeled and cooked
    • 1 cup water
    • 2 onions, finely chopped
    • 1 tsp ginger paste
    • 2 tsp garlic paste
    • 1/2 cup oil or Ghee
    • 1 tsp turmeric powder
    • 4 tsp mild curry powder
    • 2 tsp chili powder
    • 1 tsp garam masala powder
    • 1 tsp whole sizzling Seeds
    • 1 Tin chopped tomatoes
    • 4 tbsp tomato puree

    For Garnishing:

    • fresh coriander leaves, finely chopped
    • 4-5 green chillies, thinly sliced

    [/tab] [tab]Yield: 3 servings

    Nutritional information is not yet available. [/tab] [/tabs]

    Directions:
    [tabs type=”horizontal”] [tabs_head] [tab_title]Step by Step Method[/tab_title] [tab_title]Serving Suggestions[/tab_title][/tabs_head] [tab]

    Step 1

    Heat oil in a pan over medium heat.

    Step 2

    When hot add the whole seeds and cook until they sizzle and crackle then add the chopped onions and reduce the heat to low.

    Step 3

    Stir fry onions gently and slowly until they turn into golden.

    Step 4

    Make a paste of the ginger puree, garlic puree, curry powder, turmeric powder, chili powder, with a little water.

    Step 5

    Add this sauce into pan and stir in well and fry for a couple of minutes.

    Step 6

    Now add cooked prawns and stir in well.

    Step 7

    Mix the chopped tomatoes, tomato Puree, together in a blender with 1/2 cup of water.

    Step 8

    Process it and make a fine paste.

    Step 9

    Then pour it into the pan and mix well.

    Step 10

    Turn up the heat until the sauce begins to simmer and leave to simmer for 10 minutes.

    Step 11

    Stir occasionally. Then remove from the heat.

    Step 12

    Transfer into a serving dish and sprinkle garam masala over it.

    Step 13

    Garnish with chopped coriander leaves and green chilies. Prawn Jalfrezi is ready to serve.

    [/tab] [tab]

    • Serve with Boiled rice.

    [/tab] [/tabs]
    If you like Prawn Jalfrezi Recipe and make it then let me know your feedback by commenting below.And if you know more innovative ways in which we can utilize this mouthwatering Prawn Jalfrezi, do share with us and we would be glad to give it a try.

  • The Perfect Party Appetizer: Easy Potato Croquettes Recipe!

    Potato Croquettes

    Everyone loves Potato Croquettes. In this recipe, I am making Potato Croquettes, a perfect snack for every occasion.
    Must try this Potato Croquettes Recipe , you’ll love it.

    Check it out the Potato Croquettes Recipe here!!

    Prep Time:30 minutes

    Cook Time:10 minutes

    Servings: 4

    Ingredients:

    • 1/2 kg potatoes
    • 2 eggs
    • 1 cup bread crumbs
    • 50 gm butter
    • 4 tbsp parsley
    • 1 tbsp Parmesan cheese
    • 1 tsp black pepper
    • 1/2 tsp Chinese Salt
    • salt to taste

    Directions:

    1. Boil and Mash potatoes.
    2. Add butter, Chinese salt, parsley, and Parmesan cheese.
    3. Season with salt and pepper.
    4. Mix well.
    5. Shape them into croquettes.
    6. In a small bowl, beat eggs.
    7. Dip croquettes into beaten egg.
    8. Then roll them into breadcrumbs.
    9. Turn to coat evenly.
    10. Heat oil in a pan over medium heat.
    11. Fry croquettes for 5-6 minutes or until golden brown.
    12. Remove from the oil and drain on paper towel.
    13. Potato Croquettes are ready to serve.
    • Enjoy with Chili Garlic Sauce.

    If you like Potato Croquettes Recipe  and make it then let me know your feedback by commenting below.

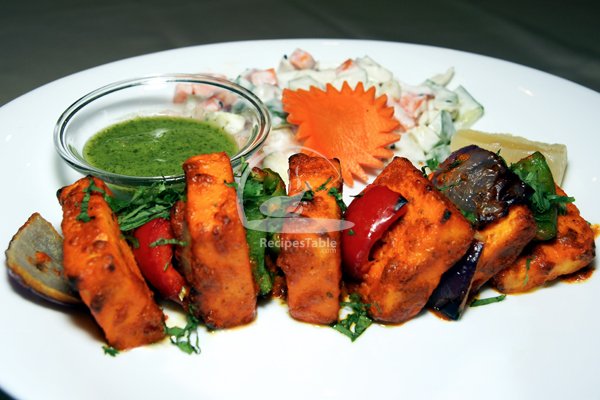
  • Crispy & Juicy: The Best Paneer Tikka Recipe Ever!

    Paneer Tikka

    Paneer Tikka is one of the best recipes that can be served as starter or as an accompaniment. All you need to do is marinade the paneer, this marination can be kept for two to three days and can be baked at the time when your guests come as it only takes 40 mints.Must try this Paneer Tikka Recipe, you’ll love it.

    Paneer Tikka Recipe
    Photo: Paneer Tikka Recipe

    Check it out the Paneer Tikka Recipe here!!

    [divider]

    [one_fourth]Prep Time:10 minutes[/one_fourth] [one_fourth]Cook Time:10 minutes[/one_fourth] [one_fourth]Servings: 3[/one_fourth] [one_fourth_last]Difficulty Level: Very Easy[/one_fourth_last]

    [divider]

    [tabs type=”horizontal”] [tabs_head] [tab_title]Ingredients[/tab_title] [tab_title]Nutrition[/tab_title] [/tabs_head] [tab]

    • 1/2 kg paneer cubes, about 3 cm/1.5 each
    • 2 tsp garlic paste
    • 2 tsp ginger paste
    • 1 tsp chaat masala
    • 2 tsp chilli powder
    • 1 tsp tandoori masala
    • 1 tsp powdered black pepper
    • 1 tbsp salt
    • a few drops of red colour
    • 3 tbsp vinegar OR 1 cup yogurt
    • oil for brushing
    • 1 lemon quartered
    • 1 onion sliced into rings, for garnishing

    [/tab] [tab]Yield: 3 servings

    Nutritional information is not yet available. [/tab] [/tabs]

    Directions:
    [tabs type=”horizontal”] [tabs_head] [tab_title]Step by Step Method[/tab_title] [tab_title]Serving Suggestions[/tab_title][/tabs_head] [tab]

    Step 1

    Mix all the ingredients, except the garnishes, and leave for 20-30 minutes.

    Step 2

    About 20 minutes before serving, place the paneer on a drip pan and bake in the pre-heated oven for about 10 minutes.

    Step 3

    Remove from oven, brush with oil and bake again for 10 minutes.

    Step 4

    Alternatively, you can grill on a griller or a barbecue pit. (The drippings should definitely have a means of escape, or else the paneer will get soggy.)

    Step 5

    Garnished with lemon and onion rings. Paneer Tikka is ready to serve.

    [/tab] [tab]

    • Serve with chutney and naan.

    [/tab] [/tabs]
    If you like Paneer Tikka Recipe and make it then let me know your feedback by commenting below.And if you know more innovative ways in which we can utilize this hot and spicy Paneer Tikka, do share with us and we would be glad to give it a try.

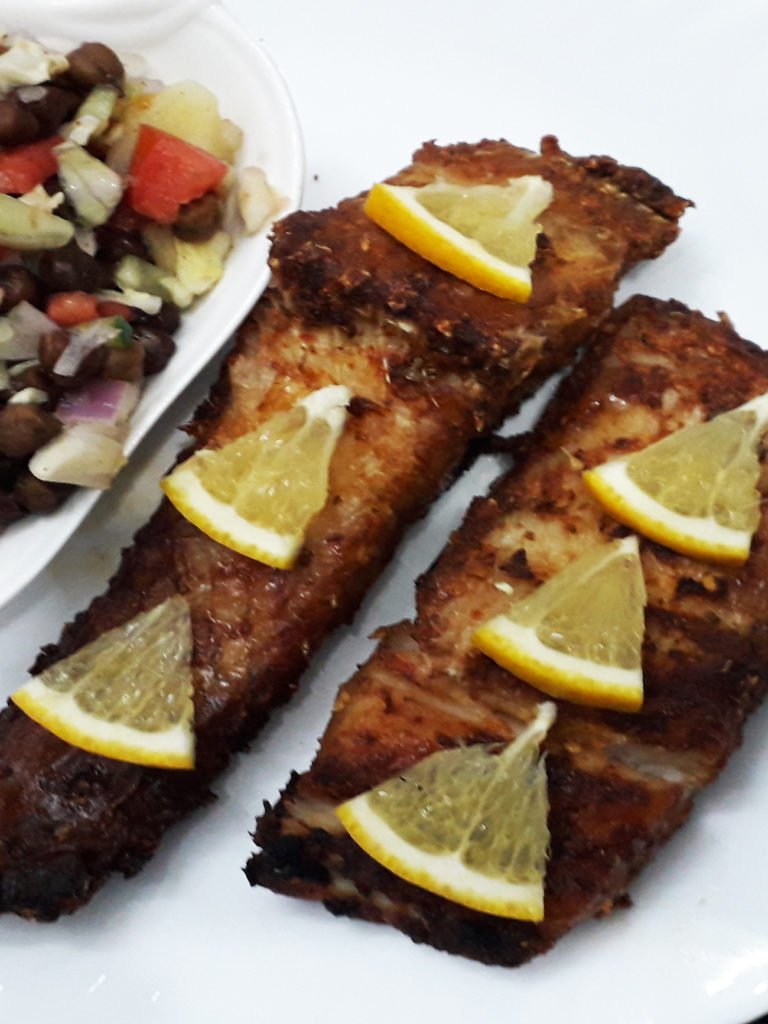
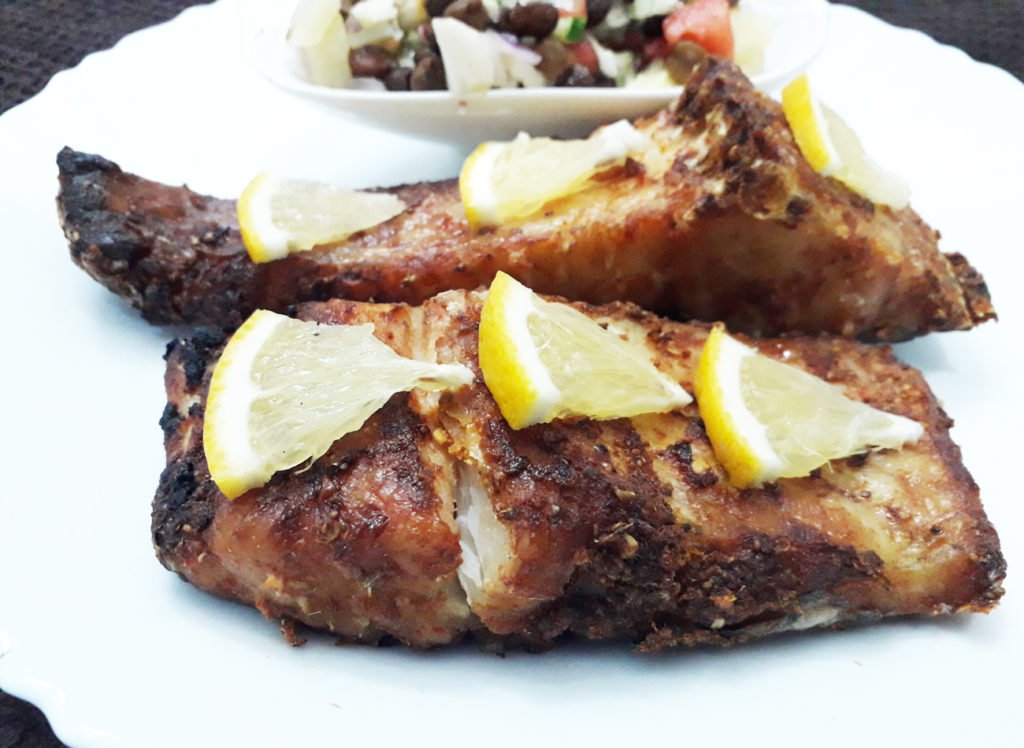
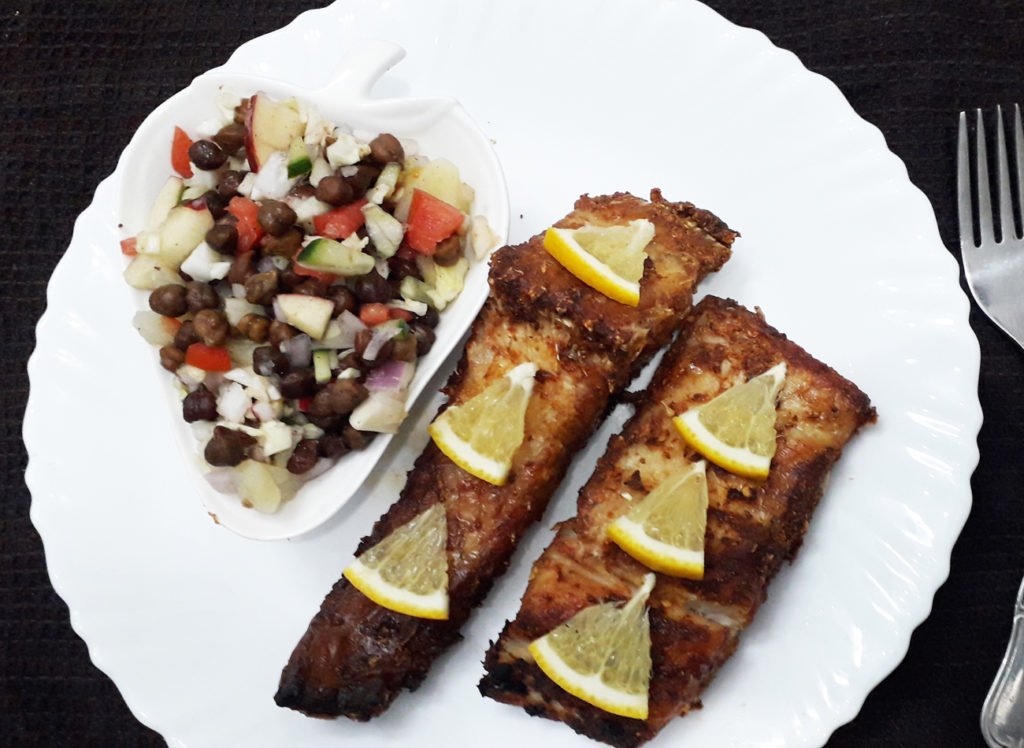
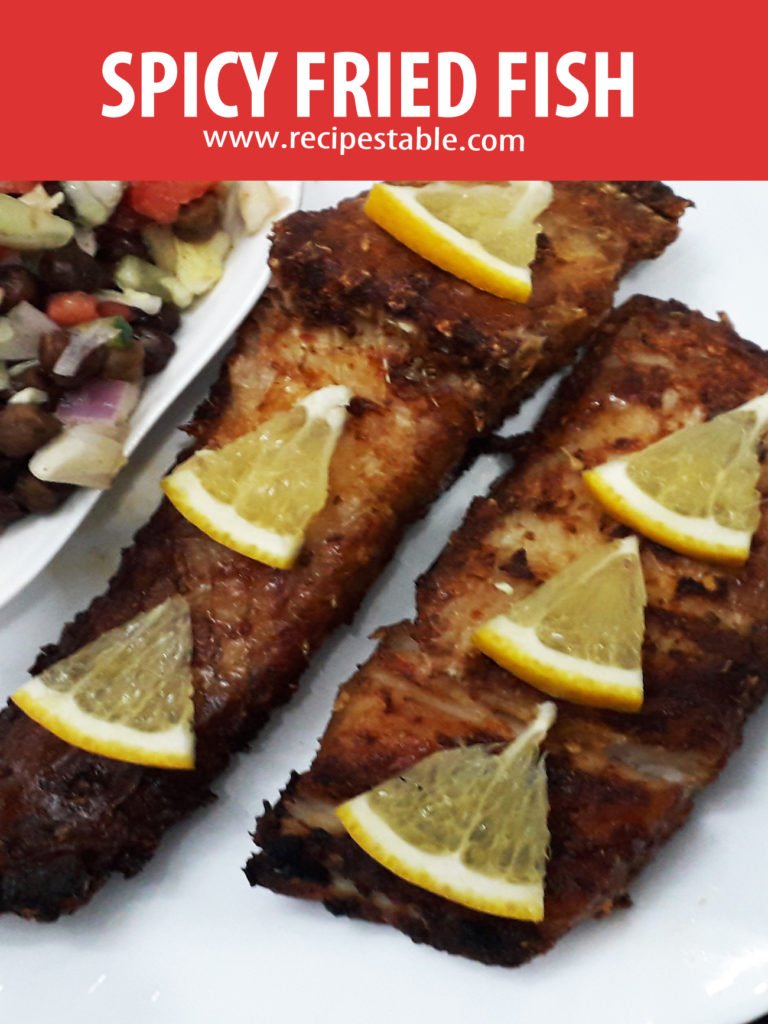
  • Spicy Crispy and Juicy Fried Fish Recipe

    This post may contain affiliate links. Please read my disclosure policy.

    This fried fish is so flavorful, crispy and juicy, your guests will beg you for the recipe. This easy to make restaurant style dish is a keeper and will have you fried fish on a regular basis.

    Spicy Fried Fish

    Try my Fried Fish Recipe. It will be a hit at your next dinner party, or a delicious week-night dinner. Cooking is not Rocket Science, we just need to learn to use what we have on hand to create simple delicious meals.

    Fried Fish
    Fried Fish

    Simple and easy Fried Fish recipe with an excellent flavor. It’s an outstanding dish that can be used as a mean to impress your social circle! Give it a try

    Bismillah let’s get started.
    Check it out The Juicy Fried Fish recipe Recipe and printable version here!!

    Juicy Fried Fish Recipe

    This fried fish is so flavorful, crispy and juicy, your guests will beg you for the recipe. This easy to make restaurant style dish is a keeper and will have you fried fish on a regular basis.
    Course Appetizer, Comfort Food, Main Course
    Cuisine Food Fusion, Indian, Pakistani
    Keyword 30 minutes meals, Dinner, fish, fried fish, fried food, Lunch, Ramadan, spicy
    Prep Time 10 minutes
    Cook Time 15 minutes
    Marination 2 hours
    Total Time 2 hours 25 minutes
    Servings 4
    Author Bushra Waheed

    Ingredients

    • 1 kg mahi mahi fish fillets (rahu machli)
    • 1/2 cup plain flour (maida)
    • 4 tbsp lemon juice (limo)
    • 2 tbsp garlic paste (lehsan paste)
    • 1 tsp mango powder
    • 1 tsp red chili powder
    • 1 tsp red pepper crushed
    • 1 tsp turmeric powder (haldi powder)
    • 1 tsp cumin powder crushed(zeera powder)
    • 1 tsp carom seeds crushed(ajwain)
    • salt to taste
    • oil for frying

    Instructions

    • Wash fish fillets and pat dry.
    • Sprinkle turmeric powder, salt and lemon juice over the fish. Toss the coat evenly.
    • Let it marinate for 2-3 hours.
    • In a large bowl, mix together the plain flour, garlic paste, mango powder, red chili, crushed red chili, carom seeds, cumin powder.Mix well.
    • Pour this paste over the fish fillets Cover and marinate for another 40 minutes.
    • After 40 minutes, heat oil in a pan over medium heat. Deep fry fish for 12-15 minutes or until crispy and golden brown.
    • Don’t overcook.
    • Remove from the oil and drain on kitchen paper.
    • Transfer into a serving dish.
    • Garnish with lemon or orange slices.
    • Fried Fish is ready to serve. ENJOY 🙂

    Want more Fried Fish Inspiration? 

    Here are some other Fried Fish recipes on my blog:

    Pin it for Later

    Hope you guys loved this one and are having a great winter. Pin it for Later!

    Pin it for later ~ Spicy Fried Fish

    Put your own spin on it. And lemme know how it turns out and do take a few seconds to rate it! I would love to see your recreations so tag me on instagram @recipestable or Facebook (Recipestable) or on Twitter so I can see how lovely yours turn out.

  • Fish Temperade Recipe

    Fish Temperade

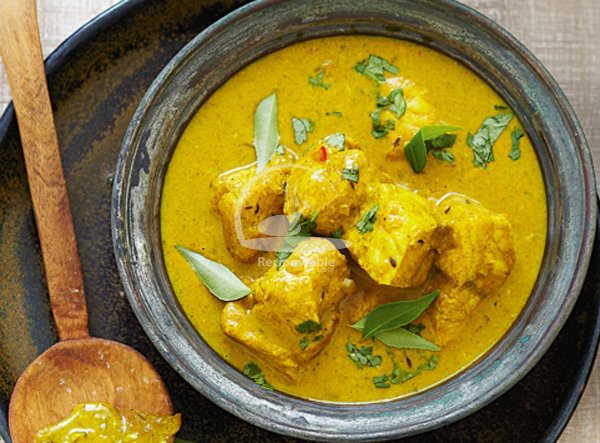
    A very spicy,tantalizing, tempting Fish curry recipe. It’s very delicious and yummy fish curry. Just follow this Fish Temperade Recipe and make the tasty meal for your family.

    Fish Temperade Recipe
    Photo: Fish Temperade Recipe

    Check it out the Fish Temperade Recipe here!!

    [divider]

    [one_fourth]Prep Time:10 minutes[/one_fourth] [one_fourth]Cook Time:30 minutes[/one_fourth] [one_fourth]Servings:2 [/one_fourth] [one_fourth_last]Difficulty Level: Medium[/one_fourth_last]

    [divider]

    [tabs type=”horizontal”] [tabs_head] [tab_title]Ingredients[/tab_title] [tab_title]Nutrition[/tab_title] [/tabs_head] [tab]

    • 1 cup Assorted Shellfish
    • 1 tbsp Coriander Seeds
    • 1 tsp Cumin Seeds
    • 1 cup Grated Coconut
    • 2 Large Onions
    • 3 Dried Red Chillies
    • 3 tbsp Tamarind pulp
    • 1 tsp Sugar
    • 1/2 tsp Turmeric powder
    • 6 Flakes Garlic
    • Small piece of Ginger
    • 1 tbsp Oil
    • Salt to taste
    • A little amount of water

    [/tab] [tab]Yield:2 servings

    Nutritional information is not yet available. [/tab] [/tabs]

    Directions:
    [tabs type=”horizontal”] [tabs_head] [tab_title]Step by Step Method[/tab_title] [tab_title]Serving Suggestions[/tab_title][/tabs_head] [tab]

    Step 1

    Heat oil in a pan and seethe the cumin seeds, chillies and coriander till they splutter.

    Step 2

    Grind coconut, garlic, onion and ginger to make fine paste.

    Step 3

    Saute this paste in oil.

    Step 4

    Add little water and fry for a minute.

    Step 5

    Add turmeric powder, tamarind pulp, sugar and salt.

    Step 6

    Now add the fish and cook it till sauce gets thickened. Fish Temperade is ready to serve. Enjoy!

    [/tab] [tab]

    • Serve with rice.

    [/tab] [/tabs]
    If you like Fish Temperade recipe and make it then let me know your feedback by commenting below.And if you know more innovative ways in which we can utilize this mouthwatering Fish Temperade, do share with us and we would be glad to give it a try.

  • The Perfect Batter: Secrets to Making Light and Crispy Fish Tempura!

    Fish Tempura

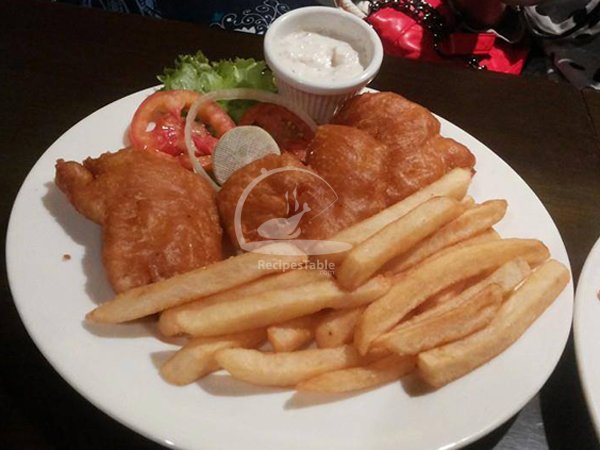
    Today I’m sharing one of the most popular Japanese recipes; Fish Tempura, a very crispy and light dish.

    Fish fillets are fried in crispy batter.Goes great with finger chips and salad.Must try this Fish Tempura Recipe, and dont forget to share you experience with us!!

    Fish Tempura Recipe
    Photo: Fish Tempura Recipe

    Check it out the Fish Tempura Recipe Here !!

    [divider]

    [one_fourth]Prep Time:10 minutes[/one_fourth] [one_fourth]Cook Time:10 minutes[/one_fourth] [one_fourth]Servings:4 [/one_fourth] [one_fourth_last]Difficulty Level: Easy[/one_fourth_last]

    [divider]

    [tabs type=”horizontal”] [tabs_head] [tab_title]Ingredients[/tab_title] [tab_title]Nutrition[/tab_title] [/tabs_head] [tab]

    • 1 kg fish fillets
    • salt and pepper
    • 1 egg, lightly beaten
    • 1/4 cup of water
    • 3 tbsp all-purpose flour
    • 1 cup bread crumbs
    • 2 cup cooking oil

    [/tab] [tab]Yield: 4 servings

    Nutritional information is not yet available. [/tab] [/tabs]

    Directions:
    [tabs type=”horizontal”] [tabs_head] [tab_title]Step by Step Method[/tab_title] [tab_title]Serving Suggestions[/tab_title][/tabs_head] [tab]

    Step 1

    Heat the cooking oil in a wide skillet or wok.

    Step 2

    Pat the fillets dry with paper towels.

    Step 3

    Season lightly with salt and pepper.

    Step 4

    Mix together the egg, water and flour.

    Step 5

    Dip each fillet into the batter then roll in the crumbs.

    Step 6

    Lower into the hot oil.

    Step 7

    Cook two to three at a time; they brown fast.

    Step 8

    Drain on paper towels.Fish Tempura is ready to serve.ENJOY!

    [/tab] [tab]

    [/tab] [/tabs]
    If you like Fish Tempura recipe and make it then let me know your feedback by commenting below.And if you know more innovative ways in which we can utilize this mouthwatering Fish Tempura, do share with us and we would be glad to give it a try.

  • Level Up Your Fries: The Flavorful Italian Seasoned Fries Recipe!

    Italian Seasoned Fries

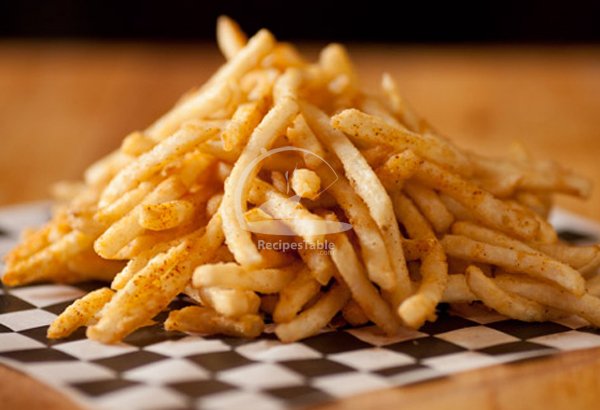
    These Spicy, Oven-baked fries are very easy to make, and a great way to kick up your burger platter. They are seasoned with a very flavorful Italian seasoning.Must Try this Italian Seasoned Fries, You’ll Love it.

    Seasoned Fries Recipe
    Photo: Italian Seasoned Fries Recipe

    Check it out the Italian Seasoned Fries Recipe Here !!

    Prep Time:15 minutes

    Cook Time:15 minutes

    Servings:3

    Difficulty Level: Easy

    Ingredients

    • 500 gm potatoes
    • 1/2 cup Parmesan cheese, grated
    • 2 tsp Italian seasoning
    • salt according to taste


    Directions:

    Step 1

    Preheat oven to 450 degree F.

    Step 2

    Wash potatoes and peel.

    Step 3

    Then cut into shape of French fries.

    Step 4

    Lined a baking dish with foil.

    Step 5

    Place potatoes on the baking dish.

    Step 6

    Bake for 8-10 minutes or until potatoes are half done.

    Step 7

    In a bowl, add cheese, Italian seasoning and salt.

    Step 8

    Sprinkle this mixture over baked potatoes.

    Step 9

    Toss to coat evenly.

    Step 10

    Bake 5 minutes longer or until crispy and golden brown. Italian Seasoned Fries are ready to serve.

    Recipe Note’s

    To Make Crispy Seasoned Fries:

    The secret I found to making the French fries crisp is to soak them in a salt water brine.

    Serving Suggestions:

    • Serve with Tomato Sauce.

    If you like Italian Seasoned Fries Recipe  and make it then let me know your feedback by commenting below.