Tag: Dinner Recipes

  • Easy Juicy Steak Recipe: How to Cook Steak (Tender, Flavorful, Restaurant-Style)

    Juicy Steak

    A moist, juicy steak is a real treat and so easy to cook for a dinner party. Try this Juicy Steak recipe,You’ll like it.

    This will produce some of the juiciest steak you will ever cook at your house. Butter coating and herb seasoning makes your steak so moist, juicy and flavorful.
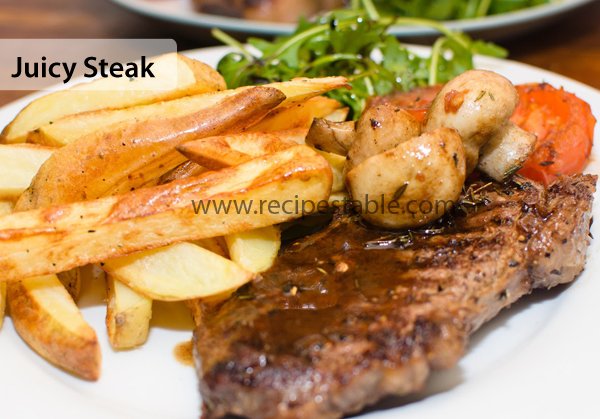
    juicy Steak Recipe
    Photo: Juicy Steak Recipe

    Check it out the Juicy Steak Recipe here!!

    [divider]

    [one_fourth]Prep Time:10 minutes[/one_fourth] [one_fourth]Cook Time:30 minutes[/one_fourth] [one_fourth]Servings:4 [/one_fourth] [one_fourth_last]Difficulty Level: Easy[/one_fourth_last]

    [divider]

    [tabs type=”horizontal”] [tabs_head] [tab_title]Ingredients[/tab_title] [tab_title]Nutrition[/tab_title] [/tabs_head] [tab]

    • 500 gm rib-eye steak
    • 1 tbsp butter
    • 1 tbsp Worcestershire sauce
    • 1 tsp meat tenderizer or raw papaya paste
    • 1 tsp herb seasoning
    • 1 tsp garlic powder
    • salt and black pepper to taste

    [/tab] [tab]Yield:4 servings

    Amount Per Serving

    • Calories: 214 kcal
    • Carbohydrates:2.2 g
    • Cholesterol: 56 mg
    • Fat:16.3 g
    • Fiber:0 g
    • Protein:12.6 g
    • Sodium:404 mg

    Percent Daily Values are based on a 2,000 calorie diet.

    [/tab] [/tabs]

    Directions:
    [tabs type=”horizontal”] [tabs_head] [tab_title]Step by Step Method[/tab_title] [tab_title]Recipe Note’s[/tab_title][tab_title]Serving Suggestions[/tab_title][/tabs_head] [tab]

    Step 1

    Preheat oven broiler.

    Step 2

    Brush beef steak with half of the butter.

    Step 3

    Pour Worcestershire sauce over it.

    Step 4

    Rub meat tenderizer over the steak.

    Step 5

    Season with garlic,herb seasoning, salt and pepper.

    Step 6

    Put beef steak on a roasting pan.

    Step 7

    Broil for 8 minutes or until its changes color.

    Step 8

    Remove steak from the oven and flip over.

    Step 9

    Spread remaining butter and season just like the other side.

    Step 10

    Return to the broiler and broil another 8 minutes, or until to desired doneness.

    Step 11

    Transfer into a serving platter. Juicy Steak is ready to eat!!

    [/tab]

    [tab]

    1. Adjust times according to the type and thickness of the steaks.
    2. The key to a juicy steak is cook it FROZEN.

    [/tab]

    [tab]

    • Serve with French Fries , roasted mushrooms and veggies.

    [/tab] [/tabs]
    If you like Juicy Steak Recipe and make it then let me know your feedback by commenting below.And if you know more innovative ways in which we can utilize this mouth watering Juicy Steak, do share with us and we would be glad to give it a try.
  • Easy Chili Garlic Fish Recipe: Perfect for Weeknight Dinners (Ready in 30 Minutes!)

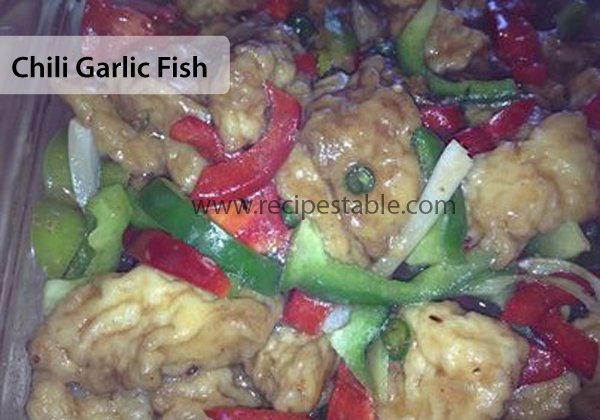
    Chili Garlic Fish

    Garlicky and spicy, Chili Fried Fish has to be one of my all time favourites. Ready in less than 40 minutes, this hot, garlic stir fried fish is perfect for a week-night meal.
    The aromas released while cooking this dish will have everyone licking their lips in anticipation. Must try this Chili Garlic Fish recipe, you’ll love it.

    Chili Garlic Fish Recipe
    Photo: Chili Garlic Fish Recipe

    Check it out the Chili Garlic Fish Recipe here!!

    [divider]

    [one_fourth]Prep Time:30 minutes[/one_fourth] [one_fourth]Cook Time:30 minutes[/one_fourth] [one_fourth]Servings:4[/one_fourth] [one_fourth_last]Difficulty Level: Easy[/one_fourth_last]

    [divider]

    [tabs type=”horizontal”] [tabs_head] [tab_title]Ingredients[/tab_title] [tab_title]Nutrition[/tab_title] [/tabs_head] [tab]

    For Frying Fish

    • 1 kg boneless fish fillets, cut into cubes
    • 2 eggs
    • 4 tablespoon cornflour
    • 1 teaspoon soy sauce
    • 1 teaspoon ginger garlic paste
    • 1/2 teaspoon red chili sauce
    • a pinch of cayenne pepper
    • salt to taste
    • oil for deep frying

    For Sauce:

    • 1 cup fish stock
    • 4 garlic cloves, chopped
    • 1 green onion, thinly sliced
    • 1 green bell pepper, thinly sliced
    • 1 red bell pepper, thinly sliced
    • 2 tablespoon vegetable oil
    • 2 tablespoon red chili paste
    • 3 tablespoon tomato ketchup
    • 1 tablespoon soy sauce
    • 1 tablespoon cornflour ( dissolved in little water)
    • 1 teaspoon red chili sauce
    • Salt to taste

    [/tab] [tab]Yield: 4 servings

    Nutritional information is not yet available. [/tab] [/tabs]

    Directions:
    [tabs type=”horizontal”] [tabs_head] [tab_title]Step by Step Method[/tab_title] [tab_title]Serving Suggestions[/tab_title][/tabs_head] [tab]

    Step 1

    Wash fish and pat dry.

    Step 2

    Cut into cubes and place in a large bowl.

    Step 3

    Add eggs, soy sauce, chili sauce, ginger garlic paste, cornflour, cayene pepper and salt to taste. Mix until well combined.

    Step 4

    Leave it for 30 minutes to blend flavors.

    Step 5

    Now heat oil in a deep pan oevr medium heat. Fry fish pieces, a few at a time, for 3-4 minutes or until crispy and golden brown.

    Step 6

    Remove from the oil and absorbant on kitchen paper.

    Step 7

    Keep warm and repeat this procedure with remaining fish.

    Step 8

    Meanwhile, heat 2 tablespoon vegetable oil in a wok or pan. Saute garlic for 30 seconds.

    Step 9

    Then add red bell pepper, green bell pepper. Stir-fry for 2 minutes or until crisp-tender.

    Step 10

    Stir in the tomato ketchup, red chili paste, soy sauce and red chili sauce.

    Step 11

    Season with salt and pepper to taste.

    Step 12

    Add fish stock. Bring to a boil.

    Step 13

    Cook for 4 minutes then stir in the cornflour paste.

    Step 14

    Add fried fish pieces. Cook and stir for 2 minutes or until sauce is thickened.

    Step 15

    Top with green onion. Deliciuos Chili Gralic Fish is ready to serve.

    [/tab] [tab]

    • Serve with Steamed Rice.

    [/tab] [/tabs]
    If you like Chili Gralic Fish recipe and make it then let me know your feedback by commenting below.And if you know more innovative ways in which we can utilize this mouth watering Chili Gralic Fish, do share with us and we would be glad to give it a try.

  • Balti Beef Bliss: The Recipe You Need in Your Life!

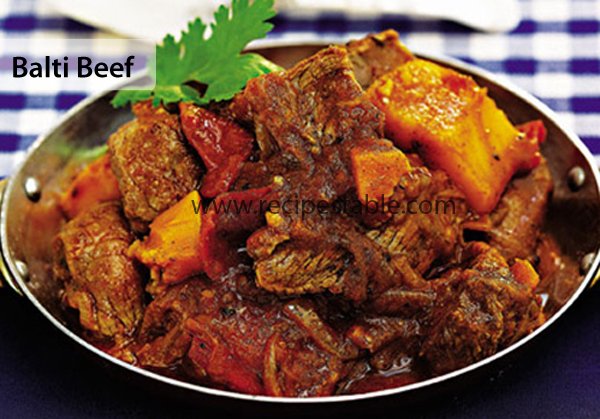
    Balti Beef

    Balti Beef is a stir-fried tomato based curry that originated in Kashmir and traditionally served with naan bread.Must try this Balti Beef recipe, you’ll like it.

    Balti Beef Recipe
    Photo: Balti Beef Recipe

    Check it out the Balti Beef Recipe here!!

    [divider]

    [one_fourth]Prep Time:10 minutes[/one_fourth] [one_fourth]Cook Time:35 minutes[/one_fourth] [one_fourth]Servings: 4[/one_fourth] [one_fourth_last]Difficulty Level: Easy[/one_fourth_last]

    [divider]

    [tabs type=”horizontal”] [tabs_head] [tab_title]Ingredients[/tab_title] [tab_title]Nutrition[/tab_title] [/tabs_head] [tab]

    For Balti Beef:

    • 1 kg sirloin beef roast, cut into slices
    • 1 onion, finely chopped
    • 2 red bell pepper,seeded and chopped
    • 2 tbsp desi ghee or butter
    • 2 tbsp ginger garlic paste

    For Balti Sauce:

    • 2 tbsp desi ghee or vegetable oil
    • 2 large onions,finely chopped
    • 3 tomatoes, chopped
    • 1 tbsp ginger garlic paste
    • 1 tsp paprika powder
    • 1 tsp cumin powder
    • 1 tsp coriander powder
    • 1/2 tsp turmeric powder
    • 1/2 tsp red cayenne pepper
    • 1/4 tsp cardamom powder
    • 1 bay leaf
    • salt to taste

    For Garnishing

    • Few coriander leaves, chopped

    [/tab] [tab]Yield: 4 servings

    Amount Per Serving ( 1 serving = 1 cup)

    • Calories: 390.7
    • Total Fat: 19.6 g (Saturated Fat: 10.5)
    • Cholesterol: 131.0 mg
    • Sodium: 122.9 mg
    • Total Carbohydrate:20.7 g
    • Dietary Fiber: 5.3 g
    • Sugars: 10.9 g
    • Protein: 35.4 g

    [/tab] [/tabs]

    Directions:
    [tabs type=”horizontal”] [tabs_head] [tab_title]Step by Step Method[/tab_title] [tab_title]Serving Suggestions[/tab_title][/tabs_head] [tab]

    Step 1
    To make Balti Sauce:

    Heat ghee or oil in a pot oevr medium heat. Saute onion for 5 minutes or until crisp-tender.

    Step 2

    Add ginger garlic paste and stir fry for 2 minutes.

    Step 3

    Stir in the tomatoes.

    Step 4

    Season with the paprika, turmeric powder, cumin powder, coriander powder, cayenne pepper, cardamom powder, bay leaf, and salt.

    Step 5

    Add 1 cup of water and bring to a boil.

    Step 6

    Reduce the heat. Cover and simmer for 20 minutes or until sauce is thickened.

    Step 7

    Let the sauce cool slightly, discard the bay leaf.

    Step 8

    Pour the mixture into a blender and process until smooth.

    Step 9

    Keep aside.

    Step 10
    To Make Balti Beef:

    Wipe out the pot and return it to medium heat.

    Step 11

    Melt ghee and add onion, garlic and stir fry for 5 minutes or until lighlt browned.

    Step 12

    Add the red bell pepper. Cook and stir for 2 minutes.

    Step 13

    Stir in the beef roast and continue cooking for 2 minutes, until it starts to turn brown.

    Step 14

    Add the balti sauce and bring to a boil.

    Step 15

    Reduce the heat to medium-low. Cover and simmer for 5 minutes or until the sauce is thickened.

    Step 16

    Adjust the seasoning according to your taste.

    Step 17

    Dish it out. Garnish with coriander leaves. Delicious Balti Beef is ready to serve.

    [/tab] [tab]

    • Serve with Naan bread.

    [/tab] [/tabs]
    If you like Balti Beef Recipe and make it then let me know your feedback by commenting below.And if you know more innovative ways in which we can utilize this mouth watering Balti Beef, do share with us and we would be glad to give it a try.

  • The Ultimate Green Malai Tikka Pizza Recipe (Unique & Flavorful!)

    Green Malai Tikka Pizza

    Bring new life and innovation in the classic Pizza recipe and let the East meet West. Try out this Green Malai Tikka Pizza Recipe with completely desi malai chicken tikka topping. Yum Yum!! Give it a try!

    Green Malai Tikka Pizza Recipe
    Photo: Green Malai Tikka Pizza Recipe

    Check it out the Green Malai Tikka Pizza Recipe here !!

    [divider]

    [one_fourth]Prep Time:30 minutes[/one_fourth] [one_fourth]Cook Time:30 minutes[/one_fourth] [one_fourth]Servings: 4[/one_fourth] [one_fourth_last]Difficulty Level: Medium[/one_fourth_last]

    [divider]

    [tabs type=”horizontal”] [tabs_head] [tab_title]Ingredients[/tab_title] [tab_title]Nutrition[/tab_title] [/tabs_head] [tab]

    For Pizza Dough

    • 2-1/2 cups plain flour
    • 2 tablespoon vegetable oil
    • 1-1/2 teaspoon instant yeast
    • 1 teaspoon sugar
    • 1 teaspoon chicken powder,(optional)
    • Salt to taste
    • Luke warm water as required

    For Chicken Marination:

    • 400 gm boneless chicken, cubed
    • 2 tablespoon fresh cream
    • 2 tablespoon lemon juice
    • 2 tablespoon oil
    • 1 tablespoon green chili garlic sauce
    • 1 teaspoon ginger garlic paste
    • 1/2 teaspoon white pepper
    • Salt to taste

    For Malai Pizza Sauce:

    • 1 cup milk
    • 2 tablespoon cornflour
    • 2 tablespoon cream cheese
    • 1 tablespoon butter
    • 1/4 teaspoon white pepper
    • Salt to taste

    For Pizza Topping

    • 1 onion, thinly sliced
    • 1 green bell pepper, thinly sliced
    • 1/4 cup mushrooms, thinly sliced
    • 1/2 cup cheddar cheese
    • 1/2 cup Mozzarella cheese
    • 1 teaspoon dried Oregano, crushed

    [/tab] [tab]Yield: 4 servings

    Nutritional information is not yet available. [/tab] [/tabs]

    Directions:
    [tabs type=”horizontal”] [tabs_head] [tab_title]Step by Step Method[/tab_title] [tab_title]Serving Suggestions[/tab_title][/tabs_head] [tab]

    Step 1
    To Make Pizza Dough:
    In a large bowl, combine together the flour, instant yeast, Salt, sugar, oil and chicken powder.

    Step 2

    Add luke warm water and knead a soft dough.

    Step 3

    Bang dough well.

    Step 4

    Keep the dough in a greased bowl. Cover with a wet cloth and leave it on room temperature for 30 minutes.

    Step 5

    Punch down the dough.

    Step 6

    Lightly greased a pizza pan or baking sheet with cooking spray or oil.

    Step 7

    Roll dough and put on the prepared pan.

    Step 8

    Prick the dough with fork and set aside

    Step 9

    To Make Pizza Sauce:

    In a large saucepan, Cook all together the pizza sauce ingredients until sauce is thickened.

    Step 10

    Spread sauce on the pizza base.

    Step 11

    To Make Chicken Filling:
    In a mixing bowl, coat the chicken strips with salt, white pepper, green chili garlic sauce, lemon juice and ginger garlic paste.

    Step 12

    Heat 1 tablespoon oil in a pan over medium heat.

    Step 13

    Cook chicken for 15-20 minutes or until all juices run clear and chicken is no longer pink.

    Step 14

    Give dum of a coal and stir with cream and keep aside.

    Step 15

    To Assemble Pizza:

    Put chicken filling on pizza base.

    Step 16

    Top with onion, green pepper and mushrooms.

    Step 17

    Sprinkle with cheddar cheese, Mozzarella cheese and oregano.

    Step 18

    Bake, in the preheated oven, for 30 minutes or until crust turn golden and cheese is bubbly.

    Step 19

    Remove from the oven. Cut into wedges. Delicious Green Malai Tikka Pizza is ready to serve.

    [/tab] [tab]

    Serve with [/tab] [/tabs]
    If you like Green Malai Tikka Pizza  Recipe and make it then let me know your feedback by commenting below.And if you know more innovative ways in which we can utilize this mouth watering Green Malai Tikka Pizza , do share with us and we would be glad to give it a try.

  • Cheese Steak Sandwich Recipe

    Cheese Steak Sandwich

    A cheese steak sandwich is not really a steak at all – it is a sandwich made with cooked sliced steak _ top with cheese and Caramelized Onions. Meaty, gooey, and delightfully Cheese Steak Sandwich Recipe, Give it a try!!

    Cheese Steak Sandwich Recipe
    Photo: Cheese Steak Sandwich Recipe

    Check it out the Cheese Steak Sandwich Recipe here!!

    [divider]

    [one_fourth]Prep Time:10 minutes[/one_fourth] [one_fourth]Cook Time:35 minutes[/one_fourth] [one_fourth]Servings: 4[/one_fourth] [one_fourth_last]Difficulty Level: Easy[/one_fourth_last]

    [divider]

    [tabs type=”horizontal”] [tabs_head] [tab_title]Ingredients[/tab_title] [tab_title]Nutrition[/tab_title] [/tabs_head] [tab]

    • 2 pounds lean sirloin beef tenderloin, cut into thin slices
      2 tsp olive oil
    • 1/2 cup chili sauce
    • 1/2 cup tomato sauce
    • 1 tbsp soy sauce
    • 1 tsp garlic paste
    • 1 tsp black pepper, freshly ground
    • 1 tsp Italian herb seasoning
    • salt to taste
    • 8 slices provolone cheese
    • 4 Italian Hogie rolls
    • 1/2 cup caramelized onion

    [/tab] [tab]Yield: 4 servings

    Nutritional information is not yet available. [/tab] [/tabs]

    Directions:
    [tabs type=”horizontal”] [tabs_head] [tab_title]Step by Step Method[/tab_title] [tab_title]Serving Suggestions[/tab_title][/tabs_head] [tab]

    Step 1

    Heat a grilled pan over medium high heat.

    Step 2

    Put beef sliced steak on it. Drizzle some oil.

    Step 3

    Cook steak for 4 minutes on each side or until lightly browned but not crisp.

    Step 4

    Stir in the garlic, chili sauce, soy sauce and tomato sauce.

    Step 5

    Tenderize steak by cutting into meat with the side of your spatula while they cook.

    Step 6

    Season with Italian seasoning, salt and pepper.

    Step 7

    Cover and let it simmer for 20-25 minutes or until cooked thorough.

    Step 8

    Split Italian rolls into lengthwise.

    Step 9

    Line each of split roll with 2 slices of provolone cheese.

    Step 10

    Divide steak mixture into 4 equal portions.

    Step 11

    Put hot steak mixture on Roll. Top with Carmalized onions.

    Step 12

    Rolls on top of the cheese. The heat from the meat and onions will melt the cheese.

    Step 13

    Transfer into a serving platter. Garnish with lettuce leaves. Delicious Cheese Steak Sandwich is ready to serve. ENJOY!!

    [/tab] [tab]

    [/tab] [/tabs]

    If you like Cheese Steak Sandwich Recipe and make it then let me know your feedback by commenting below.And if you know more innovative ways in which we can utilize this mouth watering Cheese Steak Sandwich, do share with us and we would be glad to give it a try.

  • Winter Comfort Food: Easy Fish Tikka Boti Recipe (Perfect for Cold Nights!)

    Fish Tikka Boti

    Today i am sharing Fish Tikka Boti recipe for all Fish lovers. It is a very healthy diet as it contains the vitamins A and Vitamin D. Once you cook this Fish Tikka Boti and serve, your friends and family will love it.

    This is an excellent and perfect Fish boti recipe and it is very simple to make. 

    Fish Tikka Boti Recipe
    Photo: Fish Tikka Boti Recipe

    Check it out the Fish Tikka Boti Recipe here!!

    Fish Tikka Boti Recipe

    Prep Time 10 minutes
    Cook Time 20 minutes
    Total Time 30 minutes
    Servings 6
    Author Bushrah @ Recipestable

    Ingredients

    • 1 kg fish fillets cut into cubes
    • 2 tablespoon ginger garlic paste
    • 1/2 cup plain yogurt
    • 1/2 cup fresh cream
    • 2 tablespoon lemon juice
    • 2 teaspoon red chili powder
    • 1 teaspoon cumin powder
    • 1 teaspoon coriander powder
    • 1 teaspoon garam masala powder
    • 1 teaspoon green chili paste
    • 1/2 teaspoon turmeric powder
    • salt to taste
    • few drops of food color
    • skewers as required
    • oil for basting

    For Garnishing

    • few salad leaves
    • lemon wedges

    Instructions

    Method

    • Wash fish and pat dry.Cut fish fillets into 1 inch cubes.
    • Put in a large bowl. Add salt, green chili paste, garlic- ginger paste, lemon juice, yogurt, fresh cream, red chili, turmeric powder, cumin powder, coriander powder, Garam masala powder and food color. Mix well.
    • Cover and marinate for at least 1 hour to blemd flavours.
    • Soak the bamboo skewers into the water for 20 minutes, so they don’t get burnt while grilling.
    • Thread fish cubes on the wet bamboo skewers.
    • Grill them on charcoal grill for 5 minutes on each side or until they turn into golden color.
    • Bust with oil. Remove from the skewers and transfer into a serving platter.
    • Garnish with lemon wedges and salad leaves. Delicious Fish Boti Tikka is ready to serve. ENJOY!!

    Notes

    Serving Suggestions:
    Serve it with green salad and Naan bread.

    I have also posted Tandoori Fish Tikka Recipe which are another easiest & tastiest version of making Fish Tikka at home. Do check it out as well.  It’s finger lickin’ good. You’ll be coming back for more. 


    Put your own spin on it. And lemme know how it turns out. Post a photo on Facebook (Recipestable) or  on Twitter so I can see how lovely yours turn out.


    Happy Dinner Making!!

  • Unlock the Secrets of Kashmiri Cuisine: Fried Kashmiri Chops Recipe

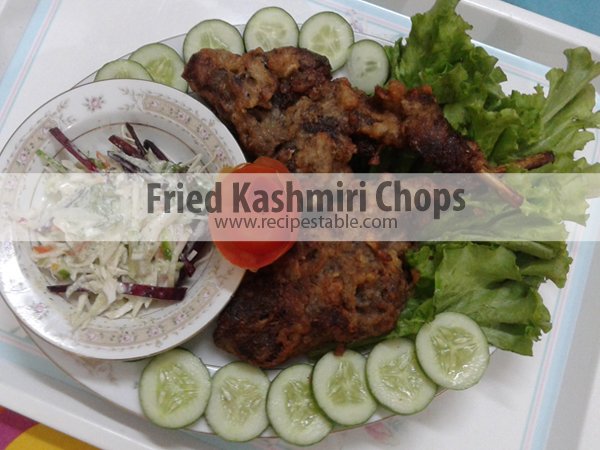
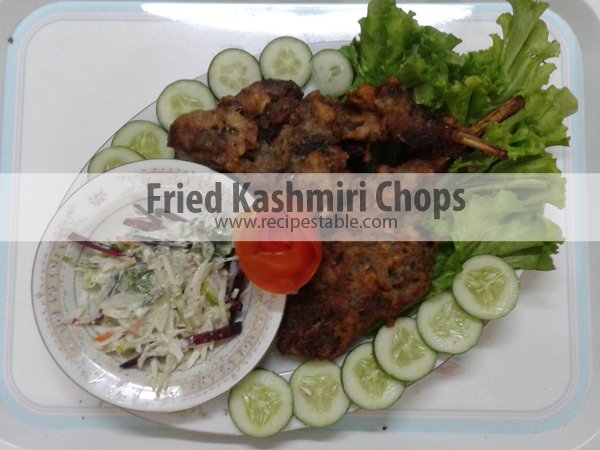
    Fried Kashmiri Chops

    These Fried Kashmiri Chops are cooked in a very unique way as first they are boiled in milk and they are fried. Boiling in milk makes them very tender and juicy. Also it doesn’t absorb much oil when fried. Even though we use such a large number of spices in this dish, but it has very mild flavour and is delicious to eat. Must try this Fried Kashmiri Chops recipe, you’ll love it.

    Fried Kashmiri Chops Recipe
    Photo: Fried Kashmiri Chops Recipe
    Fried Kashmiri Chops Recipe
    Photo: Fried Kashmiri Chops Recipe
    Fried Kashmiri Chops Recipe
    Photo: Fried Kashmiri Chops Recipe

    Check it out the Fried Kashmiri Chops Recipe here!!

    [one_fourth]Prep Time:15 minutes + marination[/one_fourth] [one_fourth]Cook Time:1 hour[/one_fourth] [one_fourth]Servings:4 [/one_fourth] [one_fourth_last]Difficulty Level:Easy [/one_fourth_last]

    [tabs style=”h1″ ]
    [tab title=”Ingredients” ]

    • 1 kg mutton chops
    • 1 cup all purpose flour
    • 1 cup milk
    • 2 tablespoon plain yogurt
    • 1 tablespoon ginger garlic paste
    • 1 tablespoon aniseeds
    • 1/2 teaspoon Baking soda
    • a piece of 2 inch of Cinnamon Stick
    • Salt to taste
    • peanut oil for frying

    For Garnishing:

    • lemon wedges
    • salad leaves

    [/tab]
    [tab title=”Nutrition” ]

    Yield: 5 servings

    Amount Per Serving
    Percent Daily Values are based on a 2,000 calorie diet.

    [/tab]
    [/tabs]

    Directions:

    [tabs style=”h1″ ]
    [tab title=”Step By Step Method” ]

    Step 1

    Wash mutton chops properly and pat dry.

    Step 2

    Tie ginger, cinnamon, aniseeds in a clean white cloth.

    Step 3

    Put meat, milk, 1/2 liter water and tie cloth in a large pot.

    Step 4

    Bring to a boil and reduce heat to medium low. Cover the cook for 45 minutes or until the meat becomes tender.

    Step 5

    Drain the mutton and squeeze the spice bundle to extract maximum flavor and discard.

    Step 6

    Reserve the stock.

    Step 7

    In a shallow bowl, sieve together the flour, baking powder and salt.

    Step 8

    Add the yogurt and enough stock to make a batter of thick consistency.

    Step 9

    Heat oil in a deep pan over medium heat.

    Step 10

    Dip mutton chops in the batter and fry for 4-5 minutes or until crispy and golden.

    Step 9

    Remove from the oil and drain on absorbant paper.

    Step 10

    Transfer into a serving platter.

    Step 11

    Garnish with lettuce leaves and lemon wedges.Delicious Fried Kashmiri Chops are ready to serve. ENJOY!!
    [/tab]

    [tab title=”Serving Suggestions”]Serve with Rice, salad and green chutney.[/tab]
    [/tabs]

    If you like Fried Kashmiri Chops Recipe and make it then let me know your feedback by commenting below.And if you know more innovative ways in which we can utilize this mouth watering Fried Kashmiri Chops, do share with us and we would be glad to give it a try.
  • Sweet and Sour Fish Recipe

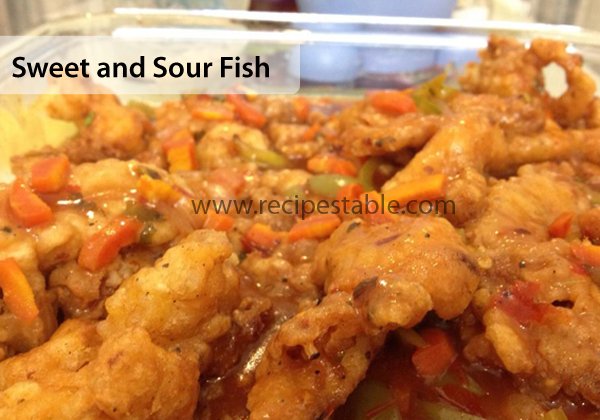
    Sweet and Sour Fish

    This Sweet and Sour Fish recipe is one of the easiest and quickest  dish that you can make. Deep fried fish with sweet and sour sauce. Practically any kind of firm-fleshed fish, such as tilapia,halibut goes well with this mildly tangy, brightly flavored sauce.

    Sweet and sour Fish Recipe
    Photo: Sweet and Sour Fish Recipe

    Bismillah, let’s begin!

    Check it out the Sweet and Sour Fish Recipe and printable version below.

    Sweet and Sour Fish Recipe

    Prep Time 10 minutes
    Cook Time 25 minutes
    Total Time 35 minutes
    Servings 6
    Author Bushrah | Recipestable

    Ingredients

    For Fried Fish

    • 1 kg halibut fish
    • 1 cup cooking oil
    • 2 tbsp soy sauce
    • 2 tbsp all-purpose flour
    • a pinch of salt
    • a pinch of pepper

    For Sauce

    • 1 cup pineapple chunks cubed
    • 1 onion cubed
    • 1 red bell pepper cubed
    • 1 green bell pepper cubed
    • 1 cup tomato ketchup
    • 1/2 cup pineapple juice
    • 2 tablespoon water
    • 1 tablespoon sesame oil
    • 1 tablespoon white sugar
    • 4 teaspoon all purpose flour
    • salt to taste

    Instructions

    Method

    • Cut fish into 1 inch cubes.
    • Place fish, 2 tablespoon flour, soy sauce in a mixing bowl.
    • Season with a pinch of salt and pepper. Mix well and marinate for 30 minutes.
    • Heat oil in a deep frying pan over medium heat.Deep fry fish pieces for 3-4 minutes on each or until crispy and golden brown.
    • Remove from th oil and drain on an absorbent paper. Set aside and keep warm.

    To Make the Sauce

    • Meanwhile, heat sesame oil in a skillet over medium heat.Saute onion, pineapple, red and green pepper for 1 minute.
    • Stir in the pineapple juice, sugar, tomato ketchup and salt. Dissolve 4 teaspoons of flour in 2 tablespoon water and make a thick paste.
    • Pour this mixture into the skillet. keep stirring.
    • Cook for 2-3 minutes or until sauce is thickened.
    • Arrange fried fish pieces in a large dish. Pour sweet and sour sauce over the fish. Delicious sweet and Sour Fish is ready to serve.

    Notes

    Recipe Note’s:
    We have determined the nutritional value of oil for frying based on a retention value of 10% after cooking. The exact amount may vary depending on cook time and temperature, ingredient density, and the specific type of oil used.
    Serving Suggestions:
    Serve with Fried Rice

    I have also posted Sweet and Sour Chicken Recipe which is another easiest & tastiest version of making chinese dinner. Do check it out as well.


    Put your own spin on it. And lemme know how it turns out. Post a photo on Facebook (Recipestable) or  on Twitter so I can see how lovely yours turn out.


    Happy Cooking!!

    If you like this post, Please Subscribe to my blog and let me know your feedback by commenting below.. I have lots more recipes to share with you.


  • Family Feast: Angara Qeema Recipe (Smoked Mince)

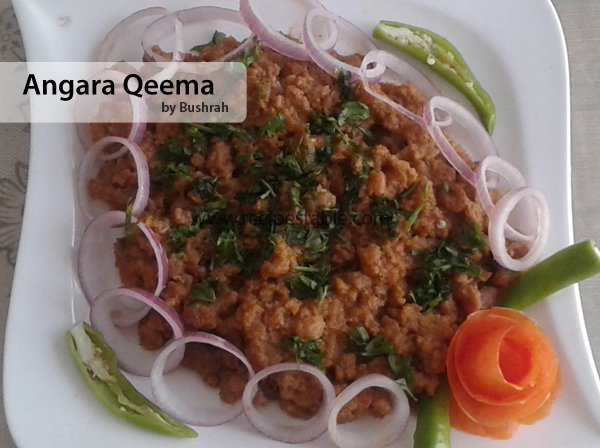
    Angara Qeema

    This Angara Qeema recipe is so easy to make and a hearty meal. Everyone loves it to take with puri paratha, onion rings and green chutney. Prepare it for your next party menu, it would be most hit dish of your table. Give it a try!!

    Angara Qeema Recipe
    Photo: Angara Qeema Recipe

    Check it out the Angara Qeema Recipe here!!

    [divider]

    [one_fourth]Prep Time:10 minutes + overnight marination[/one_fourth] [one_fourth]Cook Time:1 hour[/one_fourth] [one_fourth]Servings:4 [/one_fourth] [one_fourth_last]Difficulty Level: Easy[/one_fourth_last]

    [divider]

    [tabs type=”horizontal”] [tabs_head] [tab_title]Ingredients[/tab_title] [tab_title]Nutrition[/tab_title] [/tabs_head] [tab]

    • 1 kg mince meat
    • 1 cup ghee or butter
    • 1/2 cup fried onion, crushed
    • 4 tablespoon papaya paste
    • 2 tablespoon ginger garlic paste
    • 2 teaspoon red chili powder
    • 2 teaspoon cumin seeds, roasted and crushed
    • 1-1/2 teaspoon garam masala powder
    • 1 teaspoon coriander powder
    • 1/2 teaspoon turmeric powder
    • salt to taste

    Other Ingredients

    • a piece of Coal

    For Garnishing:

    • Ring onion
    • few coriander leaves
    • green chilies
    • lemon wedges

    [/tab] [tab]Yield: 4 servings

    Nutritional information is not yet available. [/tab] [/tabs]

    Directions:
    [tabs type=”horizontal”] [tabs_head] [tab_title]Step by Step Method[/tab_title] [tab_title]Serving Suggestions[/tab_title][/tabs_head] [tab]

    Step 1

    Place mince and all ingredients (except gheee) in a large bowl.

    Step 2

    Mix until well combined.

    Step 3

    Cover and marinate overnight to blend flavors.

    Step 4

    Heat ghee or butter in a large skillet or pan.

    Step 5

    Add marinated qeema. Stir and cook on low flame for 40 minutes or until cooked thorough.

    Step 6

    Now give dum of coal for a while.

    Step 7

    Dish it out.

    Step 8

    Garnish with ring onion, lemon wedges, green chilies, and coriander leaves. Angara Qeema is ready to serve.

    [/tab] [tab]

    • Serve along with Naan, Onion rings and mint chutney.

    [/tab] [/tabs]

    If you like Angara Qeema Recipe and make it then let me know your feedback by commenting below.And if you know more innovative ways in which we can utilize this mouth watering Angara Qeema, do share with us and we would be glad to give it a try.

  • Aloo Mutter Recipe

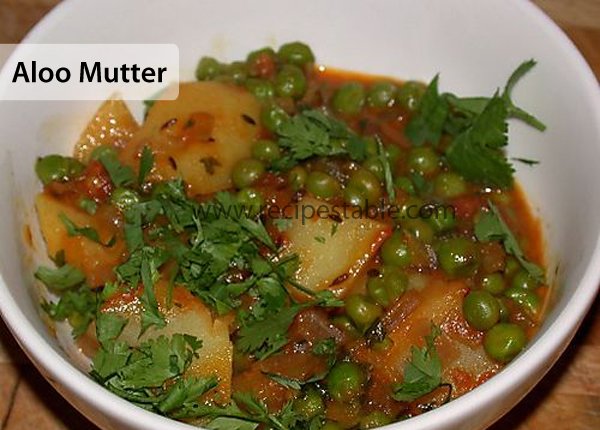
    Aloo Mutter

    Aloo Muttuer _ a simple Pakistani Style curry which we often make at home. Aloo and Mutter, their combo is always good. Must try this Aloo Mutter Recipe, you’ll love it.

    Aloo Mutter Recipe
    Photo: Aloo Mutter Recipe

    [divider]

    [one_fourth]Prep Time:10 minutes[/one_fourth] [one_fourth]Cook Time:30 minutes[/one_fourth] [one_fourth]Servings:4 [/one_fourth] [one_fourth_last]Difficulty Level:Easy [/one_fourth_last]

    [divider]

    [tabs type=”horizontal”] [tabs_head] [tab_title]Ingredients[/tab_title] [tab_title]Nutrition[/tab_title] [/tabs_head] [tab]

    • 4 Potatoes
    • 1 Cup green peas
    • 1 Large chopped tomato
    • 2 Green chilies chopped
    • 1/2 tsp Red chili powder
    • 3/4 tsp Turmeric Powder
    • 1/2 cup oil
    • few Coriander leaves
    • Salt to taste

    [/tab] [tab]Yield: 4 servings

    Nutritional information is not yet available. [/tab] [/tabs]

    Directions:
    [tabs type=”horizontal”] [tabs_head] [tab_title]Step by Step Method[/tab_title] [tab_title]Serving Suggestions[/tab_title][/tabs_head] [tab]

    Step 1

    Wash potatoes and cut them into cubes.

    Step 2

    Heat the oil and add tomato, turmeric powder, red chili powder and green chilies.

    Step 3

    Fry it till oil is absorbed.

    Step 4

    Add potatoes and green peas and mix them well.

    Step 5

    Fry it for 5 minutes.

    Step 6

    Add 2 cups water and cover it. Cook it till water is partly absorbed.

    Step 7

    Garnish it with fresh coriander leaves. Aloo Mutter is ready to serve.

    [/tab] [tab]

    • Serve with Chapati.

    [/tab] [/tabs]
    If you like Aloo Mutter Recipe and make it then let me know your feedback by commenting below.And if you know more innovative ways in which we can utilize this mouth watering Aloo Mutter, do share with us and we would be glad to give it a try.
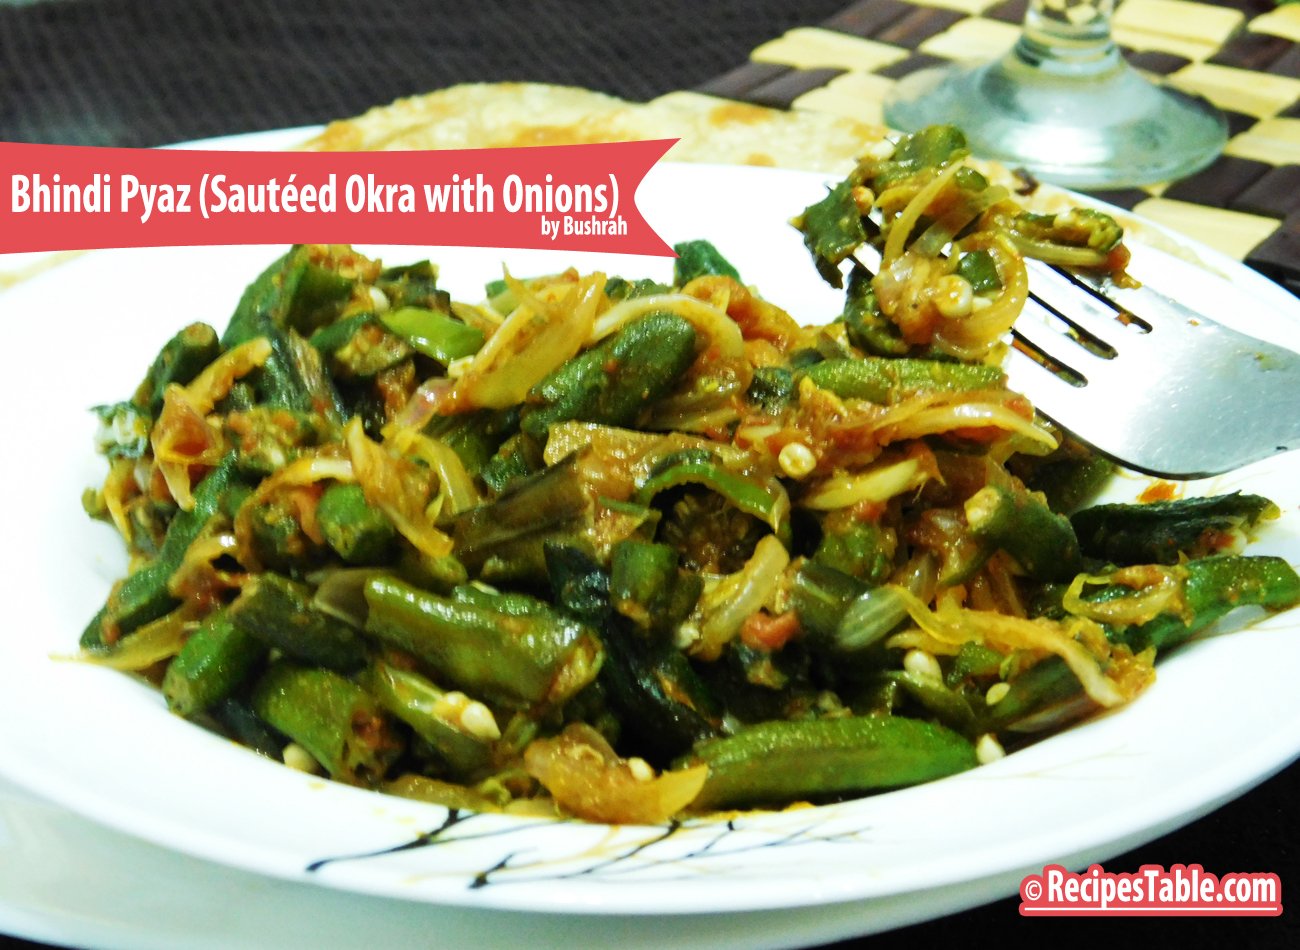
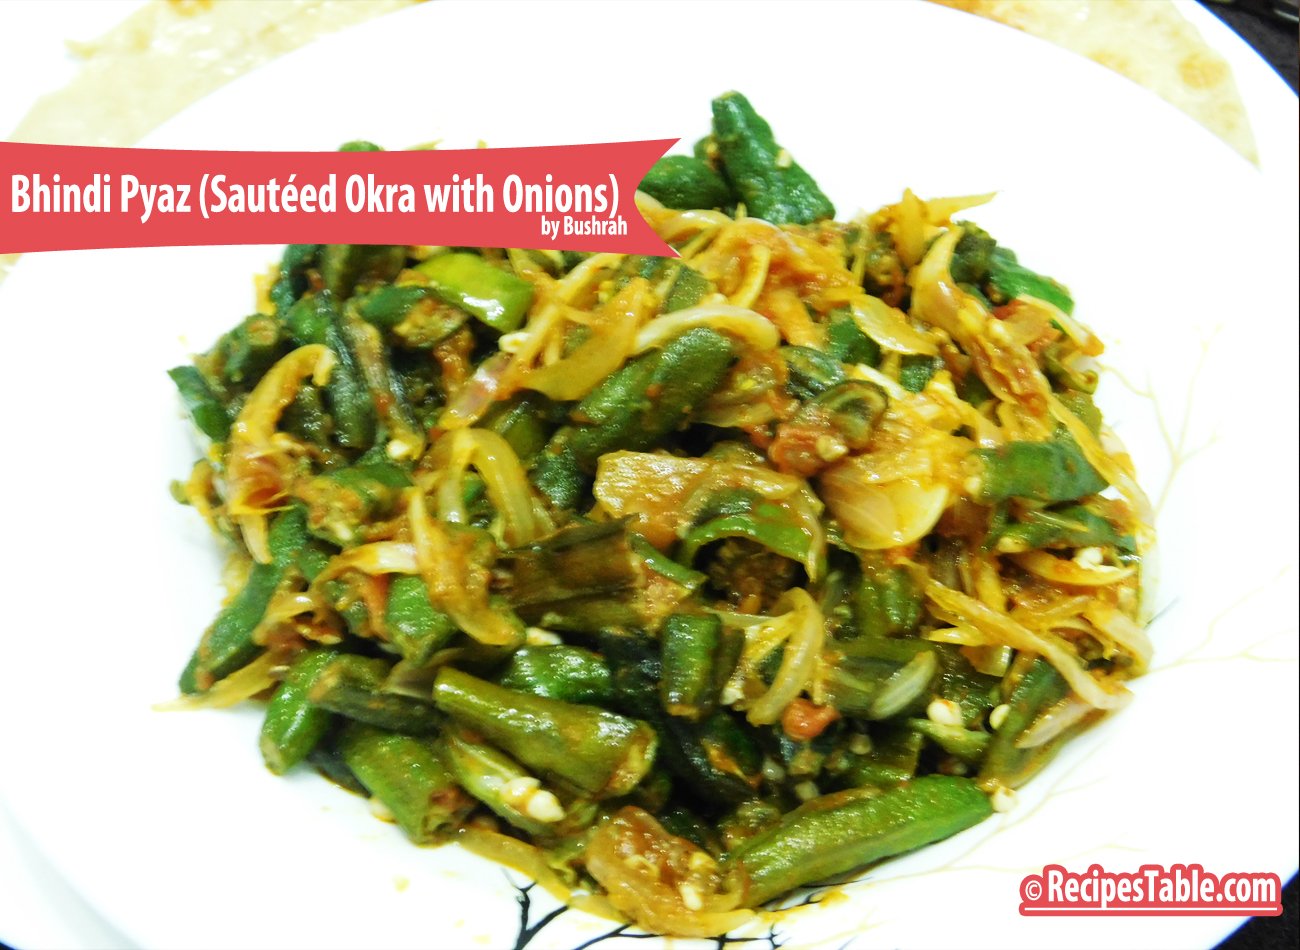
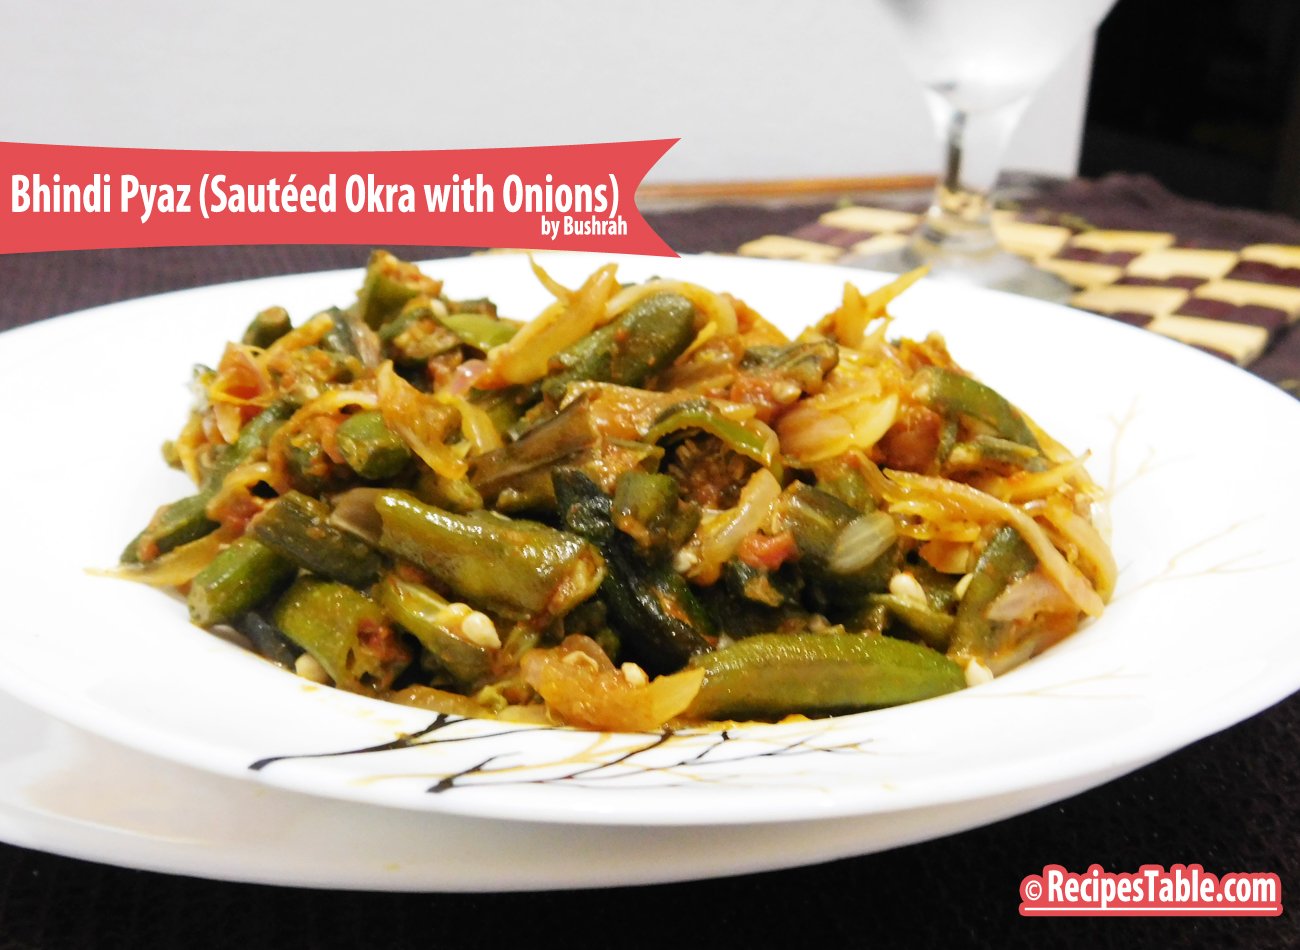
  • Recipe: Bhindi Pyaz (Sautéed Okra with Onions)

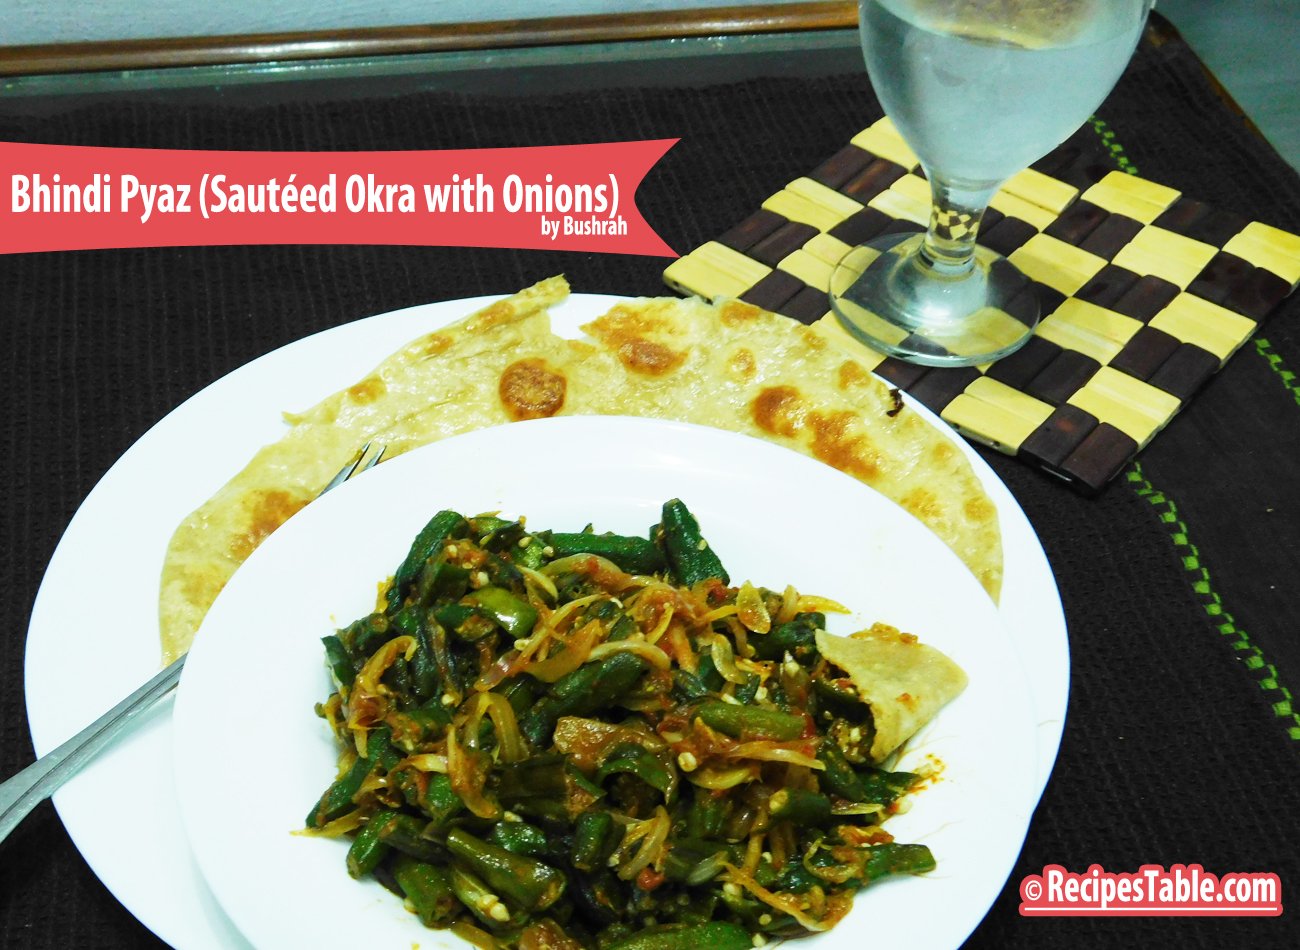
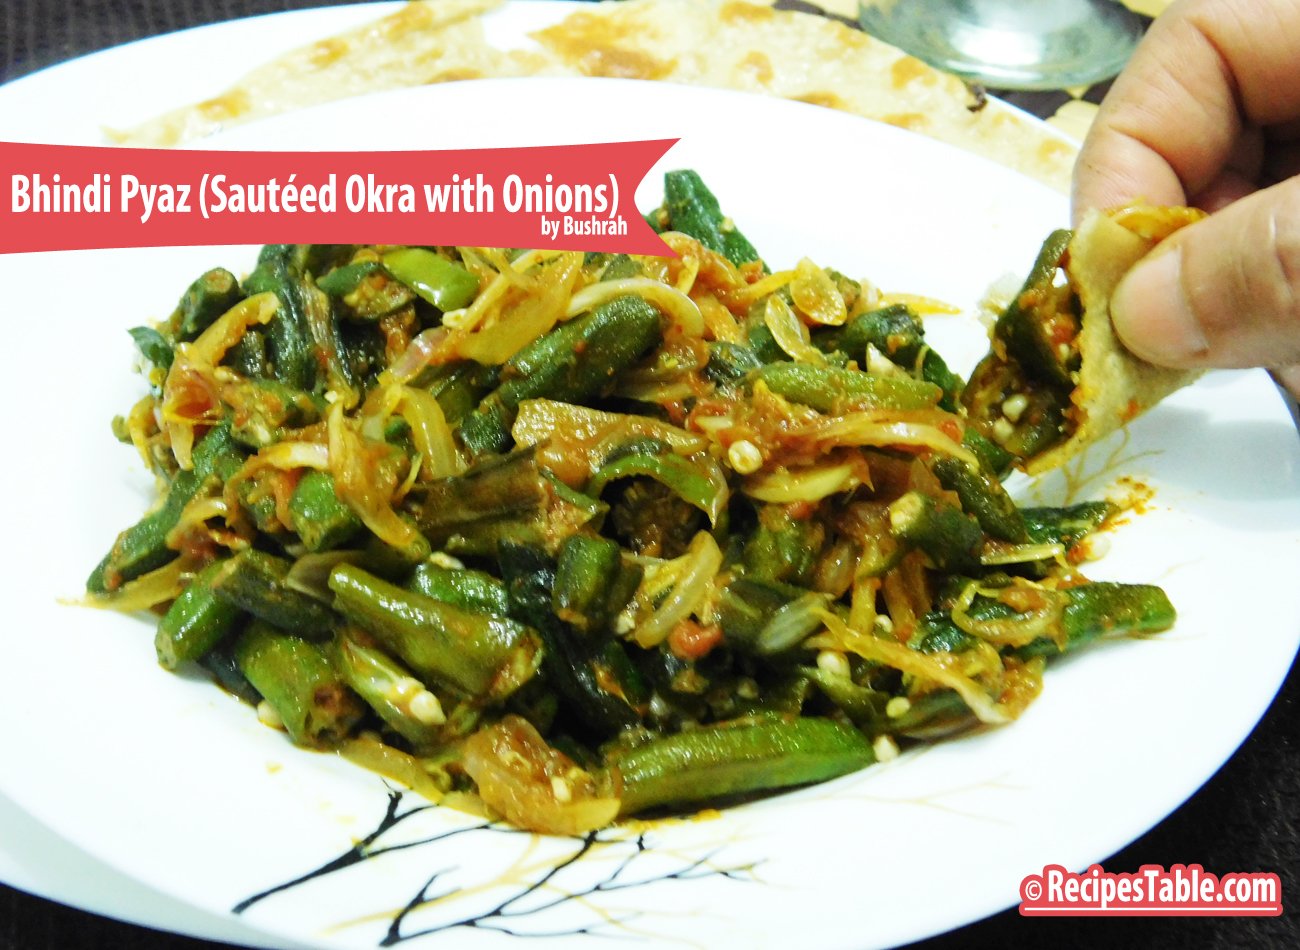
    Bhindi Pyaz 

    Bhindi Pyaz is a spicy veggie curry made from onion, okra and some spices. It is very easy and quick to make so you can make it on everyday basis. This Bhindi Pyaz is very healthy and taste so delicious. Goes great with chapati or tandoori roti. Give it a try!!

    Bhindi Pyaz (Sautéed Okra with Onions)
    Photo: Bhindi Pyaz (Sautéed Okra with Onions)


    Bhindi Pyaz (Sautéed Okra with Onions)

    Photo: Bhindi Pyaz (Sautéed Okra with Onions)

    Bhindi Pyaz (Sautéed Okra with Onions)
    Photo: Bhindi Pyaz (Sautéed Okra with Onions)
    Bhindi Pyaz (Sautéed Okra with Onions)
    Photo: Bhindi Pyaz (Sautéed Okra with Onions)
    Photo: Bhindi Pyaz (Sautéed Okra with Onions)
    Photo: Bhindi Pyaz (Sautéed Okra with Onions)

    Check it out the Bhindi Pyaz Recipe here!!

    Bhindi Pyaz Recipe

    Prep Time 20 minutes
    Cook Time 25 minutes
    Total Time 45 minutes
    Servings 6
    Author Bushrah | Recipestable

    Ingredients

    • 500 gm lady finger
    • 4 tbsp oil
    • 3 onions thinly sliced
    • 1 tbsp grated ginger
    • 1 tbsp garlic paste
    • 1/2 tsp lemon juice
    • 1 pinch asafetida
    • 1 tsp red chili powder
    • 1/4 tsp turmeric powder
    • 2 green chillies finely chopped
    • 1 tbsp coriander leaves finely chopped
    • salt to taste

    Instructions

    • Slit lady finger half lengthwise. If too long cut into 3-inch long pieces.
    • Heat 2 tbsp oil in a nonstick pan.
    • Add ladyfinger, stir fry till it is crisp.
    • If overdone it will turn blackish, is underdone it will be sticky.
    • Remove from pan, keep aside till required.
    • Heat remaining oil in same pan, stir fry onions till golden brown.
    • Keep aside in pan till required.
    • Just before serving, heat onions in pan. Add all other seasoning, stir fry for a few seconds.
    • Add lady finger,red chili powder, salt, stir and transfer into serving dish.
    • Garnish with chopped coriander. Delicious Bhindi Pyaz is ready to serve.

    Notes

    Serving Suggestions:
    Serve hot and crisp with roti or parathas.
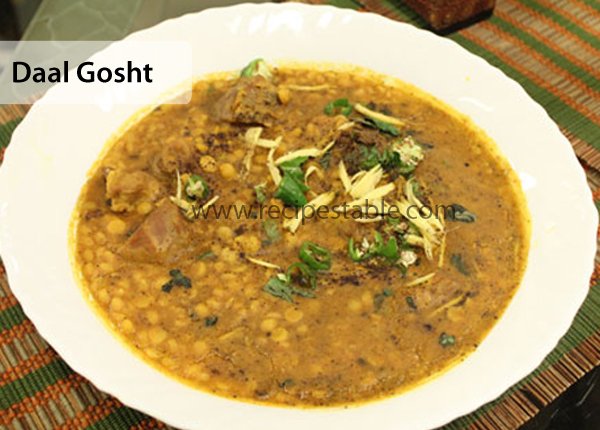
  • Daal Gosht Recipe

    Daal Gosht

    This Daal Gosht Recipe makes a great one-pot meal.It’s easy to make, high fiber and delicious. Perfect for meat lovers.Giving it an attempt is must.

    Daal Gosht Recipe
    Photo: Daal Gosht Recipe

    Check it out the Daal Gosht Recipe here!!

    [divider]

    [one_fourth]Prep Time:30 minutes[/one_fourth] [one_fourth]Cook Time:1 hour 30 minutes[/one_fourth] [one_fourth]Servings:4 [/one_fourth] [one_fourth_last]Difficulty Level:Medium [/one_fourth_last]

    [divider]

    [tabs type=”horizontal”] [tabs_head] [tab_title]Ingredients[/tab_title] [tab_title]Nutrition[/tab_title] [/tabs_head] [tab]

    • 500 gm boneless mutton
    • 4 onions, sliced
    • 2 tomatoes, chopped
    • 5 green chilies, chopped
    • 1 lemon, juiced
    • 1/2 cup oil or ghee
    • 1/2 cup Chana dal
    • 1/2 cup Tur dal
    • 1/2 cup yogurt
    • 2 tablespoon ginger garlic paste
    • 1 teaspoon red chili powder
    • 1 teaspoon turmeric powder
    • 1 teaspoon coriander powder
    • 1 teaspoon garam masala powder
    • 1 teaspoon amchur powder
    • 1 teaspoon cumin seeds
    • 1/2 teaspoon mustard seeds
    • Salt To taste

    For Garnishing:

    • ginger slices
    • few coriander leaves
    • green chilies

    [/tab] [tab]Yield: 4 servings

    Nutritional information is not yet available. [/tab] [/tabs]

    Directions:
    [tabs type=”horizontal”] [tabs_head] [tab_title]Step by Step Method[/tab_title] [tab_title]Serving Suggestions[/tab_title][/tabs_head] [tab]

    Step 1

    Marinate mutton in Curd/Yogurt, lemon juice, part of turmeric powder, part of Garam Masala Powder, mix well, leave aside for 2 hours.

    Step 2

    And now take chana dal and tur dal and cook it.

    Step 3

    Add turmeric and green chilies when it comes to a boil cover the pan and let it cook for some time till it is fully cooked.

    Step 4

    Take a pan, put some oil, Whole Garam Masala and add onion and sauté well.

    Step 5

    Next add green chili when the onions gets golden brown add ginger, garlic, coriander powder, remaining turmeric powder, red chili powder, cook for some time.

    Step 6

    Now add the marinated mutton to this mixture and

    Step 7

    Grind dal in a mixer and add to the mutton.

    Step 8

    Give tarka of mustard seeds, cumin seeds and whole red chili, sprinkle some coriander and cook the pan and simmer it for an hour.

    Step 9

    Finely to this mixture add tomatoes, amchur powder, add a little salt, remaining garam masala powder, and cover it again for 10-15 minutes and cook on slow fire or till the mutton is fully cooked.

    Step 10

    Dish it out. Daal Gosht is ready to serve.

    [/tab] [tab]

    • Serve with tandoori Roti and salad.

    [/tab] [/tabs]
    If you like Daal Gosht Recipe and make it then let me know your feedback by commenting below.And if you know more innovative ways in which we can utilize this mouth watering Daal Gosht, do share with us and we would be glad to give it a try.
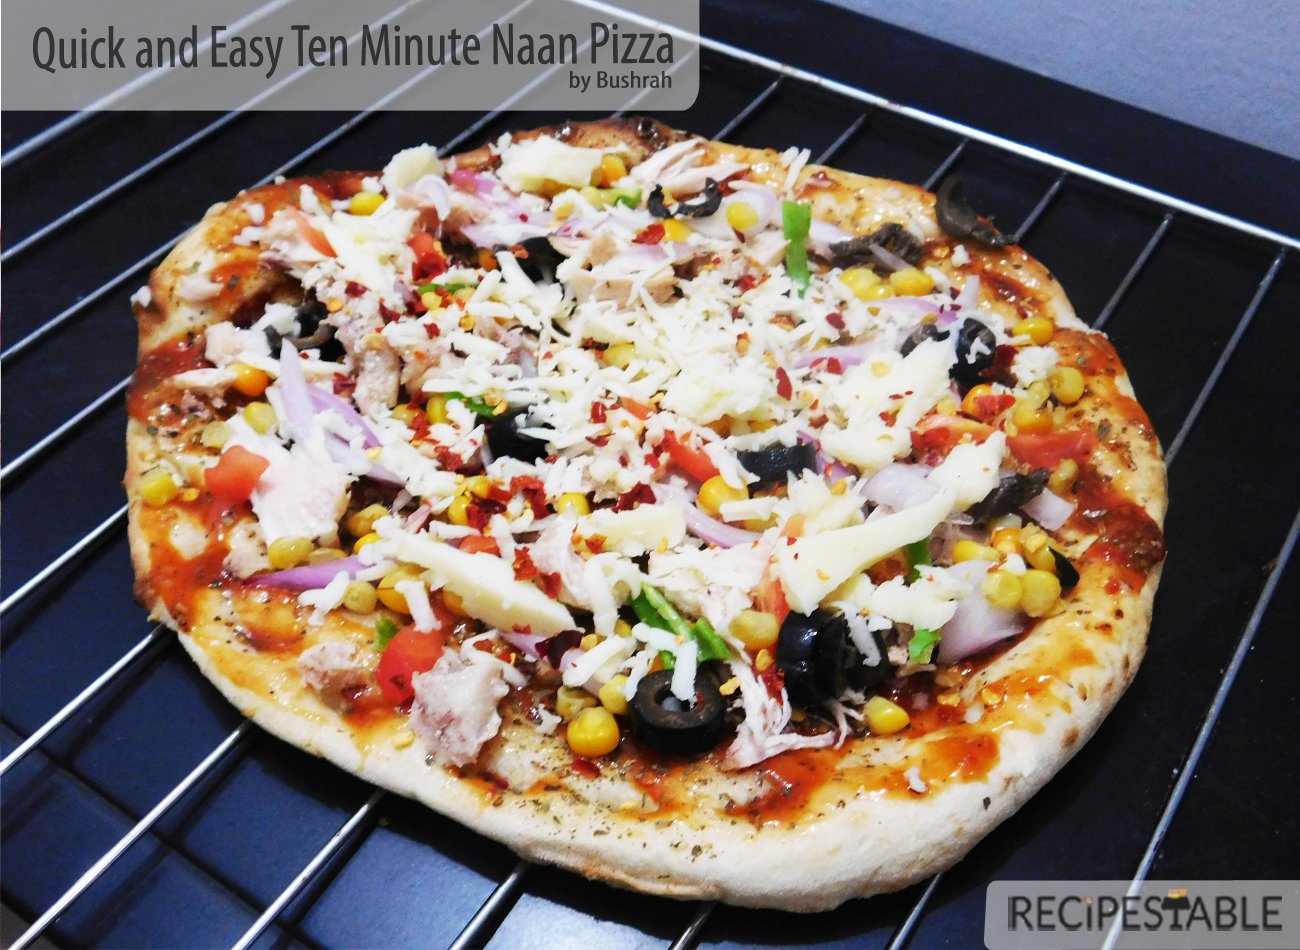
  • Recipe: Quick and Easy Ten Minute Naan Pizza

    Recipe: Quick and Easy Ten Minute Naan Pizza

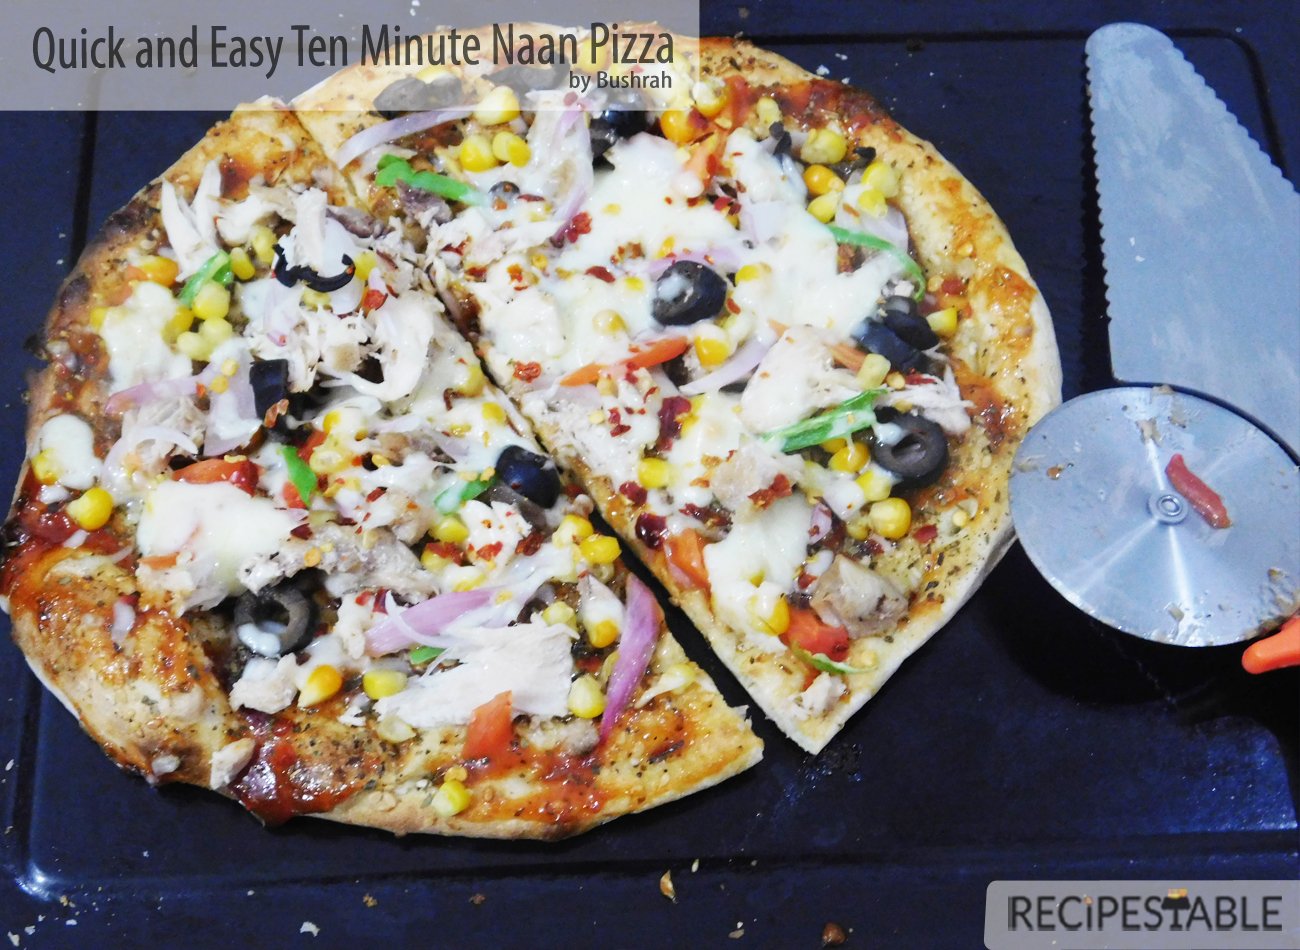
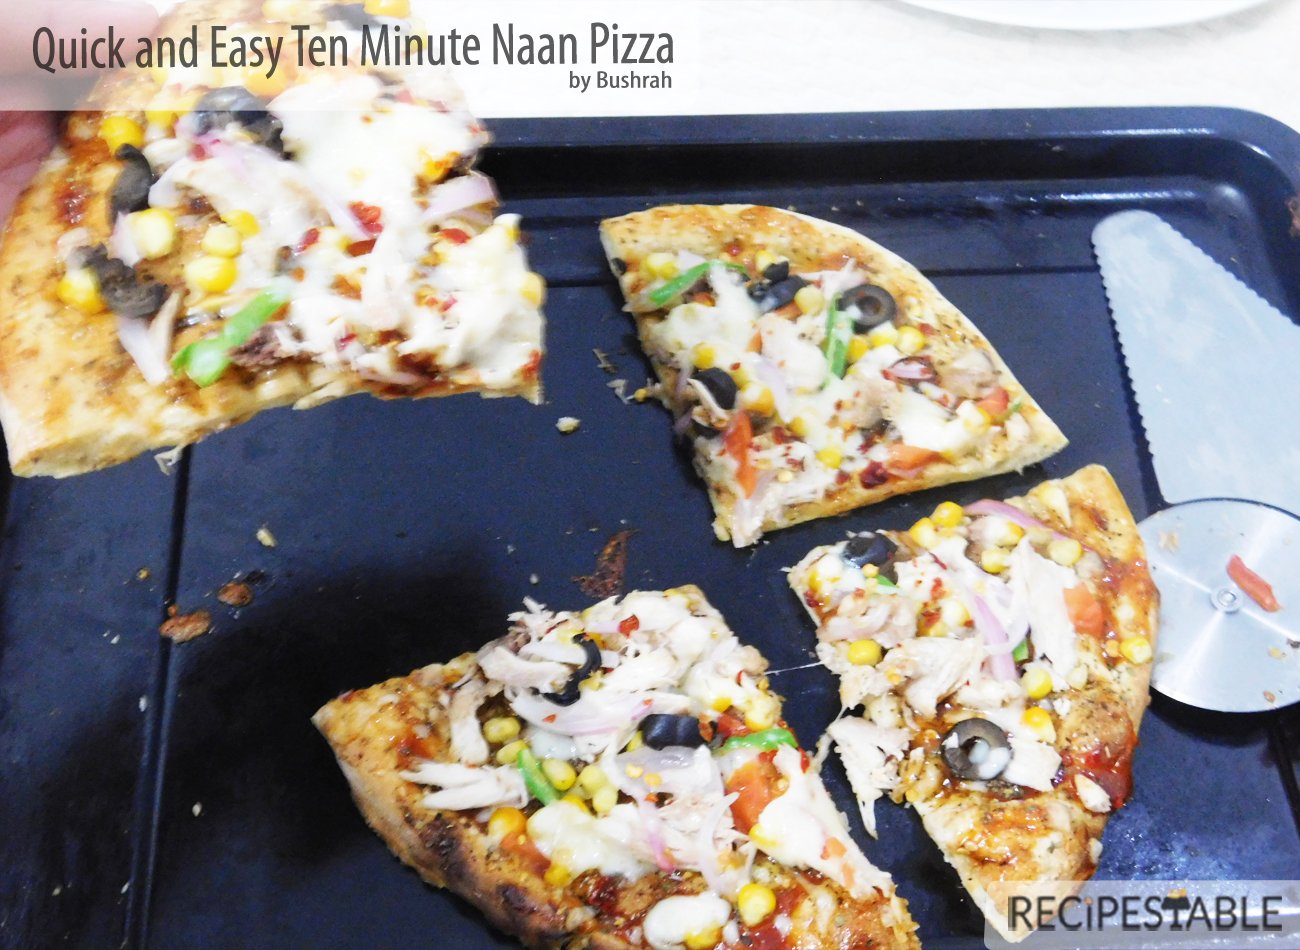
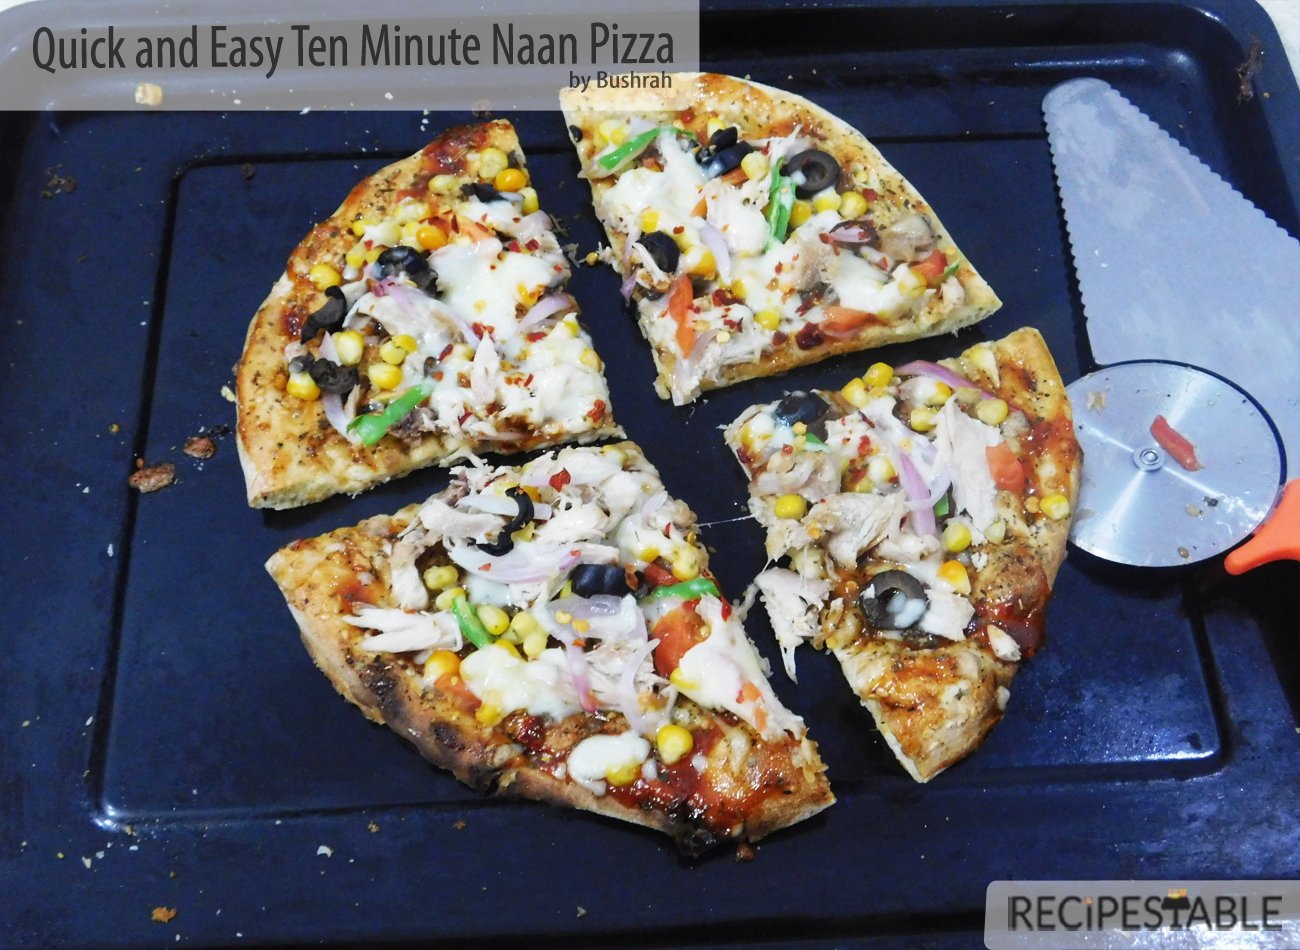
    Super quick and easy tasty home-made pizza made using shop-bought naan bread; ready in under ten minutes! Yes, This naan bread pizza takes just 10 minutes to make from start to finish – a great quick and easy weeknight meal the whole family will love!

    Quick and Easy Ten Minute Naan Pizza
    Quick and Easy Ten Minute Naan Pizza

    Although I do really like making my own pizza from scratch, including the dough; it can be a bit of a faff and takes a while. Not good if you are hungry and craving pizza fast! I am not a fan of shop bought pizza bases, but one really good ready-made solution is naan bread; it makes the perfect pizza base and because it is pre-baked you simply need to melt your cheese to finish off your pizza.

    Quick and Easy Ten Minute Naan Pizza
    Quick and Easy Ten Minute Naan Pizza

    If the first thing you do when you crave pizza is pull out a take-out menu, it’s time to switch things up a bit. Step (leap?) outside of your comfort zone and make your own at home. Don’t worry, this doesn’t require whipping up your own dough and waiting for it to rise (or whatever it’s supposed to do). Now you can use a traditional Asian flatbread, a.k.a. naan, to bring your favorite food to life. It’s as simple as 1, 2, 3… literally.

    Step one: Buy a piece of naan.

    Step two: Top it with delicious ingredients.

    Step three: Throw it in the oven. Because ain’t nobody got time to make that dough.

    Quick and Easy Ten Minute Naan Pizza
    Quick and Easy Ten Minute Naan Pizza

    This one is topped simply with pizza sauce, leftover grilled chicken, with some vegetables (onion, sweet corn, green pepper, mushrooms) olives and herbs and chili flakes for flavour; you could also use a sore bough Pizza sauce if you prefer. I use a mixture of mozzarella and cheddar cheeses but really you can use whatever kind of cheese you like, or happen to have in the fridge. You can also chuck on some cooked veggies, kebabs or meat (any toppings need to be pre-cooked as the pizza is in the oven for such a short amount of time).

    Quick and Easy Ten Minute Naan Pizza
    Quick and Easy Ten Minute Naan Pizza

    This naan pizza takes just a couple of minutes to assemble then 5-10 minutes in the oven meaning that you can have delicious fresh pizza fast! I like to keep a couple of naan breads in the freezer for this very purpose; you never know when a pizza craving is going to strike!

    Quick and Easy Ten Minute Naan Pizza
    Quick and Easy Ten Minute Naan Pizza

    Bismillah let’s get started

    Check it out the  Quick and Easy Ten Minute Naan Pizza Recipe here!!

    I have also posted Easiest Bread Pizza and Pizza Sandwiches  recipes which are another easiest & tastiest version of making Pizza at home. Do check it out as well.  It’s finger lickin’ good. You’ll be coming back for more.


    Put your own spin on it. And lemme know how it turns out. Post a photo on Facebook (Recipestable) or  on Twitter so I can see how lovely yours turn out.

  • The Perfect Anytime Meal: Quick and Flavorful Rapid Fire Chili Chicken Recipe

    Rapid Fire Chili Chicken

    Rapid Fire Chili Chicken is a spicy Chinese Main Course recipe. It’s quick and easy to make. Must try this Rapid Fire Chili Chicken Recipe, you’ll like it.

    Bismillah, let’s begin!

    Check it out the Rapid Fire Chili Chicken Recipe and printable version below.

    Rapid Fire Chili Chicken Recipe

    Prep Time 5 minutes
    Cook Time 25 minutes
    Total Time 30 minutes
    Servings 4
    Author Bushrah | Recipestable

    Ingredients

    • 500 gm boneless chicken
    • 1 tablespoon ginger grated
    • 2 tablespoon oil or butter
    • 1 tablespoon soy sauce
    • 1 tablespoon vinegar
    • 1 tablespoon honey
    • 2 tablespsoon cornflour
    • 1 green bell pepper cut into cubes
    • 6 green chilies thinly sliced
    • 1/2 teaspoon black pepper crushed
    • 1/4 teaspoon salt

    Instructions

    Method

    • Rinse and drain chicken prperly.
    • Cut into 1 inch pieces.
    • Place chicken in a bowl, add cornflour, black pepper and salt.
    • Turn to coat evenly.
    • Heat oil in a pan, add ginger.
    • Cook for 1 minutes then put chicken in it.
    • Keep stirring.
    • Cook for 8-10 minute or until turn golden brown.
    • Then add green bell pepper and stir fry for 2 minutes.
    • Now add soya sauce ,vinegar and honey.
    • Simmer for 5 minutes or until sauce has thickened.
    • Turn off the heat.
    • Take it out into a serving dish.
    • Sprinkle green chilies over it.Rapid Fire Chili Chicken is ready to serve.

    Notes

    Serving Suggestions:
    Enjoy with boiled rice.

    I have also posted Chili Chicken Legs Recipe which is another easiest & tastiest version of making chili chicken. Do check it out as well.


    Put your own spin on it. And lemme know how it turns out. Post a photo on Facebook (Recipestable) or  on Twitter so I can see how lovely yours turn out.


    Happy Cooking!!

    If you like this post, Please Subscribe to my blog and let me know your feedback by commenting below.. I have lots more recipes to share with you.

  • Easy Chili Chicken Legs Recipe: Restaurant-Style Flavor at Home

    Chili Chicken Legs

    A tasty version of Chicken drumsticks with a bit of sweetness and spiciness. Easy and delicious Asian style chicken drumsticks. Sweet chili sauce adds an Asian flavour. Must try this Chili Chicken Legs Recipe, you’ll love it.

    Chili Chicken Legs Recipe
    Photo: Chili Chicken Legs Recipe

    Check it out the Chili Chicken Legs Recipe here !!

    [divider]

    [one_fourth]Prep Time:10 minutes[/one_fourth] [one_fourth]Cook Time:20 minutes[/one_fourth] [one_fourth]Servings: 5[/one_fourth] [one_fourth_last]Difficulty Level:Easy [/one_fourth_last]

    [divider]

    [tabs type=”horizontal”] [tabs_head] [tab_title]Ingredients[/tab_title] [tab_title]Nutrition[/tab_title] [/tabs_head] [tab]

    • 12 chicken drumsticks, skin removed
    • 5 tbsp sweet chili sauce
    • 3 tbsp soy sauce
    • 2 tbsp honey
    • salt and pepper to taste

    [/tab] [tab]Yield: 5 servings

    Amount Per Serving: ( 1 serving = 1 each)

    • Calories: 142 kcal
    • Carbohydrates: 5.9 g
    • Cholesterol: 62 mg
    • Fat: 4.1 g
    • Fiber: 0.2 g
    • Protein: 19.6 g
    • Sodium: 353 mg

    [/tab] [/tabs]

    Directions:
    [tabs type=”horizontal”] [tabs_head] [tab_title]Step by Step Method[/tab_title] [tab_title]Serving Suggestions[/tab_title][/tabs_head] [tab]

    Step 1

    Take a small bowl, combine together the honey, chili sauce, soy sauce, salt and pepper.

    Step 2

    Keep aside 1/2 of the marinade for basting.

    Step 3

    Place chicken drumsticks in a resealable plastic bag.

    Step 4

    Pour remaining marinade over the chicken drumsticks.

    Step 5

    Shake well to coat evenly.

    Step 6

    Cover and refrigerate at least 1 hour.

    Step 7

    Preheat an outdoor grill for medium-high heat.

    Step 8

    Lightly grease the grill grate with oil.

    Step 9

    Arrange drumsticks on the preheated grill.

    Step 10

    Cook on each side for 10 minutes or until all juices run clear, basting and turning occasionally.

    Note:Baste frequently with the reserved sauce during the last 5 minutes.

    Step 11

    Remove from the grill and transfer into a serving dish. Delicious Chili Chicken Legs are ready to serve. Enjoy !!

    [/tab] [tab]

    • Serve with green salad and your favorite dipping sauce.

    [/tab] [/tabs]
    If you like Chili Chicken Legs Recipe and make it then let me know your feedback by commenting below.And if you know more innovative ways in which we can utilize this mouth watering Chili Chicken Legs, do share with us and we would be glad to give it a try.

  • Skip the Takeout: Parmesan Chicken Drumsticks Made Easy

    Parmesan Chicken Drumsticks

     This Parmesan Chicken Drumsticks Recipe is my favorite. It is very tender, crispy and juicy.  Don’t hesitate to try out this Parmesan Chicken Drumsticks Recipe, your inner self will appreciate you and you’ll feel happy!!

    Parmesan Chicken Drumsticks Recipe
    Photo: Parmesan Chicken Drumsticks Recipe

    Check it out the Parmesan Chicken Drumsticks Recipe here !!

    [divider]

    [one_fourth]Prep Time:10 minutes[/one_fourth] [one_fourth]Cook Time:45 minutes[/one_fourth] [one_fourth]Servings:12 [/one_fourth] [one_fourth_last]Difficulty Level:Very Easy [/one_fourth_last]

    [divider]

    [tabs type=”horizontal”] [tabs_head] [tab_title]Ingredients[/tab_title] [tab_title]Nutrition[/tab_title] [/tabs_head] [tab]

    • 12 chicken drumsticks
    • 2 cups grated Parmesan cheese
    • 1 cup bread crumbs
    • 1 egg, lightly beaten
    • 1 tsp ground black pepper
    • 1 tsp dried oregano
    • 1 tsp salt
    • 1/2 tsp paprika powder
    • nonstick cooking spray

    [/tab] [tab]Yield: 12 servings

    Amount Per Serving:( 1 serving = 1 each)

    • Calories: 466 kcal
    • Carbohydrates:1.4 g
    • Cholesterol:229 mg
    • Fat: 26.7 g
    • Fiber: 0.1 g
    • Protein: 51.8 g
    • Sodium: 981 mg

    [/tab] [/tabs]

    Directions:
    [tabs type=”horizontal”] [tabs_head] [tab_title]Step by Step Method[/tab_title] [tab_title]Serving Suggestions[/tab_title][/tabs_head] [tab]

    Step 1

    Preheat oven at 400 degree F or 204 degree C.

    Step 2

    Line a baking sheet with aluminium foil and grease the foil with non-stick cooking spray.

    Step 3

    Place Parmesan cheese in a shallow bowl. Add salt, oregano, paprika and pepper. Mix well.

    Step 4

    Take another shallow bowl, beat egg until lemon colored.

    Step 5

    Dip chicken in egg. Coat with bread crumbs.

    Step 6

    Roll in cheese mixture.

    Step 7

    Arrange drumsticks on the prepared baking sheet.

    Step 8

    Bake, in the preheated oven for 45 minutes, or until urn golden brown in color.

    Step 9

    Remove from the oven. Delicious Parmesan Chicken Drumsticks are ready to serve.

    [/tab] [tab]

    • Serve with a nice fresh salad and a vegetable.

    [/tab] [/tabs]
    If you like Parmesan Chicken Drumsticks Recipe and make it then let me know your feedback by commenting below.And if you know more innovative ways in which we can utilize this mouth watering Parmesan Chicken Drumsticks, do share with us and we would be glad to give it a try.