Author: Bushra Waheed

  • Eid Special Feast: Aromatic Mutton Biryani Recipe (Easy & Delicious!)

    Mutton Biryani

    So what if Eid is over? Try this Mutton Biryani recipe on this weekend. Soft and mouth melting mutton chunks in the midst of flavorful rice. Easy and quick Mutton Biryani recipe to make Sunday meal special ; inviting.
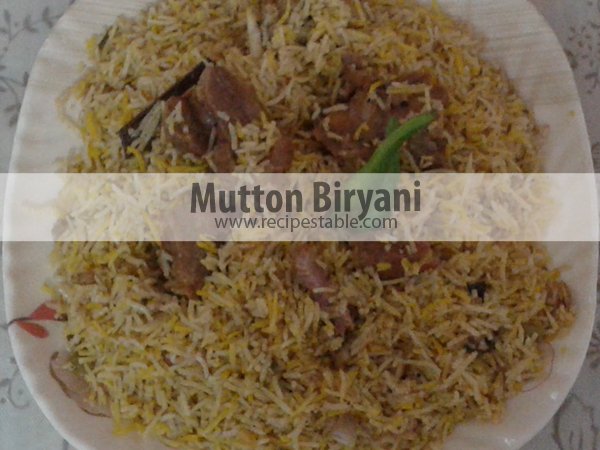
    Mutton Biryani Recipe
    Photo: Mutton Biryani Recipe

    While this mutton biryani consumes time and effort, the pay-off is a delicious main dish featuring a variety of spices.I think everyone know that making briyani is a kind of art.Yes Each step is really important in that, but with a little patience and practice you can become a[highlight] briyani master.[/highlight]
    Specially Mutton briyani is one which sat in my to do list for ages. I finally thought to give it a try. I was so careful in each step and took my own time to prepare everything, since it was my first attempt. But the result was awesome. The briyani came out with full of flavour and everyone loved it.
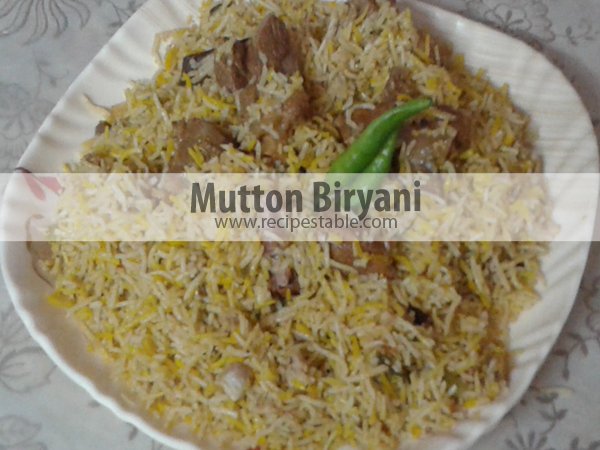
    Mutton Biryani Recipe
    Photo: Mutton Biryani Recipe

    There are certain steps in making the perfect briyani..I have given everything perfectly here. I think this will help you a lot. Make sure you check the seasonings at every level of cooking. Sealing the cover with dough should be proper to ensure that the steam can’t escape.

    Here’s a delicious Mutton Biryani recipe that you can cook and enjoy with the family!!Hope everyone will give this and try and enjoy your weekend guys..See you soon with a new recipe 😉

    Check it out the Mutton Biryani Recipe and printable version below!!
    Mutton Biryani

    While this mutton and rice dish consumes time and effort, the pay-off is a delicious main dish featuring a variety of spices. Try this Mutton Biryani Recipe and don’t forget to share your experience with us!!
    Prep Time 20 minutes
    Cook Time 1 hour 30 minutes
    Total Time 2 hours
    Servings 4
    Author Bushrah | Recipestable

    Ingredients

    • 1/2 kg Mutton
    • 2 Cups basmati rice
    • Few flakes garlic
    • 3 tsp Coriander powder
    • Dried coconut
    • 1 Inch stick cinnamon
    • 3 Green chillies
    • 1 tsp Chilli powder
    • 1 Cup onion
    • 1 Inch piece ginger
    • 1 tsp Poppy seeds
    • 3 Cloves peppercorns and cardamoms
    • 1 Cup curd
    • 1/2 Cup onion
    • 2 Bay leaf
    • 8 tbsp Fat
    • Salt to taste

    Instructions

    Directions

    • Clean the meat and cut into pieces.
    • Soak the meat in curd.
    • Roast cardamom, cinnamon, peppercorns and powder cloves. Make powder.
    • Grind ginger, red chillies, green chillies, half the onions, garlic and copra.
    • Now heat fat in a pan. Add chopped onions and ground spices. Fry until onions turn golden brown.
    • Now add meat and fry well.
    • Add poppy seed powder. Add salt and remaining curd. Cook till meat becomes tender.
    • Add powdered spices to it and remove from the flame.
    • Chop remaining onions. Fry them in fat in a separate pan.
    • Add cloves and bay leaf.
    • Fry for few minutes and add rice. Fry for another few minutes. Put salt to taste and make the quantity of water double.
    • Remove from the flame when rice gets cooked and no moisture is left.
    • Arrange a part of cooked rice in a pan and sprinkle saffron water over it.
    • Place the meat over it and cover with rice layer once again. Garnish with fried onions and nuts. Mutton Biryani is ready to serve.

    Notes

    Serve with salad and mint Raita.

    If you like this Mutton Biryani Recipe, Please Subscribe to my blog. I have lots more recipes to share with you. And If you make it then let me know your feedback by commenting below.
  • Ginger Beef Recipe

    Beef strips and vegetables are cooked in tangy sauce with ginger and served over hot rice. Check it out the ginger beef recipe here!!

    [one_third] Prep Time: 20 minutes[/one_third] [one_third]Cook Time: 1 hour [/one_third] [one_third_last] Servings: 4[/one_third_last]

    [review]

    [tabs type=”horizontal”] [tabs_head] [tab_title]Ingredients[/tab_title] [tab_title]Nutrition[/tab_title] [/tabs_head] [tab]

    • 500 grams Rolled Roast of your choice
    • 1 big handful baby carrots, cut to bite size
    • 1 large fennel bulb, sliced into wedges
    • 2 medium red onions, peeled
    • 4 cloves garlic
    • 4 waxy potatoes, quartered
    • 2 sprigs rosemary
    • 1cup ginger water
    • 1 teaspoon cornstarch+ a little water
    • 3 tablespoons canola oil
    • salt, pepper to taste

    [/tab] [tab]Yield: 4 servings

    Nutritional information is not yet available. [/tab] [/tabs]

    Directions:
    [tabs type=”horizontal”] [tabs_head] [tab_title]Step by Step Method[/tab_title] [tab_title]Serving Suggestions[/tab_title][/tabs_head] [tab]

    Step 1

    Heat oil in a shallow oven proof pan.

    Step 2

    Lightly brown meat. Season to taste and remove from the pan.

    Step 3

    Throw in all vegetables in the same pan and stir to coat evenly. Season vegetables.

    Step 4

    Place browned meat on top of vegetables.

    Step 5

    Strip off rosemary leaves from stalk and sprinkle into pan.

    Step 6

    Alternatively, you can leave the rosemary on the stalks and remove before preparing the gravy.

    Step 7

    Place uncovered in preheated oven at 150 degree C for 45 mins for medium rare.

    Step 8

    Remove from oven. Put aside meat and vegetables. De-glaze pan with ginger water.

    Step 9

    Thicken sauce with cornstarch mixture. Remove twine, carve. Ginger Beef is ready to serve.

    [/tab] [tab]

    • Serve along with gravy over rice.

    [/tab] [/tabs]

  • Ginger Lamb Chops Recipe

    Fresh ginger is the star ingredient in this easy marinade. Try this Ginger Lamb Chops recipe from a member of the Recipestable Community.

    [one_third] Prep Time: 20 minutes[/one_third] [one_third]Cook Time: 25 minutes[/one_third] [one_third_last] Servings: 3[/one_third_last]

    [review]

    [tabs type=”horizontal”] [tabs_head] [tab_title]Ingredients[/tab_title] [tab_title]Nutrition[/tab_title] [/tabs_head] [tab]

    • 500 kg lamb chops(bone in)
    • 2 tbsp chopped ginger,
    • 1 ripe papaya,finely chopped
    • 1/4 cup fresh coriander leaves,finely chopped
    • 4 tbsp extra virgin olive oil
    • 2 hot green chillies, finely chopped
    • 1/2 cup thick plain yogurt
    • 2 tbsp unsalted butter
    • 1 tsp pepper
    • salt to taste

    [/tab] [tab]Yield: 3 servings

    Nutritional information is not yet available. [/tab] [/tabs]

    Directions:
    [tabs type=”horizontal”] [tabs_head] [tab_title]Step by Step Method[/tab_title] [tab_title]Serving Suggestions[/tab_title][/tabs_head] [tab]

    Step 1

    Mix ginger, papaya, oil and coriander in a liquidizer, then mix in the chillies and yogurt.

    Step 2

    Take the chops and remove fat/meat from top 2 inches and flatten out meat, removing any extra fat.

    Step 3

    Coat the chops with marinade and refrigerate in sealed bag for at least 4 hours.

    Step 4

    Sear over high heat, then grill for around 10 minutes on medium heat and then a further 5 minutes on low.

    Step 5

    Keep turning to prevent burning and baste with melted butter.

    Step 6

    Season with salt & pepper and leave to rest for a few minutes before serving. Ginger Lamb Chops is ready to serve.

    [/tab] [tab]

    • Serve with ring onions and lemon wedges.

    [/tab] [/tabs]

  • Flavorful Fusion: Qeema Biryani (Mince) Recipe (One-Pot Wonder)!

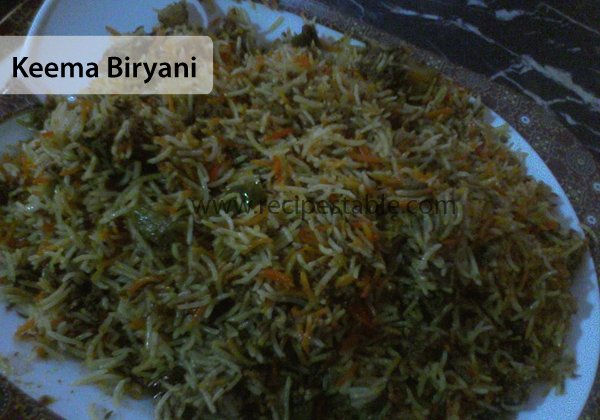
    Qeema Biryani

    This is not the traditional biryani dish. This is a different variation of biryani that uses keema or minced meat. Basically you cook the keema masala first and then layer and cook the rice on top. It is very easy and it always a hit. Try this keema biryani recipe, hope you will love it!!

    Keema Biryani Recipe
    Photo: Keema Biryani Recipe

    Check it out the Keema Biryani Recipe here!!

    [one_fourth]Prep Time:30 minutes[/one_fourth] [one_fourth]Cook Time:45 minutes[/one_fourth] [one_fourth]Servings: 4[/one_fourth] [one_fourth_last]Difficulty Level:Easy [/one_fourth_last]

    [tabs type=”horizontal”] [tabs_head] [tab_title]Ingredients[/tab_title] [tab_title]Nutrition[/tab_title] [/tabs_head] [tab]

    • 500 gm mutton mice
    • 2 cups Basmati rice, soaked
    • 1 cup fried onions
    • 2 tablespoon clarified butter or oil
    • 1 large onion, chopped
    • 2 tomatoes, chopped
    • 4 green chilies, chopped
    • 1 tablespoon ginger garlic paste
    • 1 inch cinnamon stick
    • 2 green cardamom
    • 1 black cardamom
    • 5 cloves
    • 8 black peppercorns
    • 1 teaspoon cumin seeds
    • 1 teaspoon red chili powder
    • 1 teaspoon garam masala powder
    • few saffron strands ,dissolved in ¼ cup milk
    • salt to taste

    For Garnishing:

    • 2 tablespoon fresh coriander leaves, chopped
    • 2 tablespoon mint leaves, chopped

    [/tab] [tab]Yield: 4 servings

    Nutritional information is not yet available. [/tab] [/tabs]

    Directions:
    [tabs type=”horizontal”] [tabs_head] [tab_title]Step by Step Method[/tab_title] [tab_title]Serving Suggestions[/tab_title][/tabs_head] [tab]

    Step 1

    Washed rice properly with a few changes of water. Then soaked in the water for 30 minutes.

    Step 2

    Heat oil in a large skillet over medium high heat. Add onion and cook for 4-5 minutes or until it is translucent.

    Step 3

    Now add cinnamon, green cardamom, black cardamom, black peppercorns cloves, and cumin seeds. Saute 1 minute longer or until fragrant.

    Step 4

    Add tomato and mince to the skillet. Stir and cook for 25 minutes or until well browned.

    Step 5

    Season with red chilli powder and salt. Mix well.

    Step 6

    Sprinkle garam masala and green chilies over it.

    Step 7

    Meanwhile, Bring a large pot of lightly salted water to a boil. Cook the rice in boil water until half done. Strain well and set aside.

    Step 8

    Layer the half cooked rice, keema, fried onion in a large pot. Again repeat the layers for the rice, keema, fried onion and saffron milk.

    Step 9

    Sprinkle mint and coriander leaves over it.

    Step 10

    Cover with a lid and cook for 15 minutes or until done. Dish it out. Delicious Keema Biryani is ready to serve.

    [/tab] [tab]

    [/tab] [/tabs]

    If you like Keema Biryani Recipe and make it then let me know your feedback by commenting below.And if you know more innovative ways in which we can utilize this mouth watering Keema Biryani, do share with us and we would be glad to give it a try.

  • Recipe: Hara Masala Keema (Mince with Green Spices)

    Hara Masala Keema (Mince with Green Spices)

    Hara Masala Keema literally translates to mince meat with green spices. This easy Pakistani recipe uses ingredients like cilantro. 

    Check it out the Hara Masala Keema (Mince with Green Spices) recipe here!!

     Prep Time: 30 minutes

    Cook Time: 1 hour

     Servings: 4

    Ingredients

    • 500 gm mutton mince
    • 250 gm onion, chopped
    • 250 gm yogurt
    • 1/2 cup oil
    • 12 green chilies
    • 1 bunch fresh coriander leaves, chopped
    • 2 tbsp chopped garlic
    • 1 tbsp ginger garlic paste
    • 1 tbsp whole coriander
    • 2 tsp red chili, crushed
    • 1 tsp cumin seeds
    • 1 tsp black pepper, crushed
    • 1 tsp hot spices powder
    • 1 tsp salt


    Directions:

    1. Marinate minced meat with yogurt, ginger garlic paste and salt for 30 minutes.
    2. Heat oil in a deep skillet or pan.
    3. Place marinated mince in it and cook for 20 minutes on low flame
    4. Add crush cumin, whole coriander and green chilies.
    5. Also add chopped onion, chopped garlic, hot spices powder, crushed red chili, crushed black pepper.
    6. Cover with a lid and cook on low flame for 30 minutes or until mince is tender.
    7. Turn the heat off.
    8. Sprinkle chopped coriander over it.
    9. Hara Masala Keema is ready to serve.
    10. Enjoy!!
    • Serve hot with chapati.


  • Antipasto Bread Recipe

    A flavorful Italian bread that makes an excellent “finger-food” appetizer. Easy to make and tasty too. Check it out the Antipasto Bread recipe here!!

    [one_third] Prep Time: 10 minutes[/one_third] [one_third]Cook Time: 20 minutes[/one_third] [one_third_last] Servings:8[/one_third_last]

    [review]

    [tabs type=”horizontal”] [tabs_head] [tab_title]Ingredients[/tab_title] [tab_title]Nutrition[/tab_title] [/tabs_head] [tab]

    • 1 loaf (1 pound) Italian bread, unsliced
    • 8 thin slices hard salami
    • 4 plum tomatoes, thinly sliced
    • 1 carrot, finely chopped
    • 1 green pepper, finely chopped
    • 1 celery rib, finely chopped
    • 1 onion, finely chopped
    • 2 cups shredded Italian cheese blend
    • 1/2 cup chopped pitted green olives
    • 1/2 cup prepared pesto
    • 3 tbsp olive oil, divided
    • 1 tsp minced garlic

    [/tab] [tab]Yield: 8 servings

    Amount per serving.

    • Calories:389
    • Fat: 22 g (7 g saturated fat)
    • Cholesterol: 25 mg
    • Sodium: 838 mg
    • Carbohydrate: 35 g
    • Fiber: 3 g
    • Protein: 14 g

    [/tab] [/tabs]

    Directions:
    [tabs type=”horizontal”] [tabs_head] [tab_title]Step by Step Method[/tab_title] [tab_title]Serving Suggestions[/tab_title][/tabs_head] [tab]

    Step 1

    Cut bread in half lengthwise then cut in half width wise.

    Step 2

    Place cut side up in a foil-lined baking dish. Brush with 2 tbsp olive oil. Bake at 450 degree F, for 8 minutes or until lightly browned.

    Step 3

    Meanwhile, heat remaining oil in a small skillet. Add carrot, green pepper, celery, onion and garlic. Saute for 5 minutes or until crisp-tender. Spread pesto over the bread.

    Step 4

    Arrange salami, tomatoes, carrot mixture and olives over the bread. Sprinkle with cheese.

    Step 5

    Bake for 10 minutes or until cheese is melted. Cut each piece of bread in half. Antipasto Bread is ready now. Serve warm.

    [/tab] [tab]

    • Serve with with tomato relish and cold shrimp salad.

    [/tab] [/tabs]

  • Asian Noodle Toss Recipe

    It’s the perfect Asian-inspired recipe to make for your family in a pinch. Just toss in a few ingredients with spaghetti and you’ve got dinner on the table in no time! Very colorful and easy to prepare.

    Try the easy recipe of Asian Noodle Toss shown below!!

    [one_third] Prep Time: 5 minutes[/one_third] [one_third]Cook Time: 15 minutes[/one_third] [one_third_last] Servings: 5[/one_third_last]

    [review]

    [tabs type=”horizontal”] [tabs_head] [tab_title]Ingredients[/tab_title] [tab_title]Nutrition[/tab_title] [/tabs_head] [tab]

    • 1 (11 ounce) can mandarin oranges, drained
    • 2 cups cooked chicken, cubed
    • 1-1/2 cups juilenned carrots
    • 1 cup uncooked thin spaghetti
    • 1 cup sugar snap peas
    • 1/2 cup stir-fry sauce

    [/tab] [tab]Yield: 5 servings

    Amount per serving.

    • Calories: 346
    • Fat: 5 g (saturated fat: 1 g)
    • Cholesterol: 50 mg
    • Sodium: 73 mg
    • Carbohydrate: 49 g
    • Fiber: 4 g
    • Protein: 24 g

    [/tab] [/tabs]

    Directions:
    [tabs type=”horizontal”] [tabs_head] [tab_title]Step by Step Method[/tab_title] [tab_title]Serving Suggestions[/tab_title][/tabs_head] [tab]

    Step 1

    Cook spaghetti according to package directions. Stir in peas and carrots. Cook for 1 minute longer then drain.

    Step 2

    Place spaghetti, chicken, carrots, peas and oranges in a large bowl.

    Step 3

    Add stir-fry sauce and toss to coat. Asian Noodle Toss is ready to serve. Enjoy!

    [/tab] [tab]

    • Serve with lemonade.

    [/tab] [/tabs]

  • Thai Spicy Basil Chicken Fried Rice Recipe

    Thai Spicy Basil Chicken Fried Rice Recipe

    This Thai take on Chicken Fried Rice recipe is SO good and so easy. It’s important to use Thai sweet basil to get the authentic Thai restaurant taste. Yum Yum. Check it Out Thai Spicy Basil Chicken Fried Rice Recipe Here!!

    [one_third] Prep Time: 10 minutes[/one_third] [one_third]Cook Time: 20 minutes[/one_third] [one_third_last] Servings: 6[/one_third_last]

    [review]

    [tabs type=”horizontal”] [tabs_head] [tab_title]Ingredients[/tab_title] [tab_title]Nutrition[/tab_title] [/tabs_head] [tab]

    • 1 lb skinless, boneless chicken breast, cut into strips
    • 4 cups cooked jasmine rice, chilled
    • 2 cups Thai basil
    • 1/2 cup peanut oil, for frying
    • 1/2 cup cilantro sprigs
    • 6 garlic clove, minced
    • 2 serrano peppers
    • 1 cucumber, thinly sliced
    • 1 red pepper, seeded and thinly sliced
    • 1 red onion, thinly sliced
    • 3 tbsp oyster sauce
    • 2 tbsp fish sauce
    • 1 tsp white sugar

    [/tab] [tab]Yield:6 servings

    Amount per serving.

    • Calories: 700
    • Fat: 21 g( Saturated Fat: 3.5 g)
    • Cholesterol: 30 mg
    • Sodium: 780 mg
    • Carbohydrate: 106 g
    • Fiber: 3g
    • Sugars: 3g
    • Protein: 21 g

    [/tab] [/tabs]

    Directions:
    [tabs type=”horizontal”] [tabs_head] [tab_title]Step by Step Method[/tab_title] [tab_title]Serving Suggestions[/tab_title][/tabs_head] [tab]

    Step 1

    In a small bowl, combine together the oyster sauce, fish sauce, and sugar. Heat oil in a skillet over medium-high heat. Saute garlic and Serrano peppers in hot oil. Stir in the chicken, red bell pepper and onion.

    Step 2

    Pour oyster sauce mixture over it. Cook for 5 minutes or until chicken is no longer pink.

    Step 3

    Add chilled rice.Stir until sauce is blended with the rice. Remove from the heat. Stir in the basil leaves.

    Step 4

    Top with sliced cucumber and cilantro. Thai Spicy Basil Chicken Fried Rice is ready to serve. Enjoy!!

    [/tab] [tab]

    [/tab] [/tabs]

  • Easy Macaroni Salad Recipe: A Step-by-Step Guide to This Classic Side Dish!

    A refreshing and creamy pasta salad with colorful vegetables and macaroni. Chopped veggies give it crunch, and cherry tomatoes add vibrant color. Yummy. Check it out Fat Macaroni Salad recipe here !!

    [one_third] Prep Time:20 minutes[/one_third] [one_third]Cook Time: 10 minutes[/one_third] [one_third_last] Servings: 2[/one_third_last]

    [review]

    [tabs type=”horizontal”] [tabs_head] [tab_title]Ingredients[/tab_title] [tab_title]Nutrition[/tab_title] [/tabs_head] [tab]

    • 1/2 cup uncooked elbow macaroni
    • 1/2 cup quartered cherry tomatoes
    • 1/4 cup fat-free mayonnaise
    • 3 tbsp chopped celery
    • 3 tbsp chopped carrot
    • 3 tbsp chopped peeled cucumber
    • 2 tbsp chopped radishes
    • 1/8 tsp pepper
    • 1/8 tsp salt

    [/tab] [tab]Yield: 2 servings

    Nutritional information is not yet available. [/tab] [/tabs]

    Directions:
    [tabs type=”horizontal”] [tabs_head] [tab_title]Step by Step Method[/tab_title] [tab_title]Serving Suggestions[/tab_title][/tabs_head] [tab]

    Step 1

    Cook macaroni according to package directions. Drain and rinse in cold water.

    Step 2

    Place macaroni and vegetables in a small bowl. In another bowl, combine the mayonnaise, salt and pepper.

    Step 3

    Pour this mixture over the salad. Toss to coat evenly.

    Step 4

    Cover and refrigerate for 2 hours or until chilled. Fast Macaroni Salad is ready to serve. ENJOY!!

    [/tab] [tab]

    Serve with BBQ Steak.

    [/tab] [/tabs]

  • Cherry Cheesecake Pie Recipe

    Cherry Cheesecake Pie Recipe

    This cherry cheesecake pie is made with cream cheese, cherry pie filling, condensed milk, and graham cracker crust. It’s a delightful summer treat. Yummy. Check it out cherry cheesecake pie recipe here!!

    [one_third] Prep Time:20  minutes[/one_third] [one_third]Cook Time: 0 minutes[/one_third] [one_third_last] Servings: 6 [/one_third_last]

    [review]

    [tabs type=”horizontal”] [tabs_head] [tab_title]Ingredients[/tab_title] [tab_title]Nutrition[/tab_title] [/tabs_head] [tab]

    • 1 (9 inch) prepared graham cracker crust
    • 1 (14 ounce) can sweetened condensed milk
    • 1 (21 ounce) can cherry pie filling, chilled
    • 1 (8 ounce) package cream cheese, softened
    • 1/2 cup lemon juice
    • 1 tsp vanilla extract

    [/tab] [tab]Yield : 1 (9-inch) pie 

    Amount per serving.

    • Calories: 493
    • Total Fat: 21.5g
    • Cholesterol: 47mg

    [/tab] [/tabs]

    Directions:
    [tabs type=”horizontal”] [tabs_head] [tab_title]Step by Step Method[/tab_title] [tab_title]Serving Suggestions[/tab_title][/tabs_head] [tab]

    Step 1

    Place cream cheese in a medium bowl. Beat cream cheese until light and fluffy. Stir in condensed milk, lemon juice and vanilla. Mix well.

    Step 2

    Pour this mixture into the cracker crust. Chill for 2 hours or until firm. Top with cherry pie filling. Cherry Cheesecake Pie is ready now. Serve chilled.

    [/tab] [tab]

    • Serve with cherries and cool whip.

    [/tab] [/tabs]

  • Best Southern Fried Chicken Recipe

    This is a heritage recipe, both simple and reliable. Chicken in a batter of salt, pepper, flour and paprika, quickly fried in hot canola oil and served with Creamy Milky Sauce. Check it out Best Southern Fried Chicken recipe here !!

    [one_third] Prep Time: 15 minutes[/one_third] [one_third]Cook Time: 45 minutes[/one_third] [one_third_last] Servings: 8[/one_third_last]

    [review]

    [tabs type=”horizontal”] [tabs_head] [tab_title]Ingredients[/tab_title] [tab_title]Nutrition[/tab_title] [/tabs_head] [tab]

    • 2 (3 pounds each) whole chickens, cut up
    • 2 eggs, lightly beaten
    • 1 cup canola oil, for frying
    • 2 tbsp milk
    • 1-1/4 cups all-purpose flour
    • 1-1/2 tsp salt
    • 1/2 tsp balck pepper
    • 1/4 tsp roasted ground cumin
    • 1/4 tsp paprika
    • 1/4 tsp dried oregano

    For Milky Sauce:

    • 1 cup milk
    • 1 cup water
    • 1/4 cup all-purpose flour
    • 1/2 tsp salt
    • 1/8 tsp browning sauce
    • 1/8 tsp pepper
    • fresh oregano

    [/tab] [tab]Yield: 8 servings

    Amount per serving.

    • Calories: 551
    • Fat: 40 g ( saturated fat: 8 g)
    • Cholesterol: 123 mg
    • Sodium: 680 mg
    • Carbohydrate: 20 g
    • Fiber: 1 g
    • Protein: 26 g

    [/tab] [/tabs]

    Directions:
    [tabs type=”horizontal”] [tabs_head] [tab_title]Step by Step Method[/tab_title] [tab_title]Serving Suggestions[/tab_title][/tabs_head] [tab]

    Step 1

    To Make Fried Fried Chicken:

    Take a shallow bowl, add eggs and milk to it. Whisk with a hand beater and set aside. Place flour and seasonings in another shallow bowl. Mix well. Dip chicken pieces in the egg-milk mixture then coat with flour mixture. Heat oil in a deep wok over medium high heat. Brown chicken for 5-7 minutes on both sides. Cover with a lid and cook over low heat for 30 minutes or until chicken juices run clear. Transfer into a serving dish and keep warm.

    Step 2

    To Make Milky Sauce

    Take a small saucepan, add flour, salt and pepper. Cook and stir over medium heat for 5 minutes or until lightly browned. In a small bowl, mix together the milk and water. Pour into the saucepan. Bring to a boil. Cook and stir for 2 minutes or until sauce is thickened. Stir in browning sauce.

    Step 3

    Garnish with oregano. Best Southern Fried Chicken to serve. ENJOY!!

    [/tab] [tab]

    • Serve with Milky Sauce.

    [/tab] [/tabs]

  • Apple Nut Bars Recipe

    These Apple Nut  bars are very versatile and can be topped with frosting for a sweet treat or left alone for a more nutritious snack. For big apple taste packed into a yummy bar, try these bars. Yum Yum. Check it out the Apple Nut Bars recipe here!!

    [one_third] Prep Time: 15 minutes[/one_third] [one_third]Cook Time: 25 minutes[/one_third] [one_third_last] Servings: 12[/one_third_last]

    [review]

    [tabs type=”horizontal”] [tabs_head] [tab_title]Ingredients[/tab_title] [tab_title]Nutrition[/tab_title] [/tabs_head] [tab]

    • 2 cups chopped tart apples
    • 1/2 cup all-purpose flour
    • 2/3 cup sugar
    • 1/4 cup chopped pecans
    • 2 egg whites
    • 1 tsp baking powder
    • 1/2 tsp vanilla extract

    [/tab] [tab]Yield: 12 servings

    Amount per serving.

    • Calories: 73
    • Sodium: 50 gm
    • Cholesterol: 0
    • Carbohydrate: 14 gm
    • Protein: 1 gm
    • Fat: 2 gm

    Diabetic Exchanges:

    • 1 starch

    [/tab] [/tabs]

    Directions:
    [tabs type=”horizontal”] [tabs_head] [tab_title]Step by Step Method[/tab_title] [tab_title]Serving Suggestions[/tab_title][/tabs_head] [tab]

    Step 1

    Place egg whites, sugar and vanilla extract in a large bowl. Beat for 2 minutes or until frothy.

    Step 2

    In another bowl, mix together flour and baking powder.

    Step 3

    Gradually add flour mixture into egg mixture. Beat until well blended.

    Step 4

    Fold in pecans and apples.

    Step 5

    Transfer into a 9-inch. square baking pan coated with cooking spray.

    Step 6

    Bake at 350 degree f, for 25 minutes or until a toothpick inserted near the center comes out clean.

    Step 7 

    Allow to cool on a wire rack.

    Step 8 

    Then cut into squares. Store in the refrigerator. Apple Nut Bars are ready to serve. Enjoy!!
    [/tab] [tab]

    • Serve with milkshake or smoothie.

    [/tab] [/tabs]

  • Simple & Refreshing: The Perfect Carrot Raita Recipe!

    Simple & Refreshing: The Perfect Carrot Raita Recipe!

    Carrot is a good source of fiber, sugars and vitamin A. Its consumption in the form of Carrot raita is very delicious and healthy in nature. It’s a great summer dish. Goes great with all Indian cuisine. Check it out Carrot Raita recipe here!!

    [one_third] Prep Time:10  minutes[/one_third] [one_third]Cook Time: minutes[/one_third] [one_third_last] Servings: 6 [/one_third_last]

    [review]

    [tabs type=”horizontal”] [tabs_head] [tab_title]Ingredients[/tab_title] [tab_title]Nutrition[/tab_title] [/tabs_head] [tab]

    • 2 cups plain yogurt
    • 1-1/2 cup grated carrots
    • 2 tbsp mint leaves
    • 2 tbsp chopped walnuts
    • 1 tbsp lemon juice
    • 1 tsp roasted ground cumin
    • 1/2 tsp chat masala

    [/tab] [tab]Yield: 6  servings

    Amount per serving.

    • Calories: 632.5
    • Fat: 46.0 g (Saturated Fat: 6.6 g)
    • Cholesterol: 16.5 mg
    • Sodium: 284.1 mg
    • Carbohydrate: 51.4 g
    • Fiber: 15.8 g
    • Sugars: 22.1 g
    • Protein: 17.7 g

    [/tab] [/tabs]

    Directions:
    [tabs type=”horizontal”] [tabs_head] [tab_title]Step by Step Method[/tab_title] [tab_title]Serving Suggestions[/tab_title][/tabs_head] [tab]

    Step 1

    Take a medium size bowl, add yogurt to it. Whisk yogurt until smooth. Stir in the lemon juice, walnuts and ground cumin.

    Step 2

    Add carrots, toss to coat evenly.

    Step 3

    Cover and refrigerate for 30 minutes or until chilled.

    Step 4

    Just before serving, sprinkle with chat masala. Garnish with mint leaves. Delicious Carrot Raita is ready to eat. ENJOY!!

    [/tab] [tab]

    • You can serve this delicious carrot raita with Chicken Biryani.

    [/tab] [/tabs]

  • Citrus Cabbage Slaw Recipe

    This Citrus Cabbage Slaw recipe is great on one of those hot and summery days. Plan ahead this needs to refrigerate for 2 hours. Easy and refreshing salad, great as a side dish for barbecue or roast dishes. Try the easy recipe of Citrus Cabbage Slaw shown below!!

    [one_third] Prep Time:15  minutes[/one_third] [one_third]Cook Time: 0 minutes[/one_third] [one_third_last] Servings: 8 [/one_third_last]

    [review]

    [tabs type=”horizontal”] [tabs_head] [tab_title]Ingredients[/tab_title] [tab_title]Nutrition[/tab_title] [/tabs_head] [tab]

    • 1 (11 ounce) can mandarin oranges, drained
    • 1 (8 ounce) can unsweetened pineapple chunks, drained
    • 5 cups shredded cabbage
    • 1 cup cauliflower florets
    • 1/2 cup chopped green bell pepper
    • 2/3 cup sugar
    • 1/3 cup vegetable oil
    • 1/3 cup white vinegar
    • 1 tbsp water
    • 2 tsp minced onion
    • 1 tsp prepared mustard
    • 1 tsp salt
    • 1/2 tsp celery seed

    [/tab] [tab]Yield: 8 servings

    Amount Per Serving

    • Calories: 195
    • Fat: 9 g (saturated fat: 1 g)
    • Cholesterol: 0
    • Sodium: 314 mg
    • Carbohydrate: 28 g
    • Fiber: 2 g
    • Protein: 2 g

    Diabetic Exchanges

    • 1 vegetable
    • 1 fruit
    • 1 fat
    • 1/2 starch

    [/tab] [/tabs]

    Directions:
    [tabs type=”horizontal”] [tabs_head] [tab_title]Step by Step Method[/tab_title] [tab_title]Serving Suggestions[/tab_title][/tabs_head] [tab]

    Step 1

    In a large bowl, add cabbage, cauliflower, oranges, pineapple and green bell pepper. Toss well.

    Step 2

    In a small bowl, mix together oil, vinegar, water, onion, mustard, celery seeds, and salt.

    Step 3

    Pour this dressing over the cabbage mixture. Stir well.

    Step 4

    Cover and refrigerate for 2 hours or until chill. Citrus Cabbage Slaw is ready to serve. ENJOY!

    [/tab] [tab]

    • Serve with Tacos,  burgers and sandwiches.

    [/tab] [/tabs]

  • Broccoli Coleslaw Recipe

    An easy alternative to tradition coleslaw, it stays crisp, crunchy and full of flavor. The light vinegar dressing isn’t overpowering. Folks will be pleasantly surprised when they taste this unique coleslaw made with broccoli instead of cabbage. Perfect for picnics and family meals. Check it out Broccoli Coleslaw recipe here!!

    [one_third] Prep Time: 10 minutes[/one_third] [one_third]Cook Time: 0 minutes[/one_third] [one_third_last] Servings: 6 [/one_third_last]

    [review]

    [tabs type=”horizontal”] [tabs_head] [tab_title]Ingredients[/tab_title] [tab_title]Nutrition[/tab_title] [/tabs_head] [tab]

    • 6 cups broccoli coleslaw mix
    • 1/2 cup chopped green onion
    • 1/3 cup vegetable oil
    • 1/4 cup cider vinegar
    • 2 tbsp sugar
    • 1 tsp seasoned salt
    • 1/2 tsp dill weed
    • 1/4 tsp celery seed
    • 1/4 tsp pepper

    [/tab] [tab]Yield: 6 servings

    Amount per serving.

    • Calories: 153
    • Fat: 12 g (saturated fat: 2 g)
    • Cholesterol: 0
    • Sodium: 261 mg
    • Carbohydrate: 11 g
    • Fiber: 2 g
    • Protein: 2 g

    [/tab] [/tabs]

    Directions:
    [tabs type=”horizontal”] [tabs_head] [tab_title]Step by Step Method[/tab_title] [tab_title]Serving Suggestions[/tab_title][/tabs_head] [tab]

    Step 1

    Place coleslaw mix and onions in a large bowl.

    Step 2

    Place remaining ingredients in a jar with a tight fitting lid. Shake well.

    Step 3

    Drizzle over the coleslaw. Toss to coat.

    Step 4

    Cover and refrigerate for 2 hours or until chill. Broccoli Coleslaw is ready to serve.

    [/tab] [tab]

    Serve with BBQ Mutton Chops.

    [/tab] [/tabs]

  • Buttery Cornbread Recipe

    A sweet, moist and delicious cornbread recipe for a healthy breakfast. If you like sweet cornbread then this recipe is perfect for you! It’s so simple and tasty too. Check it Buttery Cornbread recipe here!

    [one_third] Prep Time: 15 minutes[/one_third] [one_third]Cook Time: 25 minutes[/one_third] [one_third_last] Servings: 12[/one_third_last]

    [review]

    [tabs type=”horizontal”] [tabs_head] [tab_title]Ingredients[/tab_title] [tab_title]Nutrition[/tab_title] [/tabs_head] [tab]

    • 3 eggs
    • 2-1/3 cups all purpose flour
    • 2/3 cup butter or margarine, softened
    • 1-2/3 cups milk
    • 1 cup cornmeal
    • 1 cup sugar
    • 4-1/2 tsp baking powder
    • 1 tsp salt

    [/tab] [tab]Yield: 12 servings

    Amount per serving.

    • Calories: 259
    • Fat: 10 g
    • Cholesterol: 68 mg
    • Sodium: 386 mg
    • Carbohydrate: 37 g
    • Fiber: 1 g
    • Protein: 5 g

    [/tab] [/tabs]

    Directions:
    [tabs type=”horizontal”] [tabs_head] [tab_title]Step by Step Method[/tab_title] [tab_title]Serving Suggestions[/tab_title][/tabs_head] [tab]

    Step 1

    Preheat oven to 400 degree F. Lightly grease a 13-in. x 9-in. x 2-in. baking pan with cooking spray. Set aside.

    Step 2

    In a large mixing bowl, cream butter with sugar. In a small bowl, whisk eggs with milk. In a separate bowl, combine flour, cornmeal, baking powder and salt. Fold flour mixture to the creamed mixture alternately with egg mixture.

    Step 3

    Pour this batter into the prepared baking pan. Bake for 25 minutes or until a toothpick inserted near the center comes out clean. Cool on a wire rack for 10 minutes then cut into squares. Buttery Corn Bread is ready to serve. Enjoy!!

    [/tab] [tab]

    • Serve with butter or syrup.

    [/tab] [/tabs]