Tag: Lunch Recipes

  • Veggie Delight: The Flavorful Vegetable Kofta Biryani Recipe!

    Vegetable Kofta Biryani

    Biryani is one of the most famous rice dishes in the world. Here’s a classic Vegetable Kofta Biryani Recipe for veggie lover’s. This Vegetable Kofta Biryani recipe is a sure way to cook the best aromatic biryani you have ever tasted.
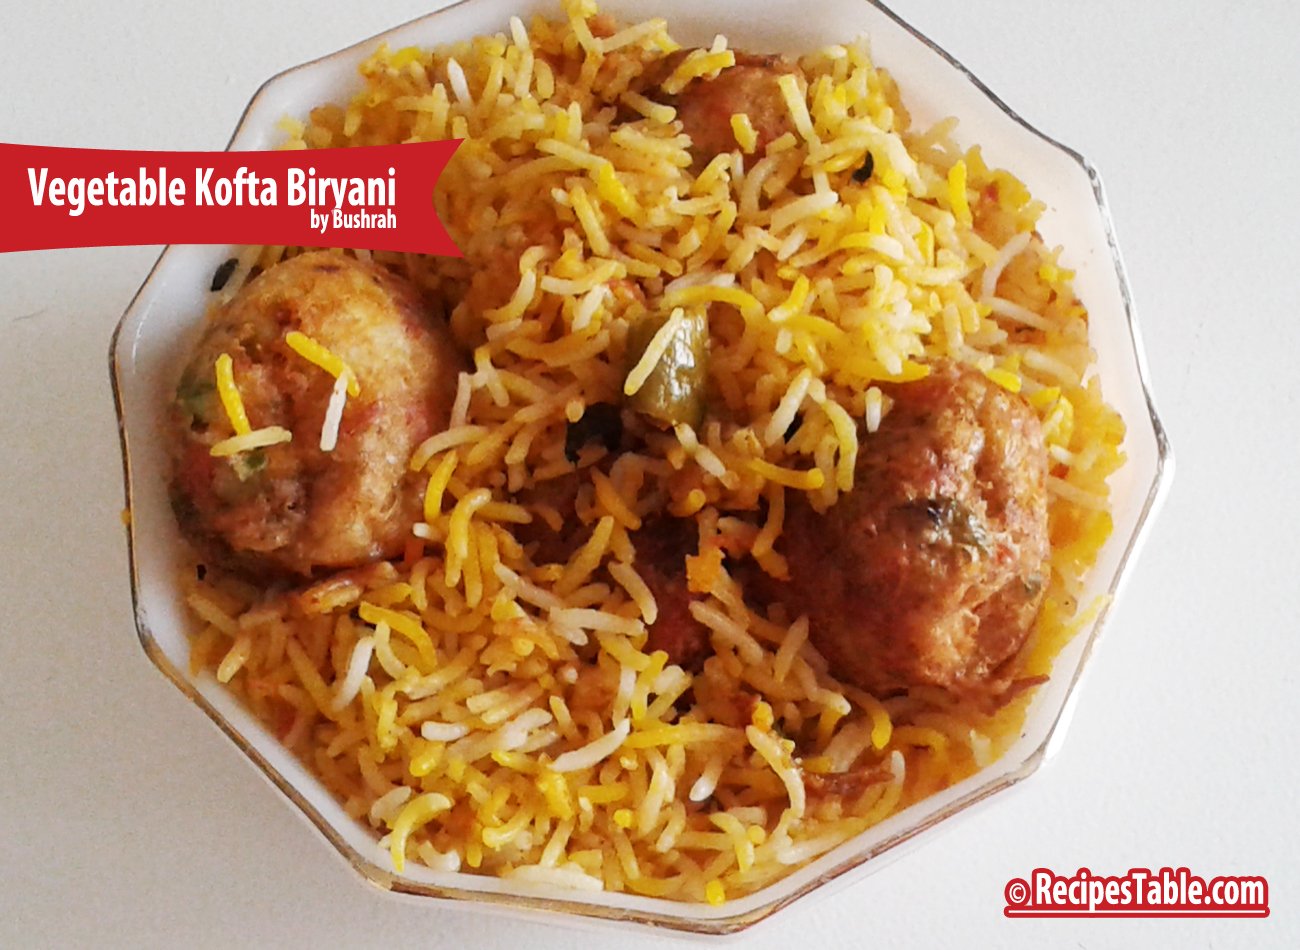
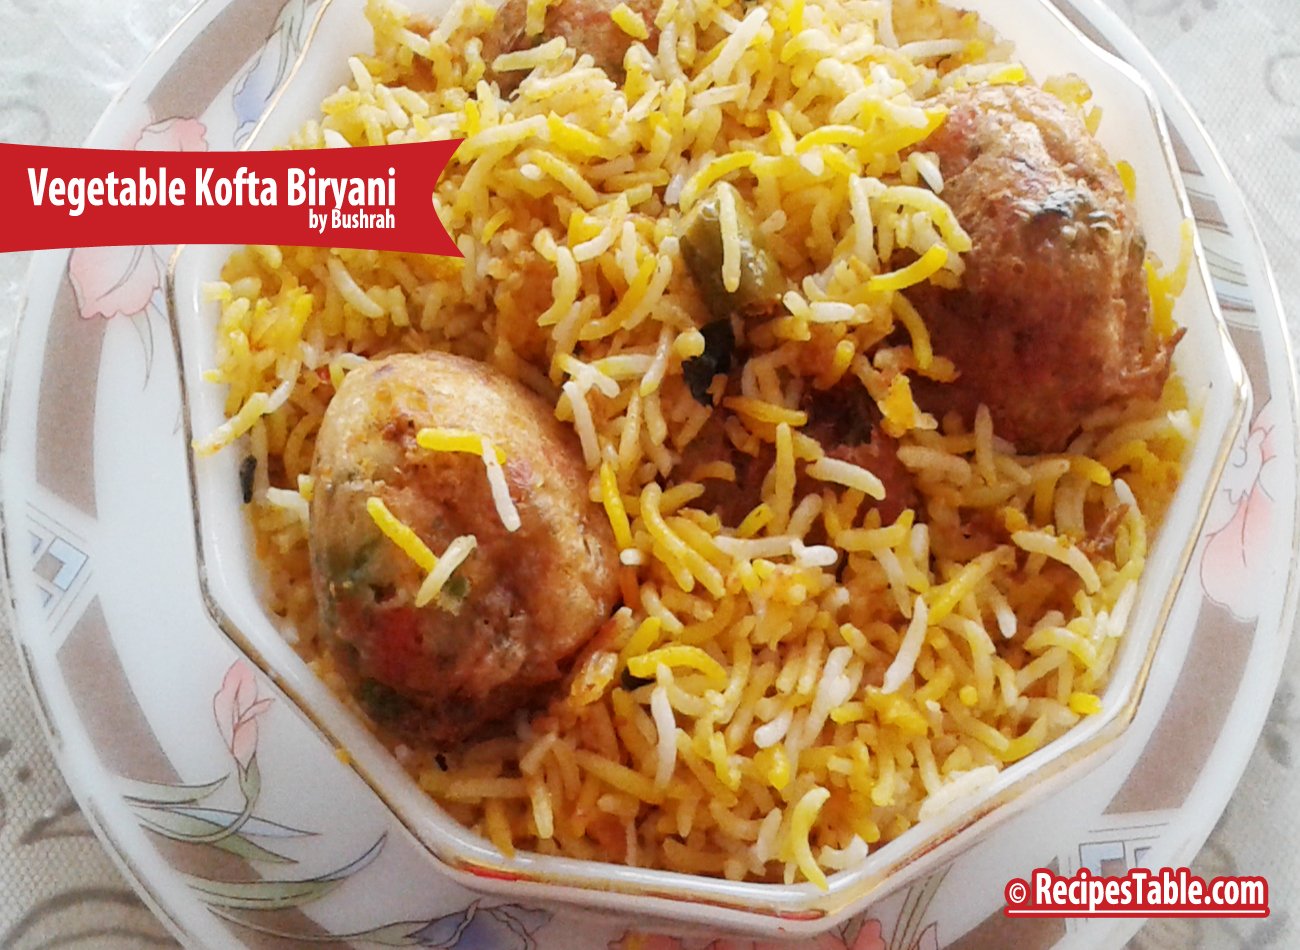
    Vegetable Kofta Biryani Recipe
    Photo: Vegetable Kofta Biryani
    Vegetable Kofta Biryani recipe
    Photo: Vegetable Kofta Biryani

    Check it out the Vegetable Kofta Biryani Recipe here!!

    Prep Time: 30 minutes

    Cook Time:40 minutes

    Servings: 4

    Difficulty Level: Easy

    Ingredients


    • 1 cup basmati rice
    • 1/4 cup boiled and mashed potatoes
    • 1 cup mixture of finely chopped carrot, cabbage , grated 
    • 1/4 cup boiled and mashed green peas
    • 1/4 cup fresh mint leaves
    • 1/4 cup chickpea flour
    • 2 tablespoon rice flour
    • 2 tablespoon fresh coriander leaves, finely chopped
    • 2 tablespoon ginger garlic paste
    • 2 tablespoon green onions, chopped
    • 2 tablespoon plain yogurt
    • 1 onion, thinly sliced
    • 1 tomato, chopped
    • 1 bay leaf
    • 1 cinnamon stick.
    • 1 cloves
    • 2 green chilies, thinly sliced
    • 1 teaspoon red chili powder
    • 1 teaspoon coriander powder
    • 1/2 teaspoon garam masala powder
    • salt to taste
    • oil for deep frying


    Directions:

    Step 1

    Wash and soak rice in water for 30 minutes.

    Step 2

    Boil basmati rice by adding 2 cups of water. Drain and keep aside.

    Step 3

    Take a large bowl, add the potatoes, boiled vegetables, green peas, fresh coriander, chickpea flour and rice flour.

    Step 4

    Add the red chilli powder, coriander powder, garam masala, salt. Mix until well combined. Now make small balls of it.

    Step 5

    Heat oil in a deep pan for medium heat. Fry the balls for 3-4 minutes or until crispy and golden brown.

    Step 6

    Take another medium pot or pan, heat 3 tablespoon oil in it. Add bay leaf, clove, cinnamon and cook for 30 minutes (Fry until the begins to darken but not burn.)

    Step 7

    Add chopped onions, ginger-garlic paste and saute for 3-4 minutes or until onions turns light brown in color.

    Step 8

    Then add tomatoes, green chilli and saute till the tomatoes are nicely cooked.

    Step 9

    Now add yogurt and salt and saute for 5-8 minutes so that the raw smell goes away, in a medium flame. (Do not let it burn)

    Step 10

    Now add the boiled rice to the mixture and mix well.

    Step 11

    Simmer it for about 2 minutes and then add the fried koftas. (Mix carefully. Do not break the koftas). Sprinkle mint leaves over it.

    Step 12

    Take it out in a serving dish. Garnish with spring onions. Vegetable Kofta Biryani is ready to serve.

    • Serve with raita.


    If you like Vegetable Kofta Biryani  Recipe  and make it then let me know your feedback by commenting below.And if you know more innovative ways in which we can utilize this mouth watering Vegetable Kofta Biryani , do share with us and we would be glad to give it a try.


  • The No-Fail French Salad Recipe

    The No-Fail French Salad Recipe

    Today’s post is about a recipe that is as old as my habit of  recording/saving recipes in hardcover notebooks. It’s a foolproof recipe for a SUPER YUM salad that has always been a savior whenever I’m pulling off family dawats/get together s or random hangouts at home with friends.

    Tbh, I can’t believe I didn’t put this french salad recipe up on the blog earlier.

    Let’s dig straight in.

    Make this colorful french salad in minutes. What could be easier? Check it out French Salad Recipe here! 

    Prep Time: 10 minutes

     Servings:4

    Ingredients

    For Salad:

    • 1 boiled potato, chopped
    • 1/2 bunch iceberg, chopped
    • 1 carrot, chopped
    • 1 cucumber, chopped
    • 1 tomato, chopped
    • 1/2 radish, chopped

    For Salad Dressing:

    • 2 tbsp lemon juice
    • 3 tbsp tomato ketchup
    • 1/2 cup mayonnaise
    • 1/2 cup  mozzarella cheese, grated
    • 1 tsp black pepper, crushed
    • salt to taste

    Directions:

    1. French Salad is ready to serve. Enjoy!
    2. Cover and refrigerate for 2 hours or until chill.
    3. Toss to coat evenly.
    4. Sprinkle  grated cheese over it.
    5. Pour this salad dressing on the chopped vegetables.
    6. Mix well.
    7. In a small bowl, add mayonnaise, tomato ketchup, lemon juice, black pepper and salt.
    8. set aside.
    9. Place all chopped vegetables in a large bowl.
    10. Serve with BBQ meal.


  • Burger with a Kick! Make a Delicious Chatpata Aloo Tikki Burger!

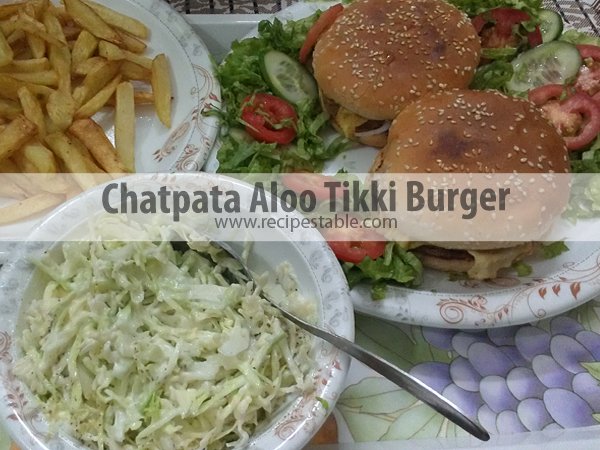
    Chatpata Aloo Tikki Burger

    Love burger ? OR Want to try some new veggie burgers? Today, I’m sharing an easy to make chatpata aloo tikki burger recipe with you.
    If you’re craving a tangy or chatpata veggie burger — one that you can really sink your teeth into — then you’ve come to the right place, my friend. No dull and tasteless burger here. There are so many famous street foods in Lahore that are amazingly delicious, mouthwatering, but they are mostly unhealthy. I love eating healthy, but burgers is one of my guilty pleasures. So you know I’m going to take advantage of this lol 😛

    Chatpata Aloo Tikki Burger Recipe
    Photo: Chatpata Aloo Tikki Burger Recipe

    This is a very [highlight]healthy and nutritious burger[/highlight] recipe, ideal for the vegetarians or for those who want to create a quick lunch meal as just takes your 25-30 minutes. It is popular in both elders and young one’s enjoy it with any type of dip which gives you a perfect taste.

    Let’s start making this amazing burger!. Ready ?

    Chatpata Aloo Tikki Burger Recipe
    Photo: Chatpata Aloo Tikki Burger Recipe

    Check it out the Chatpata Aloo Tikki Burger Recipe and printable version below!!

    Chatpata Aloo Tikki Burger

    Love burger ? Today, I’m sharing an easy to make chatpata aloo tikki burger recipe with you. Ideal for the vegetarians or for those who want to create a quick lunch meal as just takes your 25-30 minutes.
    Prep Time 20 minutes
    Cook Time 10 minutes
    Total Time 30 minutes
    Servings 10
    Author Bushrah | Recipestable

    Ingredients

    For Aloo Tikki

    • 4 boiled potatoes peeled and mashed
    • 2 eggs lightly beaten
    • 1/2 cup bread crumbs
    • 1/2 cup cheddar cheese grated
    • 2 tablespoon mint leaves
    • 2 tablespoon fresh coriander
    • 1 teaspoon dry mango powder
    • 1 teaspoon chopped green chili
    • 1 teaspoon red chili flakes
    • 1 teaspoon cumin powder
    • salt to taste
    • Oil for frying
    • For Aloo Tikki Burger
    • 10 burger buns
    • 5 tsp butter
    • 1 cup tomato ketchup
    • 1/2 cup green chutney
    • 1/2 cup shredded cabbage
    • 2 small onions cut into rings.
    • 2 cucumber thinly sliced
    • 2 to matoes thinly sliced

    Instructions

    Directions

    • Put mashed potatoes in a large bowl. Add dry mango powder, cumin seeds, red chili, salt, green chili, mint and coriander leaves. Mix until well combined.
    • Make 10 balls out of the aloo mixture. Now stuff 1 teaspoon cheese on each potato ball and shape into a flat Patty(tikki).
    • Beat eggs in a small bowl and place bread crumbs in another shallow bowl. First dip each aloo tikki in the egg then coat with crumb mixture.
    • Heat oil in a nonstick pan over medium heat. Shallow fry aloo tikki for 1-2 minutes on each side or until golden brown. Transfer into a plate and keep warm.
    • Cut the buns from the center. Toast them with the little butter.
    • Put one teaspoon ketchup on one side of the burger bun and one teaspoon of green chutney on the other side.
    • Put a aloo tikki on it some sliced onions, cucumber, tomatoes and shredded cabbage. Cover it with the second part of the bun.
    • Press it down softly and insert a toothpick through the bun. Repeat this procedure with remaining buns and make all the burgers.Chatpata aloo Tikki Burger is ready to eat.

    Notes

    Serve with green chutney, ketchup and french fries.

    I have also posted Chicken Roast Burger Recipe which is another quick version of making burgers. Do check it out as well.

    [divider]

    If you like this Chatpata Aloo Tikki Burger Recipe,Please Subscribe to my blog. I have lots more recipes to share with you. And If you make it then let me know your feedback by commenting below.

  • RECIPE: Jhatpat Chicken (Quick Chicken Curry)

    RECIPE: Jhatpat Chicken (Quick Chicken Curry)

    This Jhatpat Chicken is very quick to prepare and tasty too. It goes with chapati for light lunch menu with salad and chutney. 

    [one_third] Prep Time: 10 minutes+ marination[/one_third] [one_third]Cook Time:25  minutes[/one_third] [one_third_last] Servings: 5[/one_third_last]

    [tabs type=”horizontal”] [tabs_head] [tab_title]Ingredients[/tab_title] [tab_title]Nutrition[/tab_title] [/tabs_head] [tab]

    For Jhatpat Chicken:

    • 1 kg chicken, cut into 16 pieces
    • 1/2 cup cooking oil
    • 2 tbsp tomato ketchup
    • 1 tbsp Wooster sauce
    • 1 tbsp garlic, minced
    • 1 tsp ginger garlic paste
    • 1 tsp red chili powder
    • 1 tsp mustard powder
    • 1 tsp black pepper
    • 1 tsp salt

    For Sauce:

    • 1 onion, cut into rings
    • 1 tomato, cut into fingers
    • 1 capsicum, cut into rings
    • a pinch of orange color
    • 2 tbsp tomato paste
    • 2 tbsp vinegar
    • 2 tbsp tomato ketchup
    • 1 tsp sugar

    [/tab] [tab]Yield: 5 servings

    Nutritional information is not yet available. [/tab] [/tabs]

    Directions:
    [tabs type=”horizontal”] [tabs_head] [tab_title]Step by Step Method[/tab_title] [tab_title]Serving Suggestions[/tab_title][/tabs_head] [tab]

    1. Put chicken pieces into a bowl.
    2. Add ginger garlic paste, mustard powder, Wooster sauce and tomato ketchup.
    3. Season with red chili salt and black pepper.
    4. Cover and marinate for 2 hours.
    5. After 2 hours, heat oil in a deep skillet or pot.
    6. Put marinated chicken in it.
    7. Cook for 10 minutes or until no longer pink.
    8. Now add all the ingredients for sauce with 1 cup water.
    9. Cover with a lid and let it simmer for 10 minutes or until cooked thorough.
    10. Now add vegetables and cook for 5 minutes.
    11. Take it out in a serving dish.
    12. Jhatpat Chicken is ready now.

    [/tab] [tab]

    • Serve hot with Naan or Paratha.

    [/tab] [/tabs]

  • Chocolate Paratha Recipe

    Chocolate Paratha 

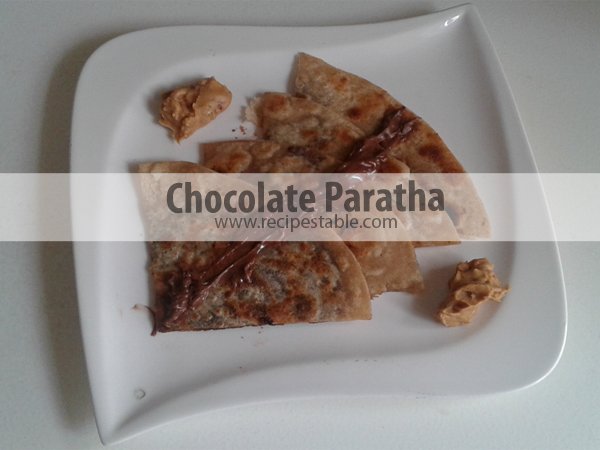
    Today afternoon for Lunch, I was getting [highlight]chocolate cravings[/highlight]. So, I decided to make stuffed Chocolate Paratha…. sounds yummy. This Chocolate Paratha is healthy, yummy and delicious.

    Chocolate Paratha Recipe
    Photo: Chocolate Paratha Recipe

    I have used dark melted chocolate and walnuts (to add some crunch) as I am a Walnut’s lover. You could use grated chocolate for this recipe.You can have this chocolate treat whenever you like; remember to have it in moderation as part of a healthy diet.

    Chocolate Paratha Recipe
    Photo: Chocolate Paratha Recipe

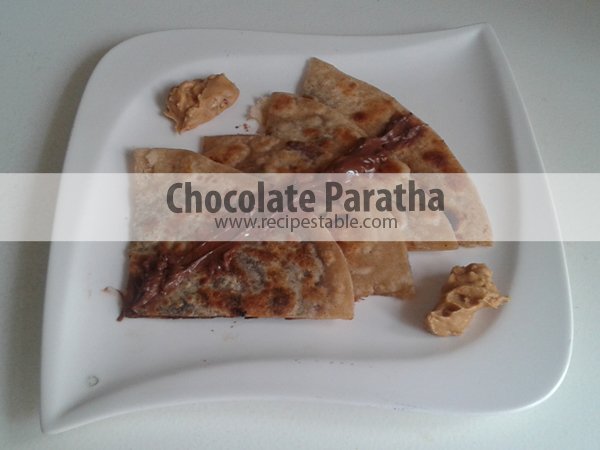
    Do try this recipe, You’s kids will just love them. This [highlight]Chocolate Paratha[/highlight] can be great as snack, quick meals and lunch box. It’s easy to make and you can make them any time of the day.[highlight]Chocoholics [/highlight]will love this sweet treat.

    Chocolate Paratha Recipe
    Photo: Chocolate Paratha Recipe

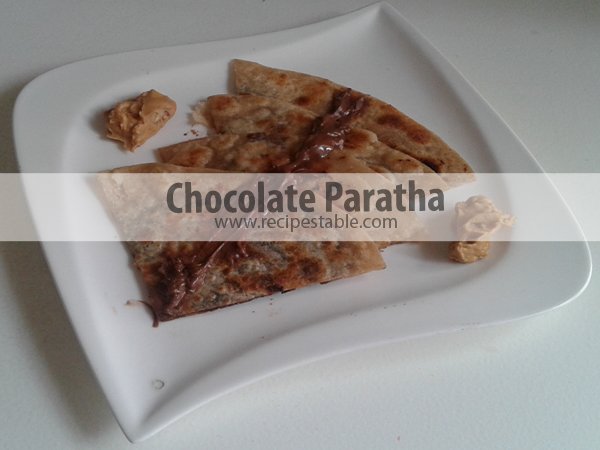
    Treat your family with this yummy Chocolate Paratha. Better than store bought junk. All you need to make this tasty paratha is chocolate, flour, milk, and some walnuts. Really that’s it… ok a little bit of butter too 🙂 Goes great with a cup of coffee and some peanut butter. 

    Check it out the Chocolate Paratha recipe and printable version below:

    Chocolate Paratha

    Treat your family with this yummy Chocolate Paratha. Better than store bought junk. All you need to make this tasty paratha is chocolate, flour, milk, and some walnuts.
    Prep Time 20 minutes
    Cook Time 20 minutes
    Total Time 40 minutes
    Servings 6
    Author Bushrah | Recipestable

    Ingredients

    • 500 gm Wheat flour
    • 1 cup Chocolate
    • 1/2 cup walnuts crushed
    • Milk for kneading
    • Ghee or oil for cooking
    • 1/4 cup peanut butter Optional

    Instructions

    Directions

    • Place flour in a large bowl. Knead a soft dough with milk.
    • Keep aside.
    • Melt chocolate in a double boiler.
    • Stir in the walnuts.
    • Make 12 small balls from the dough.
    • Roll out into round shape chapati.
    • Spread chocolate mixture over a chapati.
    • Cover with second chapati.
    • Seal edges.
    • Heat a griddle or tawa.
    • Put paratha on the griddle, apply ghee over it.
    • Cook on low flame for 2 minutes or until lightly browned.
    • Take it out in a serving plate.
    • Drizzle with chocolate syrup. Delicious Chocolate Paratha is ready to serve.ENJOY!!

    Notes

    Serving Suggestions:
    Serve with Jam or jellies or Peanut butter.

    If you like this Chocolate Paratha Recipe, Please Subscribe to my blog. I have lots more recipes to share with you. And If you make it then let me know your feedback by commenting below.

  • The Tastiest Zinger Burger Recipe to Try at Home

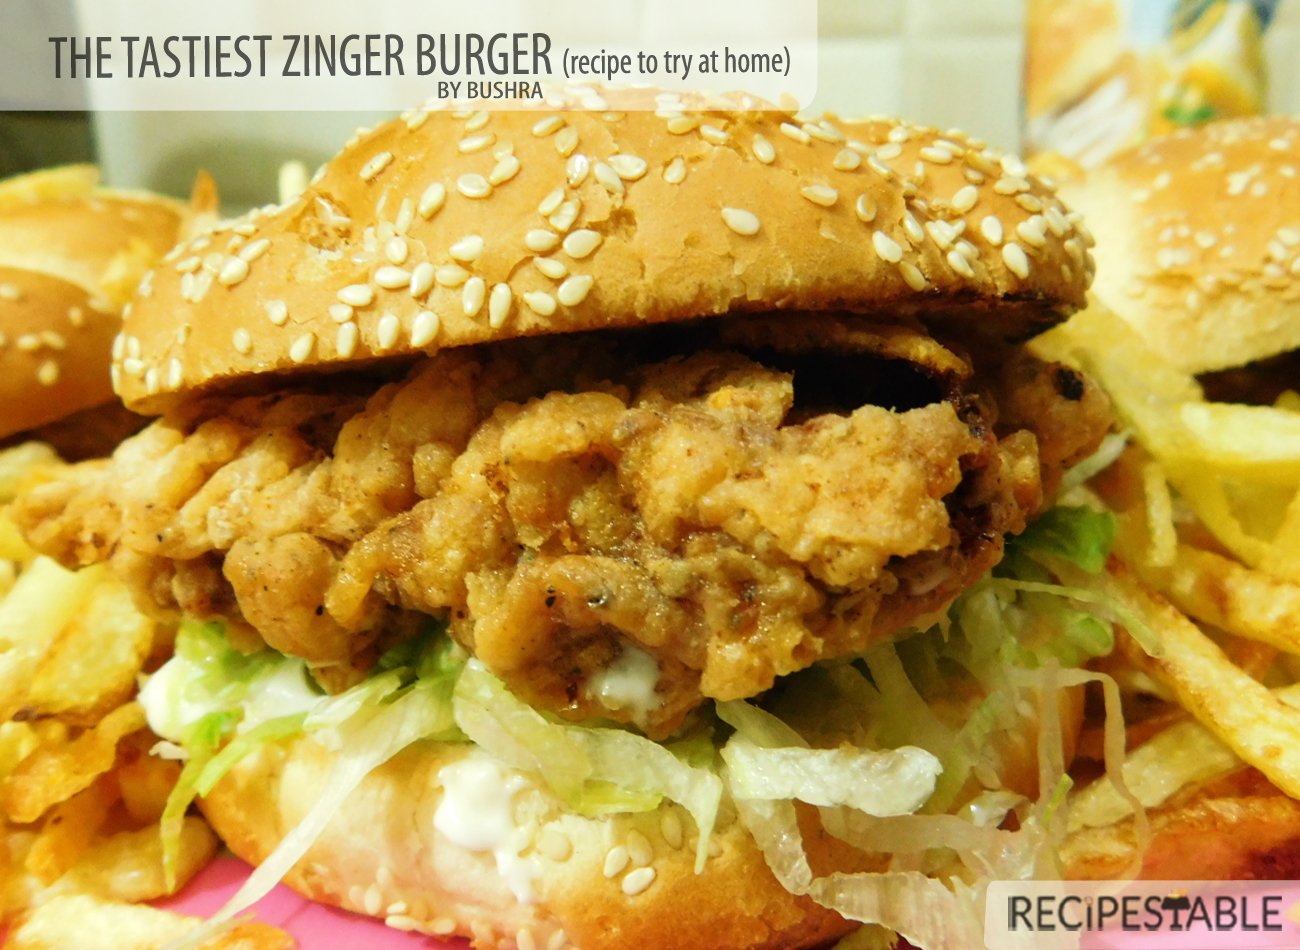
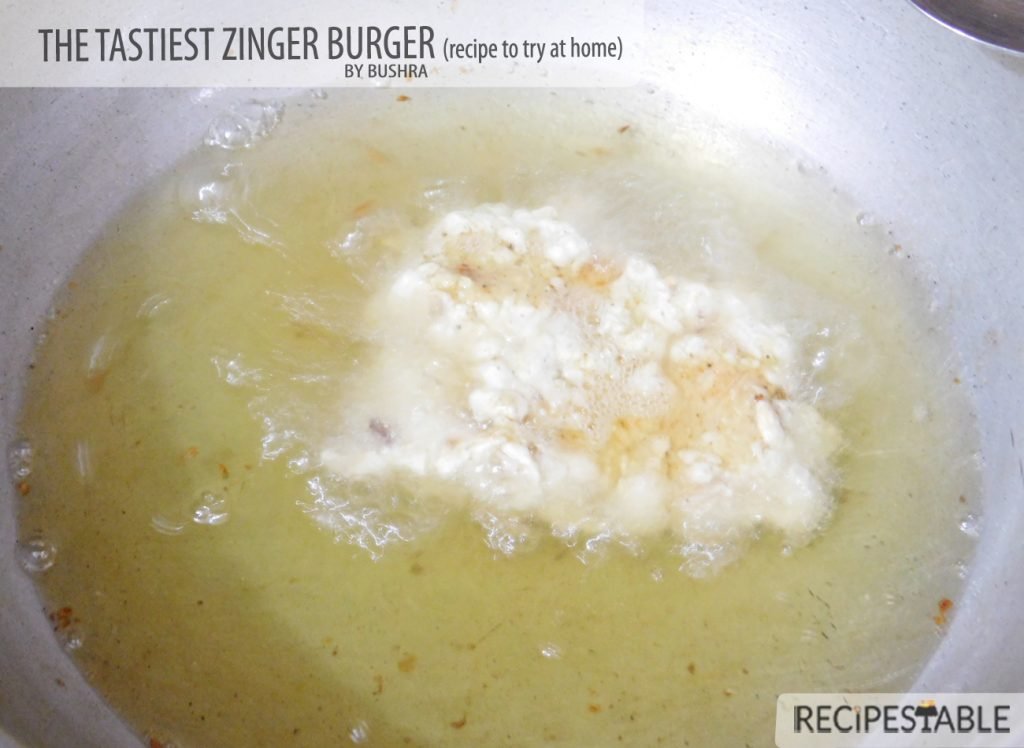
    The Tastiest Zinger Burger Recipe to Try at Home

    Can you resist a tempting, crispy, juicy burger? Well I can’t, for sure. May it be chicken, veggie or fish, bring it on baby. 

    Homemade Tastiest Zinger Burger Recipe
    The Tastiest Zinger Burger Recipe to Try at Home

    Zinger Burger

    Zinger Burger is a heart favorite fast food of all ages people especially kids love it. Oh yes, that zinger that makes us drool ..How the HELL do they make it ? Well, here’s the solution mates. Now you can make this versatile burger at home with this easy zinger burger recipe. Just follow My recipe to make these delicious all time favorite burgers.

    A thing of beauty, joy forever! This is pure joy, alhumdulillah!

    The Tastiest Zinger Burger Recipe to Try at Home
    The Tastiest Zinger Burger Recipe to Try at Home
    The Tastiest Zinger Burger Recipe to Try at Home
    The Tastiest Zinger Burger Recipe to Try at Home

     I have given a lot of zinger burger recipes a try but this one seemed to click. Because, it was quick, easy and oh-so perfect! Enough said, let’s make some burgers.

    The Tastiest Zinger Burger Recipe
    The Tastiest Zinger Burger Recipe to Try at Home
    The Tastiest Zinger Burger Recipe to Try at Home
    The Tastiest Zinger Burger Recipe to Try at Home
    The Tastiest Zinger Burger Recipe to Try at Home
    The Tastiest Zinger Burger Recipe to Try at Home

    Please your family with homemade Zinger Burger. You may enjoy this crispy zinger burger with Coleslaw salad any time of the day especially at evening.

    Bismillah Let’s get started!

    Ingredients in Zinger Burger?

    How to make The Tastiest Zinger Burger at Home (step by step instructions):

    The Tastiest Zinger Burger Recipe to Try at Home
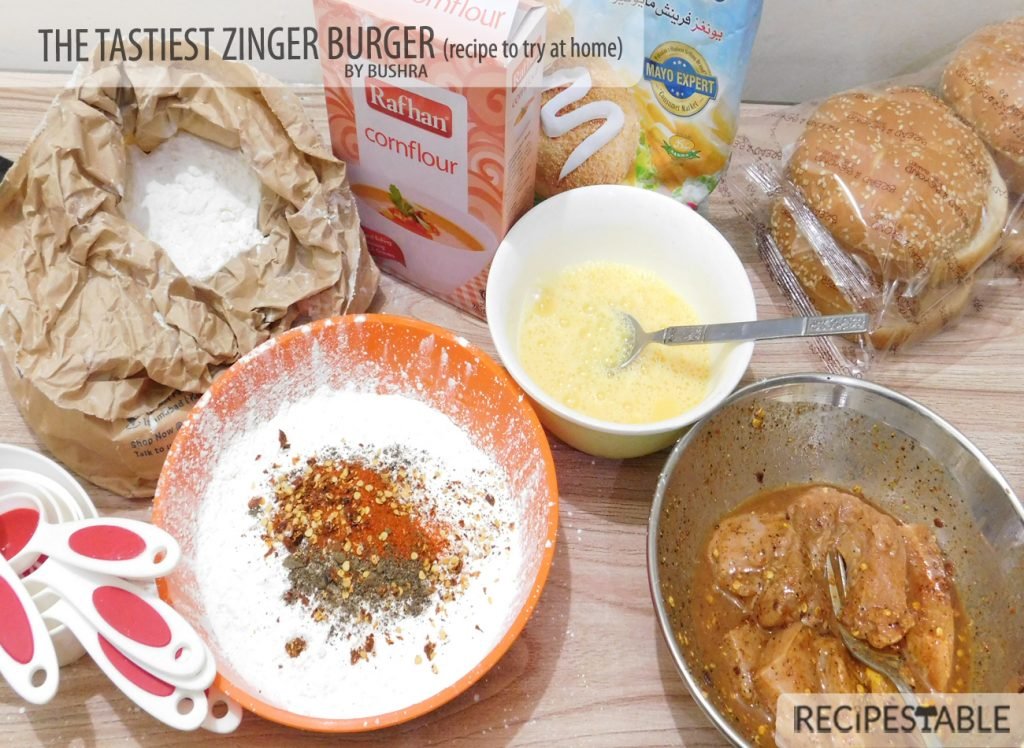
    Ingredients You need to make the Tastiest Zinger Burger at Home

    Check it out the Zinger Burger recipe and printable version below!!

    Zinger Burger Recipe

    Prep Time 30 minutes
    Cook Time 15 minutes
    Total Time 45 minutes
    Servings 4
    Author Bushra Waheed

    Ingredients

    For Chicken Marination

    • 4 boneless skinless chicken breast flattened
    • 3 tablespoon white vinegar
    • 2 tablespon mustard paste
    • 1 teaspoon red chili crushed
    • 1 teaspoon garlic powder
    • Salt to taste

    For Coating

    • 3 eggs lightly beaten
    • 1 cup rice flour
    • 1 cup corn flour
    • 1/2 cup white plain flour
    • 2 tablespoon chicken powder
    • 1 teaspoon black pepper
    • 1/4 teaspoon white pepper
    • 1/2 teaspoon baking powder
    • oil for frying

    Other ingredients

    • 1 cup mayonnaise
    • 4 burger buns
    • salad leaves as required

    Instructions

    Method

    • Flatten chicken breast with a kitchen hammer.
    • Put them in a large mixing bowl.
    • Add mustard paste, white vinegar, salt, red chilli and garlic powder. Turn to coat evenly.
    • Cover and marinate for 30 minutes to blend flavors.
    • In a small bowl, Mix together the mayonnaise and mustard paste. Set aside.
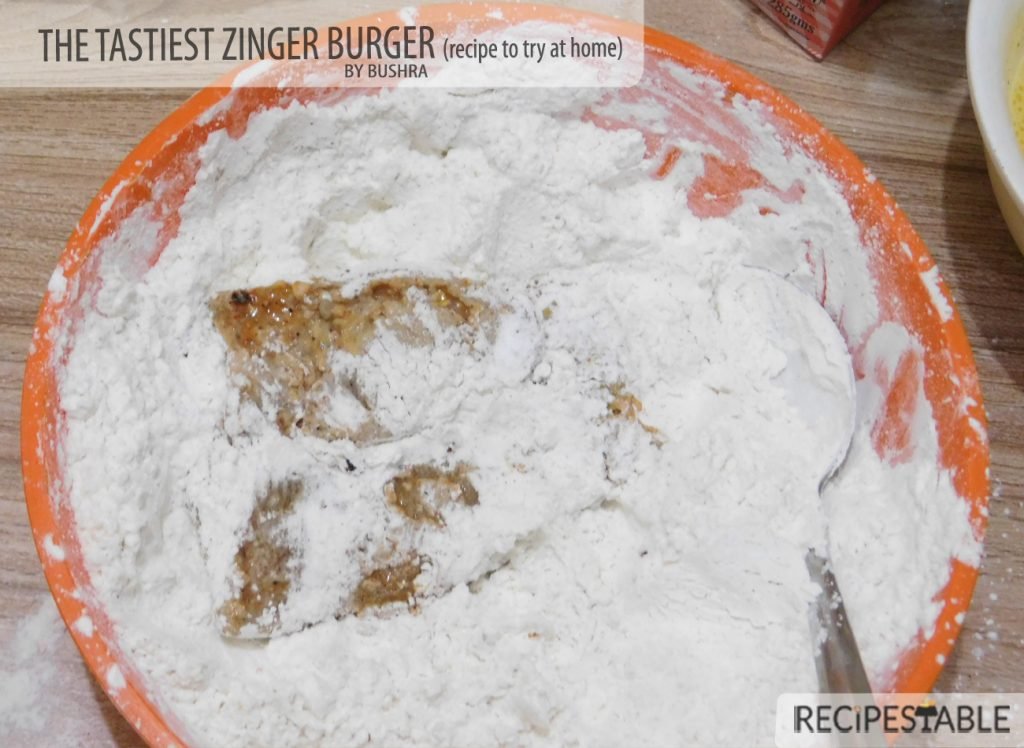
    • Meanwhile, Take a large bowl, combine together the rice flour, corn flour, white flour, black pepper, white pepper, chicken powder, baking powder, garlic powder and salt. Keep aside.
    • Beat eggs in a small bowl.
    • First, coat the marinated chicken with flour mixture. Then dip in eggs and again repeat this process.
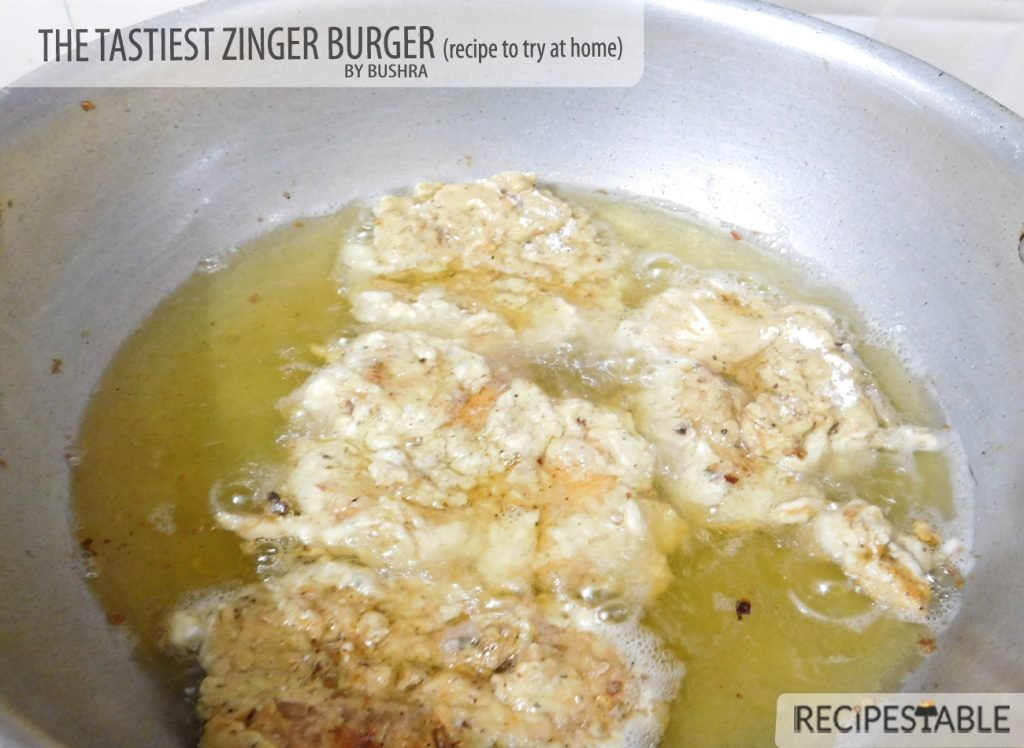
    • Heat oil in a large pan or skillet over medium heat. Deep fry Chicken for 5 minutes then put the lid on and cook anoher 5-8 minutes or until chicken is cooked thorough and turn golden brown.
    • Remove from oil and keep warm.
    • Cut the burger buns in half. Hot a non-stick griddle over medium heat. Toast or warm the burger buns on it.
    • Spread mayo sauce on the burger bun then put fried chicken on it. Again spread mayo sauce on it. Top with lettuce or salad leaves. Cover with the other half of the bun. Delicious Zinger Burger is ready to serve.

    Notes

    Serving Suggestions:
    Serve hot with french fries or coleslaw salad.

    Put your own spin on it. And lemme know how it turns out. Post a photo on Facebook (Recipestable) or  on Twitter so I can see how lovely yours turn out.

    Happy Cooking!!

    [divide icon=”circle”]

    If you like this Zinger Burger recipe, Please Subscribe to my blog. I have lots more recipes to share with you. And If you make it then let me know your feedback by commenting below.

    [divide icon=”circle”]

  • Potato Cheese Seekh Kabab Recipe

    Potato Cheese Seekh Kabab

    For all the vegetarians out there! Do you feel left out when you see everyone enjoying meaty seekh kebabs, but you cannot since your vegetarian? No worries, because you too can enjoy deliciously grilled seekh kebabs prepared with strictly vegetables by following this scrumptious recipe. 

    Bismillah, Let’s get started!

    Check it out the Potato Cheese Seekh Kabab recipe and printable version below.

    Potato Cheese Seekh kabab

    Prep Time 15 minutes
    Cook Time 10 minutes
    Total Time 25 minutes
    Servings 8
    Author Bushrah | Recipestable

    Ingredients

    • 500 boiled potatoes
    • 200 gm cheese grated
    • 1 egg white
    • 2 tbsp rice flour
    • 2 green chilies finely chopped
    • 1/2 bunch mint leaves finely chopped
    • 1 tbsp seekh kabab Masala
    • 1 tsp red chili powder
    • 1/2 tsp black pepper crushed
    • 2 bread slices
    • salt to taste
    • 2 tbsp Oil
    • Salt to taste

    Instructions

    Method

    • Peel boiled potatoes and mash them with a fork.
    • Add rice flour, mint leaves, red chili, bread slices, black pepper, green chilies, seekh kabab Masala and salt.
    • Add egg white and cheese mix well.
    • Make seekh kababs out of this mixture.
    • Cook on a hot greased grill for 4-5 minutes or until well done. Delicious Potato Cheese Seekh kabab is ready to serve.

    Notes

    Serving Suggestions:
    Serve hot with paratha and mint chutney .
      Put your own spin on it. And lemme know how it turns out. Post a photo on Facebook (Recipestable) or  on Twitter so I can see how lovely yours turn out.


    Happy Cooking!!

    If you like this post, Please Subscribe to my blog and let me know your feedback by commenting below.. I have lots more recipes to share with you.

  • Lunch in Minutes: Delicious Chicken Pita Pockets Recipe!

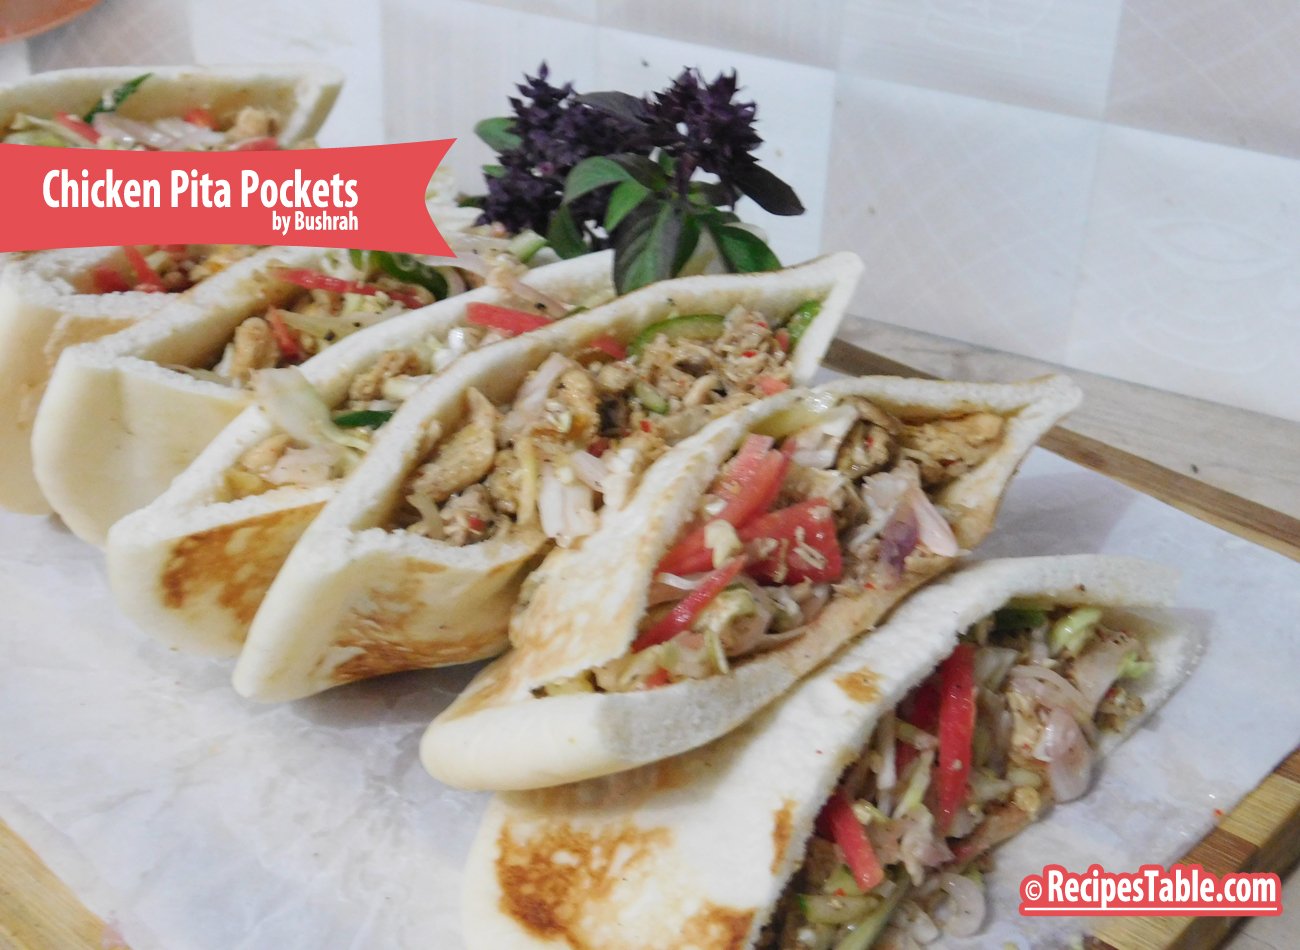
    Chicken Pita Pockets

    Shredded veggies and chicken tikka are packed ahead of time so your kids can assemble the pita pocket by themselves. Perfect for busy week nights. 

    Chicken Pita Pockets recipe
    Photo: Chicken Pita Pockets

    I’ve been experimenting recently to find a delicious Chicken Pita pockets recipe that can be made relatively quickly. I like pitas for its pocket like, leak-proof space. It’s not gonna get all over your hands and your filling stays snug in one place even after you’ve taken several bites.

    Chicken Pita Pockets recipe
    Photo: Chicken Pita Pockets

    This classic dish has been modified to be lower in fat and salt, yet it’s still packed with flavour and spice. Low fat yogurt and low fat cream cheese, whilst the skinless chicken pieces are infused with cumin, paprika and garlic for aroma and taste.It so delicious and healthy too. Spoon chicken mixture onto pita’s, fold in half and serve right away or wrap in foil to eat on the go.

    Photo: Chicken Pita Pockets
    Photo: Chicken Pita Pockets

    Very healthy and satisfying dish that fills your appetite. So, try this recipe and don’t forget to share your experience with me.

    Check it out the Chicken Pita Pockets Recipe and printable version below!!

    Chicken Pita Pockets

    This classic dish has been modified to be lower in fat and salt, yet it’s still packed with flavour and spice. Low fat yogurt and low fat cream cheese, whilst the skinless chicken pieces are infused with cumin, paprika and garlic for aroma and taste.It so delicious and healthy too.
    Prep Time 20 minutes
    Cook Time 20 minutes
    Total Time 40 minutes
    Servings 8
    Author Bushrah | Recipestable

    Ingredients

    Ingredients

    For Chicken Marinade

    • 500 gm chicken breasts boneless and skinless
    • 1 cup plain yogurt
    • 1 tablespoon vegetable oil
    • 1 tablespoon ginger garlic paste
    • 1 tablespoon lemon juice
    • 1 teaspoon paprika powder
    • 1/2 teaspoon ground cumin
    • salt according to taste

    For Sauce

    • 4 tablespoon sour cream
    • 3 tablespoon mayonnaise
    • 2 tablespoon chili garlic sauce
    • 1 clove garlic roasted and chopped
    • a pinch of paprika powder

    For Pita Pockets

    • 4 pita breads
    • 1 cucumber diced
    • few salad leaves chopped
    • few lemon wedges
    • red onion thinly sliced

    Instructions

    Directions

    • Remove all the fat from the chicken and rinse it with cold water. Pat dry.
    • Cut chicken into small cubes.
    • Put chicken in a large bowl. Add yogurt, ginger garlic paste, salt, paprika, cumin and lemon juice. Stir to coat evenly.
    • Cover and marinate for 30 minutes to blend flavors.
    • Now heat 1 tablespoon oil in a non-stick pan. Add marinated chicken.
    • Stir and cook for 10-12 minutes or until chicken is no longer pink and all juices run clear.
    • Allow to cool.
    • To make sauce: In a small bowl, mix together cream cheese, mayonnaise, chili garlic sauce and paprika powder.
    • Cut the pita bread into halves and gently pull each half open to form a pocket.
    • Fill each with salad leaves, onion, cucumber and lemon wedges.
    • Divide the chicken tikka mixture among the pita pockets. Drizzle it with with prepared sauce. Delicious Chicken Pita Pockets are ready to eat. Enjoy!!

    Notes

    Note :
    Cover the pita bread so it remains soft and warm.
    Serving Suggestions:
    Serve with cream sauce and french fries.
    If you like this Chicken Pita Pockets Recipe, Please Subscribe to my blog. I have lots more recipes to share with you. And If you make it then let me know your feedback by commenting below.

  • Pecan Chicken Pockets Recipe

    An American recipe, that takes 15 minutes to prepare and 30 minutes to cook with an Oven. Crescent rolls provide a flaky outer crust for these comforting, flavorful handheld sandwiches. It’s crispy, easy and yummy! I hope you like it.
    Check it out Pecan Chicken Pockets recipe here!!

    [one_third] Prep Time: 15 minutes[/one_third] [one_third]Cook Time:30 minutes[/one_third] [one_third_last] Servings: 2[/one_third_last]

    [review]

    [tabs type=”horizontal”] [tabs_head] [tab_title]Ingredients[/tab_title] [tab_title]Nutrition[/tab_title] [/tabs_head] [tab]

    • 1 tube (4 ounces) refrigerated crescent rolls
    • 1/2 cup cooked chicken, cubed
    • 1/2 cup fresh mushrooms, sliced
    • 3 tbsp softened butter, divided
    • 3 tbsp chive and onion cream cheese, spreadable
    • 3 tbsp seasoned bread crumbs
    • 2 tbsp chopped pecans
    • a dash of pepper

    [/tab] [tab]Yield: 2 servings

    Amount per serving.

    • Calories:606
    • Fat:43 g (saturated fat: 20 g)
    • Cholesterol: 96 mg
    • Sodium: 1,041 mg
    • Carbohydrate:33 g
    • Fiber:1 g
    • Protein: 18 g

    [/tab] [/tabs]

    Directions:
    [tabs type=”horizontal”] [tabs_head] [tab_title]Step by Step Method[/tab_title] [tab_title]Serving Suggestions[/tab_title][/tabs_head] [tab]

    Step 1

    Preheat oven to 350 degree F.

    Step 2

    Place cream cheese, butter and pepper in a medium bowl. Stir in mushrooms and chicken. Divide crescent dough into two rectangles. Seal perforations.

    Step 3

    Spoon chicken mixture on the each rectangle. Roll up, starting from a short side; pinch ends to seal.

    Step 4

    Place bread crumbs and pecans in a shallow bowl. Melt remaining butter and brush over the dough. Roll in crumb mixture.

    Step 5

    Place roll on an ungreased baking sheet. Bake for 30-35 minutes or until golden brown. Pecan Chicken Pockets are ready now.
    [/tab] [tab]

    • Serve with Pineapple Mustard Dip.

    [/tab] [/tabs]

  • Recipe: Mini Kebab

    Mini Kebab 

    Prep Time: 15 minutes

    Cook Time: 20 minutes

    Servings: 5

    Ingredients

    • 1/2 kg lamb mince
    • 1 cup spring onion
    • 4 green chilies
    • 1 tsp ginger paste
    • 1 tsp garlic paste
    • 2 tsp cumin seeds
    • 1 tsp coriander seeds
    • 1 tsp red chili, crushed
    • 1 tsp chaat masala
    • salt to taste
    • 2 eggs, lightly beaten
    • oil for frying

    Directions:

    1. Place mince in a chopped.
    2. Add spring onion, green chilies, coriander seeds, ginger garlic paste, cumin seeds, chaat masala, red chili and salt in it.
    3. Chop for 1 minute or until well combined.
    4. Take it out in a bowl.
    5. Make small kebabs out of the mixture.
    6. In a small bowl, beat egg.
    7. Heat oil in a deep pan over medium heat.
    8. Dip kebab in beaten egg.
    9. Fry kebabs on low heat for 10 minutes or until golden.
    10. Remove from the oil and drain on kitchen paper.
    11. Mini Kebabs are ready to serve.

    Serving Suggestions:

    • Enjoy with Yogurt Sauce.


  • Toasted Corned Beef Sandwiches Recipe

    Toasted Corned Beef Sandwiches Recipe

    These Reuben-type sandwiches uses corned beef, mayo and Swiss cheese.These delicious, gooey sandwiches are perfect with dill pickles and plenty of coleslaw. Try this Toasted Corned Beef Sandwiches recipe, when you need lunch in a hurry!!

    [one_third] Prep Time: 10 minutes[/one_third] [one_third]Cook Time: 10 minutes[/one_third] [one_third_last] Servings: 2 [/one_third_last]

    [review]

    [tabs type=”horizontal”] [tabs_head] [tab_title]Ingredients[/tab_title] [tab_title]Nutrition[/tab_title] [/tabs_head] [tab]

    • 4 slices pumpernickel bread
    • 2 slices Swiss cheese
    • 1 green onion, finely chopped
    • 1/2 cup chopped cooked corned beef
    • 2 tbsp + 1 tsp mayonnaise
    • 2 tbsp chopped celery
    • 1 tbsp butter, softened
    • 1/2 tsp prepared mustard

    [/tab] [tab]Yield: 2  servings

    Amount Per Serving: ( 1 serving = 1 sandwich)

    • Calories: 480
    • Fat: 34 g (13 g saturated fat)
    • Cholesterol: 75 mg
    • Sodium: 875 mg
    • Carbohydrate: 26 g
    • Fiber: 4 g
    • Protein: 16 g

    [/tab] [/tabs]

    Directions:
    [tabs type=”horizontal”] [tabs_head] [tab_title]Step by Step Method[/tab_title] [tab_title]Serving Suggestions[/tab_title][/tabs_head] [tab]

    Step 1

    Place corned beef, mayo, celery, green onion and mustard in a small bowl. Mix until well combined.

    Step 2

    Spread over two slices of bread.

    Step 3

    Top with cheese. Cover with remaining bread slices.

    Step 4

    Spread outside of sandwiches with butter.

    Step 5

    Heat a small skillet over medium heat.

    Step 6

    Toast sandwiches for 2 minutes on each side or until cheese is melted.

    Step 7

    Transfer into a serving plate. Toasted Corned Beef Sandwiches are ready to serve.

    [/tab] [tab]

    • Serve with Seasoned Oven Fries and Tomato Ketchup.

    [/tab] [/tabs]

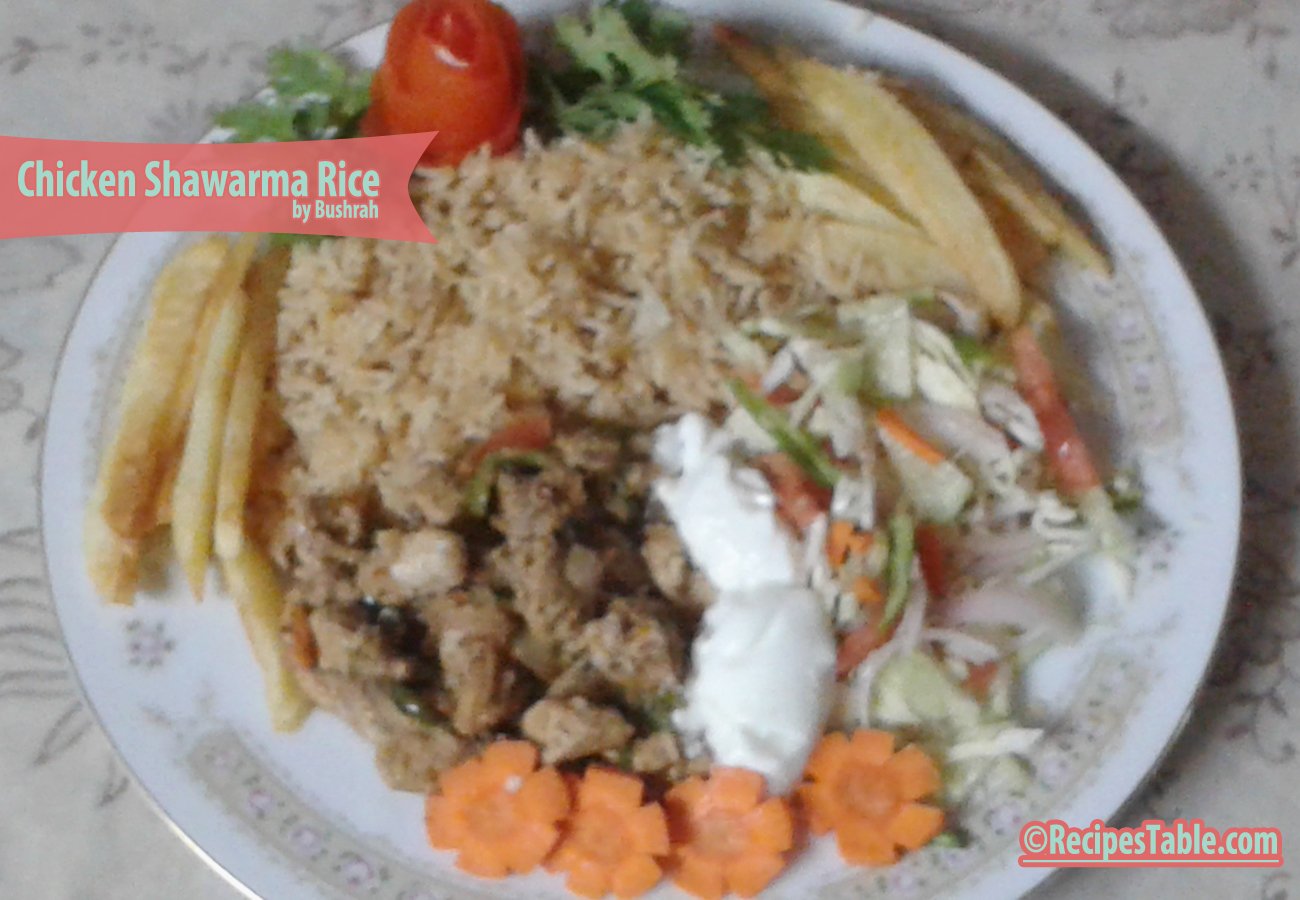
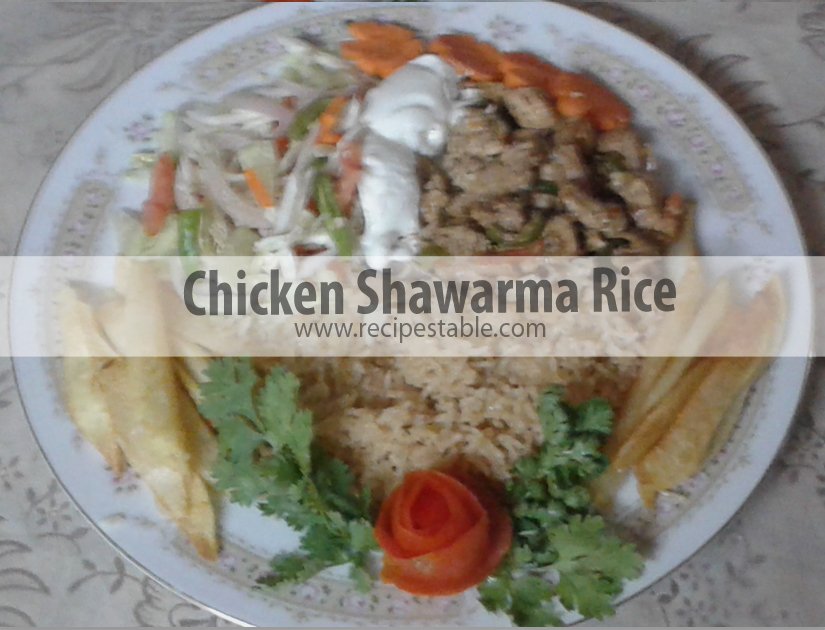
  • Chicken Shawarma Rice Recipe

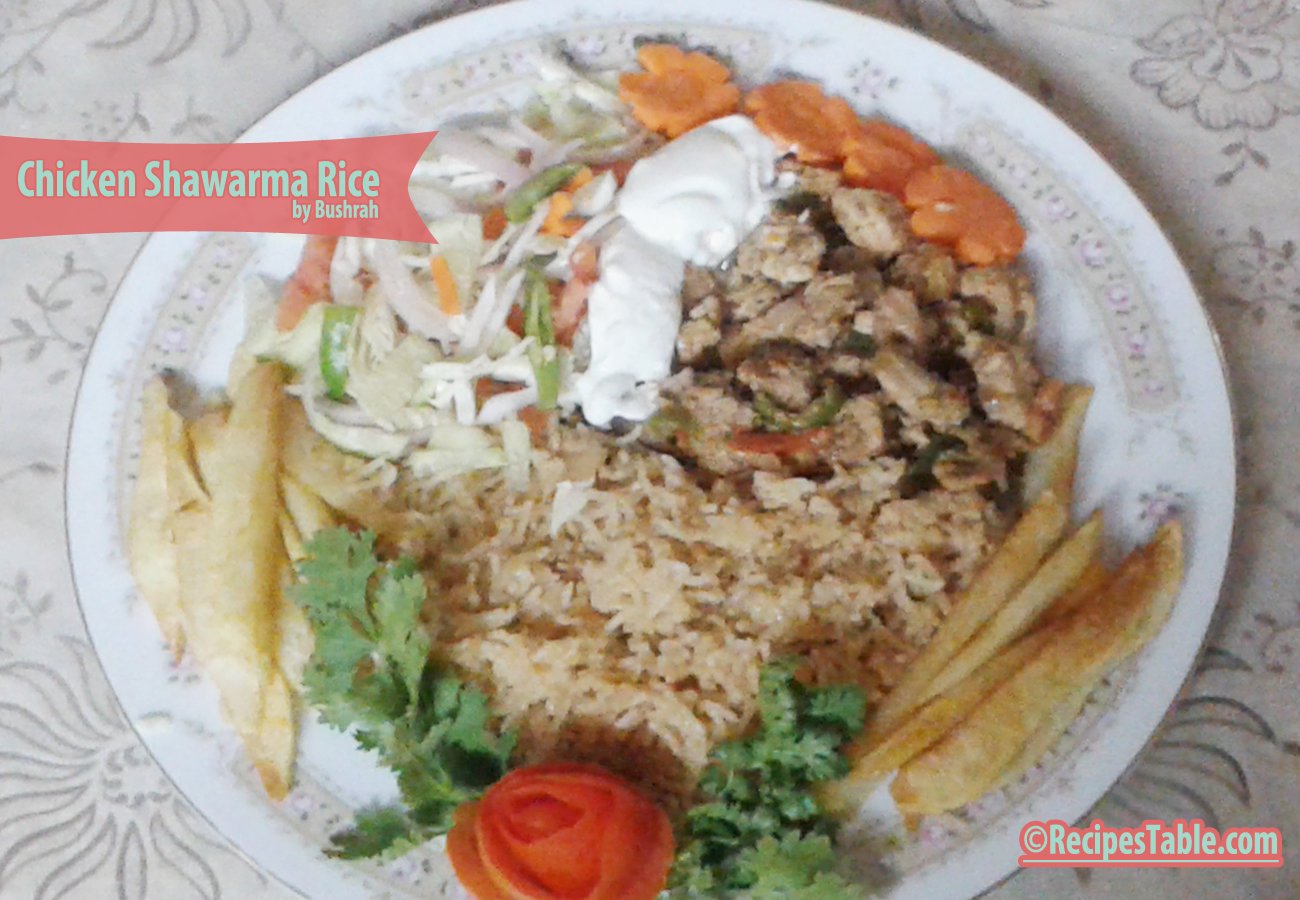
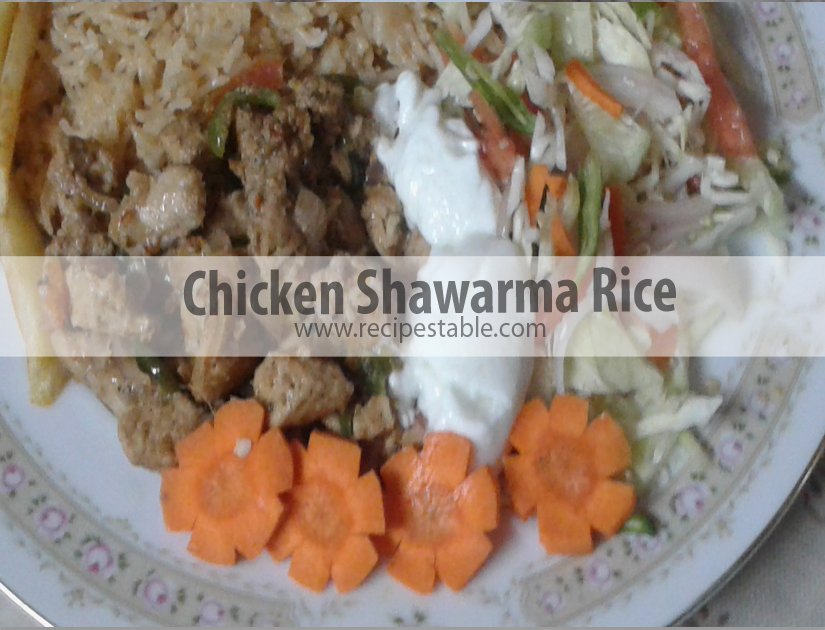
    Chicken Shawarma Rice

    As a change from the normal, I sometimes love having chicken shawarma over rice as opposed to rolled up in a pita. This is a must-try recipe. Check it out Chicken Shawarma Rice recipe here.

    Chicken Shawarma Rice Recipe
    Photo:Chicken Shawarma Rice


     Chicken Shawarma Rice Recipe
    Photo: Chicken Shawarma Rice Recipe

    Chicken Shawarma Rice recipe
    Photo:Chicken Shawarma Rice

    Photo: Chicken Shawarma Rice
    Photo:Chicken Shawarma Rice Recipe

    Chicken Shawarma Rice

    As a change from the normal, I sometimes love having chicken shawarma over rice as opposed to rolled up in a pita. This is a must-try recipe.
    Prep Time 30 minutes
    Cook Time 30 minutes
    Total Time 1 hour
    Servings 6
    Author Bushrah | Recipestable

    Ingredients

    For Chicken Shawarma

    • 1 pound boneless chicken breast cubed
    • 2 tbsp vegetable oil
    • 2 tbsp yogurt
    • 1 tbsp ginger garlic paste
    • 1 tbsp lemon juice
    • 1 tsp red chili powder
    • 1 tsp cumin powder
    • 1 tsp tandoori masala
    • 1 tsp salt
    • 1/4 tsp turmeric powder

    For Chicken Shawarma Rice

    • 2 cups rice
    • 2-1/2 cups chicken stock
    • 1 small onion
    • 2 tbsp vegetable oil
    • 1 tbsp butter
    • 1/2 tsp ginger-garlic paste
    • 1 cinnamon stick
    • 1 cardamom pod
    • 2 cloves
    • 1 green chilli finely chopped
    • 1 tbsp chopped green onions
    • 1 tsp cumin powder
    • 1/4 tsp black pepper
    • 1/4 tsp. turmeric powder
    • 1/4 tsp cinnamon powder
    • salt to taste

    Other Ingredients

    • Garlic sauce or plain yoghurt.
    • 1 to mato thinly sliced
    • 1 onion thinly sliced
    • 1/4 chopped cabbage
    • 1/4 cup pickled cucumber
    • 1 tbsp pepper sauce
    • French Fries
    • Lettuce Leaves

    Instructions

    Method

      To Make Chicken Shawarma

      • In a small bowl, combine the yogurt, oil, ginger garlic paste, red chili powder, cumin powder, tandoori masala, salt and lemon juice.
      • Pour this mixture over the chicken cubes.
      • Toss to coat evenly.
      • Cover and marinate for 4 hours to blend flavors.
      • After 4 hours, thread chicken on the metal skewers.
      • Grill on each side for 5 minutes or until tender.
      • Remove from the skewers.
      • Chop into chunks.
      • Set aside and and keep warm.

      To Make Chicken Shawarma Rice

      • Wash rice with few changes of water then soaked for 30 minutes.
      • Drain rice and set aside. Heat the butter and oil in a large skillet over medium heat.
      • Add onions and cook for 5 minutes or until translucent. Add garlic paste and cook for 30 seconds.
      • Add green chillis and all other spices. Cook and stir 1 minute longer. Note: (Careful not to let them burn.)
      • Add chicken stock. Bring to a boil and let it simmer. Season with salt.
      • Add rice and stir a little.
      • Cook on high heat for 3-4 minutes then reduce the heat to medium-low.
      • Cover and let it simmer for 8-10 minutes or until all water dries up and rice are cooked evenly.
      • Now reduce the heat. Cover the skillet by using wetting a kitchen towel.
      • Placing kitchen towel over the skillet.
      • Then placing a lid on top of it.
      • Cook the rice on very low heat for 10 minutes.
      • Turn the heat off. Remove the lid and fluff the rice up.
      • Transfer rice into a large servings dish.
      • Top with chicken shawarma, lettuce leaves, cabbage, cucumber pickle, tomato and onion.
      • Drizzle with pepper sauce.Chicken Shawarma Rice is ready to serve. enjoy!

      Notes

      Serving Suggestions:
      Serve with french fries.

      I have also posted Chicken Shawarma Wraps which is another tastiest version of making Shawarma at home. Do check it out as well.


      Put your own spin on it. And lemme know how it turns out. Post a photo on Facebook (Recipestable) or  on Twitter so I can see how lovely yours turn out.Put your own spin on it. And lemme know how it turns out. Post a photo on Facebook (Recipestable) or on Twitter so I can see how lovely yours turn out.


      Happy Cooking!!

      If you like this Chicken Shawarma Rice Recipe, Please Subscribe to my blog. I have lots more recipes to share with you. And If you make it then let me know your feedback by commenting below.

    • Lunchtime Made Easy: The Perfect Lunch Box Pizzas Recipe!

      Take a break from the norm and make that midday meal interesting and delicious for both you and your kids with these Lunch Box Pizzas.

      A yummy lunchbox idea great for school or work. Check it out Lunch Box Pizzas recipe here.

      [one_third] Prep Time: 10 minutes[/one_third] [one_third]Cook Time: 10 minutes[/one_third] [one_third_last] Servings:10[/one_third_last]

      • 1 (7.5 ounce) package buttermilk biscuits
      • 1 cup cooked chicken, cubed
      • 3/4 cup shredded Monterrey Jack cheese
      • 1/4 cup tomato sauce
      • 1 tsp Italian seasoning

      [/tab] [tab]

      Yield: 10 servings

      Nutritional information is not yet available.

      [/tab] [/tabs]

      Directions:
      [tabs type=”horizontal”] [tabs_head] [tab_title]Step by Step Method[/tab_title] [tab_title]Serving Suggestions[/tab_title][/tabs_head] [tab]

      Step 1

      Flatten each biscuit into a 3-inch. circle. Gently press biscuits into greased muffin cups.

      Step 2

      In a small bowl, combine the chicken and tomato sauce. Season with Italian seasoning. Spoon 1 teaspoonful into each cup. Top each with 1 tablespoon of cheese.

      Step 3

      Bake at 425° for 10 minutes or until cheese is melted and crust is golden brown. Lunch Box Pizzas are ready to Serve. Enjoy!!

      [/tab] [tab]

      • Serve with Ketchup or chili Sauce.

      [/tab] [/tabs]

    • Egg Fenugreek Pakora Recipe

       Aslam-o-Alakaum My Readers !!

       In the Name of Allah, Most Gracious, Most Merciful

      Egg Fenugreek Pakora

      Bismillah, let’s begin!

      Check it out the Egg Fenugreek Pakora Recipe and printable version below.

      Egg Fenugreek Pakora Recipe

      Prep Time 10 minutes
      Cook Time 20 minutes
      Total Time 30 minutes
      Servings 8
      Author Bushrah | Recipestable

      Ingredients

      • 8 Eggs
      • 1 cup fenugreek Leaves chopped
      • 3 tablespoon fresh Coriander leaves chopped
      • 2 green Chillies finely chopped
      • 3 stalks Spring Onions finely chopped
      • 4 tablespoon chickpea flour or besan
      • 1/2 teaspoon Cumin Powder
      • 1/2 teaspon red chilli powder
      • 1/4 teaspoon Carom Seeds/ajwain optional
      • 1 teaspoon Chaat Masala
      • 1/4 teaspoon baking soda
      • salt to taste
      • Oil for deep frying

      Instructions

      Method

      • Boil the eggs till hard and well cooked.
      • Drain and dunk in cold water.
      • Remove the shell and chop the eggs.
      • Mix fenugreek leaves (methi), coriander leaves,green chillies and spring onions in a bowl and add gram flour to it and mix well.
      • Now add carom seeds, red chilli powder, chaat masala, cumin powder, soda bicarbonate and salt to it and mix well.
      • Add chopped boiled egg to the mixture and splash a little water and combine the ingredients well.
      • In a wok, heat sufficient oil over medium heat.
      • Now take a spoonful of the egg mixture and gently fry it in the oil.
      • Fry the pakoras in small batches till golden brown in color and perfectly cooked.
      • Drain into a paper towel. Egg Fenugreek Pakora is ready to serve.

      Notes

      Serving Suggestions:
      Serve hot with your favorite chutney or dip.
       

      I have also posted Egg Pakora Recipe which is another easiest & tastiest version of making pakora. Do check it out as well.


      Put your own spin on it. And lemme know how it turns out. Post a photo on Facebook (Recipestable) or  on Twitter so I can see how lovely yours turn out.


      Happy Cooking!!

      If you like this post, Please Subscribe to my blog and let me know your feedback by commenting below.. I have lots more recipes to share with you.

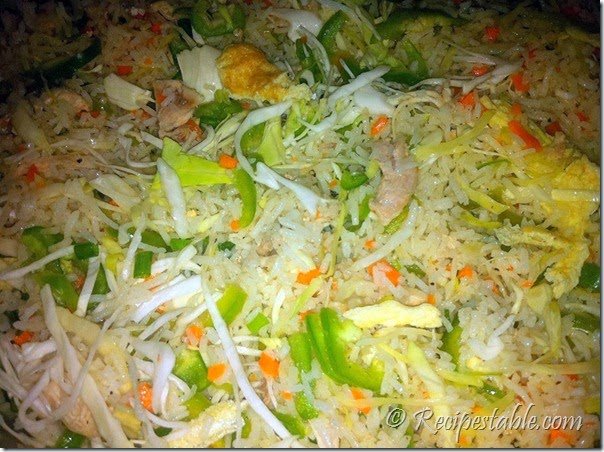
    • Easy Fried Rice Recipe: Better Than Takeout in 20 Minutes!

      Easy Fried Rice Recipe: Better Than Takeout in 20 Minutes!

      Fried Rice

      A basic recipe for fried rice that you can enjoy as is or load up with meat and vegetables. It’s a great way to use up leftover cooked rice and it can be ready in just a few minutes. Fried Rice is one of hearty meal for people. It goes great with any kind of Manchurian. A must try recipe!!

      fried rice recipe
      Photo: fried rice recipe

      Fried Rice Recipe

      Prep Time 15 minutes
      Cook Time 20 minutes
      Total Time 35 minutes
      Servings 6
      Author Bushrah | Recipestable

      Ingredients

      • 500 gm boiled rice
      • 500 gm boneless chicken
      • 4 tbsp vegetable oil
      • 4 tbsp soy sauce
      • 4 cloves garlic minced
      • 1 egg lightly beaten
      • 1 cup spring onion thinly sliced
      • 1 cup cauliflower florets
      • 1 cup carrot thinly sliced
      • 1 cup green bell pepper thinly sliced
      • 1 tsp red chili crushed
      • 1 tsp black pepper
      • 1/2 tsp salt

      Instructions

      Method

      • Beat egg in a bowl.
      • Heat 1/2 tsp oil in a pan fry egg in it.
      • Cut into strips and keep aside.
      • Cut chicken into small pieces and set aside.
      • Heat oil in a heavy bottom skillet or pot.
      • Add garlic and cook for 1 minutes
      • Put chicken in it.
      • Stir fry for 10 minutes or until juice runs clear.
      • Season with red chili, salt and black pepper.
      • Cook for 2 minutes or until chicken is tender.
      • Now add all vegetables and soy sauce.
      • Stir fry for 2-3 minutes.
      • Then add boiled rice and cooked egg.
      • Mix well.
      • Cook on low flame for 10 minutes.
      • Transfer into a serving plate.
      • Fried Rice is ready to serve.

      Notes

      Serving Suggestions:
      Serve with Manchurian.
       

      I have also posted  Vegetable Fried Rice Recipe which is another easiest & tastiest version of making Fried Rice. Do check it out as well.


      Put your own spin on it. And lemme know how it turns out. Post a photo on Facebook (Recipestable) or  on Twitter so I can see how lovely yours turn out.


      Happy Coing!!

      If you like this post, Please Subscribe to my blog and let me know your feedback by commenting below.. I have lots more recipes to share with you.

    • A Flavorful Twist: Make Delicious Spicy Cheese Naan at Home!

      Spicy Cheese Naan 

      Check it out the Spicy Cheese Naan recipe here!!

      Ingredients:
      For the dough :

      • 500 gm plain flour
      • 25 gm ghee or butter
      • 20 gm fresh yeast or 2 tsp dry yeast
      • 1 tsp salt
      • 2 tbsp fresh yogurt
      • 1 tbsp sugar

      For the Stuffing:

      • 100 grams paneer,grated
      • salt to taste
      • 3-4 green chillies, chopped
      • 1 onion, chopped
      • 2 tbsp fresh coriander leaves,chopped

      How To make Spicy Paneer Naan :

      • Take plain flour and sieve it.
      • Yeast sugar in 1 cup warm water and mix it well, till yeast dissolves.
      • Cover it for 5-7 minutes till the mixture becomes full of froth.
      • Take the sieved flour and add this mixture, curd, salt and ghee to the flour.
      • With the help of water, make a dough of it.
      • Knead well for at least 6-8 minutes.
      • Cover the dough with wet cloth and keep it aside for 30 minutes.
      • After 30 minutes knead it again for 1 minute.
      • Meanwhile mix the ingredients of stuffing together properly in a bowl.
      • Take the dough and divide it into small parts and roll them in shape of naan.
      • Put 1 tbsp of stuffing in center and bring the edges in the center to cover the stuffing completely with the dough.
      • Roll it in shape of your choice.
      • Take a pressure cooker and grease it lightly with oil.
      • Remove the lid and heat pressure cooker upside down.
      • Take the naan and apply a wet hand on one side of the naan.
      • Stick this wet side around  the inside of the pressure cooker.
      • Roast till brown spots appear.
      • Repeat it with all naans.
      • Around 3–4 naans can be placed inside the walls of pressure cooker at one time.
      • Spicy Paneer Naans are ready to be served.
      • Apply butter on them before serving.
      • Enjoy!